User Manual SIPLACE Linear Dipping Unit 2 X.pdf - 第84页
5 Cleaning 5.2 Removing the parts to be cleaned 84 User Manual SIPLACE Linear Dipping Unit 2 X 05/2020 NOTICE Avoid leakage of flux When removing the flux tank and the dipping plate leave the flux tank on the dipping pla…
5 Cleaning
5.2 Removing the parts to be cleaned
User Manual SIPLACE Linear Dipping Unit 2 X 05/2020 83
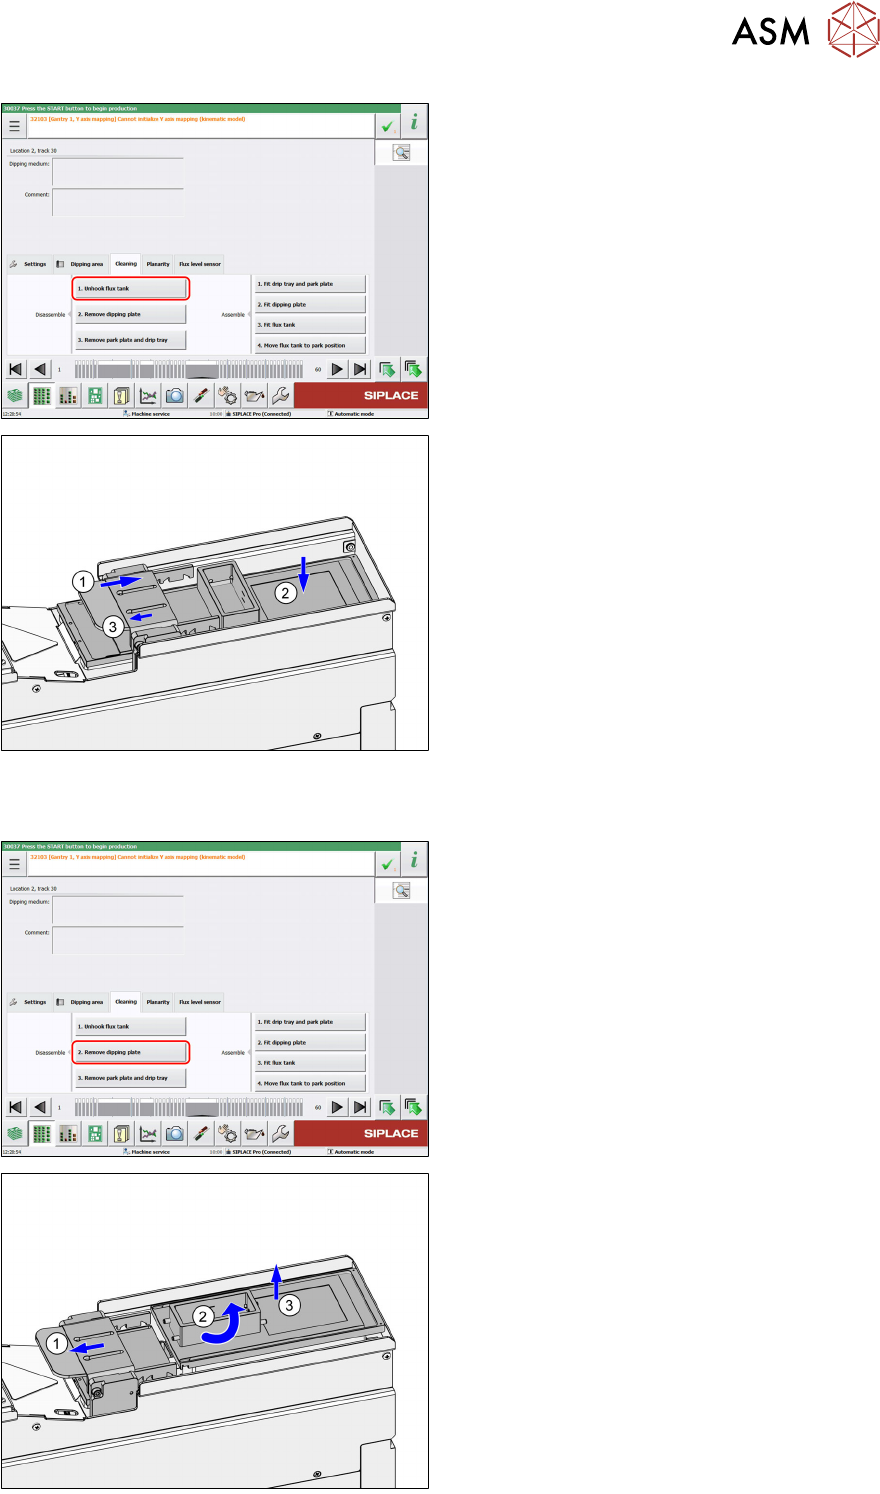
► Click on the Unhook flux tank button.
(1) The LDU moves the squeegee over the dip-
ping plate.
(2) The lifting axis is lowered and the flux tank is
released.
(3) The LDU moves the squeegee slightly back
over the park plate.
► Make sure that the flux tank is completely
released.
Removing the flux tank and the dipping plate
Prerequisites: The park plate and the dipping plate are fitted.
► Click on the Remove dip plate button.
(1) The LDU moves the squeegee back over the
park plate and the dipping plate with the flux
tank is lifted.
(2) Rotate the flux tank on the dipping plate by
approx. 90°.
(3) Remove the dipping plate together with the
flux tank.
5 Cleaning
5.2 Removing the parts to be cleaned
84 User Manual SIPLACE Linear Dipping Unit 2 X 05/2020
NOTICE
Avoid leakage of flux
When removing the flux tank and the dipping plate leave the flux tank on the dipping plate
so that remaining flux cannot leak out of the flux tank and contaminate the LDU. The remo-
val is easier when you rotate the flux tank on the dipping plate by approx. 90° without lifting
it.
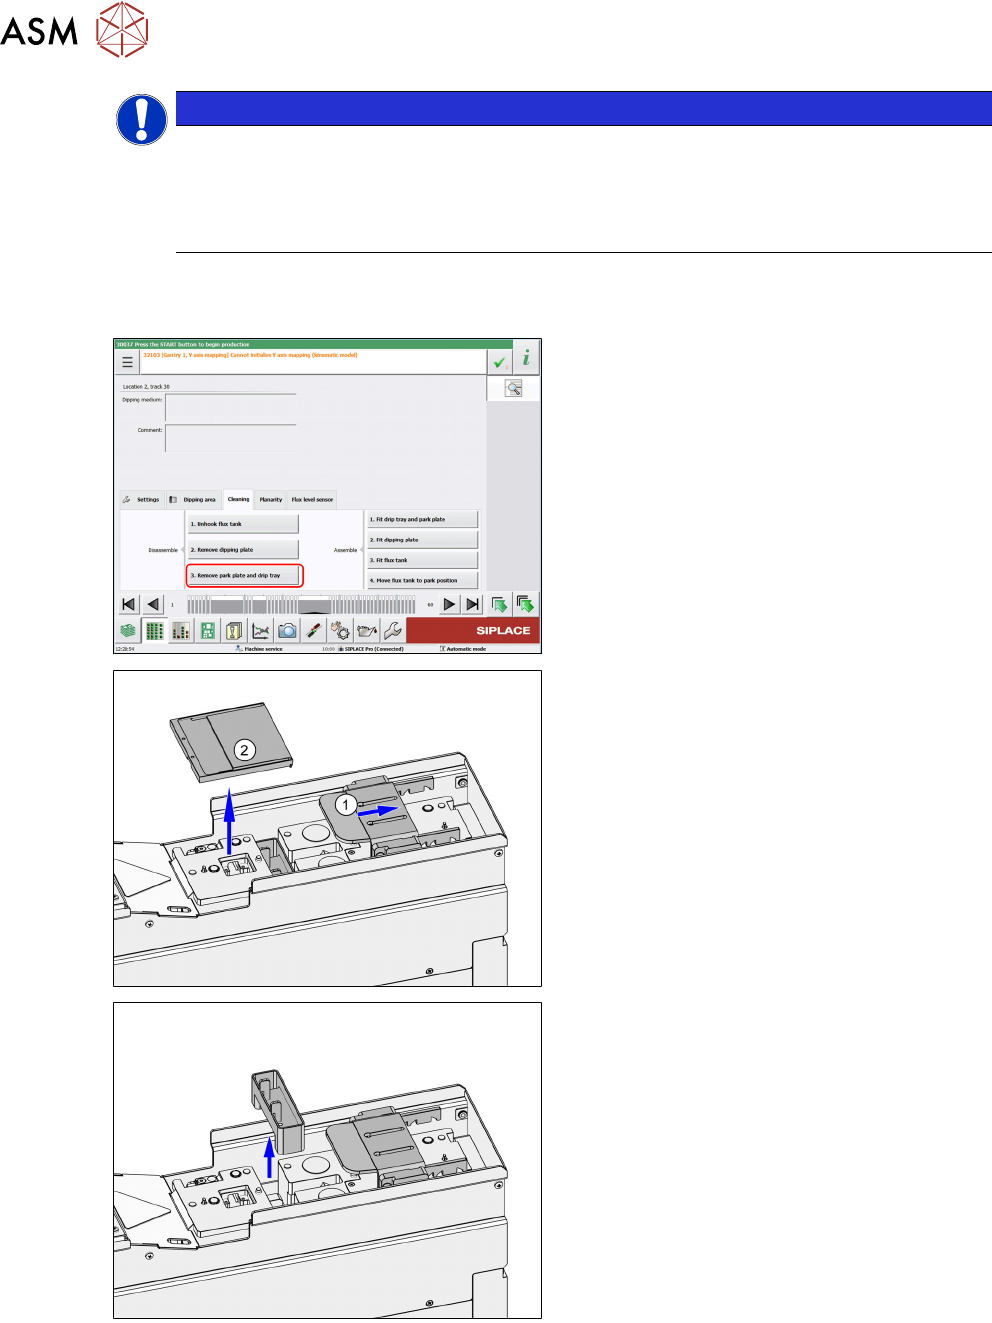
Removing the park plate and the drip tray
Prerequisites: The park plate and drip tray are fitted. The dipping plate is removed.
► Click on the Remove drip tray and park
plate button.
(1) The LDU moves the lifting axis backwards
and the squeegee to the front.
(2) Remove the park plate.
► Remove the drip tray.
5 Cleaning
5.3 Cleaning the dipping components
User Manual SIPLACE Linear Dipping Unit 2 X 05/2020 85
5.3 Cleaning the dipping components
CAUTION
Scratching of parts
The parts to be cleaned are sensitive and scratch easily.
► Do not use any spatulas or scrapers made of metal.
► Do not use sharp-edged tools.
Rough cleaning
► Remove any excess flux. Use a wooden or plastic spatula or scraper and cleansing tissues.
Fine cleaning
► Place the parts in a tub.
► Clean the parts thoroughly with a brush and cleaning agent.
► Take the parts out of the tub.
► Dry the parts with lint-free cleansing tissues.
5.4 Refitting the cleaned parts
NOTICE
Observe the exact order
It is important to perform the steps for fitting the parts in the order described here.
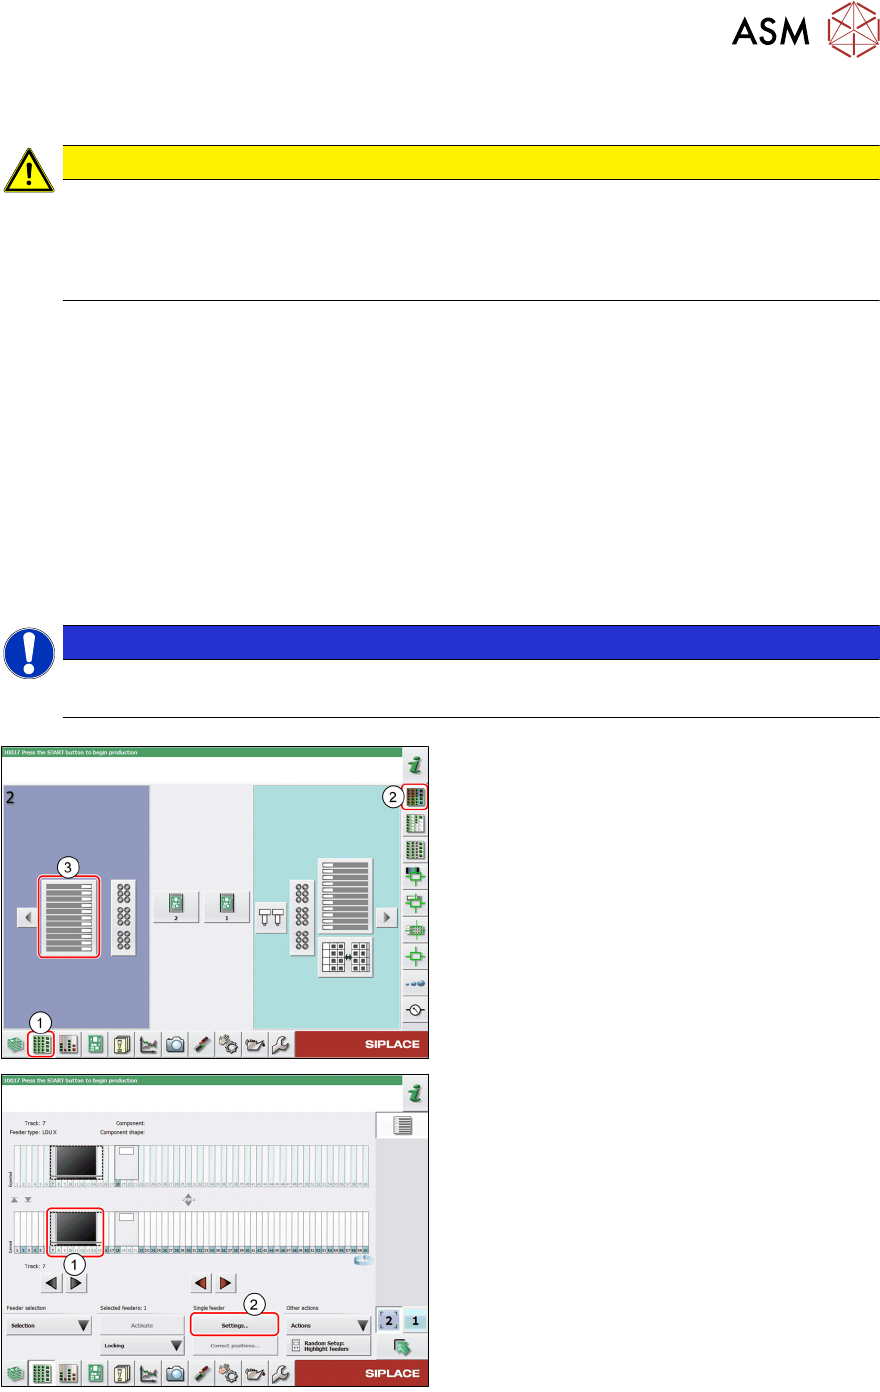
► In the station software, select the Setup
view(1) and then the Locations area (2).
► Select the Table (3) on which the LDU is
set up.
► Select the icon of the LDU(1).
► Click on the Settings... button (2).