00193796-08.pdf - 第51页
Installation Manual, Station Software Version 505.04 Edition 07/2006 51 of 156 'A' sets the network addresses and port IDs. This selection is only possible after initial installation. Notes: After the initial i…
Installation Manual Station Software Version 505.04
50 of 156
→ Click on the floppy drive in the explorer.
→ Start the relevant executable (this can be started directly from the explorer with a double click).
→ Follow the program instructions:
Insert the floppy. You may be asked whether the floppy can be deleted.
The floppy is written (the bar shows the progress).
→ When the window disappears, the floppy is finished (before removing the floppy, you must wait
until the 'active' light on the disk drive has gone out).
Notes:
- The system looks for a floppy in drive 'A': The floppy must therefore already be in the drive at the
start (this setting cannot be changed).
- You must use a formatted floppy.
(The program does not allow you to format the floppy as you create it.)
- Each time the executable is called it will create a single floppy.
- Before and during creation of each disk, no other tool may be permitted to access this floppy (e.g.
the current Explorer window, the path of a DOS box must not be set to the A: drive).
- When the second floppy is created, the incorrect message "Insert floppy 1" appears. It should
read "Insert floppy 2".
4.3.3.2 Installation procedure
→ Insert the "Rmos-1" floppy in the drive of the MC and switch the station on.
→ The following message will appear on screen
Starting MS-DOS...
DO YOU WANT TO CONTINUE INSTALLATION ?
[Y] CONTINUE [N] REBOOT SYSTEM TO CHECK OR CHANGE SETUP
[A] SET INTERNET ADDRESS
PRESS KEY TO CONTINUE [Y,N,A]?
'Y' continues the installation.
NOTES: with the error message „INVALID MEDIA TYPE“ you have to continue with (f)ail
(2 kick x; preferably at the formatting of new hard disk, the installation is then continue.
Installation Manual, Station Software Version 505.04 Edition 07/2006
51 of 156
'A' sets the network addresses and port IDs.
This selection is only possible after initial installation.
Notes:
After the initial installation, the installed standard files must be adapted to the user
network.
Update / upgrade retains the network addresses which have already been set.
The internet addresses of the MC are saved in 'C:\ETC\HOSTS'.
The port IDs of the MC are saved in 'C:\ETC\SERVICES'.
→ The installation program starts.
→ Press any key to continue or cancel with <Esc>.
The software version and the machine type are displayed.
→ Press any key to continue or cancel with <Esc>.
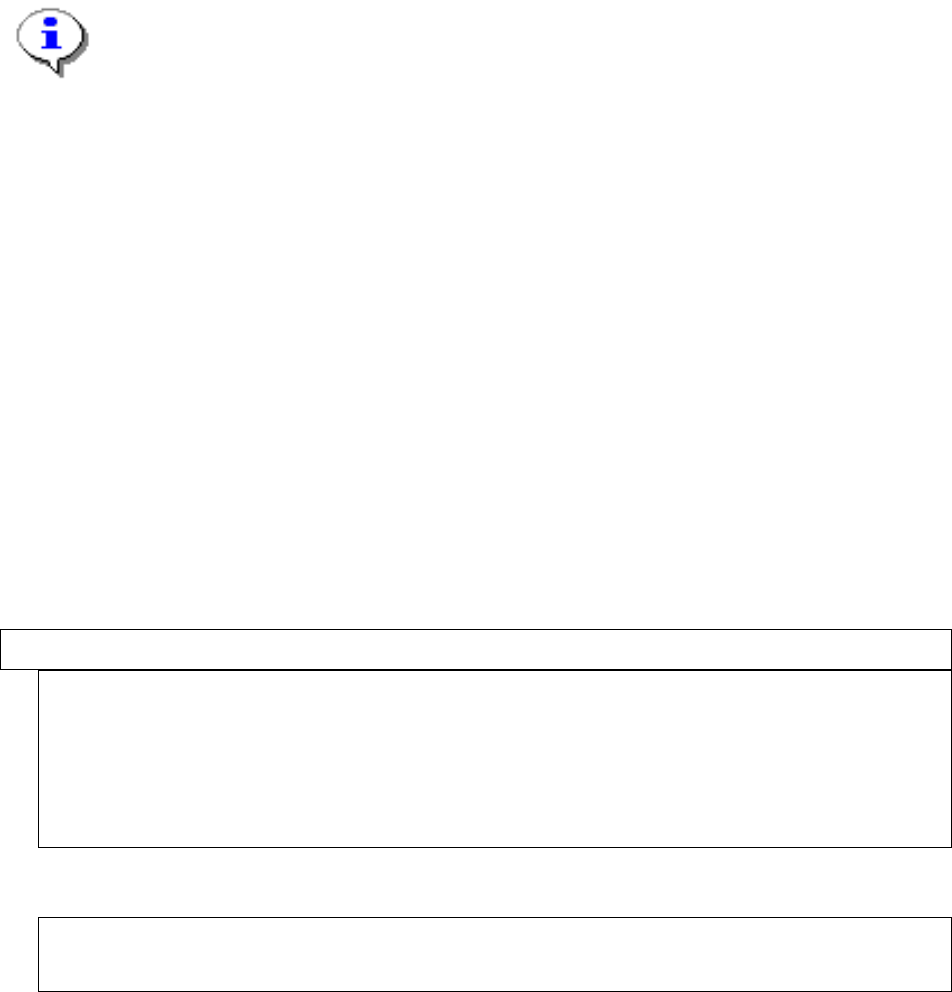
The main menu appears:
>>>
>>>
------------------Install Revision of SIPLACE Operating System
------------------
Terminate SIPLACE Installation Program
Main Menue of SIPLACE Installation MCRM3 40x.xx
Use the [Up Arrow] [Down Arrow] [Pg Up] [Pg Dn] keys to move the highlight bar to select the
button you prefer.
Press [Enter] to activate your selection
Note:
If a submenu or a function in the installation program is selected, the cursor flashes gra
y
→ Select the function "Install Revision of SIPLACE Operating System" and confirm with
<RETURN>.
Installation Manual Station Software Version 505.04
52 of 156
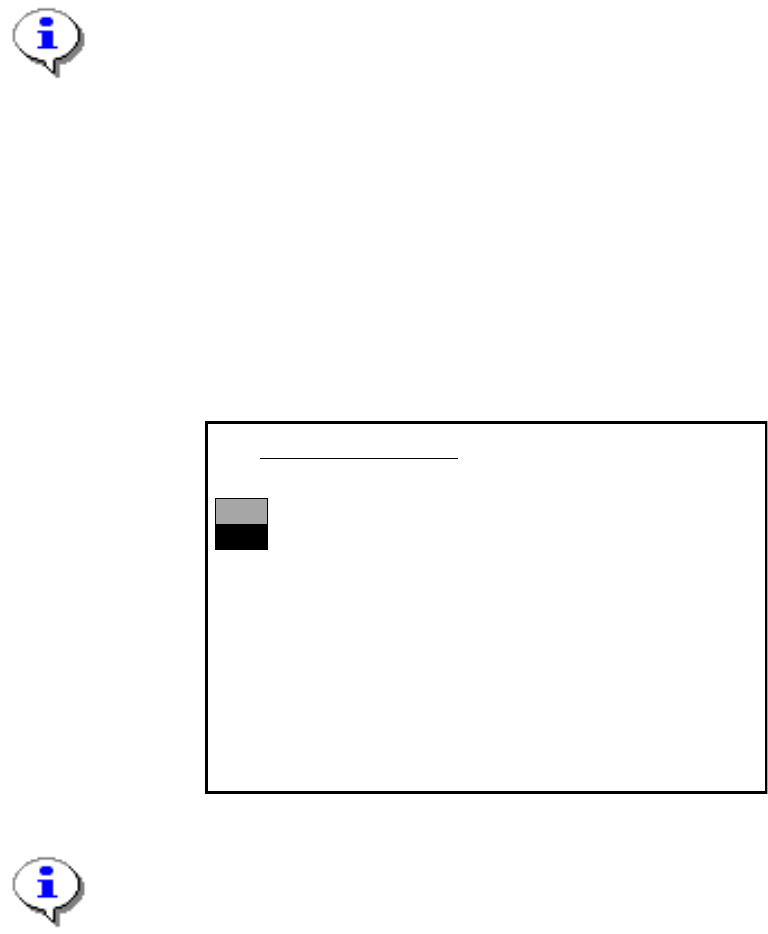
The installation is started. The following query appears:
>>>
>>>
-----No
-----Yes
1. WARNING
installation of SIPLACE operating system will only save files keeping machine data.
A
ll other files of user’s interrest have to be saved on floppy disc by user manually.
Otherwise these files will bedeleted.
Continue SIPLACE Installation Job?
Use the [Up Arrow] [Down Arrow] [Pg Up] [Pg Dn] keys to move the highlight bar to select the
button you prefer.
Press [Enter] to activate your selection
→ Use the cursor keys to select the option to continue.
Warning:
Only machine data is saved. All user data is deleted. If necessary, save your user data to
floppy.
→ Confirm your selection with <RETURN>.
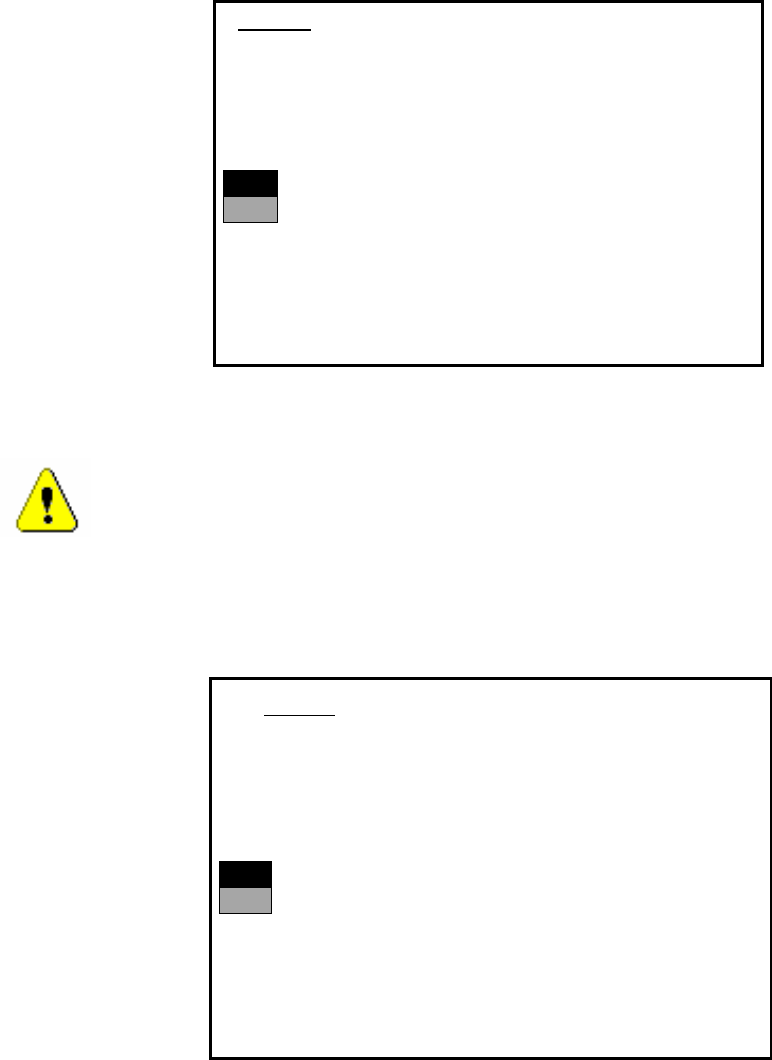
→ If you have selected “Yes“, the installation is continued and the following screen display
appears.
>>>
>>>
-----No
-----Yes
2. WARNING
Partition “C:“ of your hard disc will be formatted:
⇒
all files will be deleted.
Continue SIPLACE Installation Job?
Use the [Up Arrow] [Down Arrow] [Pg Up] [Pg Dn] keys to move the highlight bar to select the
button you prefer.
Press [Enter] to activate your selection
→ Use the cursor keys to select whether to continue ("Yes") or cancel ("No").