wire-bonder.pdf - 第65页
WEST•BOND MODEL 454647E SER IES INSTRUCTION MANUAL 59 ADVANCED PROGRAMMING Force Adjust This option allows the operator to calibrate th e H IGH F ORCE setting by simply adjusting the force adjustment knob. This A DJUSTME…
WEST•BOND MODEL 454647E SERIES INSTRUCTION MANUAL
58
ADVANCED PROGRAMMING
Dual Force
This option allows the operator to select whether the “Dual Force” feature is “ON” or “OFF”. When the
“OFF” selection is made, the “Low Force Calibration” menu will not be displayed and the higher specified
force will be applied to all wire bonds. To change the setting of this option simply press the “0” key for
“OFF” or the “5” key for “ON”. If this feature is selected to the “ON” position, the low force will be
suggested for the first bond and the high force will be suggested for the consecutive bonds. These are
suggestions only. Thus low force or high force may be specified for any bond in any order. See page 82
for details on how to select High or Low force for each individual bond.
N
OTE! The Dual Force factory setting is “OFF” in the 4500E and the 4600E modes. In
the 4700E mode, “Dual Force” is “ON” and set up for 20 grams of difference.
DUAL FORCE (See ϑ below or G was pressed from Edit Wire Tail Menu).
Dual Force: Off
5=On
8=Suggest
A=Prev option 0=Off G=Next option
8 = Restore after suggestion is made.
ϑ To edit “Dual Force”
From the H
OME menu press 4 (EDIT), 6 (MACHINE), and then 7 (DUAL FORCE)
Key Format:
Previous
Menu
1
2
Home
3
4
On
5
6
7
Suggest
8
9
Previous
option
A
Off
0
Next option
G
WEST•BOND MODEL 454647E SERIES INSTRUCTION MANUAL
59
ADVANCED PROGRAMMING
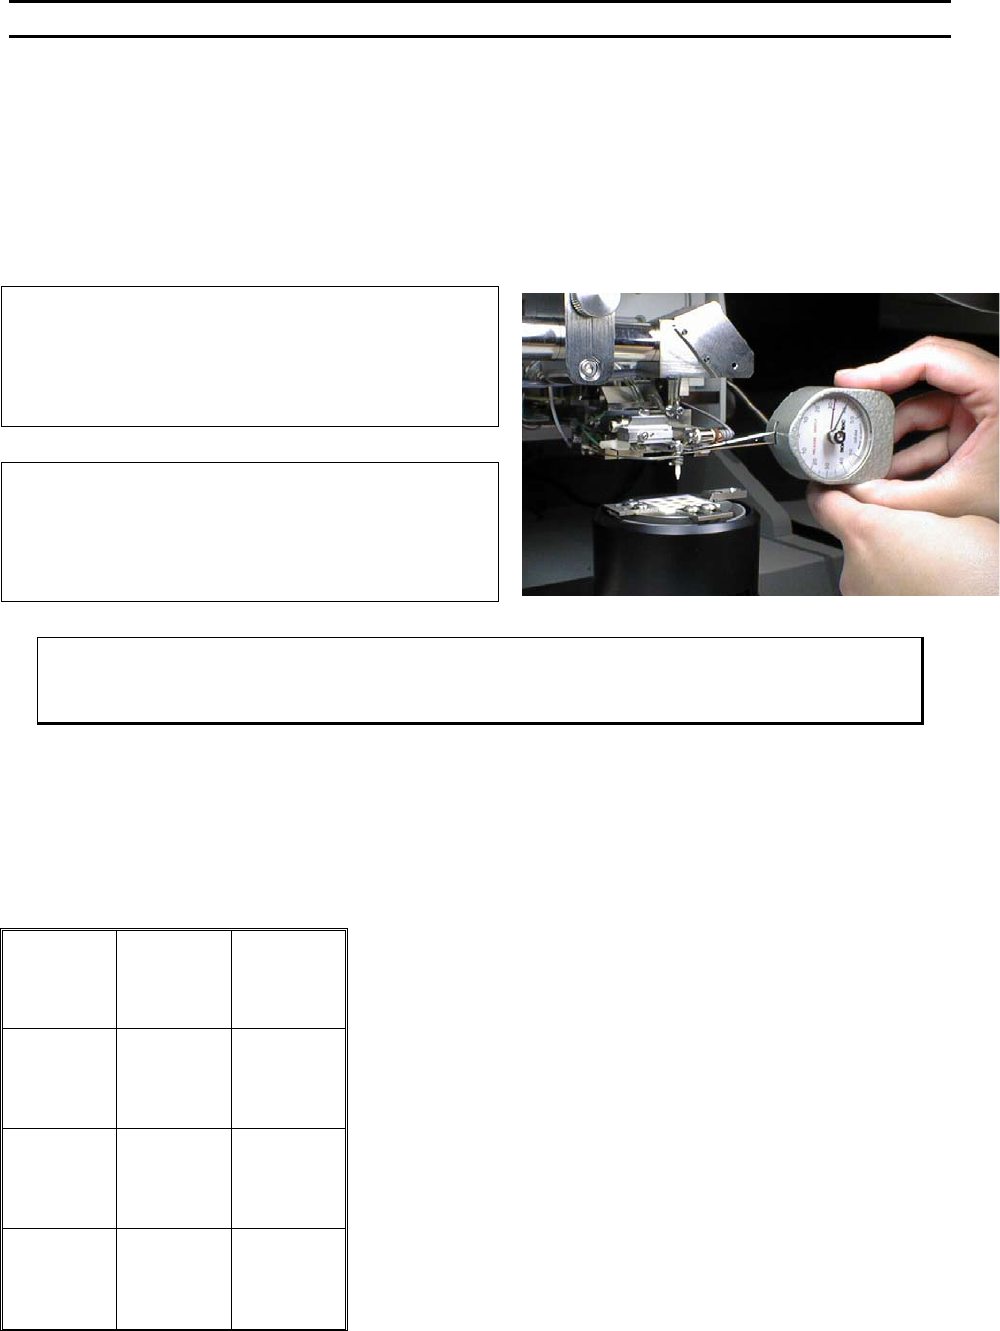
Force Adjust
This option allows the operator to calibrate the HIGH FORCE setting by simply adjusting the force
adjustment knob. This A
DJUSTMENT KNOB is located to the right of the tool head assembly (see picture on
the next page). To increase the bond force, turn the knob counter-clockwise (CCW). To decrease the
bond force turn the knob clockwise. To determine the force for bonding use a gram gauge as illustrated in
the picture below. Lift the tooling head, Just in front of the Bonding Tool, with the gram gauge. The
system will signal the operator when the firing switch opens, This will signify the High Force setting.
HIGH FORCE (Displayed if Dual Force is On)
CALIBRATE HIGH FORCE
Use force gage to measure Calibration
Force at the tool.
A=Prev option G=Next option
FORCE (Displayed if Dual Force is Off)
CALIBRATE FORCE
Use force gage to measure Calibration
Force at the tool.
A=Prev option G=Next option
ϑ To edit “High Force” (If Dual Force is ON) or “Force” (If Dual Force is OFF)
From the H
OME menu press 4 (EDIT), 6 (MACHINE), and then 8 (FORCE ADJUST)
Key Format:
1
2
Home
3
4
5
6
7
8
9
Previous
option
A
0
Next option
G
WEST•BOND MODEL 454647E SERIES INSTRUCTION MANUAL
60
ADVANCED PROGRAMMING
Low Force
This screen will only be displayed if the
operator has selected the DUAL FORCE
option. Having selected O
N for the DUAL
FORCE option, the operator is allowed to
calibrate the low force setting while at this
menu.
The operator should expect to hear the air
cylinder activate when entering this menu.
The air cylinder will deactivate when leaving
this menu.
R
EMINDER: This menu is used for calibrating
or establishing the L
OW FORCE setting.
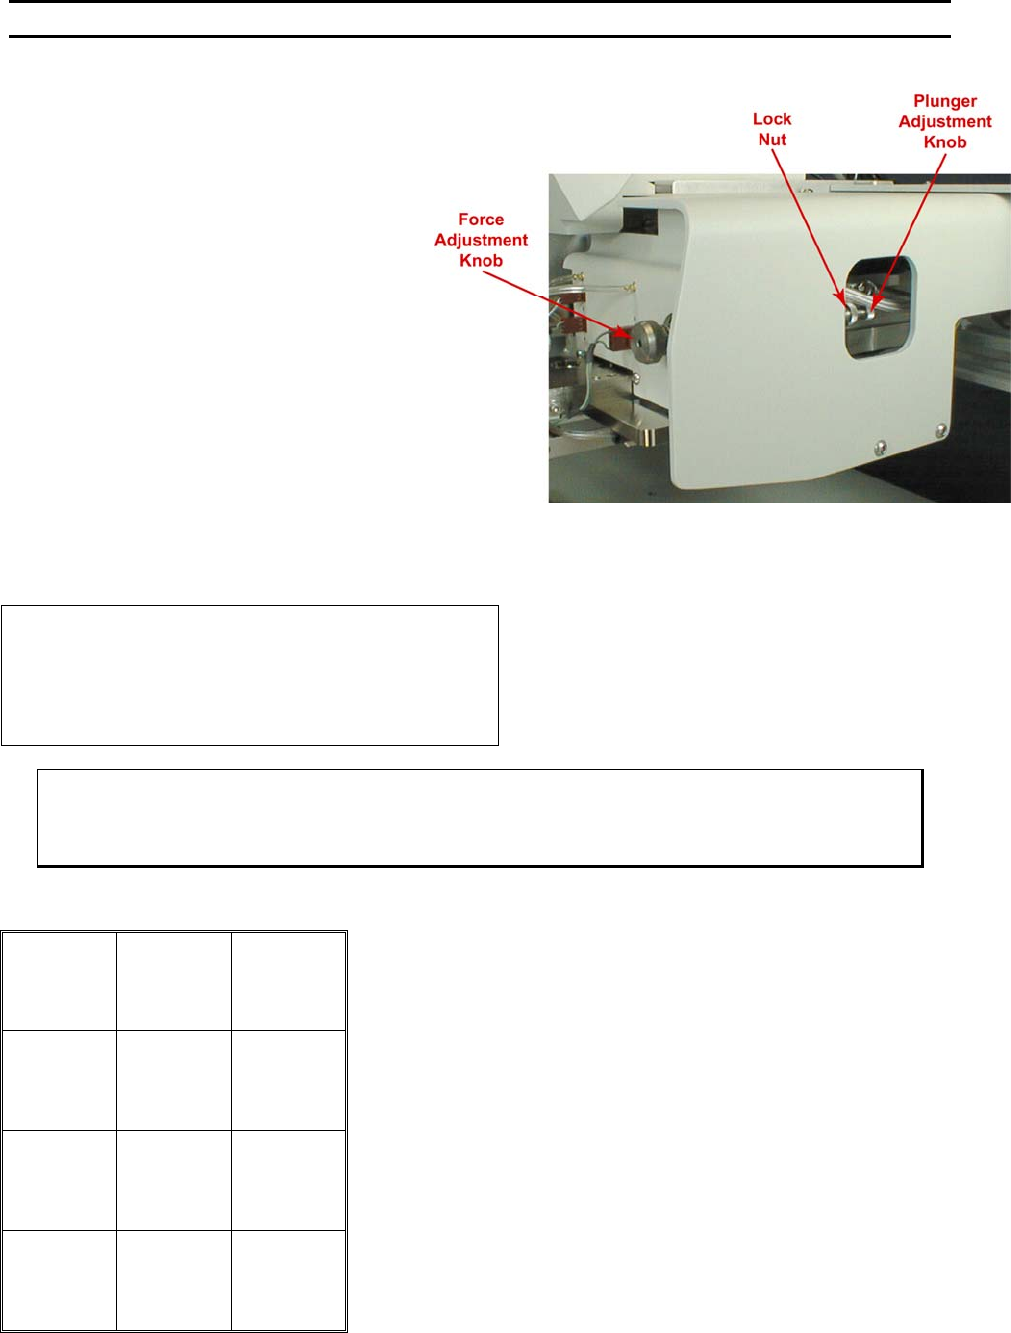
To Adjust the L
OW FORCE setting, loosen the
knurled L
OCK NUT and turn the knurled
PLUNGER ADJUSTMENT KNOB located on the
opposite end of the HIGH FORCE knob. Use
the gram gauge to determine the L
OW FORCE
setting. See page 82 for details on how to
select High or Low force for individual bonds.
LOW FORCE (Displayed if Dual Force is On)
CALIBRATE LOW FORCE
Use force gage to measure Calibration
Force at the tool.
A=Prev option G=Next option
ϑ To edit “Low Force” (If Dual Force is ON) or “Force” (If Dual Force is OFF)
From the H
OME menu press 4 (EDIT), 6 (MACHINE), 8 (FORCE ADJUST), then G (SEQUENCE)
Key Format:
1
2
Home
3
4
5
6
7
8
9
Previous
option
A
0
Next option
G