PatternPro Variable Pitch Guns.pdf - 第23页
MiniBlue ll applicator presassembled with a solenoid valve (P/N 771129) 19 P/N 1048257_03 2018 Nordson Corporation PatternPro Edition 02/18 Connecting the Solenoid Valve Follow the instructions below to connect air sup…

18
P/N 1048257_03
2018 Nordson Corporation
PatternPro
Edition 02/18
Replace an Applicator on an Existing System
NOTE: If the applicators preassembled with performance‐matched solenoid
valve require replacement, the entire applicator assembly (both the
applicator and solenoid valve) should be replaced as a single unit.
1. Relieve system hydraulic pressure and disable the applicator to be
replaced. Refer to Safety.
2. Disconnect the hose from the applicator both electrically and
hydraulically.
3. Separate the existing applicator from its mounting. If a mounting bracket
will not be reused, remove it from the mounting bar.
4. Disconnect the pipe nipple and solenoid valve from the old applicator and
install them on the new applicator.
5. Mount the new applicator and insulation plate onto the existing mounting
bracket (orrod) or disassemble a new applicator's mounting bracket and
then reassemble the clamp (with the applicator and insulation plate) onto
the existing mounting bar. Tighten the screws securely.
6. Go to Connecting the Solenoid Valve.
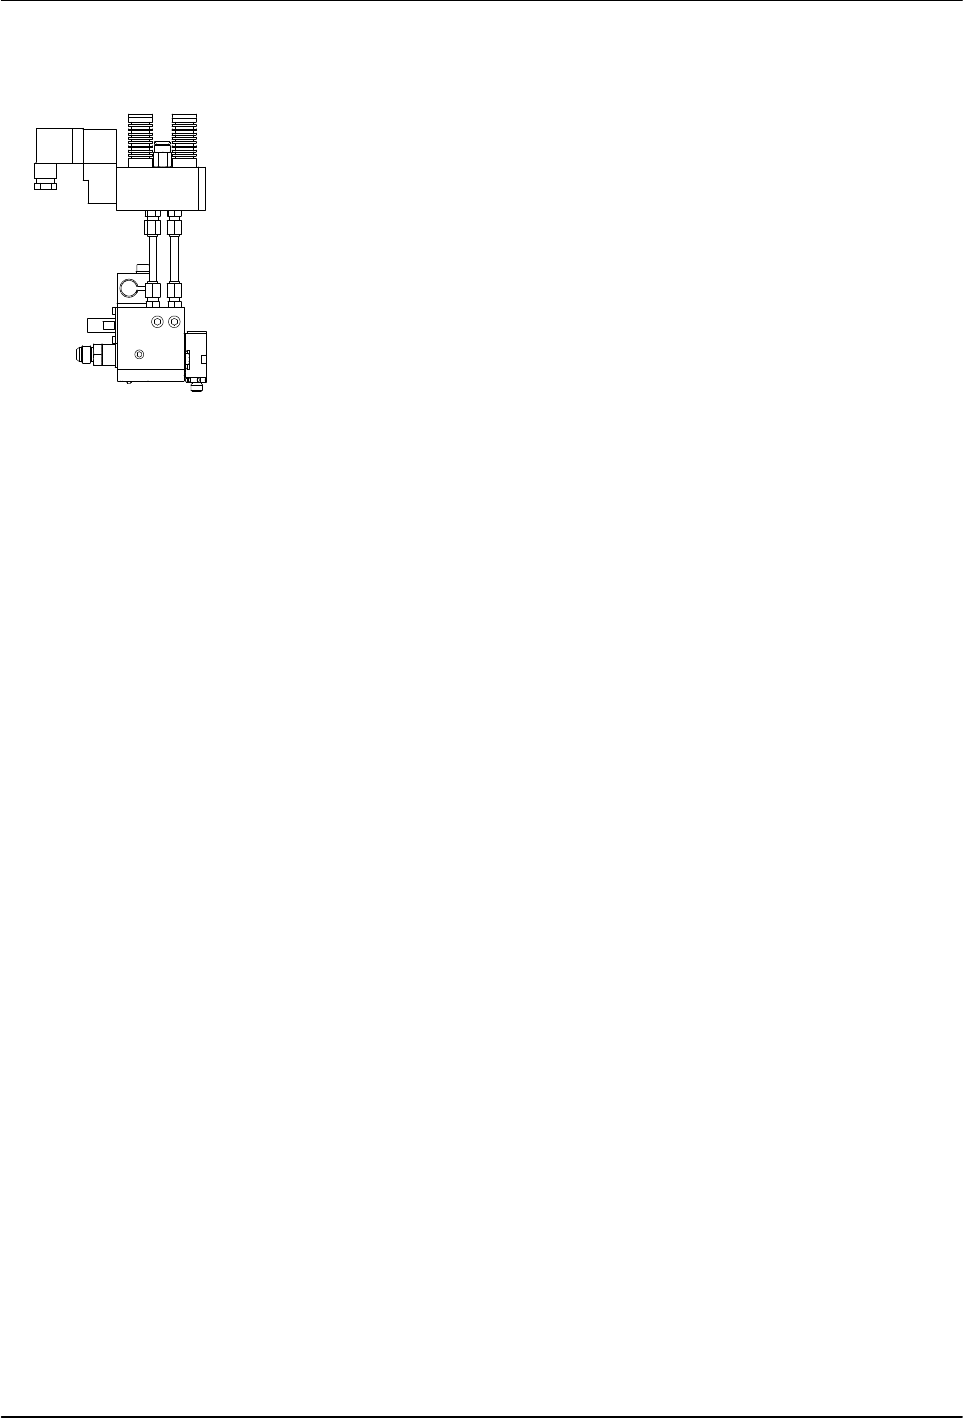
MiniBlue ll applicator
presassembled with a solenoid
valve
(P/N 771129)
19
P/N 1048257_03
2018 Nordson Corporation
PatternPro
Edition 02/18
Connecting the Solenoid Valve
Follow the instructions below to connect air supply and triggering device.
Connect Air Supply
Connect a clean, dry, non‐lubricated air supply to the air inlet on the solenoid
valves. The pipe nipple should have a 6‐mm (
1
/
4
‐in.) internal diameter.
NOTE: A pipe nipple with an internal diameter smaller than 6‐mm
(
1
/
4
‐in.) will negatively impact the applicators's performance.
20
P/N 1048257_03
2018 Nordson Corporation
PatternPro
Edition 02/18
Connect Triggering Device
Be sure to refer to the correct triggering device connection procedure for the
solenoid valve on your applicator.
For solenoids that do not have an M8 connection see the instruction below.
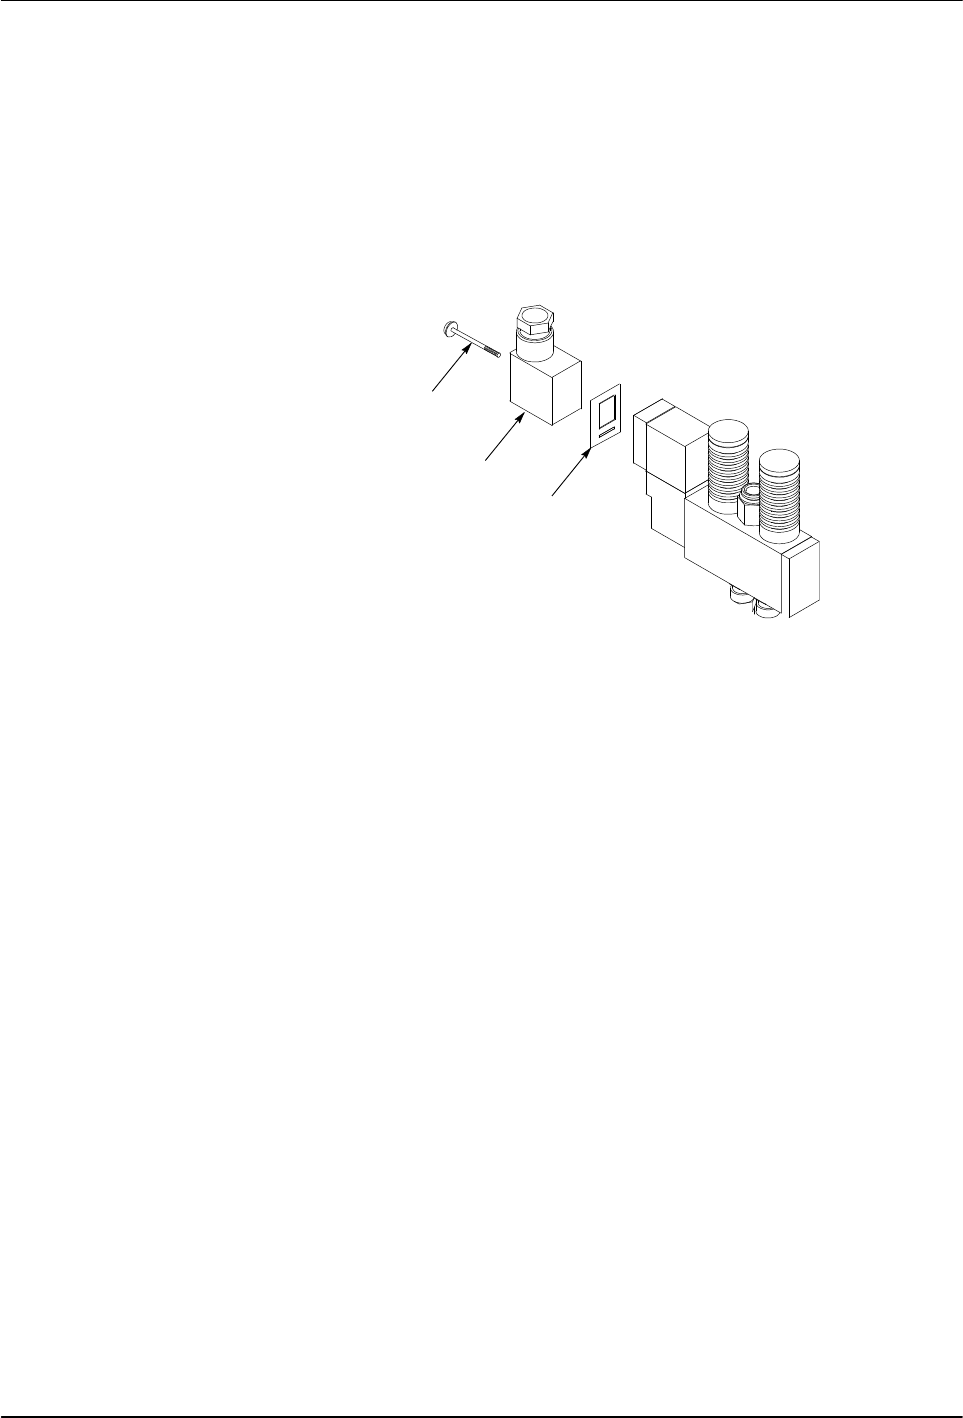
See Figure 5.
1. Remove the solenoid valve terminal block. Save the gasket that is
positioned between the terminal block and the valve.
4215012
1
2
3
Fig. 5 Removing the Solenoid Valve Terminal Block
1 Terminal block screw
2 Terminal block
3 Gasket
See Figure 6.
CAUTION: Do not attempt to pry the terminal block out of the housing. Doing
so can damage the electrical connection pins.