PatternPro Variable Pitch Guns.pdf - 第33页
4204026A Cleaning a nozzle with a probe (typical) 29 P/N 1048257_03 2018 Nordson Corporation PatternPro Edition 02/18 Cleaning Nozzles (contd) Table 4 Nozzle Removal and Installation Procedures (contd) Nozzle Type Remo…
28
P/N 1048257_03
2018 Nordson Corporation
PatternPro
Edition 02/18
Maintenance
The following table provides the recommended schedule for applicator
maintenance. Detailed procedures for weekly and semi‐annual maintenance
tasks are provided.
Frequency Task Notes
Daily Remove hot melt material and char
from the exterior of the applicator
assembly.
Weekly Clean the applicator nozzle(s). A, B
Semi‐annually Inspect the applicator wiring.
NOTE A: Use a nozzle cleaning kit, P/N 901915.
B: Process‐specific nozzle performance history may indicate the need for
more or less frequent nozzle cleaning.
Cleaning Nozzles
Applicator nozzles may become clogged when char, a by‐product of
overheating the hot melt material, becomes lodged in the nozzle. The use of
an in‐line or integral filter will significantly reduce nozzle clogging.
1. Heat the applicator to operating temperature.
2. Disable the applicator. Refer to Safety.
3. Remove nozzles as shown in Table 4.
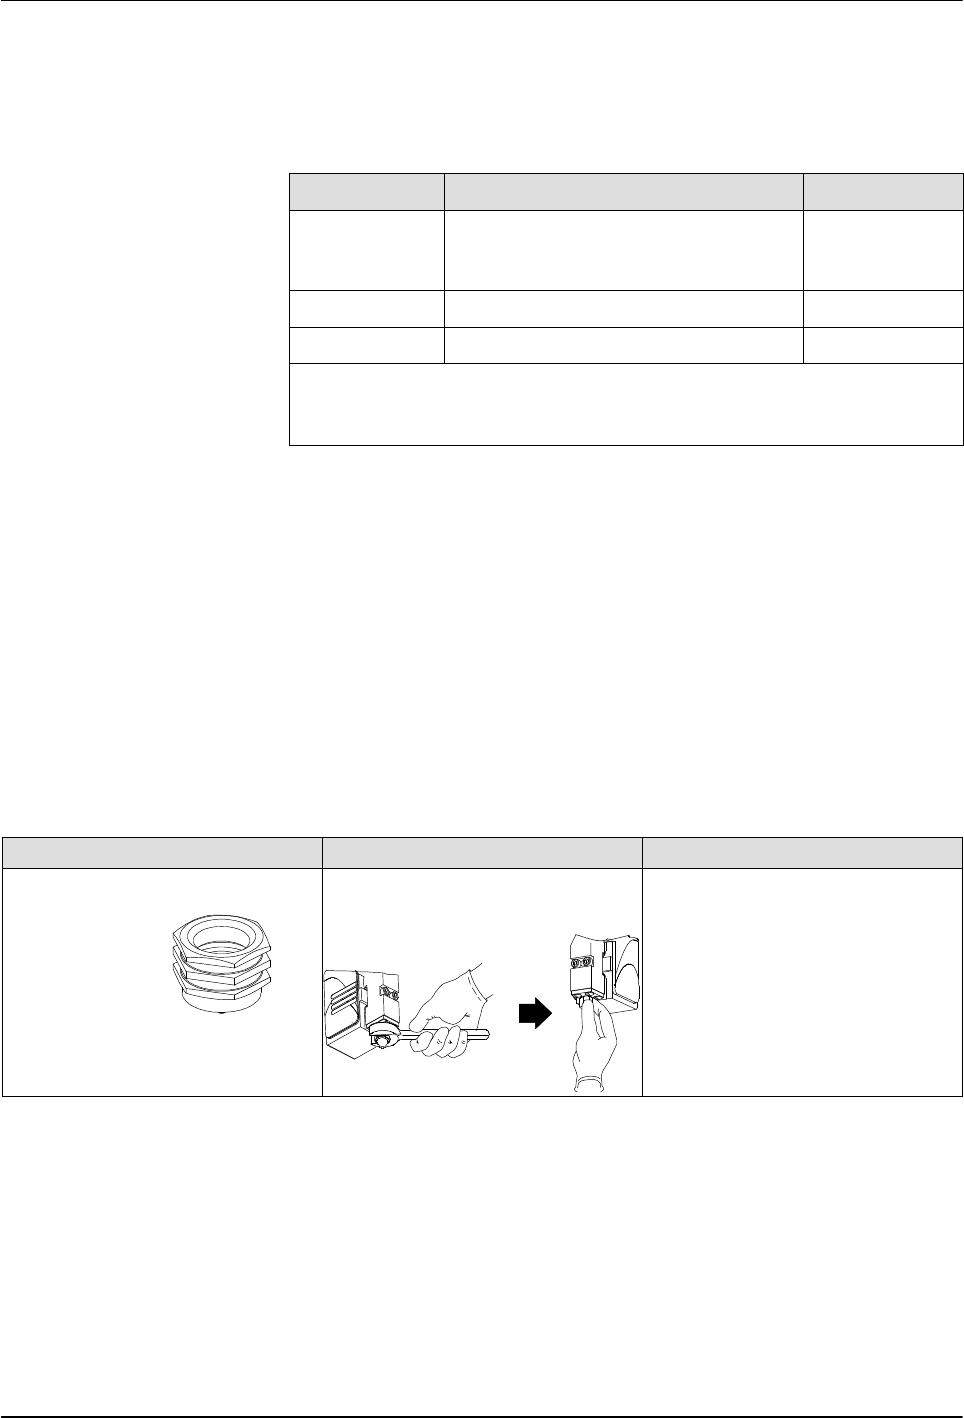
Table 4 Nozzle Removal and Installation Procedures
Nozzle Type Removal Procedure Installation Procedure
Ball and seat (for use with Saturn
nozzles).
SureBead
Use a wrench to loosen the
nozzle, then remove the nozzle
by hand (wear safety gloves).
Thread the nozzle onto the
module threads by hand; then
use a torque wrench to tighten
the nozzle to 4.5 Nm (40 in.‐lb).
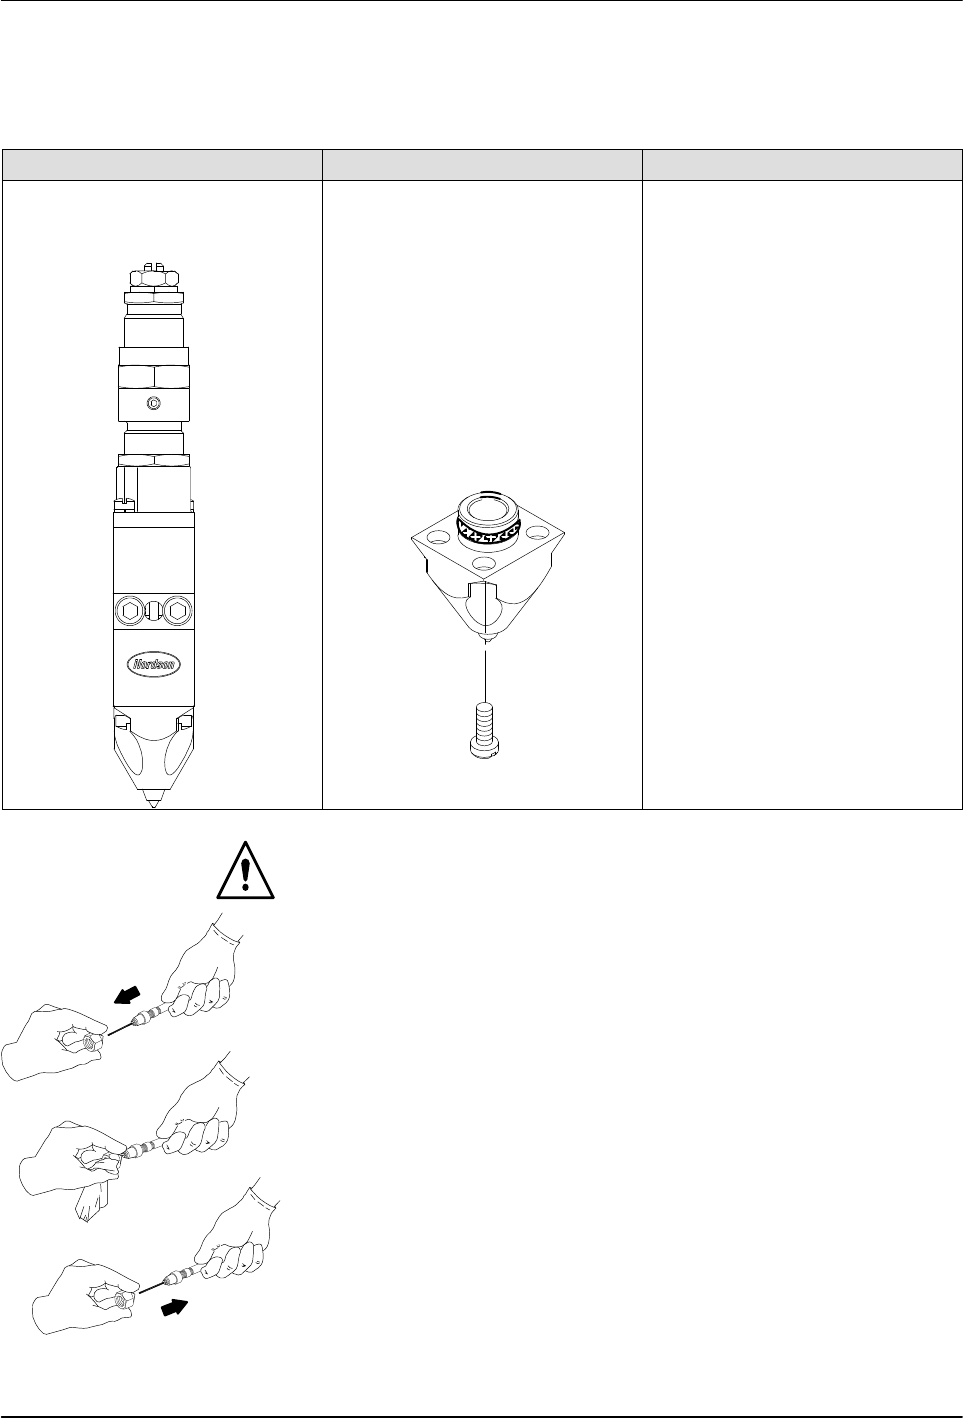
4204026A
Cleaning a nozzle with a
probe (typical)
29
P/N 1048257_03
2018 Nordson Corporation
PatternPro
Edition 02/18
Cleaning Nozzles (contd)
Table 4 Nozzle Removal and Installation Procedures
(contd)
Nozzle Type Removal Procedure Installation Procedure
Zero cavity module nozzle 1. Scribe or otherwise place a
distinctive mark on the side of
the nozzle. Use the same
mark on the applicator body
to identify the correct
replacement location for the
nozzle.
2. Remove the nozzle by
removing the four screws that
secure it to the module.
3. Remove and discard the
nozzle O‐ring.
1. Lubricate with heat‐resisting
lubricant and install a new
nozzle O‐ring.
2. Install the nozzle on the
module, verifying that the
needle guide is still inside the
nozzle and that the nozzle is
properly aligned with the
needle tip and with the scribe
made earlier.
3. Secure the nozzle with the
screws removed previously.
WARNING: Risk of fire. Do not heat Nordson Type R fluid above 245 C
(475 F). Use only an industrial grade, regulated, electrical heating device
that is designed to heat industrial fluids. Personal injury or property damage
can result if Type R cleaning fluid is heated with an open flame or in an
unregulated heating device.
4. Soak the nozzles in Nordson Type R cleaning fluid that has been heated
above the melting point of the hot melt material, to a maximum of
177 C (350F).
5. Remove the nozzles from the cleaning fluid.
CAUTION: Use the correct size precision pin probe to clean Nordson
nozzles. The use of non‐precision or incorrectly sized probes may damage
the nozzle. The Nordson nozzle cleaning kit (P/N 901915) contains a variety
of probe sizes.
6. At the outlet of each nozzle, insert a correctly sized cleaning probe.
7. With a clean cloth, firmly grip the cleaning probe, then pull the probe out
of the nozzle, wiping the probe clean.
8. Reinstall the nozzles. Refer to Table 4.

30
P/N 1048257_03
2018 Nordson Corporation
PatternPro
Edition 02/18
Inspect the Applicator Wiring
For details on inspecting the applicator wiring, refer to Replacing the RTD or
Heater in Repair.