PatternPro Variable Pitch Guns.pdf - 第31页
27 P/N 1048257_03 2018 Nordson Corporation PatternPro Edition 02/18 Shutting the System Down Follow this procedure to shut down the system. 1. Stop the production line. WARNING: System or material pressurized. Relieve …

26
P/N 1048257_03
2018 Nordson Corporation
PatternPro
Edition 02/18
Operation
The applicator is now ready for operation.
Starting the System
Follow this procedure to start the system.
CAUTION: Risk of equipment damage. Nordson Corporation recommends
turning off the applicator air supply during system startup to prevent
unexpected pressure buildup in the module and applicator body caused by
the expansion of the cold adhesive as it melts.
1. Make sure the applicator air supply is turned off.
2. Turn on the melter and allow it to reach operating temperature. Refer to
your melter manual for details on the startup procedure.
3. Turn on the applicator air supply.
4. Turn on the solenoid valve power supply, enable any triggering devices,
and start the production line.

27
P/N 1048257_03
2018 Nordson Corporation
PatternPro
Edition 02/18
Shutting the System Down
Follow this procedure to shut down the system.
1. Stop the production line.
WARNING: System or material pressurized. Relieve pressure. Failure to
observe this warning may result in serious injury.
2. Turn off the pump and relieve hydraulic pressure. Refer to your melter
manual.
3. Turn off the melter. Refer to your melter manual for details on the system
shut down procedure.
WARNING: Hot! Risk of burns. Wear heat‐protective clothing, safety
goggles, and heat‐protective gloves.
4. Place a drain pan under all applicators.
5. Manually trigger the applicators until they are drained of hot melt material.
6. Turn off the solenoid valve power supply.
7. Turn off the applicator air supply.
8. Manually trigger the applicator solenoid valves to relieve applicator air
pressure.
28
P/N 1048257_03
2018 Nordson Corporation
PatternPro
Edition 02/18
Maintenance
The following table provides the recommended schedule for applicator
maintenance. Detailed procedures for weekly and semi‐annual maintenance
tasks are provided.
Frequency Task Notes
Daily Remove hot melt material and char
from the exterior of the applicator
assembly.
Weekly Clean the applicator nozzle(s). A, B
Semi‐annually Inspect the applicator wiring.
NOTE A: Use a nozzle cleaning kit, P/N 901915.
B: Process‐specific nozzle performance history may indicate the need for
more or less frequent nozzle cleaning.
Cleaning Nozzles
Applicator nozzles may become clogged when char, a by‐product of
overheating the hot melt material, becomes lodged in the nozzle. The use of
an in‐line or integral filter will significantly reduce nozzle clogging.
1. Heat the applicator to operating temperature.
2. Disable the applicator. Refer to Safety.
3. Remove nozzles as shown in Table 4.
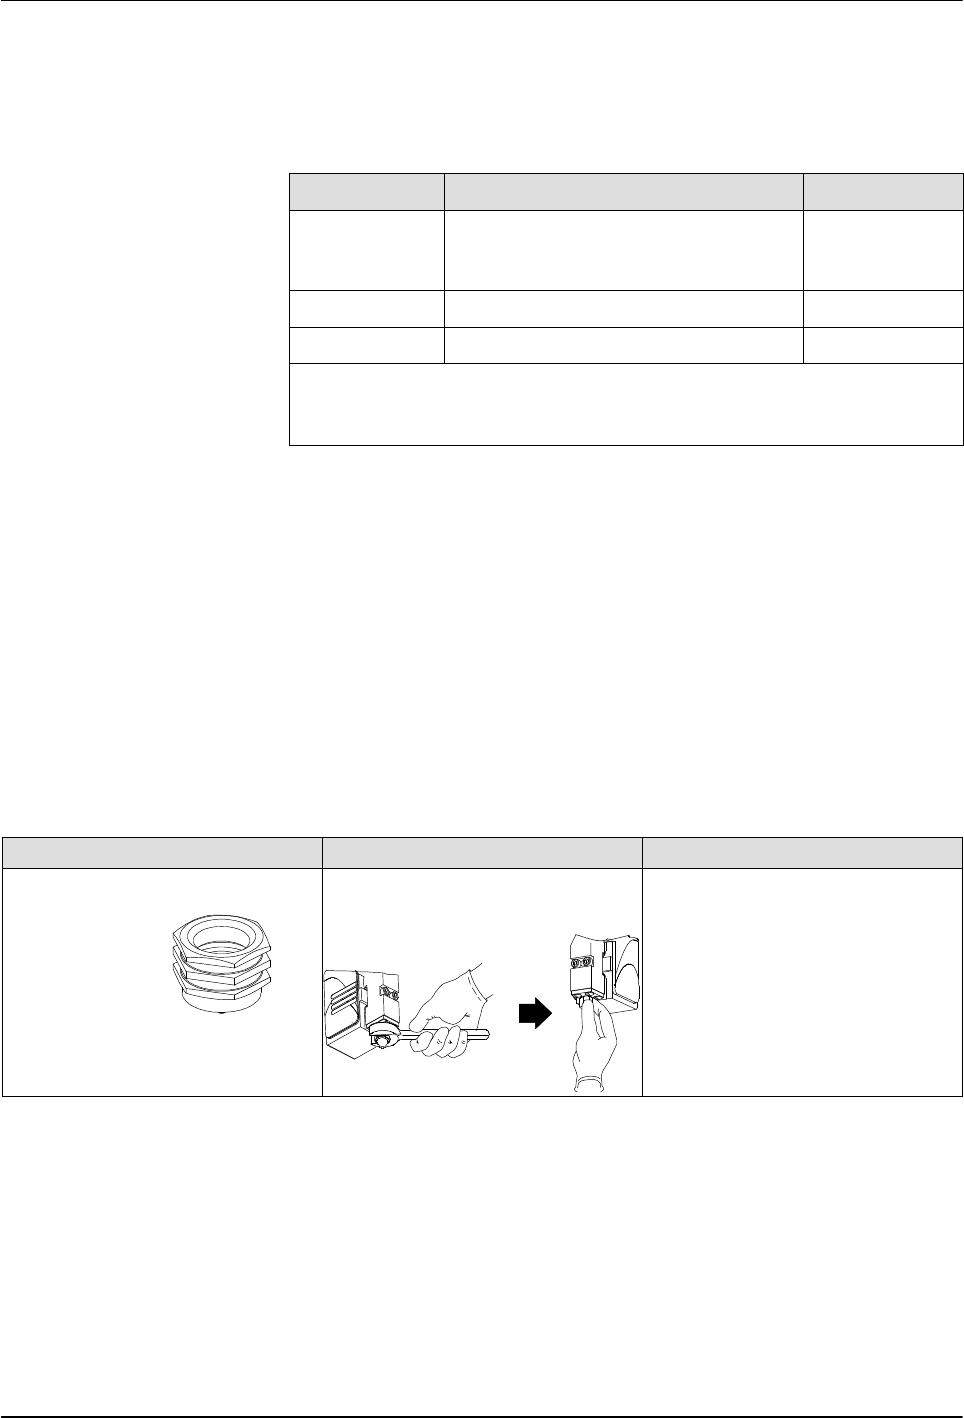
Table 4 Nozzle Removal and Installation Procedures
Nozzle Type Removal Procedure Installation Procedure
Ball and seat (for use with Saturn
nozzles).
SureBead
Use a wrench to loosen the
nozzle, then remove the nozzle
by hand (wear safety gloves).
Thread the nozzle onto the
module threads by hand; then
use a torque wrench to tighten
the nozzle to 4.5 Nm (40 in.‐lb).