3MAINTENANCE__O.pdf - 第189页
4.3 Management of Password 4 - 3.2 Setting of Password Available Areas • Enter the password specified as one for the supervisor to issue the “ Log In ” command . • Open the “ PASSWORD AVLBL . AREA SET ” display ( Fig . 4…
4.3
Management
of
Password
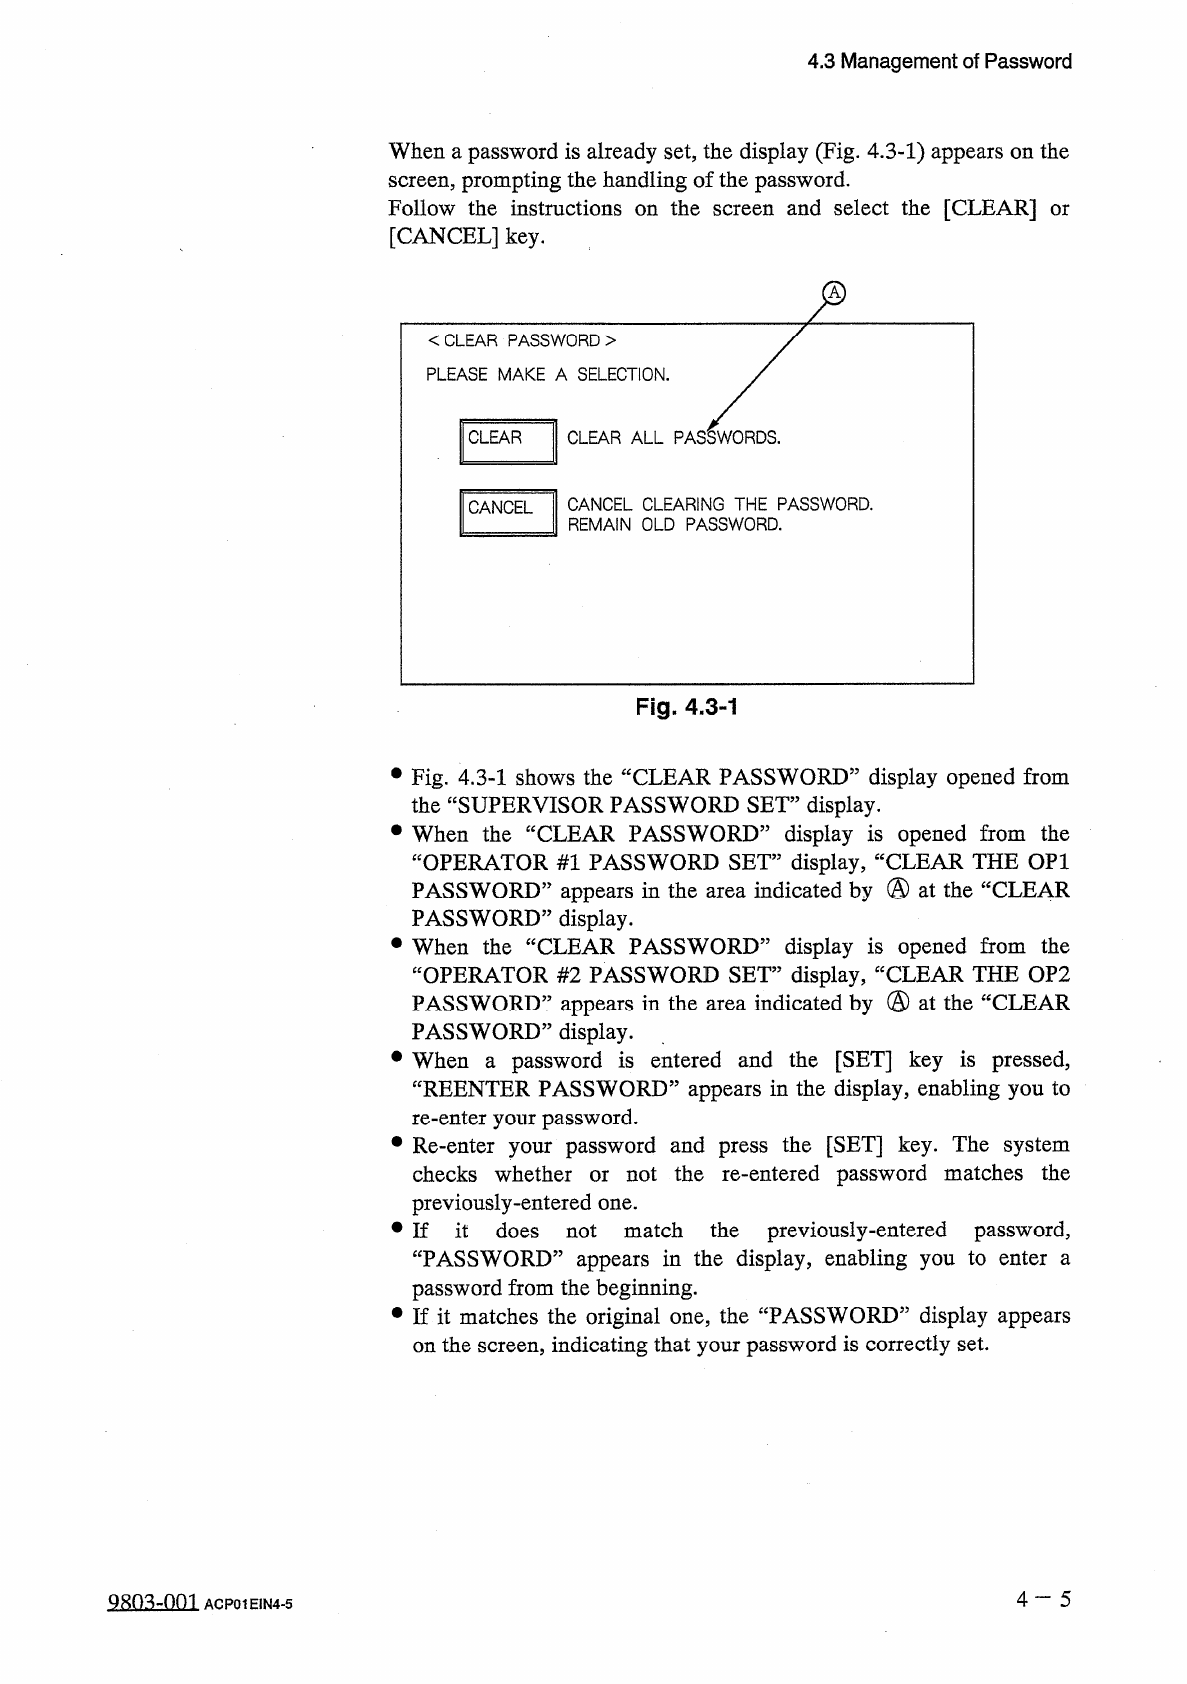
When
a
password
is
already
set
,
the
display
(
Fig
.
4.3
-
1
)
appears
on
the
screen
,
prompting
the
handling
of
the
password
.
Follow
the
instructions
on
the
screen
and
select
the
[
CLEAR
]
[
CANCEL
]
key
.
or
z
<
CLEAR
PASSWORD
>
PLEASE
MAKE
A
SELECTION
.
CLEAR
CLEAR
ALL
PASSWORDS
.
CANCEL
CLEARING
THE
PASSWORD
.
REMAIN
OLD
PASSWORD
.
CANCEL
Fig
.
4.3
-
1
•
Fig
.
4.3
-
1
shows
the
“
CLEAR
PASSWORD
”
display
opened
from
the
“
SUPERVISOR
PASSWORD
SET
”
display
.
•
When
the
“
CLEAR
PASSWORD
”
display
is
opened
from
the
“
OPERATOR
#
1
PASSWORD
SET
”
display
,
“
CLEAR
THE
OP
1
PASSWORD
”
appears
in
the
area
indicated
by
@
at
the
“
CLEAR
PASSWORD
”
display
.
•
When
the
“
CLEAR
PASSWORD
”
display
is
opened
from
the
“
OPERATOR
#
2
PASSWORD
SET
”
display
,
“
CLEAR
THE
OP
2
PASSWORD
”
appears
in
the
area
indicated
by
@
at
the
“
CLEAR
PASSWORD
”
display
.
password
is
entered
and
the
[
SET
]
key
is
pressed
,
“
REENTER
PASSWORD
”
appears
in
the
display
,
enabling
you
to
re
-
enter
your
password
.
•
Re
-
enter
your
password
and
press
the
[
SET
]
key
.
The
system
checks
whether
or
not
the
re
-
entered
password
matches
the
previously
-
entered
one
.
•
If
it
does
not
match
the
previously
-
entered
password
,
“
PASSWORD
”
appears
in
the
display
,
enabling
you
to
enter
a
password
from
the
beginning
.
•
If
it
matches
the
original
one
,
the
“
PASSWORD
”
display
appears
on
the
screen
,
indicating
that
your
password
is
correctly
set
.
•
When
a
4
一
5
Q
^
m
-
001
ACP
01
EIN
4
-
5
4.3
Management
of
Password
4
-
3.2
Setting
of
Password
Available
Areas
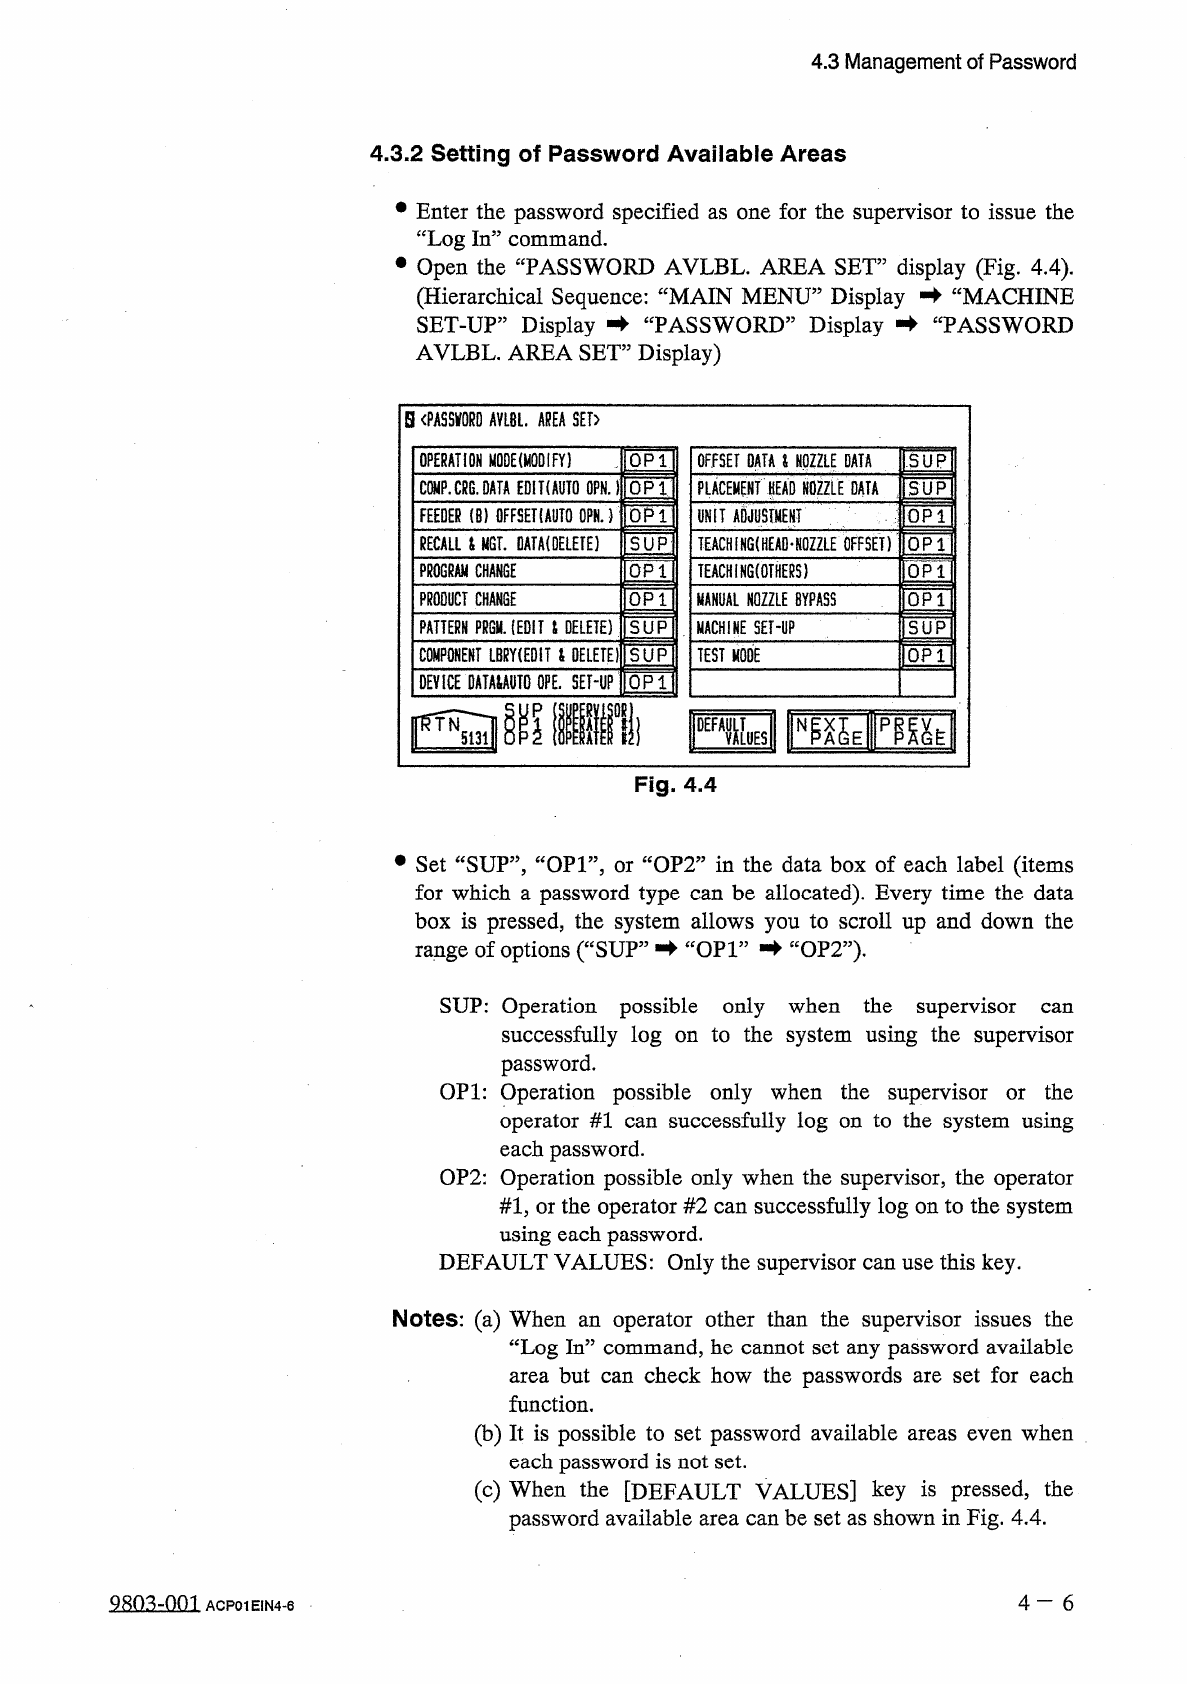
•
Enter
the
password
specified
as
one
for
the
supervisor
to
issue
the
“
Log
In
”
command
.
•
Open
the
“
PASSWORD
AVLBL
.
AREA
SET
”
display
(
Fig
.
4.4
)
.
(
Hierarchical
Sequence
:
“
MAIN
MENU
”
Display
蛑
“
MACHINE
SET
-
UP
”
Display
蛑
“
PASSWORD
”
Display
蚌
“
PASSWORD
AVLBL
.
AREA
SET
”
Display
)
S
〈
PASSWORD
AVLBL
.
AREA
SET
>
OPERATION
MODE
(
MODIFY
)
QP
1
OFFSET
DATA
&
NOZZLE
DATA
SUP
PLACEMENT
PD
NOZZLE
DATA
5
UP
CW
.
CRG
.
OAfA
EDIKAUTO
OPN
.
1
OP
1
OPT
UNIT
ADJUSTMENT
FEEDER
(
8
)
DFFSETIAUTO
OPN
.
)
RECALL
i
MGT
.
DATA
(
OELETE
)
SUP
TEACH
[
NG
(
HEAD
*
N
0
Z
2
L
£
OFFSET
)
TEACHiNGtOTHERS
)
PROGRAM
CHANGE
OP
1
PRODUCT
CHANGE
QP
1
MANUAL
NOZZLE
BYPASS
PATTERN
FRQU
.
(
EDIT
i
DELETE
)
SUP
MACHINE
SET
-
UP
IQPTI
COMPONENT
LBRY
(
EDiT
t
DELETE
)
SUP
TEST
MODE
DEVICE
DATMAUTO
OPE
.
SEHP
QP
1
1
DEFXES
Fig
.
4.4
•
Set
“
SUP
”
,
“
OP
1
”
,
or
“
OP
2
”
in
the
data
box
of
each
label
(
items
for
which
a
password
type
can
be
allocated
)
.
Every
time
the
data
box
is
pressed
,
the
system
allows
you
to
scroll
up
and
down
the
range
of
options
(
“
SUP
”
蛑
“
OP
1
”
-
►
“
OP
2
”
)
,
SUP
:
Operation
possible
only
when
the
supervisor
successfully
log
on
to
the
system
using
the
supervisor
password
.
OP
1
:
Operation
possible
only
when
the
supervisor
or
the
operator
#
1
can
successfully
log
on
to
the
system
using
each
password
.
OP
2
:
Operation
possible
only
when
the
supervisor
,
the
operator
#
1
,
or
the
operator
#
2
can
successfully
log
on
to
the
system
using
each
password
.
DEFAULT
VALUES
:
Only
the
supervisor
can
use
this
key
.
can
Notes
:
(
a
)
When
an
operator
other
than
the
supervisor
issues
the
“
Log
In
”
command
,
he
cannot
set
any
password
available
area
but
can
check
how
the
passwords
are
set
for
each
function
.
(
b
)
It
is
possible
to
set
password
available
areas
even
when
each
password
is
not
set
.
(
c
)
When
the
[
DEFAULT
VALUES
]
key
is
pressed
,
the
password
available
area
can
be
set
as
shown
in
Fig
.
4.4
.
4
-
6
980
^
-
001
ACP
01
EIN
4
-
6
4.3
Management
of
Password
4.3
.
3
Flow
of
Operation
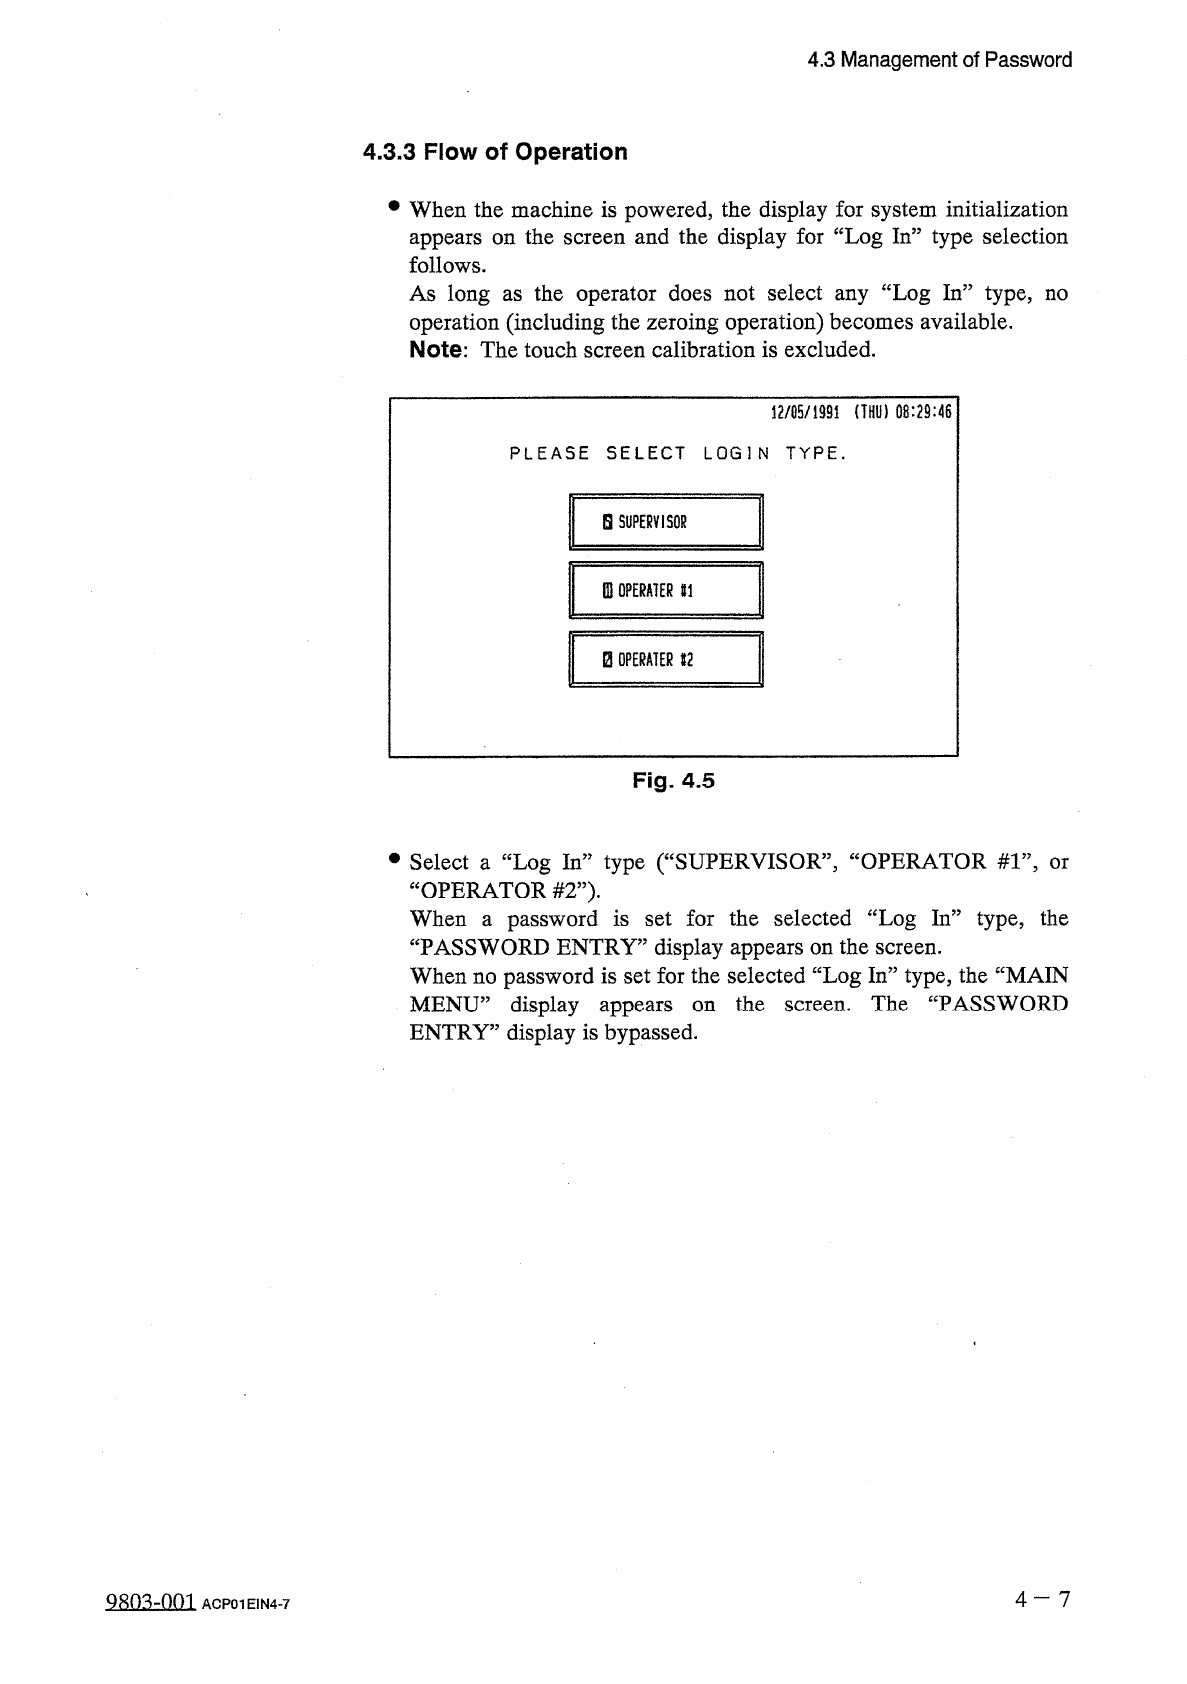
•
When
the
machine
is
powered
,
the
display
for
system
initialization
appears
on
the
screen
and
the
display
for
“
Log
In
”
type
selection
follows
.
As
long
as
the
operator
does
not
select
any
“
Log
In
”
type
,
no
operation
(
including
the
zeroing
operation
)
becomes
available
.
Note
:
The
touch
screen
calibration
is
excluded
.
12
/
05
/
1991
(
THU
)
08
:
29
:
46
PLEASE
SELECT
LOGIN
TYPE
.
H
SUPERVISOR
0
!
OPERATER
HI
B
OPERATER
12
Fig
.
4.5
•
Select
a
“
Log
In
”
type
(
“
SUPERVISOR
”
,
“
OPERATOR
#
1
”
,
“
OPERATOR
#
2
”
)
.
When
a
password
is
set
for
the
selected
“
Log
In
”
type
,
the
“
PASSWORD
ENTRY
”
display
appears
on
the
screen
.
When
no
password
is
set
for
the
selected
“
Log
In
”
type
,
the
“
MAIN
MENU
”
display
appears
ENTRY
”
display
is
bypassed
.
or
the
screen
.
The
“
PASSWORD
on
4
-
7
QRO
^
-
nm
ACP
01
EIN
4
-
7