00198045-01_OM_BulkFeeder_X_EN.pdf - 第38页
SIPLACE BulkFeede r X / Operating Ma nual 05/2017 Edition 38 5.5.2 Removing the Feeder NOTICE When tearing down t he feeder, the Base Unit and the Cart ridge sh ould be removed together to avoid dama ge and soiling of th…
SIPLACE BulkFeeder X / Operating Manual 05/2017 Edition
37
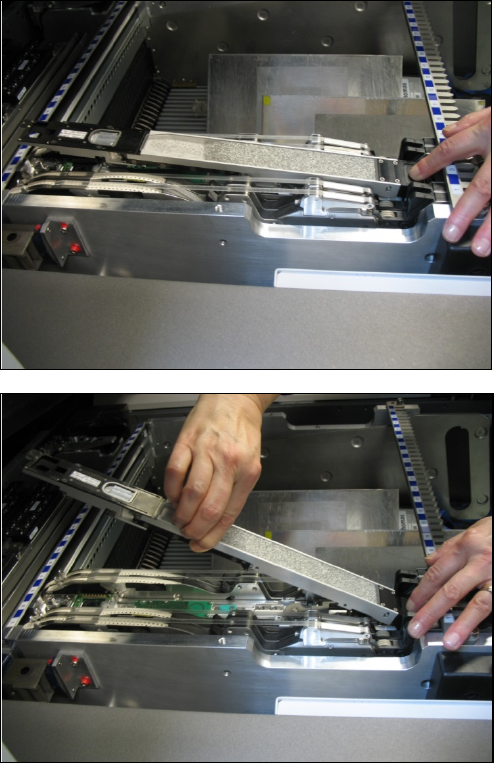
Gently put your finger on the filling ►
funnel.
Pick up the Cartridge in the middle ►
with your other hand and lift it from
the Base Unit.
SIPLACE BulkFeeder X / Operating Manual 05/2017 Edition
38
5.5.2 Removing the Feeder
NOTICE
When tearing down the feeder, the Base Unit and the Cartridge should be removed
together to avoid damage and soiling of the Base Unit.
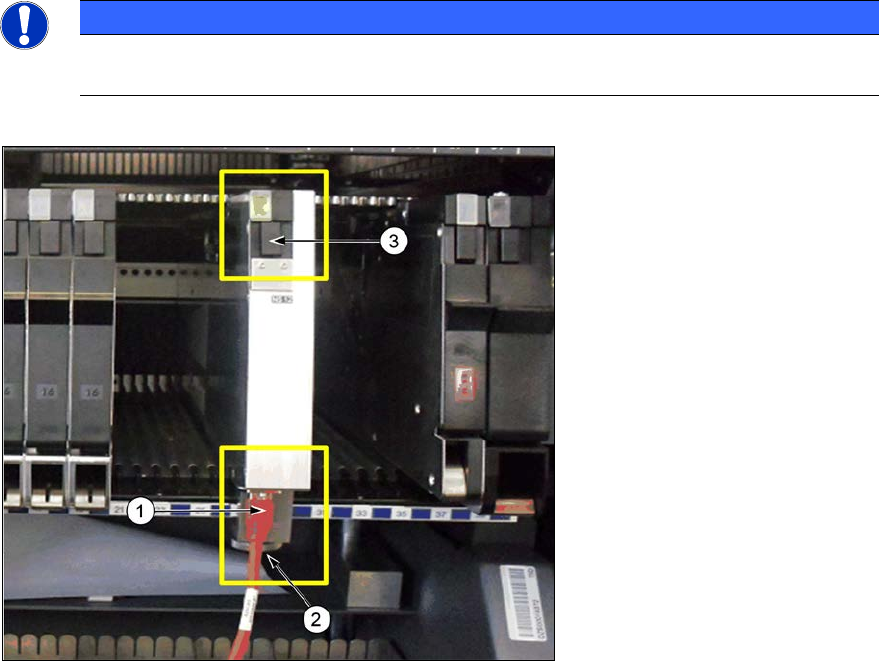
Disconnect the camera ►
cable (1) from the
corresponding connector
on the Base Unit.
Loosen the knurled screw ►
from the mechanical mount
(2) of the Base Unit.
Press the locking ►
mechanism (3) under the
status display LED at the
rear end of the Base Unit.
The log off procedure is started for the SIPLACE BulkFeeder X, the status display is switched off
and the locking mechanism will protrude. All key data will be saved in the SIPLACE BulkFeeder X.
The SIPLACE BulkFeeder X will then be automatically logged off the X-FCU and the X-FCU will
open the mechanical lock at the location. As soon as the status displays are dark, the log off
procedure is completed.
Use the SIPLACE BulkFeeder X handle (see page 7) to pull the Base Unit out of the location. ►
Do not carry the SIPLACE BulkFeeder X with the locking handle.
SIPLACE BulkFeeder X / Operating Manual 05/2017 Edition
39
5.6 Clearing the Glass Plate
During the reference run, the components are removed from the glass plate and a contamination
check of the glass plate has to be performed automatically. If contamination is detected on the
SIPLACE Vision image, this can be caused by components still present on the glass plate or by
dirt, dust, scratches etc.. A corresponding warning or error is displayed on the GUI.
If the contamination is caused by components still on the glass plate, these have to be vibrated
back into the component container.
Select Settings… – Feeder settings – Remove components from pickup plate in the table ►
view of the Setup view.
A new reference run starts automatically after this action. If the reference run fails again, the
contamination is probably caused by dirt on the glass plate. An error message is displayed on the
GUI and the machine is stopped. The glass plate has to be cleared manually.
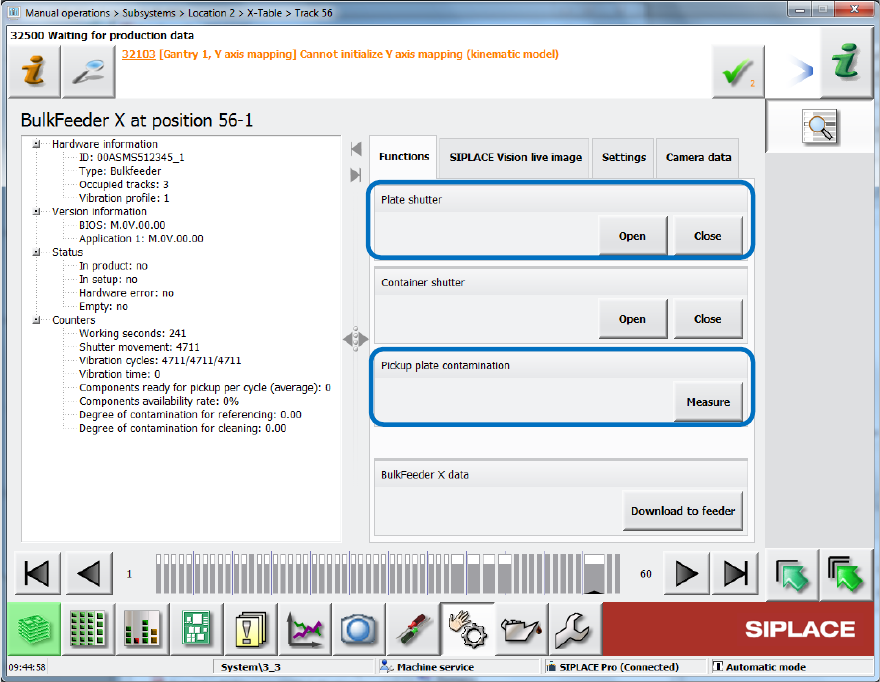
Under Manual operations, select the Open button in the Plate shutter field. ►
Figure 5-6: Opening plate shutter
Clean the glass plate with a cotton bud. ►
Click on Measure in the Pickup plate contamination field to confirm the cleaning and start a ►
new reference run.
If the reference run fails again and the glass plate is still contaminated, the glass plate has to be
cleaned outside the machine.