00198045-01_OM_BulkFeeder_X_EN.pdf - 第42页
SIPLACE BulkFeede r X / Operating Ma nual 05/2017 Edition 42 5.8 Exchanging the Glass Plate If cleaning the glas s plate fails, it has to be exchange d. Remove the Cart ridge from the Base Unit as de scribed in section 5…

SIPLACE BulkFeeder X / Operating Manual 05/2017 Edition
41
NOTICE
Repeating the cleaning procedure
If the glass plate was dirty for a long time and has not been cleaned it may happen that
the result is not satisfactory. In this case the cleaning procedure has to be repeated, i.e.
dipping the glass plate into the cleaning agent for one more hour.
Put back the glass plate into the glass plate holder with the tweezers. ►
NOTICE
Inserting the glass plate
Note the location when inserting the glass plate. The components will be transported on
the less reflective side.
Fasten the three screws of the glass plate holder on the underside of the Cartridge. ►
NOTICE
Fasten the screws
Fasten the three screws with care. Torque 0,05 – 0,1 Nm
Turn the Cartridge back again. ►
Insert the Cartridge on the Base Unit as describe d in section 5.4 Replacing the Cartridge on ►
the Base Unit.
SIPLACE BulkFeeder X / Operating Manual 05/2017 Edition
42
5.8 Exchanging the Glass Plate
If cleaning the glass plate fails, it has to be exchanged.
Remove the Cartridge from the Base Unit as described in section 5.5.1 Unlocking the ►
Cartridge.
Turn the Cartridge upside-down. ►
Figure 5-8: Removing the glass plate
Remove the three screws of the glass plate holder from the underside of the Cartridge. ►
Pull out the glass plate from the holder with the tweezers contained in the cleaning set. ►
Put the new glass plate into the glass plate holder with the tweezers. ►
Fasten the three screws of the glass plate holder on the underside of the Cartridge. ►
Turn the Cartridge back again. ►
Insert the Cartridge on the Base Unit as described in section 5.4 Replacing the Cartridge on the ►
Base Unit.
SIPLACE BulkFeeder X / Operating Manual 05/2017 Edition
43
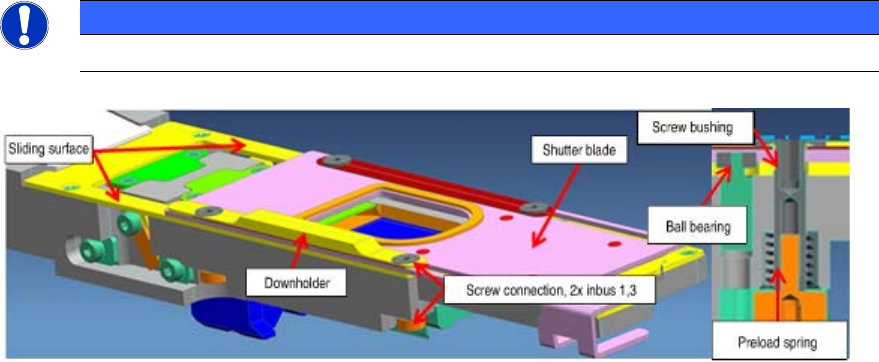
5.9 Maintaining the Plate Shutter
The ball bearings should be relubricated, when the mileage of 20% is reached. A rough cleaning of
parts is carried out at the same time.
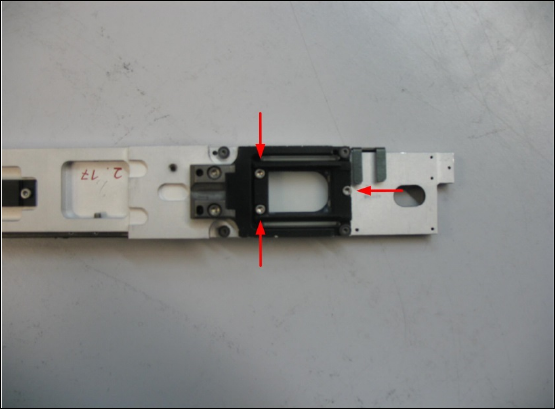
Dismantling the downholder and plate shutter
Remove the two fixing screws with a hexagon socket spanner size 1.3. ►
NOTICE
The fitting is pretensioned with a spring. Loose of parts is possible.
Remove the downholder and the screw socket. ►
Cleaning the ball bearing, sliding surfaces and shutter plate
The ball bearings are rinsed in the built-in state.
Press alcohol through the opening into the ball bearings. ►
Remove rest alcohol and soiling with compressed air. ►
Repeat this procedure 2-3 times. ►
Clean the sliding surfaces and shutter plate with a cotton wool tip and alcohol. ►
Lubrication of the ball bearings
Fill LUBCON Thermoplex ALN 1001/00 [03078556-xx] in the middle of the ball bearing, by ►
using the multi-nozzle from Eppendorf [00386154-xx] (inside the service bag).
Spread the grease in the ball bearing by rotating and by using a toothpick. ►
Assembly Instruction
Fit the parts in reverse order. ►