YSM10_Mainte_E.pdf - 第101页
3-34 3 Periodic maintenance items 0 Check the belt rotating condition. 1. Make sure that the board clamp plate top sur face is approx. 0.5mm lower than the belt upper sur face. 2. Close the machine safety cover to cancel…
3-33
3
Periodic maintenance items
7
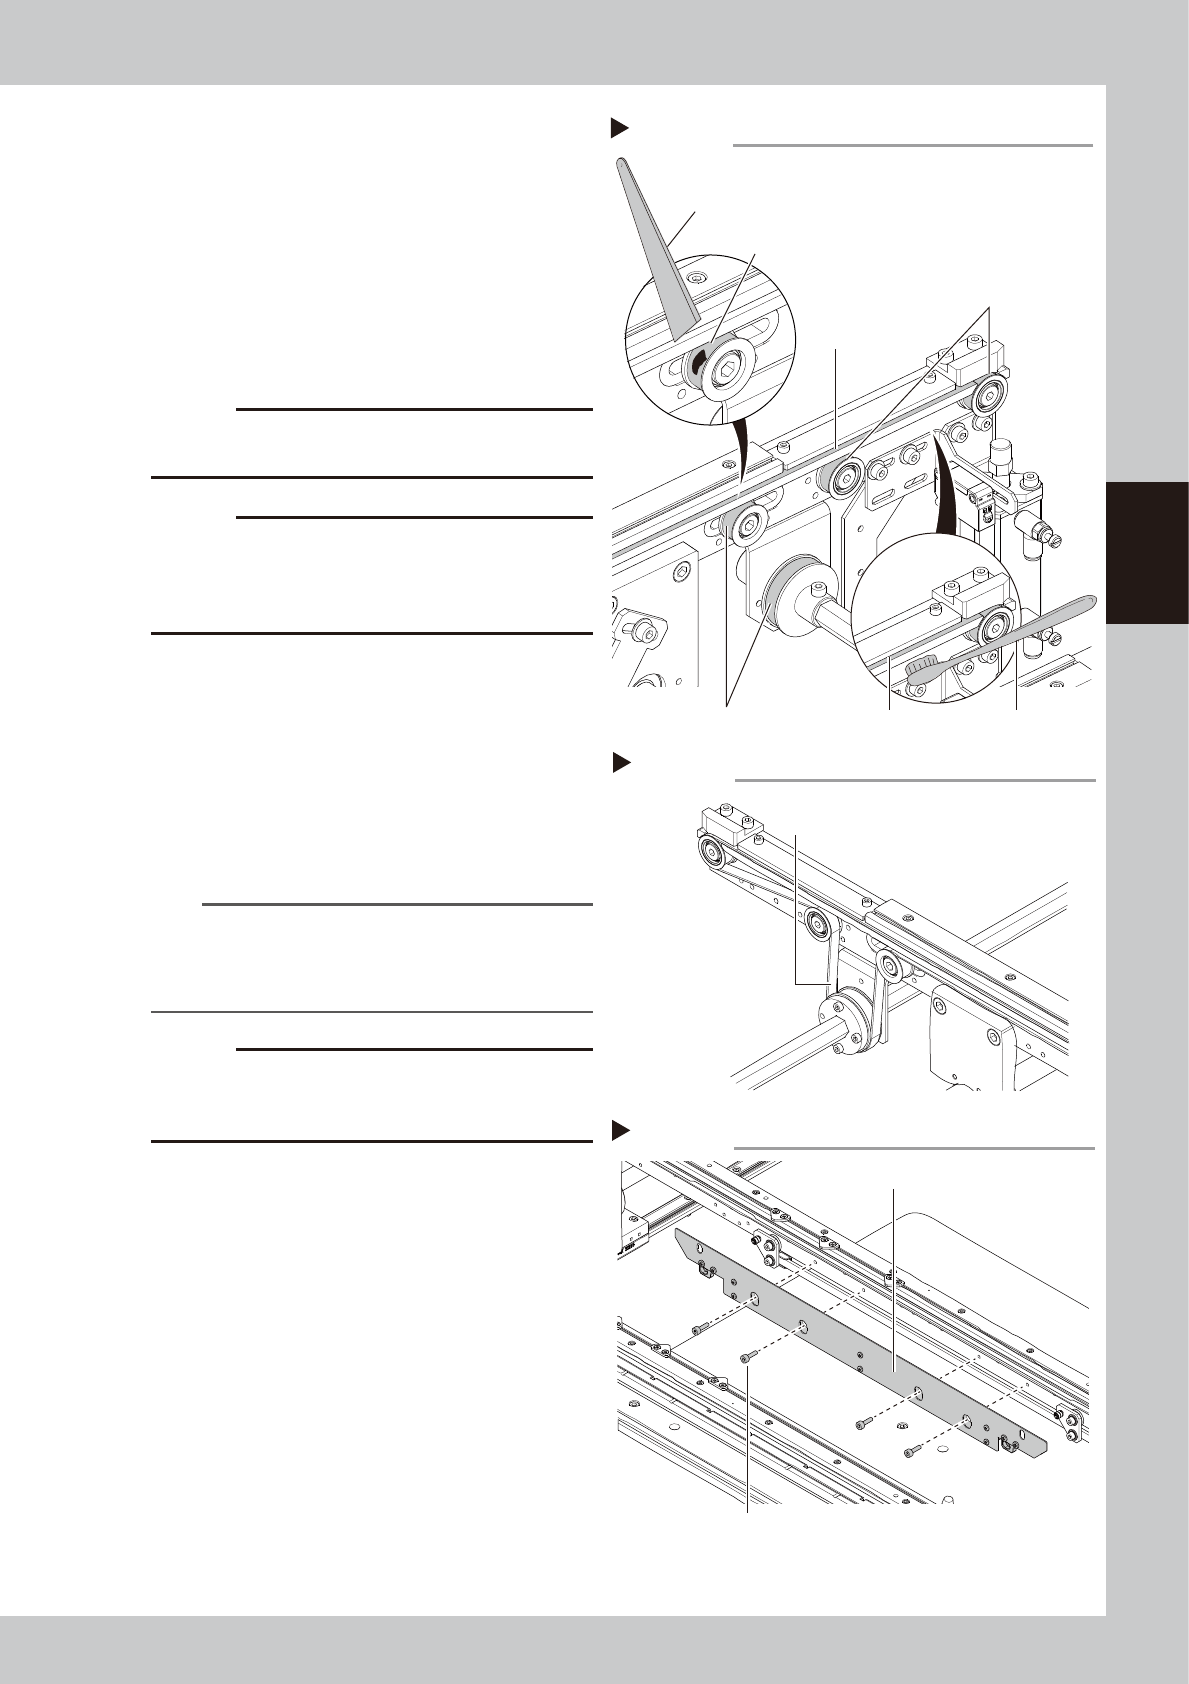
Clean the belt guides and pulleys.
1. Use a vacuum assembly (option) to
suction the belt wear debris on the belt
guides and sensors, etc.
2.
Use a plastic spatula or similar tool to
remove the belt wear debris adhering to
the outer peripheral surface of the pulleys.
3.
Use a brush or similar tool to remove the
belt wear debris caught in the belt guides
.
53345-KMG-00
c
CAUTION
Use a plastic spatula and brush to avoid scratching the
pulleys and guides.
c
CAUTION
Do not use absolute ethanol unless the guides and
pulleys are excessively dirty. If using a solvent, be
careful not to spill the solvent on the bearing in the
pulleys during cleaning.
8
Reattach the belt.
1. Reattach the belt temporarily while
putting it on the pulley.
2. Move the pulley to the position marked
in Step 4 and install the mounting bolts.
3.
If looseness of the belt is found, adjust the
pulley position to apply tension.
53346-KMG-00
n
NOTE
The conveyor belt tension standard value of this
machine is 520 to 580 Hz. Adjust the conveyor belt
tension with a tension meter as necessary. The same
standard value applies to the extension conveyor type.
c
CAUTION
The tightening torques of the pulley mounting bolt that
applies tension is 5.5N·m. Do not tighten the bolt
excessively.
9
Attach the board clamp plate.
1. Fit the board clamp plate into its original
position and tighten the board clamp
plate mounting bolts with a hex wrench
(3).
2. Remove the square cloth
placed under
the push-up plate.
53347-KMG-00
Step 7
Cleaning the belt guide and pulley
Spatula
(made of plastic)
Belt wear debris
sticking to pulley
Belt guide
Belt guide
Outer peripheral
surface of pulley
Brush
Outer peripheral surface of pulley
Step 8
Tension measurement point
Tension measurement point
Step 9
Attaching the board clamp plate
Board clamp plate
Board clamp plate mounting bolts
3-34
3
Periodic maintenance items
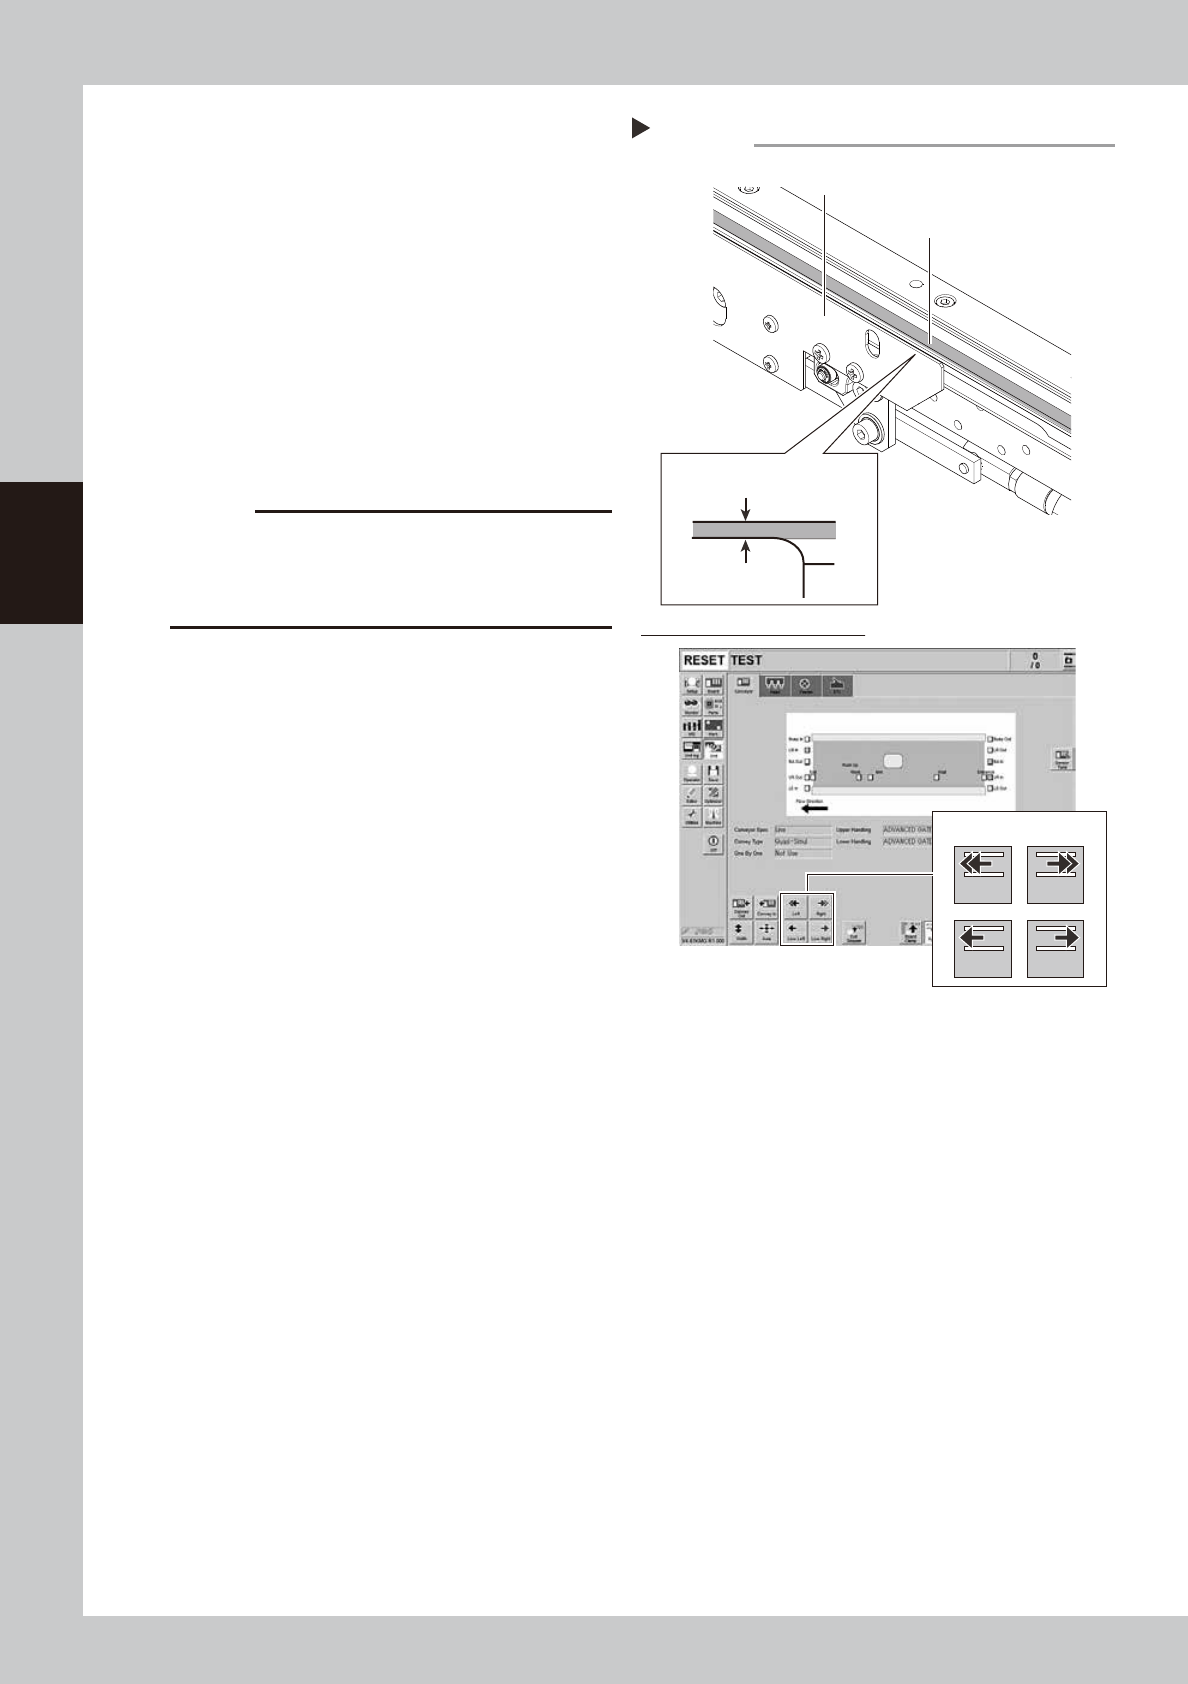
0
Check the belt rotating condition.
1. Make sure that the board clamp plate
top surface is approx. 0.5mm lower than
the belt upper surface.
2. Close the machine safety cover to
cancel the emeregency stop.
3. Press the [Conveyor In] button on the
[Unit] - [Conveyor] tab screen to turn on
the conveyor motor and check the belt
rotation.
4. If the conveyor belt rotation is uneven or
if the belt deflects, adjust the pulley
position that applies tension again.
54307-KMG-00
c
CAUTION
When the difference between the belt upper surface
and board clamp top surface is very little, the board
transfer error may occur easily. In this case, contact
YAMAHA or YAMAHA sales representatives.
Step 10
Conveyor drive buttons
0.5 mm
Checking conveyor belt rotation
Left Right
Low Left
Check the belt rotating condition
Board clamp plate
Board clamp plate
Conveyor belt
Belt upper surface
Low Right
3-35
3
Periodic maintenance items
5.3 W-axis
The following describes the cleaning and lubrication procedures for the W-axis. For details about lubrication
points and styles, see "Chapter 5 Lubrication points and schedule". Prepare the grease gun (standard type) and
the specified grease (NSL).
5.3.1 Cleaning and lubricating W-axis ball screw and hexagon spline
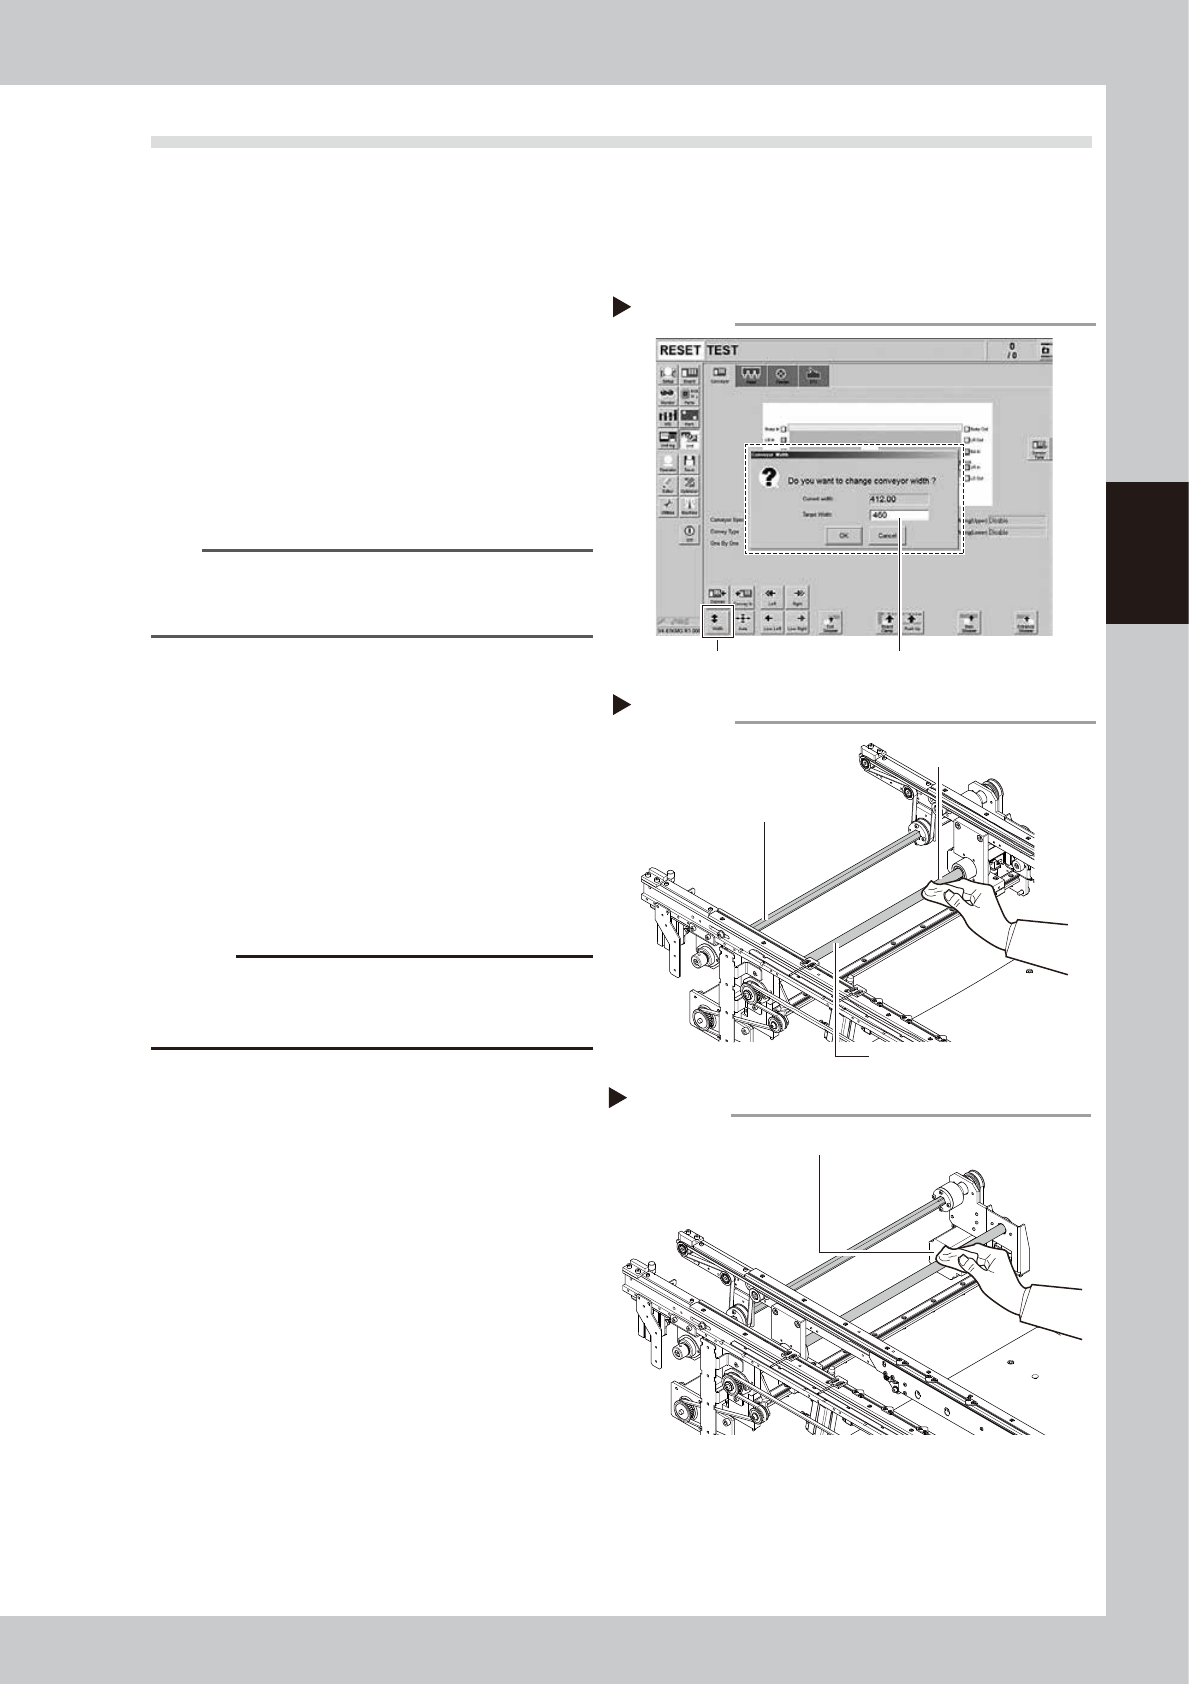
1
Change the conveyor width to its
maximum width.
1. Press the [Width] button on the [Unit]
- [Conveyor] tab screen to display the
"Conveyor Width" screen.
2. Enter the maximum value of the
conveyor width in the "Target Width" box
and press the [OK] button. The conveyor
width is changed to the specified width.
TIP
The maximum conveyor width is 460 mm as a standard
feature. If the machine is equipped with sATS15, the
maximum width is 360 mm
54308-KMG-00
2
Clean the ball screw and hexagon
spline.
e
1. Press the emergency stop button to open
the machine safety cover.
2. Wipe the old grease and soiling from the
entire ball screws and hexagon spline (2
positions each) with a lint-free cloth or
paper towel (for clean room use).
53348-KMG-00
c
CAUTION
Carefully wipe the lead grooves of the ball screw during
the cleaning work. Additionally, make sure that any dirt
is not produced.
3
Change the conveyor width to its
minimum width.
1. Close the machine safety cover to
cancel the emergency stop.
2. Press the [Width] button on the [Unit]
- [Conveyor] tab screen to display the
"Conveyor Width" screen.
3. Enter the minimum value of the conveyor
width "50 mm" in the "Target Width" box
and press the [OK] button. The conveyor
width is changed to the specified width.
4
Clean the rest of the part.
e
1. Press the emergency stop button to open
the machine safety cover.
2. Wipe off the remaining grease or soiling
described in Step 2 with paper towel or
similar tool.
53349-KMG-00
Step 1
Enter the maximum conveyor width.
[Width] button
Changing the conveyor width
Step 2
Ball screw
Cleaning cloth
Cleaning ball screw and hexagon spline
Hexagon spline
Cleaning ball screw and hexagon spline 2
Step 4
Wipe off remaining grease or soiling.