YSM10_Mainte_E.pdf - 第121页
4-12 4 Maintenance of options 4.2.2 Cleaning and lubricating the AZ-axis ball screw and guides T he following describes the procedures for cleaning and lubricating the AZ-axis (ball screw and ball guides). 1 Pull out the…
4-11
4
Maintenance of options
4.2 Monthly inspection
4.2.1 Checking the rack and the guide rail
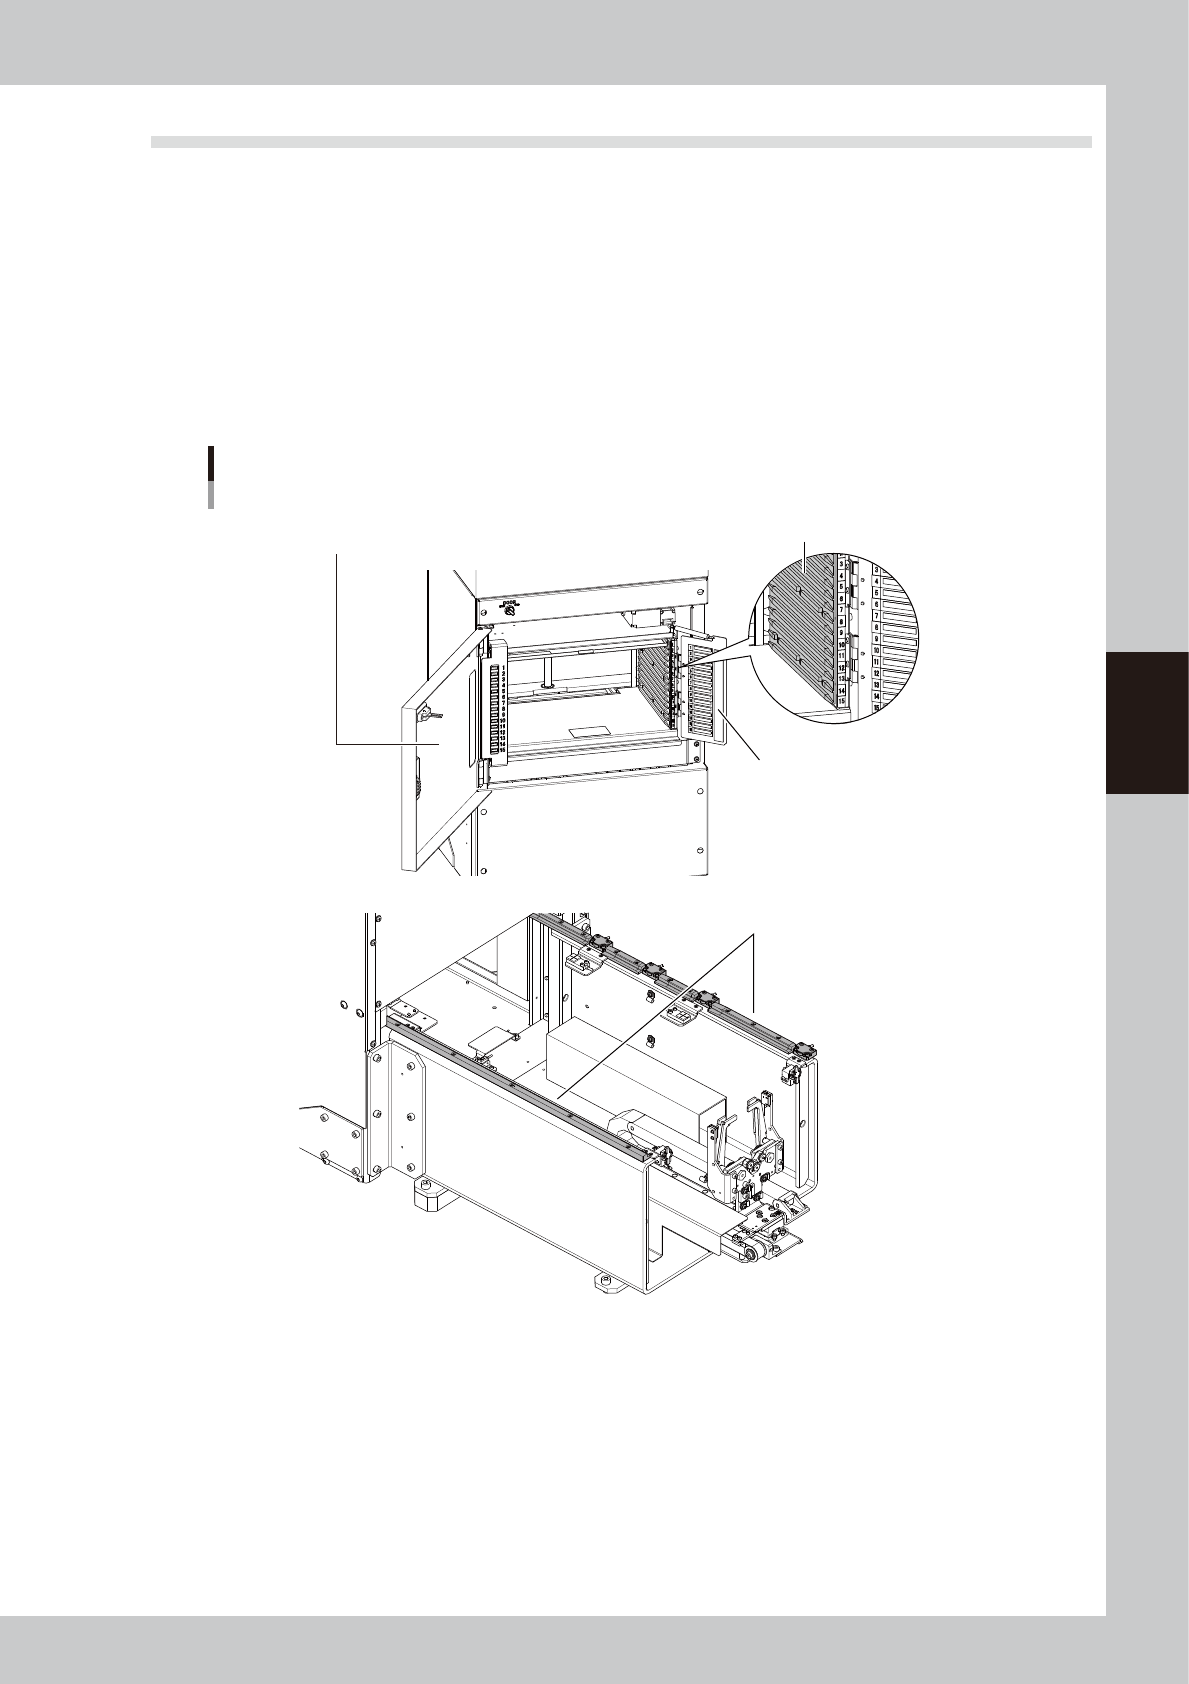
Check the rack and guide rail once a month.
n
Checkpoints
• The pallet guide section of the rack is not worn out.
• No backlash of the pallet retainer door is found.
• The rack door is not deformed.
• The guide rail section is not worn out.
• If dust or foreign objects are found in the guide rail section, remove them with the vacuum assembly.
sATS15
Checking rack and guide rail
No backlash of pallet retainer door
is found.
Guide section is not worn out.
Pallet guide section is not worn out.
No foreign objects or dust are not found in guide section.
Rack door is not deformed.
53406-KMG-00
4-12
4
Maintenance of options
4.2.2 Cleaning and lubricating the AZ-axis ball screw and guides
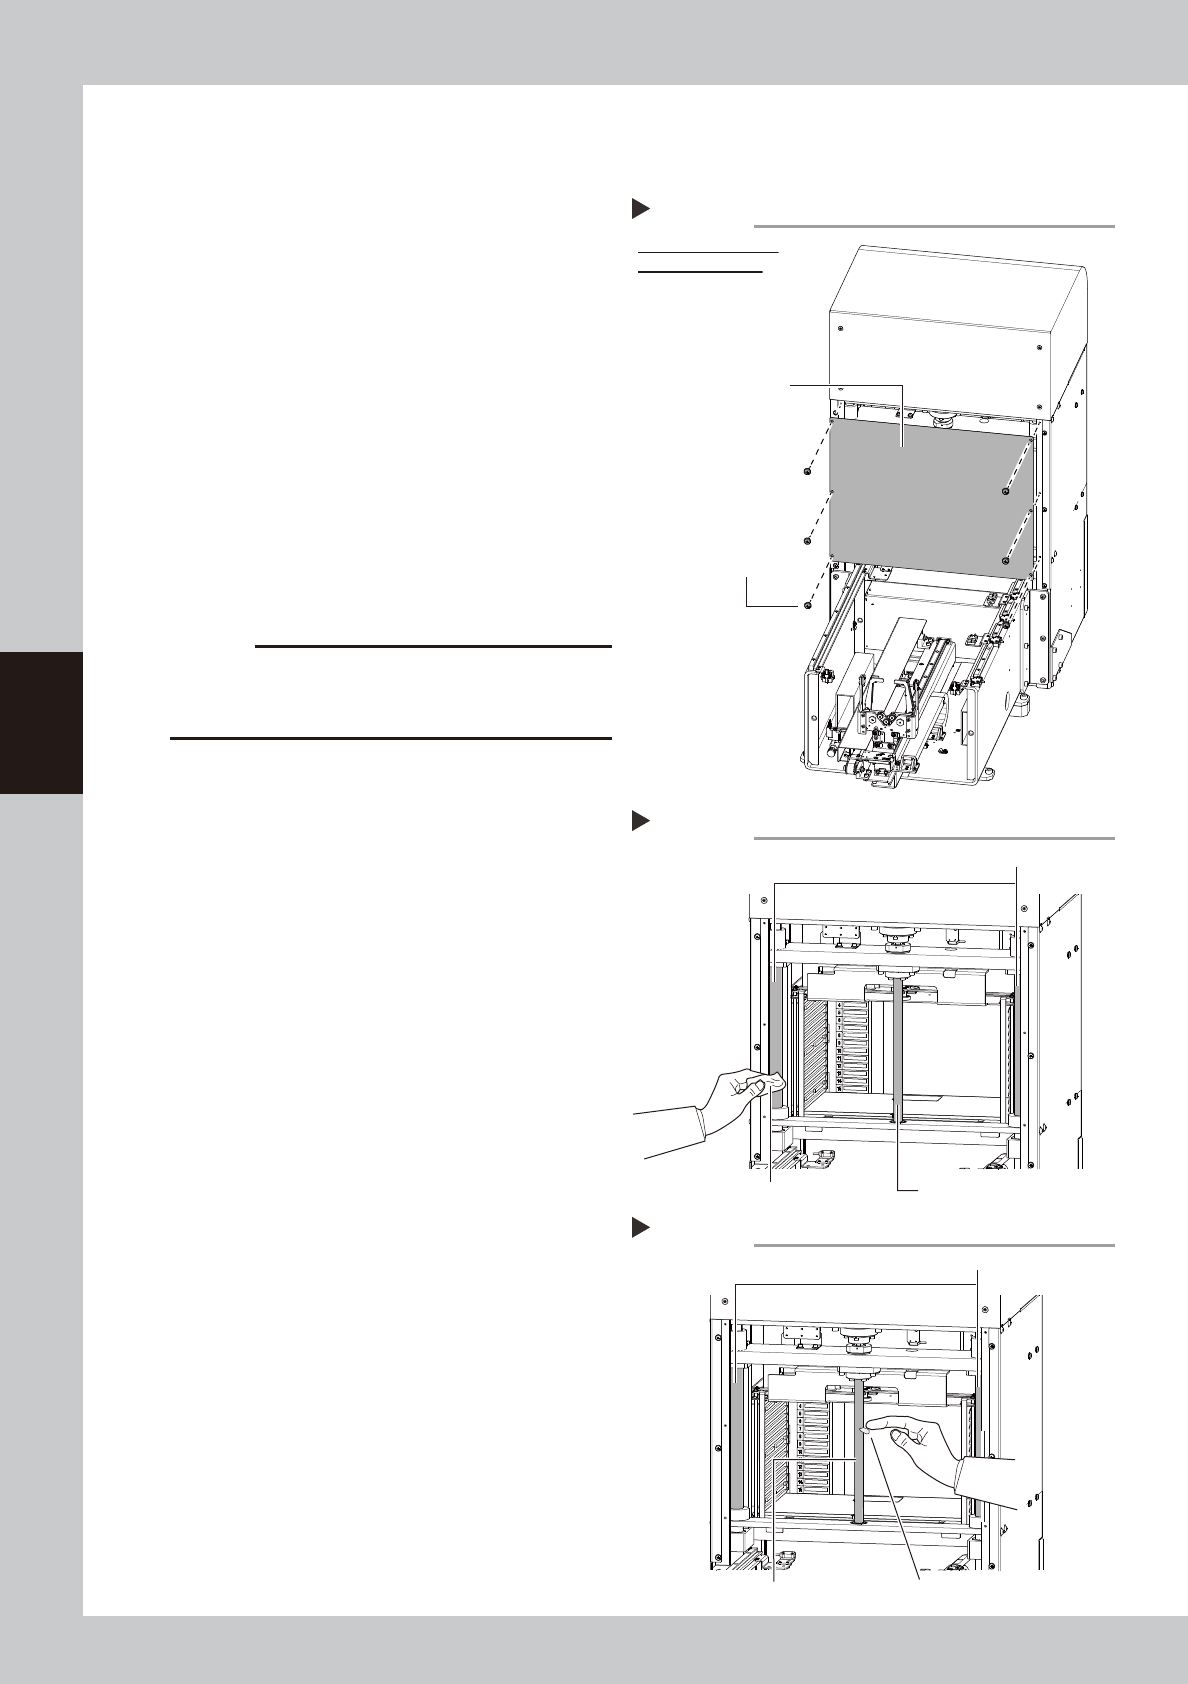
The following describes the procedures for cleaning and lubricating the AZ-axis (ball screw and ball guides).
1
Pull out the pallets.
Open the rack door to pull out all the pallets.
2
Detach the AZ-axis cover.
e
1. Press the emergency stop button to open
the safety cover on the rear side of the
machine.
2. Remove the mounting screws with a
phillips screwdriver.
53407-KMG-00
3
Clean the ball screw and the ball
guides.
Use a lint-free cleaning cloth to wipe away
excess grease or dirt from the ball screw and
the ball guides.
53408-KMG-00
c
CAUTION
When cleaning the ball screw, carefully clean its lead
groove area as well. Be sure that the cloth, etc., being
used to clean the ball screw does not produce lint, etc.
4
Apply grease to the ball screw and
the ball guides.
Apply the specified grease (NSL) by hand
uniformly over the surfaces of the ball screw,
ball guides and lead grooves.
53409-KMG-00
Detaching AZ-axis cover
Step 2
Figure viewed from
inside of machine
AZ-axis cover
Cover mounting screw (6)
Cleaning AZ-axis
Step 3
AZ-axis ball guides
Cloth AZ-axis ball screw
Lubricating AZ-axis
Step 4
AZ-axis ball guides
AZ-axis ball screw Apply grease in a uniform manner.
4-13
4
Maintenance of options
5
Spread the grease.
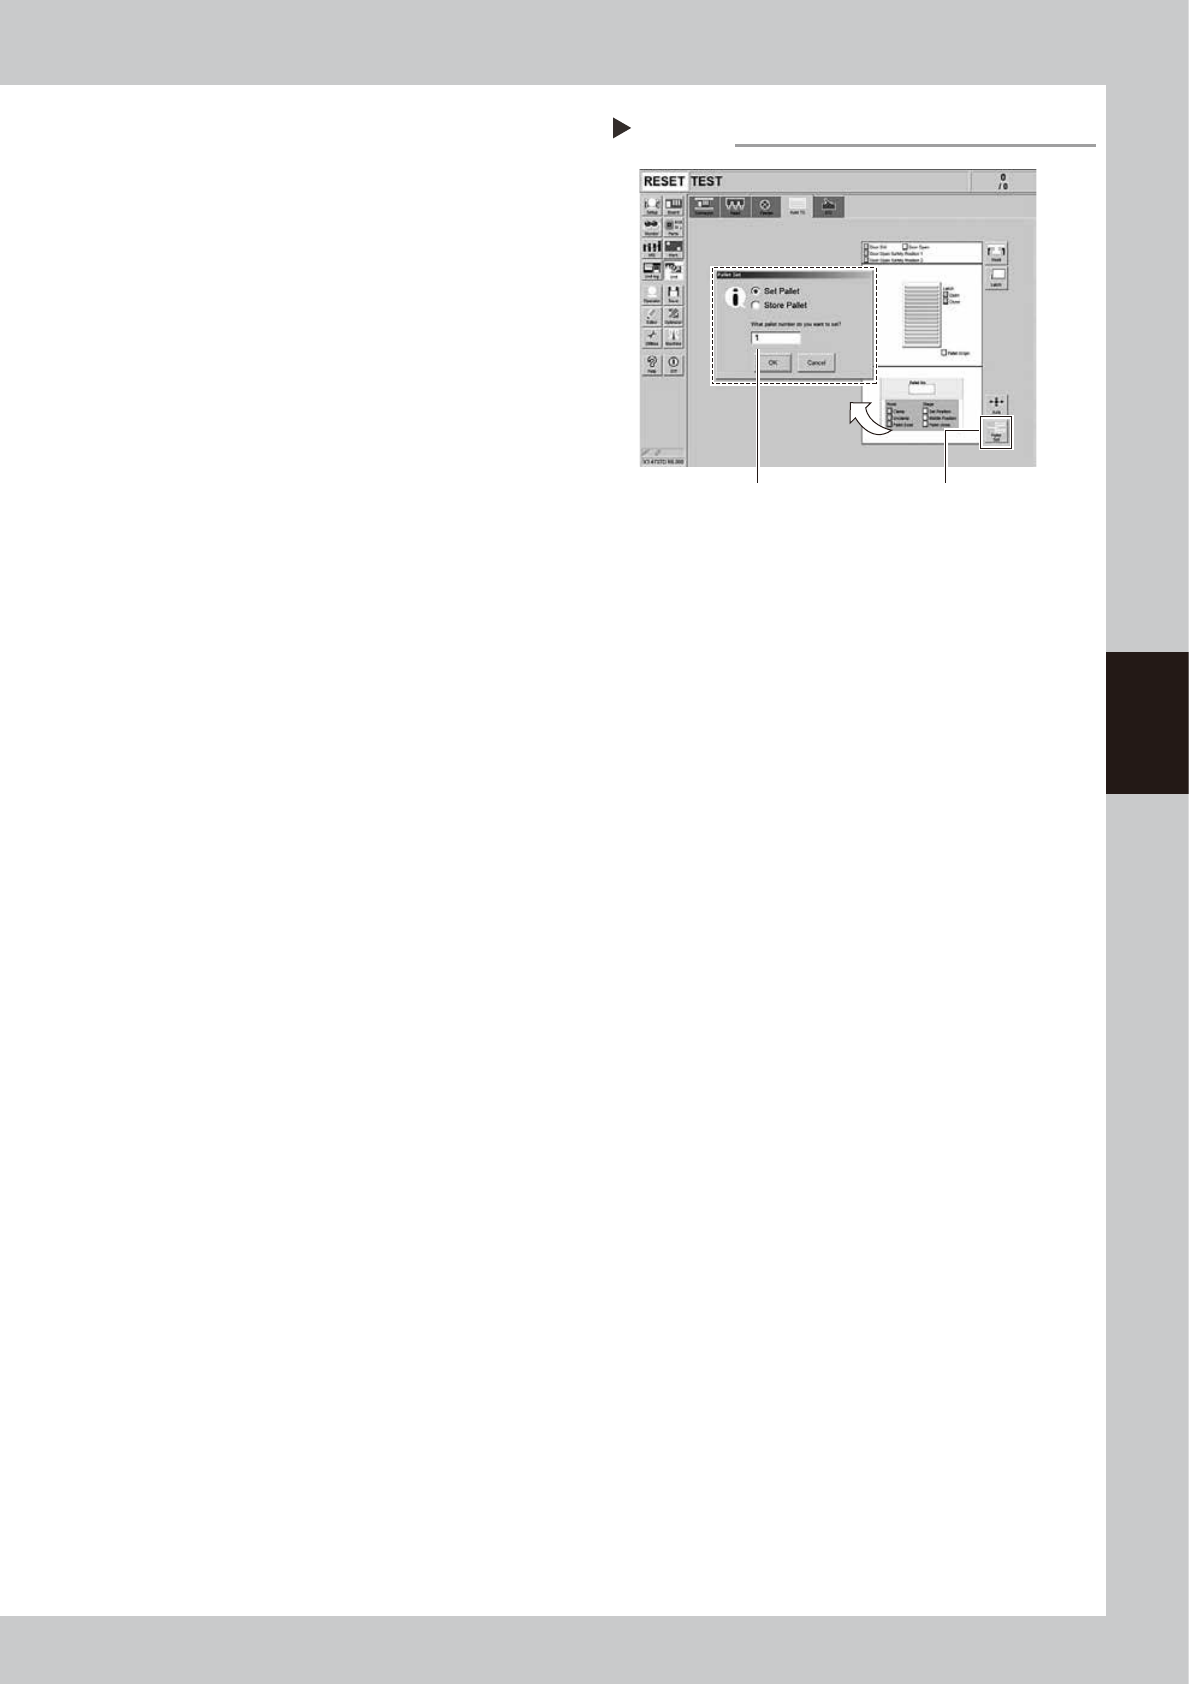
1. Close the machine safety cover to
cancel the emergency stop.
2. Press the [Pallet Set] button on the [Unit]
- [Auto TC] screen. Enter the pallet
number "1" in the box of the "Pallet Set"
screen and press the [OK] button. Move
the rack to the pull-out position of the
pallet number 1.
3. The "pallet set error" occurs as the pallet
is not set in the rack. Clear the error.
4. Move the rack to the top by turning the
door switch of sATS15 to the "OPEN" side
and then turn it to the "CLOSE" side.
5. Repeat 2 to 4 procedures 3 times.
54406-KMG-00
6
Wipe away excess grease.
e
1. Press the emergency stop button to open
the safety cover on the rear side of the
machine.
2. Use a lint-free cleaning cloth to wipe
away excess grease from the ball screw
and the ball guides.
7
Return the AZ-axis cover to the
original position.
Spreading grease over AZ-axis
Step 5
[Pallet Set] button
Pull out pallet number 1.