YSM10_Mainte_E.pdf - 第105页
3-38 3 Periodic maintenance items 5 Apply grease. 1. Close the machine safety cover to cancel the emergency stop. 2. Change the conveyor to the maximum width with the procedure of Step 1. e 3. Press the emergency stop bu…
3-37
3
Periodic maintenance items
5.3.2 Cleaning and lubricating the W-axis guide
1
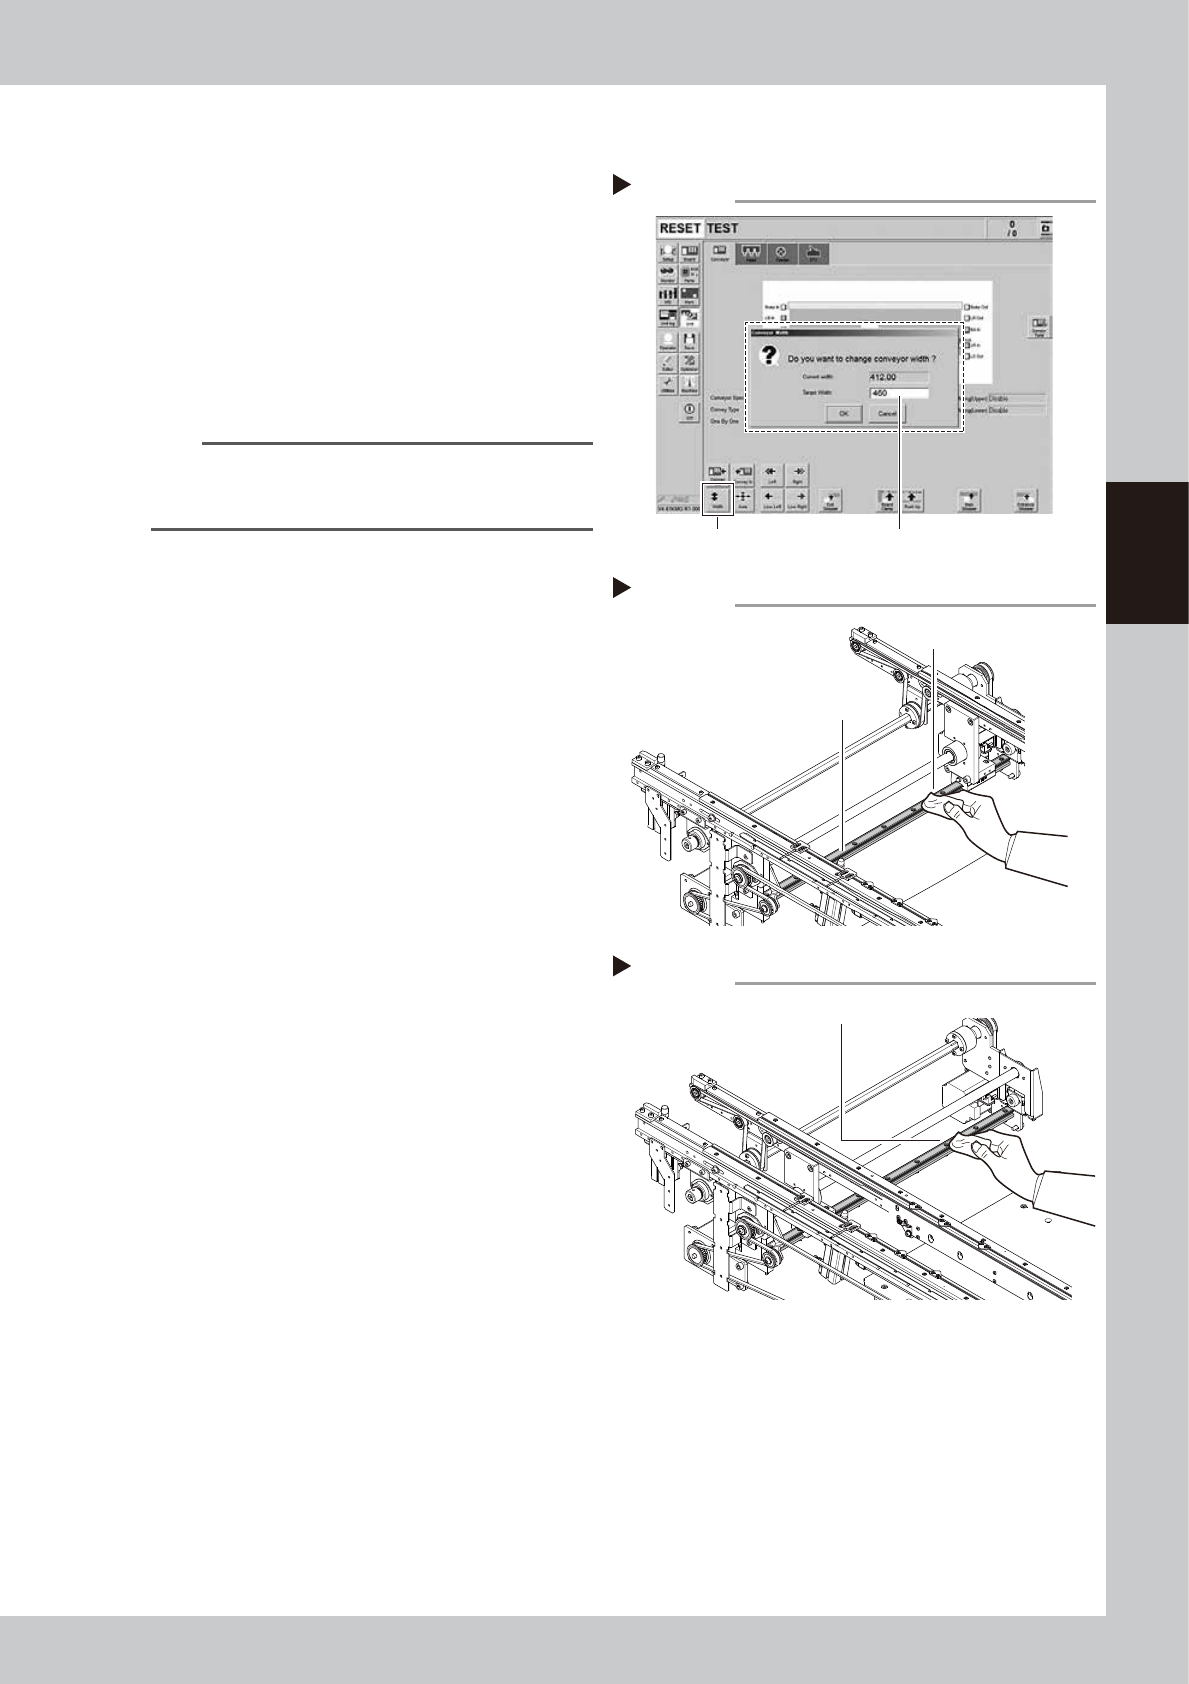
Change the conveyor width to its
maximum width.
1. Press the [Width] button on the [Unit]
- [Conveyor] tab screen to display the
"Conveyor Width" screen.
2. Enter the maximum value of the
conveyor width in the "Target Width" box
and press the [OK] button. The conveyor
width is changed to the specified width.
54308-KMG-00
TIP
The maximum conveyor width is 460 mm as a standard
feature. If the machine is equipped with sATS15, the
maximum width is 360 mm
2
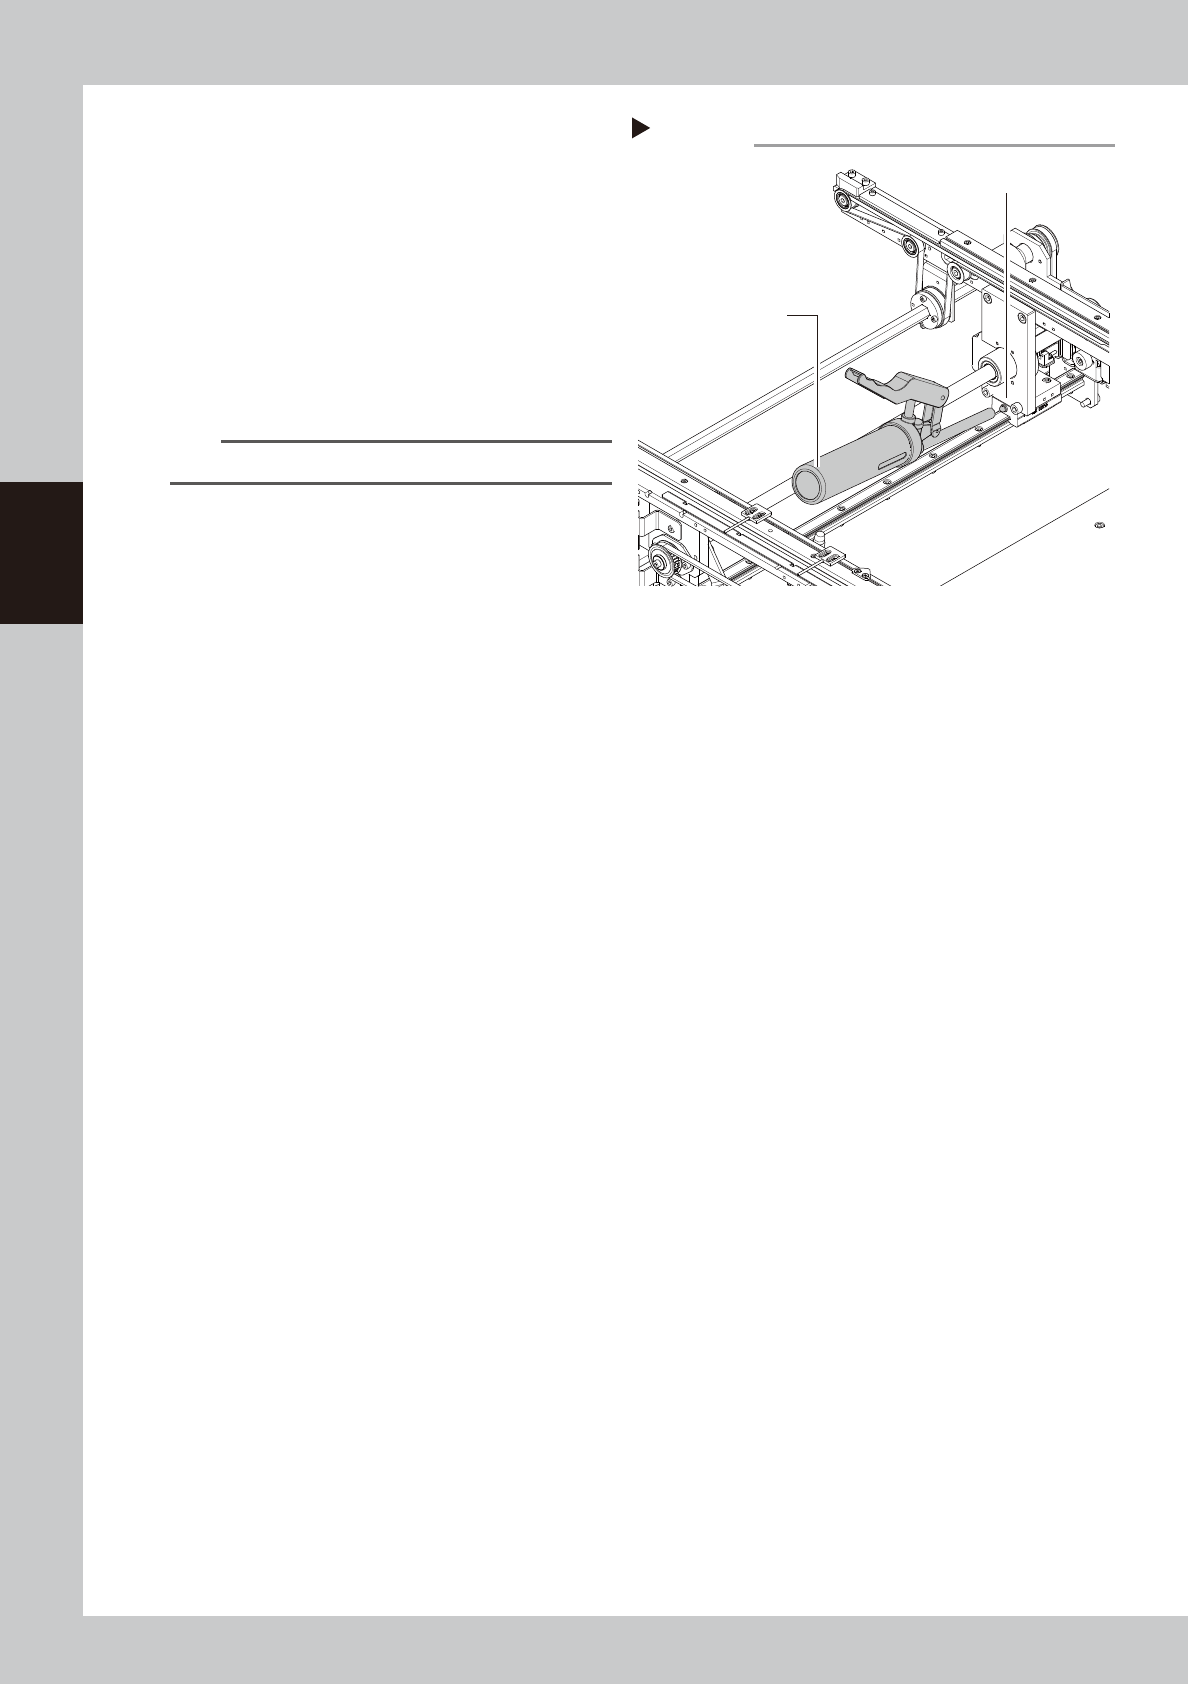
Clean the guide.
e
1. Press the emergency stop button to open
the machine safety cover.
2. Wipe the old grease and soiling from the
entire guides (2 positions) with a lint-free
cloth or paper towel (for clean room
use).
53351-KMG-00
3
Change the conveyor width to its
minimum width.
1. Close the machine safety cover to
cancel the emergency stop.
2. Press the [Width] button on the [Unit]
- [Conveyor] tab screen to display the
"Conveyor Width" screen.
3. Enter the minimum value of the conveyor
width "50 mm" in the "Target Width" box
and press the [OK] button. The conveyor
width is changed to the specified width.
4
Clean the rest of the part.
e
1. Press the emergency stop button to open
the machine safety cover.
2. Wipe off the remaining grease or soiling
described in Step 2 with paper towel or
similar tools.
53352-KMG-00
Step 1
Enter the maximum conveyor width.
[Width] button
Changing the conveyor width
Step 2
Cleaning the guide
Guide
Cleaning cloth
Step 4
Wipe off remaining grease or soiling.
Cleaning the guide 2
3-38
3
Periodic maintenance items
5
Apply grease.
1. Close the machine safety cover to
cancel the emergency stop.
2. Change the conveyor to the maximum
width with the procedure of Step 1.
e
3. Press the emergency stop button to open
the machine safety cover.
4. Use a grease gun (standard type) to
inject the prescribed grease (NSL) at the
2 W-axis guide's grease nipples.
53353-KMG-00
n
NOTE
Inject until the grease begins to seep out from the gap.
6
Spread the grease.
1. Close the machine safety cover to
cancel the emergency stop.
2. Change the conveyor width from
minimum to maximum several times with
the procedures of Step 3 and 1.
7
Wipe away excess grease.
e
1. Press the emergency stop button to open
the machine safety cover.
2. Wipe all excess grease from the guide
end face.
Step 5
Applying grease
Grease gun
(Standard type nozzle)
Grease nipple
3-39
3
Periodic maintenance items
5.4 Base
5.4.1 Cleaning the air/mist filter and cup
Air filters and oil mist filters are installed to this machine to prevent oil, water, and impurities, etc., from being
introduced into the machine from the air compressor. The following describes the procedures for inspecting,
cleaning, and replacing these filters. Make sure to detach the air coupler of the supply air connecting part for
safety work.
1
Disconnect the air coupler of the
supply air.
1. Turn the air supply/exhaust switch to the
"EXT" side.
2. Disconnect the air coupler of the supply
air.
c
CAUTION
Be aware that a loud air exhaust sound is heard when
disconnecting the air coupler. Use care to prevent oil,
water, and impurities, etc., from being sprayed out.
2
Check the inside of the filer cup.
Check for oil or water deposits in the filter
cup. If the cup is not clean, follow the steps
3 and 4 to clean it.
TIP
The drain cock at the bottom of the filter cup is an
auto-drain type. It automatically drains the oil or water
when deposited in the cup. It is recommended to
connect a hose to this drain cock.
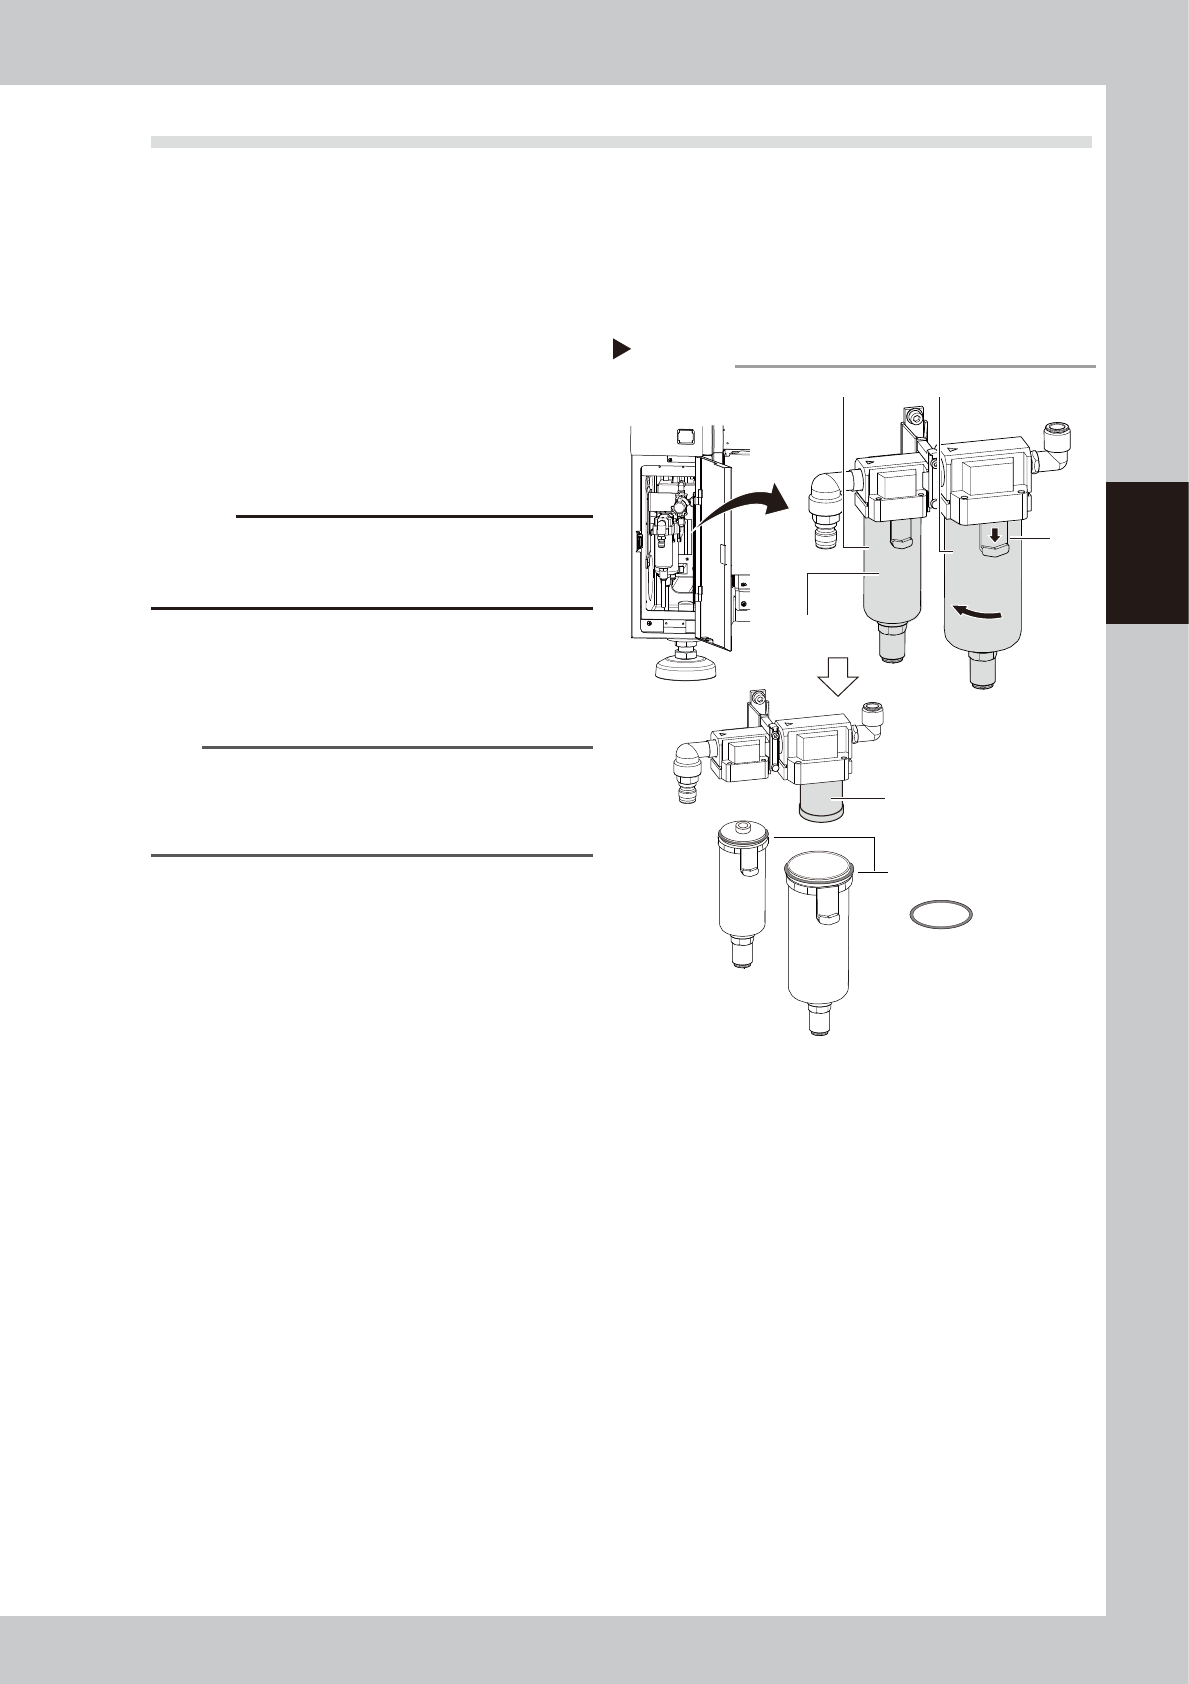
3
Detach the filter cup.
Turn the cup to the left and pull the cup
downward while pushing the button.
Regarding the air filter, the cup and the
media are detached simultaneously.
53359-KMG-00
4
Clean the inside of the filter cup.
1. Lightly clean the filter cup with water.
2. Pour water-diluted neutral detergent into
the filter cup and clean the inside while
shaking it.
3. Air blow the filter cup and wipe away
any moisture with clean cloth or paper.
Step 3
O-ring for cup
Removing the cup
Filter cup
Air filter Oil mist filter
Button
Media
(MIST FILTER ELEMENT)