Cognex_Scanner_HS-60_HF_X-_D_S_F - CS_06.pdf - 第34页
2 Assembly instructions Special des ign Cognex Scanner SIPLACE HS-60 / HF-ser ies / X-series / D-series / S / F 10/2008 Edition 34 : Mount the bracket with each 2 cable guides, 2 washe rs and 2 knurled knut s to the rail…
2 Assembly instructions Special design Cognex Scanner SIPLACE HS-60 / HF-series / X-series / D-series / S / F
10/2008 Edition
33
2.7 Hardware installation
2
Run the cables that they can’t be damaged by the width adjustment of the conveyor and that they
do not disturb the PCB transport. 2
2
The installation is shown at an X4 with single conveyor on the right side. The installation into a
double conveyor machine has to be done analogically. 2
: Shut down the machine and switch of the main switch.
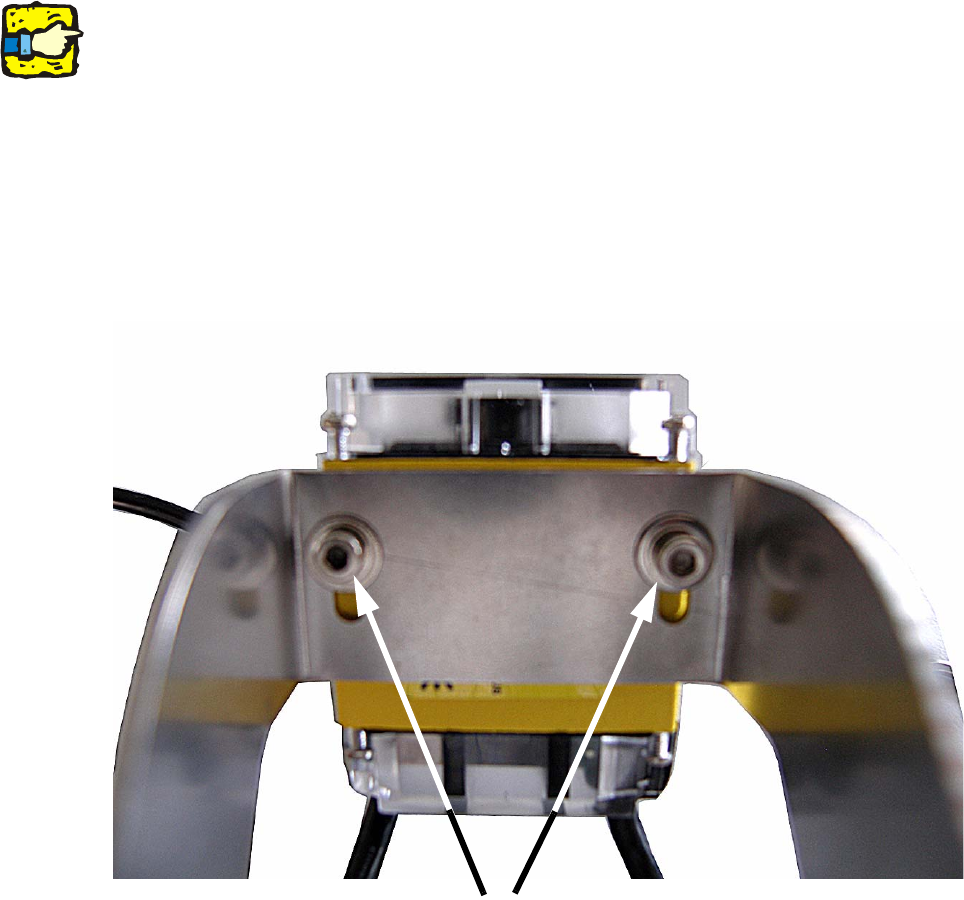
: Mount the Cognex scanner(s) with 2 washers ø 7,0 mm and 2 M3 x 5 mm screws. Therefore
put the 7,0 mm washer on the screw and then fix the scanner to the bracket.
2
2
: Adjust the focus of the scanner depending on machine type or angle adjusting (0° - 15°).
Place the bracket with the scanner on the final position and measure the distance from the ob-
jective to the PCB surface with a measuring tape.
Open the 4 screws of the objective cover and adjust the distance to the PCB surface (40 mm
or 65 mm). Then fasten the cover with the 4 screws again.
Mounting of the scanner
2 Assembly instructions Special design Cognex Scanner SIPLACE HS-60 / HF-series / X-series / D-series / S / F
10/2008 Edition
34
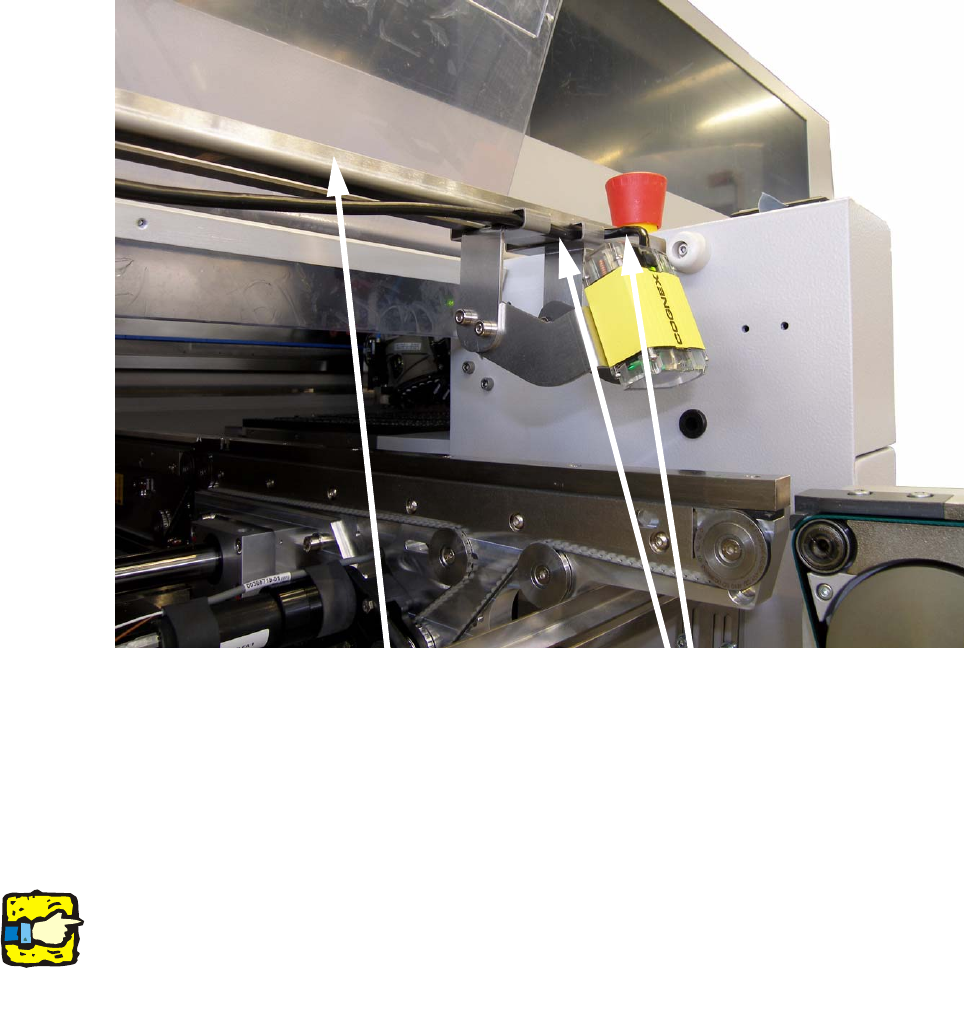
: Mount the bracket with each 2 cable guides, 2 washers and 2 knurled knuts to the rail.
2
2
: Run the cable of the scanner as shown in the picture below.
Fix the cable with another cable guide.
: Connect the cable of the scanner with the interface cable and screw them together.
2
If the scanner is connected directly (without interface cable) to the barcode manifold, it can
be damaged. 2
2
2
2
2
2
2
Mounting rail
Cable guide
2 Assembly instructions Special design Cognex Scanner SIPLACE HS-60 / HF-series / X-series / D-series / S / F
10/2008 Edition
35
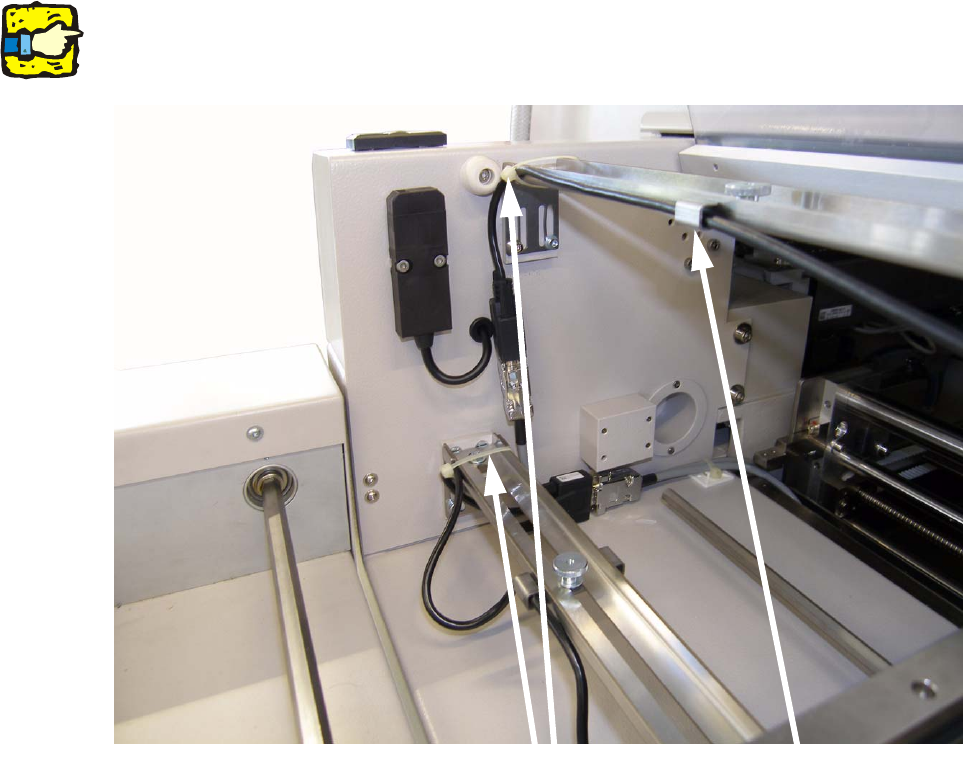
: Fix the cable of the scanner with a cable tie to the mounting rail at the left machine side.
2
Make sure that the scanner can be moved over the total width. 2
2
2
2
2
2
2
2
2
2
2
2
2
Cable ties
Cable guide