FlexSeam Dispensing System Customer Product Manual.pdf - 第25页
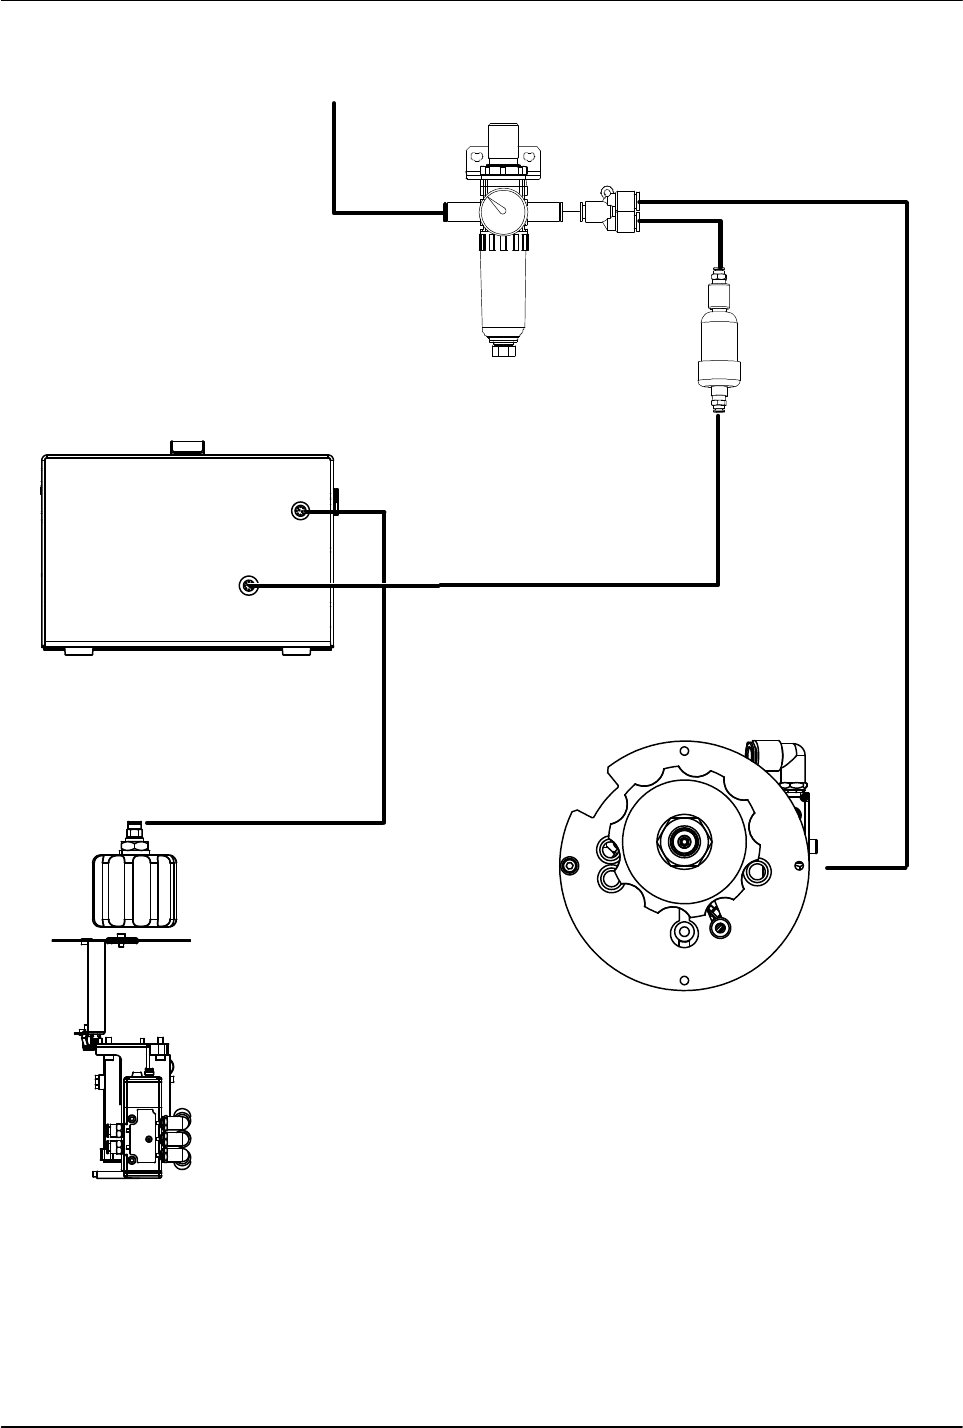
Flexseam Dispensing System 21 Part 1127900_01 E 2019 Nordson Corporation CONTROLLER 2 6 mm 6 mm AIR PRESSURE REGULATOR 3 8 mm MAIN AIR SUPPLY SOURCE 4 mm 6-MM Y-UNION AND BRACKET 1 AIR DRYER (SOLENOID VALVE) (ADHESIVE SY…

Flexseam Dispensing System
20
Part 1127900_01
E 2019 Nordson Corporation
Make the Air Supply Connections
Using items from the ship‐with kit as needed, make the air supply
connections shown in Table 3 and Figure 7. The air supply must be clean,
dry, regulated, un‐lubricated compressed air. Set the operating air pressure
to max 8 bar (116 psi).
Table 3 Air Supply Connections
Item No. in
Fig. 7
Pneumatic Connection Connect to... Then connect to...
1 Main air supply input Main air supply Air regulator input port
2 Air supply to applicator
solenoid valve
Air pressure regulator output
(Y‐fitting)
Air input port on applicator
solenoid valve
3 Air supply to controller
through air dryer
Air pressure regulator output
(Y‐fitting)
Air dryer input/output ports
and controller air input port
4 Air supply to applicator
adhesive syringe or end cap
Air output port on top of
controller
Air fitting on top of
applicator adhesive syringe
or end cap
Flexseam Dispensing System
22
Part 1127900_01
E 2019 Nordson Corporation
Connect Cables
Refer to the Unity Controller manuals for more information.
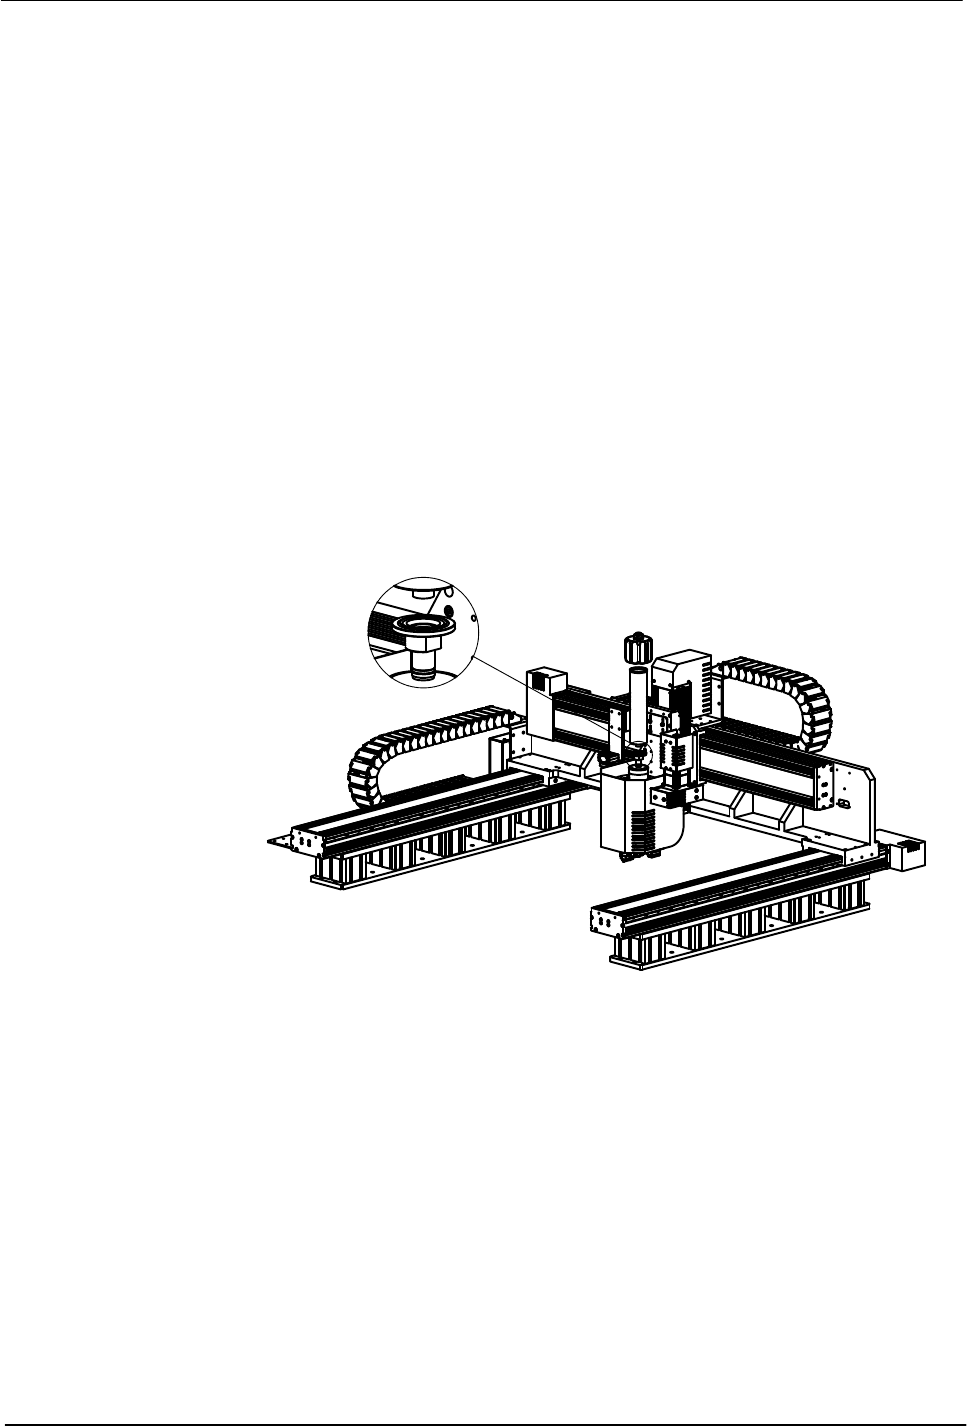
Perform Initial System Power On
1. Turn on the robot.
2. Turn on the controller. The controller display will go through the start-up
screens.
3. Turn on the air supply.
4. Flexseam applicator only
Load a flush syringe in the applicator as follows:
a. Open the air cap.
b. Remove the factory installed adhesive syringe.
c. Insert the new syringe into the applicator.
d. Reinstall the air cap.
Figure 8 Powering on a Flexseam applicator