FlexSeam Dispensing System Customer Product Manual.pdf - 第33页
Flexseam Dispensing System 29 Part 1127900_01 E 2019 Nordson Corporation Clean the Flexseam Module WARNING! Risk of Burns! Do not remove the module when the system is pressurized. Removing the module when the system is p…
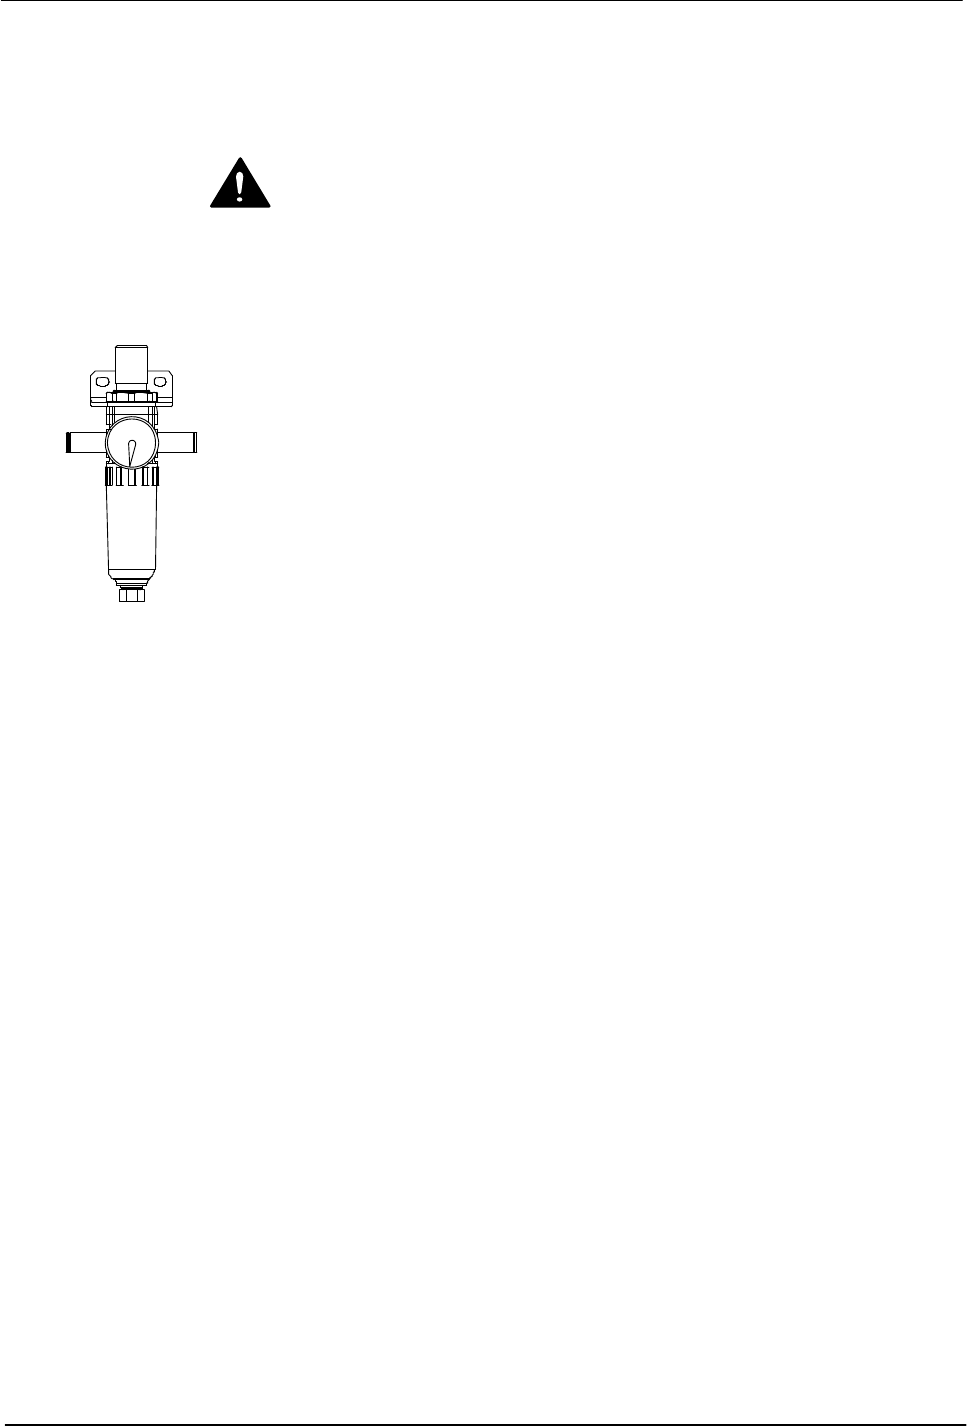
Air pressure regulator
Flexseam Dispensing System
28
Part 1127900_01
E 2019 Nordson Corporation
System Pressure Relief
System pressure must be relieved before you can safely proceed with many
troubleshooting and service‐related activities. Follow this procedure
whenever you need to relieve system pressure.
WARNING! Risk of burns. Failure to relieve system pressure can cause hot
material to spray from a connecting point. Relieve system pressure before
loosening or removing a hose, module, or any other part of a hot melt system.
Wear heat‐protective clothing, safety goggles (ANSI Z87.1 or equivalent),
and safety gloves.
1. Shut off the main air supply or set the air pressure regulator to zero (0).
2. Momentarily activate the purge switch on the controller.
3. When the service activity is completed, restore the system to normal
operation.
Flexseam Dispensing System
29
Part 1127900_01
E 2019 Nordson Corporation
Clean the Flexseam Module
WARNING! Risk of Burns! Do not remove the module when the system is
pressurized. Removing the module when the system is pressurized will
cause hot melt to free-flow from the applicator. Relieve system pressure
before removing the module. Failure to relieve system pressure can result in
personal injury.
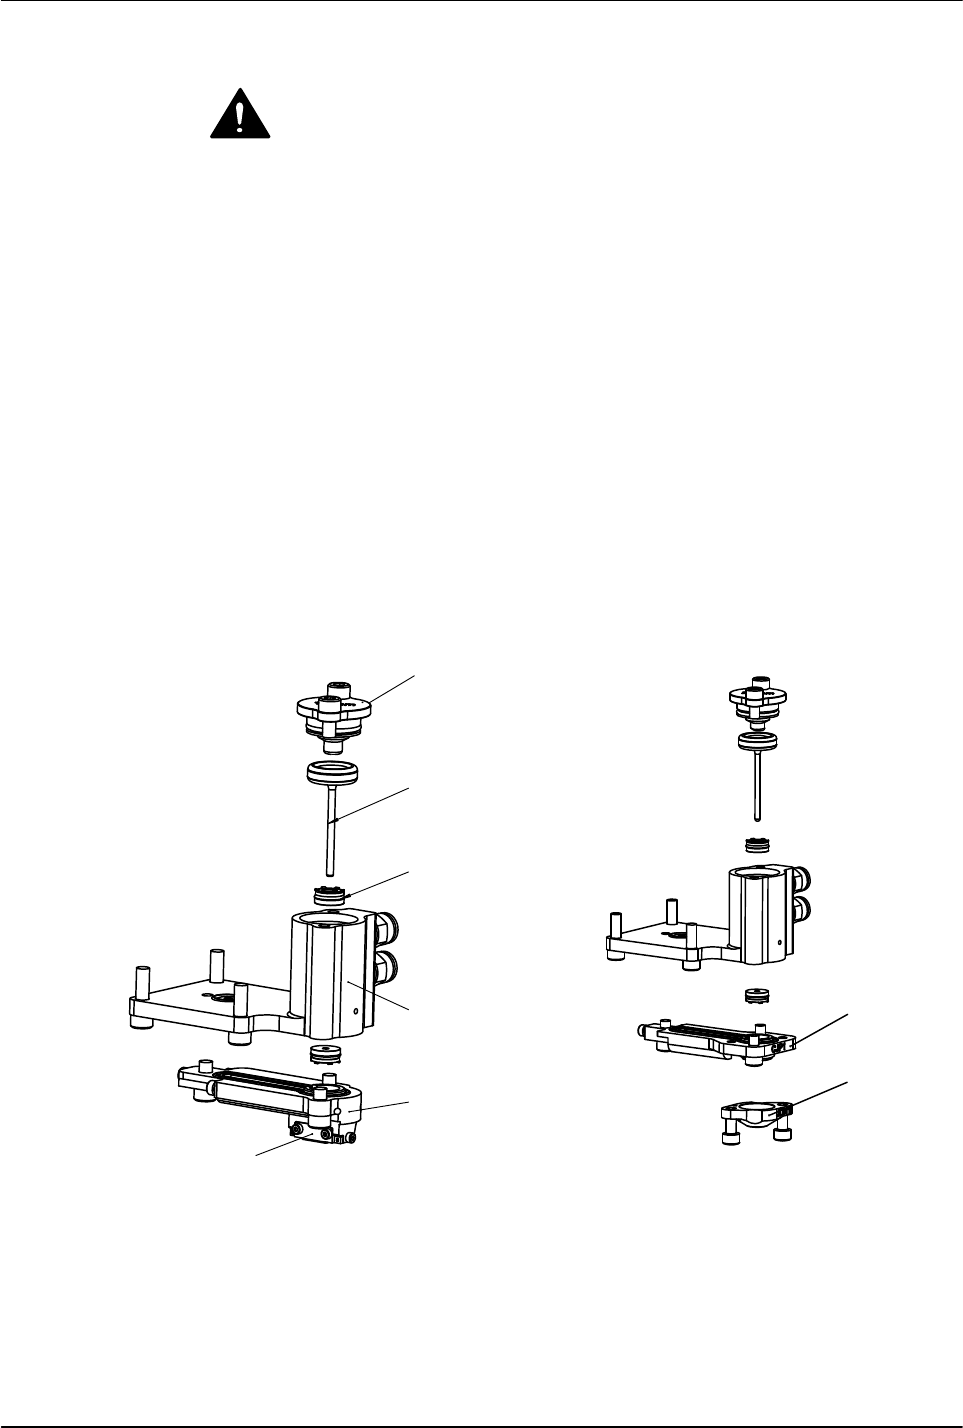
Disassemble and Clean the Module
See Figure 11.
1. Turn the melter off. Disconnect and lock out power to the melter.
2. Unfasten the three screws that connect the nozzle and module, and
remove.
3. Unfasten the four screws that connect the module and cartridge, and
remove.
4. Unfasten the two screws that connect the strike cap.
5. Remove the needle.
6. Clear the module and nozzle carefully.
1
2
3
4
5
6
7
8
Slot coating Flexseam module
Jetting Flexseam module
Figure 11 Disassembling the Flexseam module
1. Air cap
2. Needle
3. Seal spring
4. Module body
5. Nozzle place (slot coating)
6. Nozzle lip
7. Nozzle plate (jetting)
8. Nozzle (jetting)
Flexseam Dispensing System
30
Part 1127900_01
E 2019 Nordson Corporation
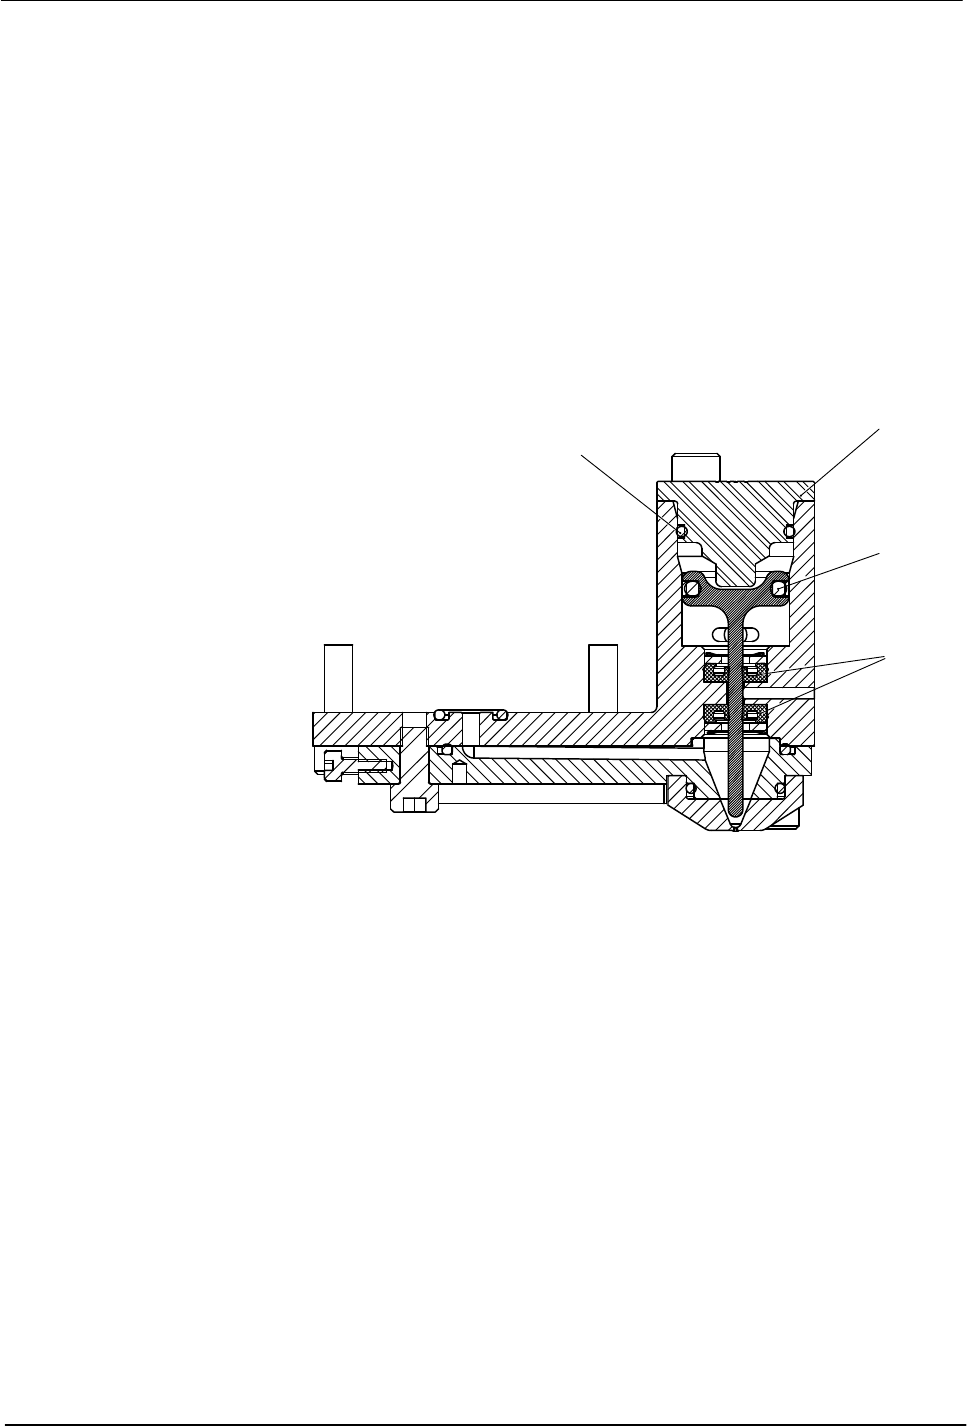
Assemble the Module
CAUTION! Do not apply excessive force to seals during installation. Doing
so can damage the seals.
1. Insert the two seals with the integrated O‐ring side facing inside the seat.
Press down to secure the seals.
2. Insert the current needle into the module straight within the seals.
3. Assemble the nozzle onto the module body with three screws.
4. Install the current air cap with two screws.
5. Install the current seal lip and shave lip with two screws.
2
1
3
4
Figure 12 Assembling the module
1.
O-ring side of seal facing the inside of
the air cap
2. Air cap
3. O-ring side of seal facing the inside of the
needle
4. O-ring side of seal facing the inside of the
module plate