FlexSeam Dispensing System Customer Product Manual.pdf - 第27页
Robot power switch Switch Flexseam Dispensing System 23 Part 1127900_01 E 2019 Nordson Corporation Operation Before operating the system for the first time, ensure that you have completed the procedures in the Installati…
Flexseam Dispensing System
22
Part 1127900_01
E 2019 Nordson Corporation
Connect Cables
Refer to the Unity Controller manuals for more information.
Perform Initial System Power On
1. Turn on the robot.
2. Turn on the controller. The controller display will go through the start-up
screens.
3. Turn on the air supply.
4. Flexseam applicator only
Load a flush syringe in the applicator as follows:
a. Open the air cap.
b. Remove the factory installed adhesive syringe.
c. Insert the new syringe into the applicator.
d. Reinstall the air cap.
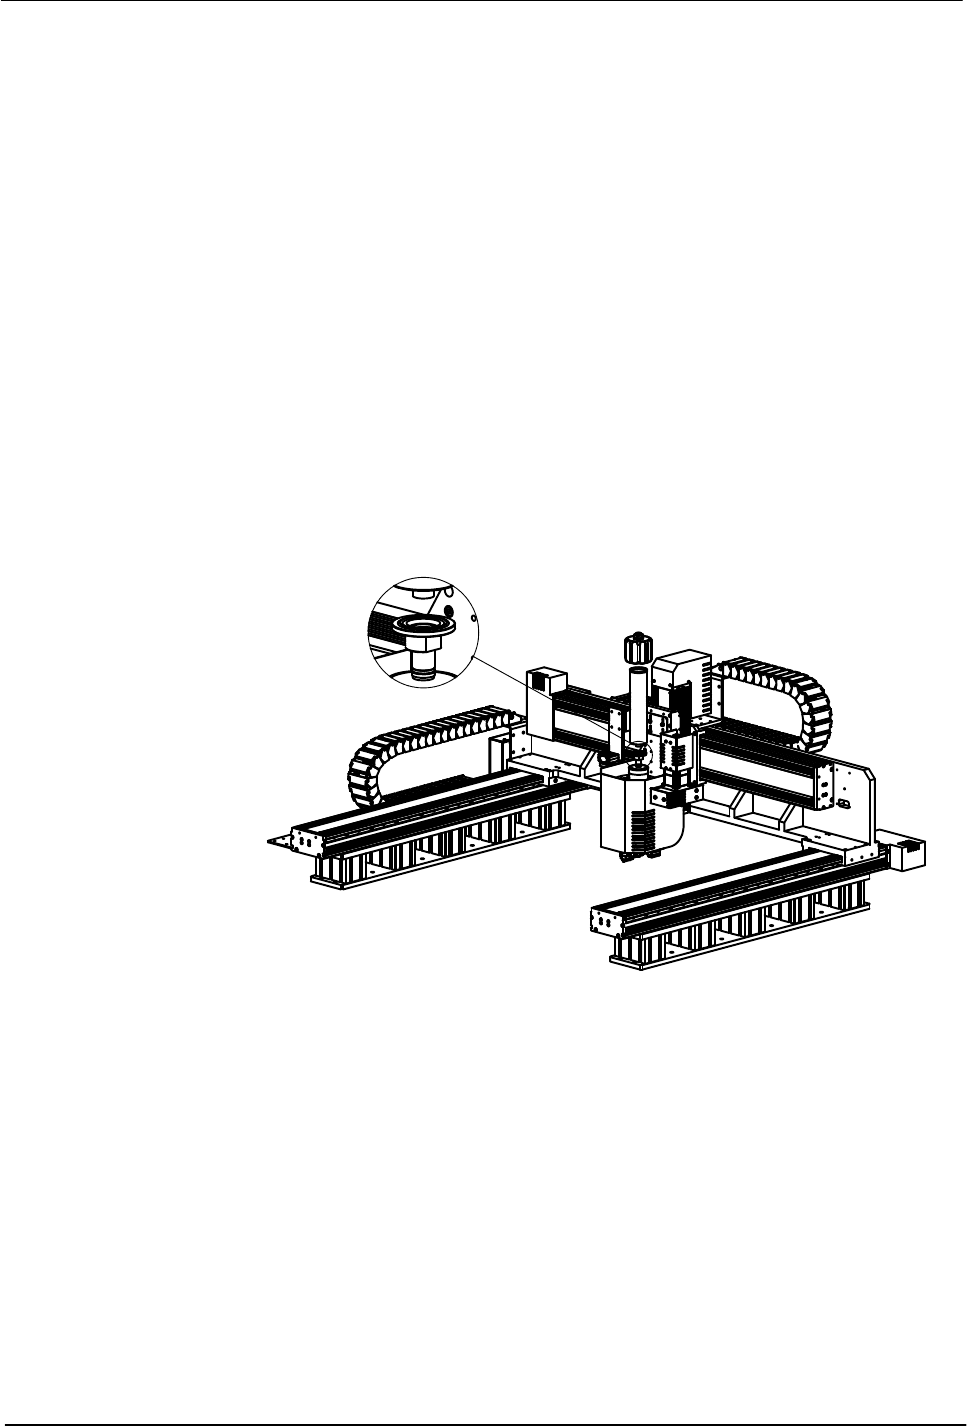
Figure 8 Powering on a Flexseam applicator
Robot power switch
Switch
Flexseam Dispensing System
23
Part 1127900_01
E 2019 Nordson Corporation
Operation
Before operating the system for the first time, ensure that you have
completed the procedures in the Installation section.
Special Operating Considerations for PUR Adhesive
The viscosity of PUR adhesive increases significantly when the system is at
operating temperature, therefore the applicator should be heated only for
operation or cleaning. If the applicator is held at operating temperature longer
than the life of the PUR adhesive, then the risk of cured material inside the
applicator increases.
However, even in the best operating scenario it is still likely that over time the
PUR will occlude the inner adhesive passages, requiring the applicator to be
cleaned. When the applicator is cleaned, is it critical to remove cured PUR
adhesive from all adhesive passages, not just the adhesive passages inside
the module.
Daily Start‐up and Operation
1. Turn on the robot.
2. Turn on the controller. The controller display will go through the start-up
screens.
NOTE: The controller always powers on in the user mode.
3. Turn on the air supply.
4. Allow the system to reach application temperature.
5. If a cured adhesive warning exists at start-up, reset the Elapsed Time
parameter to 0.
6. Verify that the temperature settings are at the desired value.
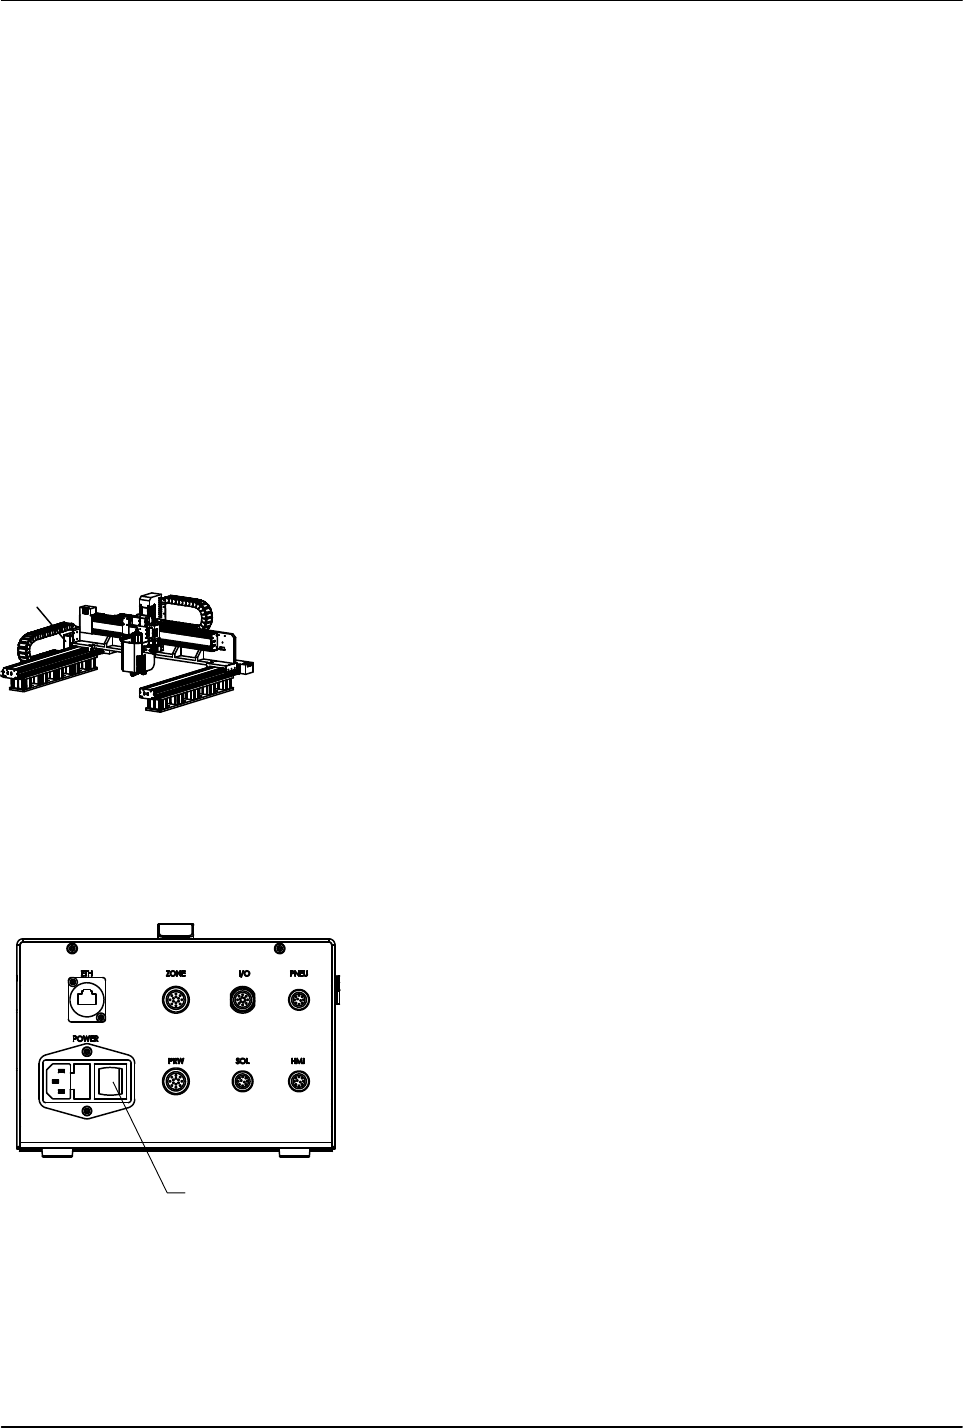
1
Figure 9 Location of controller power and purge switches
1. Controller power switch
Flexseam Dispensing System
24
Part 1127900_01
E 2019 Nordson Corporation
Daily Start‐up and Operation (contd)
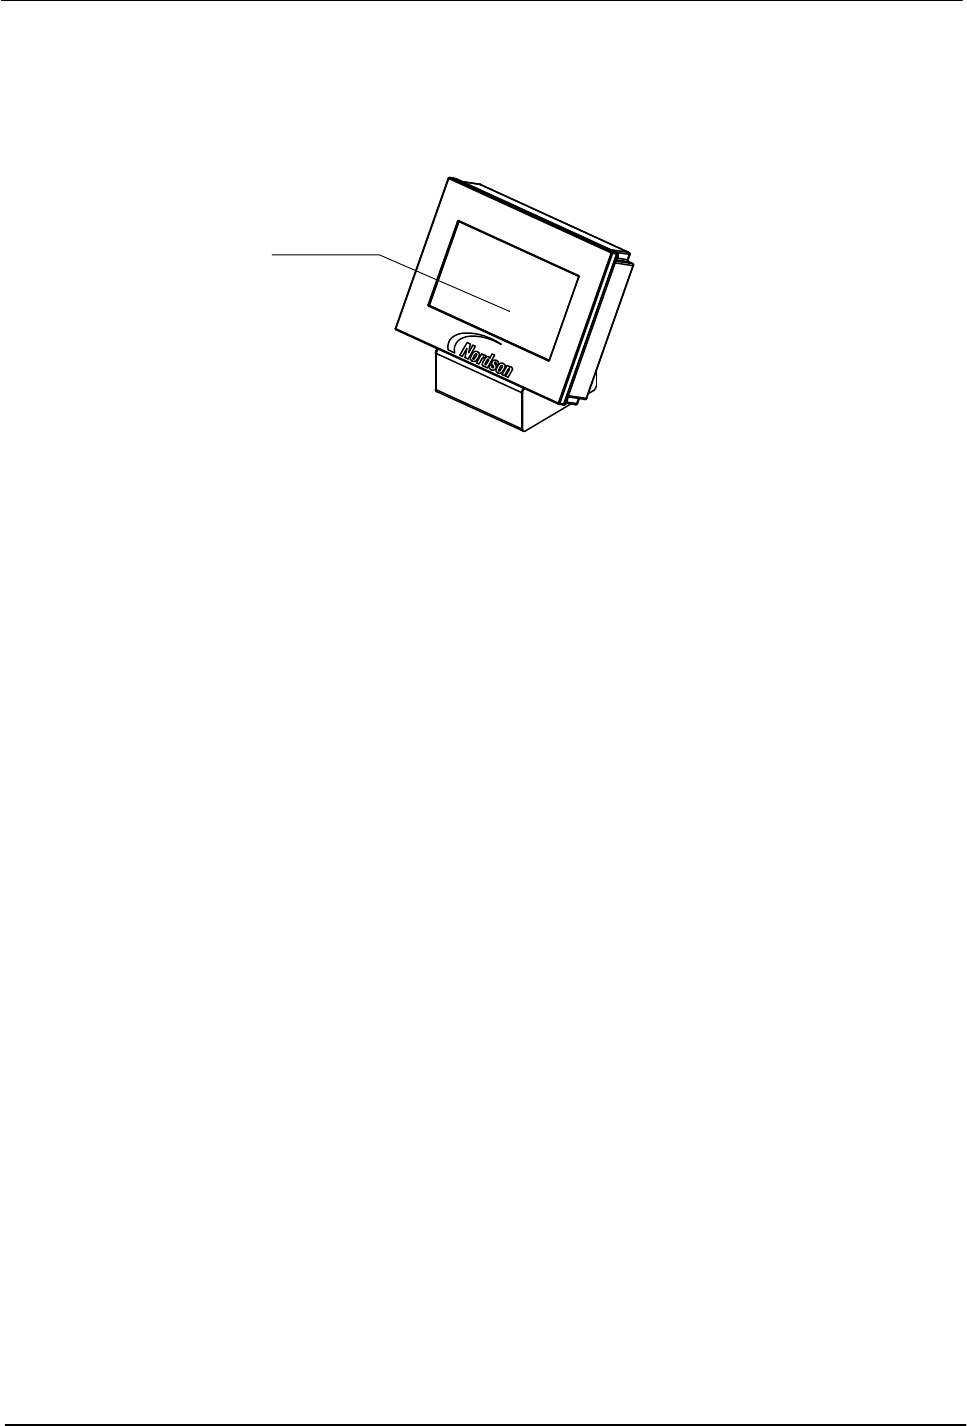
NOTE: On the Flexseam controller, you can find the purge button on the
touch screen.
Purge button
Figure 10 Location of Purge button
7. Flexseam applicator only
When the READY light turns on, place the controller purge switch in the
on position until the remaining material in the flush syringe (used during
shut down) is dispensed.
8. Flexseam applicator only
Load an adhesive syringe in the applicator as follows:
a. Open the air cap.
b. Insert the adhesive syringe into the applicator.
c. Close the air cap.
9. Place the product on the moving plate and press the START button on
the robot handle to run products.