5OM-1064-001.pdf - 第13页
2. Name of Each Section It is required to perform the following adjustment for normal use of the recognition monitor . *1 Power Switch Every time this switch is pressed, the power is turned ON or OFF . Keep the power “ON…
1. Notes on Use of Recognition Monitor
WARNING
• If anything abnormal should happen, turn off
the power switch of the machine.
Whenever the monitor is discovered in ab-
normal condition (smoke, abnormal sound or
smell, etc.), immediately turn off the power
switch of the machine and disconnect the
power cable from the monitor. In this case,
contact our sales personnel as soon as pos-
sible.
• Do not disassemble any part of the monitor.
High voltage terminations are present within
some enclosures and some housings would
be "hot". A person touching it would get a
dangerous shock or a burn.
• Keep the monitor free of any foreign sub-
stances and liquids in system. Otherwise, a
fire will break out or a person touching it will
get a dangerous electric shock. The monitor
will also break down.
CAUTION
• Be sure to turn off the power switch before
cleaning the monitor. Otherwise, a person
touching the montor will get a dangeous elec-
tric shock.
• Do not use any solvents or chemicals for
cleaning work.
Thinner, benzine, or other abrasives, etc., can
damage the cabinet and the surface of the
screen.
Wax or compressed air should not also be
used for cleaning.
• Do not block the ventilation hole nor put any-
thing around the monitor.
Leave some space (more than 10 cm) around
the monitor.
When the ventilation hole is blocked, the in-
ternal temperature rises extremely, causing
a fire or trouble to the monitor.
1. Notes on Use of Recognition Monitor
0005-002 1-2 Tg0250-PM-MD
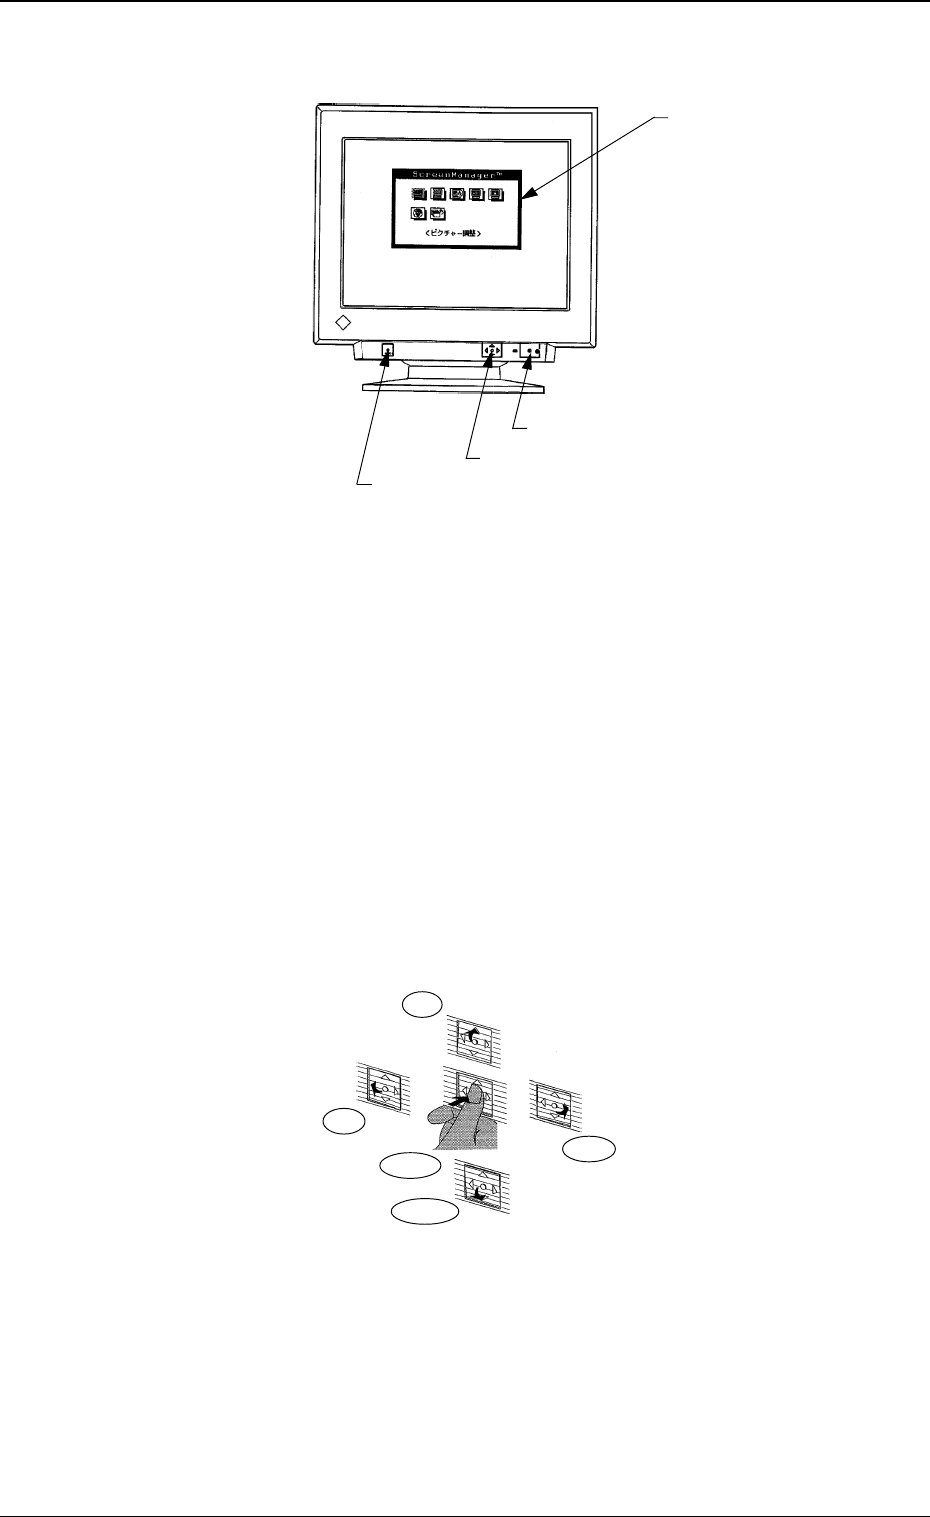
2. Name of Each Section
It is required to perform the following adjustment for normal use of the
recognition monitor.
*1 Power Switch
Every time this switch is pressed, the power is turned ON or OFF.
Keep the power “ON” in normal cases.
The power to the monitor can be controlled on the machine side.
*2 Automatic Sizing Button
Use this button to adjust the size and position of the screen.
Press this button when an image is displayed. The size and position are
automatically adjusted.
*3 Operation Pad
Use this pad to perform various kinds of settings.
Imprinted on the pad are five directions - Center, Top, Bottom, Right, and
Left.
*4 Screen Manager
Manipulate the operation pad to make various settings while viewing the
menus on the monitor.
*4 Screen Manager
*2 Automatic Sizing Button
*1 Power Switch
*3 Operation Pad
Top
Left
Right
Bottom
Center
Fig. 1.1
Fig. 1.2
2. Name of Each Section
0005-002 1-3 Tg0250-PM-MD
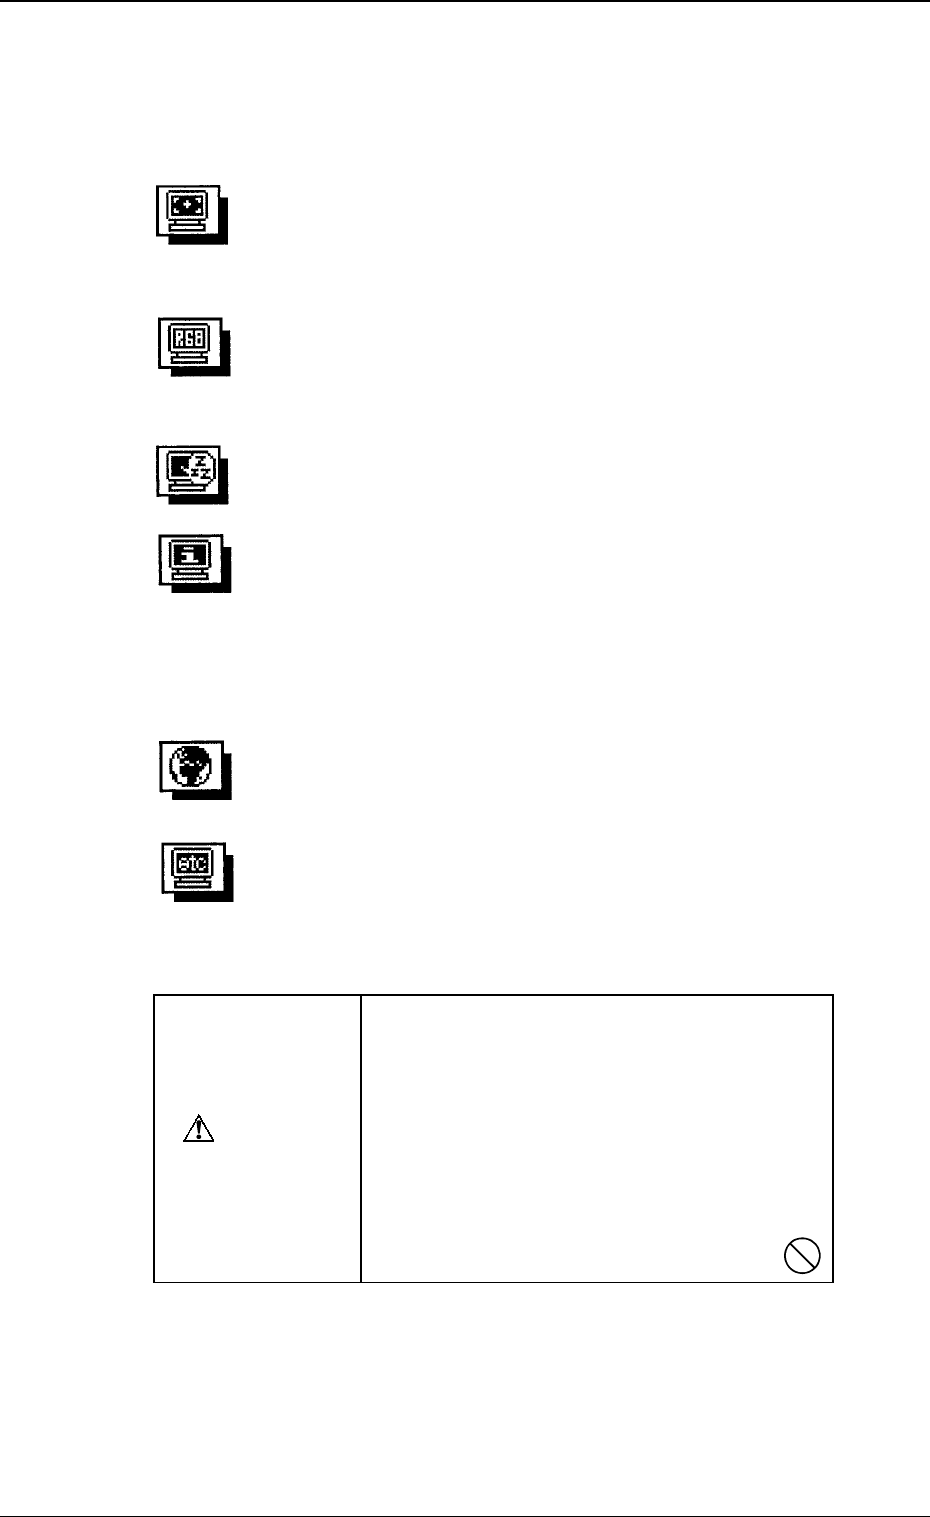
Color Adjustment
Standard Mode (Selection of Color Temperature)
Custom Mode (Creation of Color Tones)
Picture (Screen) Adjustment
Contrast/Brightness Size
Position Parallelogram
Pincushion Tilt
Moire
Information
The present settings can be checked.
The information is divided into four pages which can be opened by
pressing "Center" of the operation pad. Each page is numbered as 1/4,
2/4, 3/4 and 4/4.
Each page contains the information as follows.
1/4: Vertical/Horizontal Frequency and Moire Effect Correction
2/4: Color Mode and Temperature
3/4: Setting of Power Manager
4/4: Bee
p
Others
Degaussing Beep
Menu Position Menu Contrast
Reset
Language Selection
Japanese or English can be selected for expressions in "Screen
Manager".
Power Manager (Setting of Power-Save Mode)
3. Settings
• Use “Screen Manager” to adjust the recognition monitor.
• Menus of Screen Manager
CAUTION
Do not change the following settings unless
necessary. The monitor is factory-adjusted
upon shipment.
• Custom Mode of “Color Adjustment”
• Power Manager (Power-Save Mode: OFF)
• Language Selection
• Others
If the above settings are not made correctly,
the monitor may not work normally.
Ref.: Before performing any adjustment, keep the monitor intact for more
than 30 minutes after the power is supplied.
It takes approximately 30 minutes before the cathode-ray tube gets
warm enough, the internal electrical components are stabilized and the
colors develop in stable condition.
Fig. 1.3
3. Settings
0005-002 1-4 Tg0250-PM-MD