5OM-1064-001.pdf - 第18页
Automatic Sizing Button Power Switch Adjustment Procedure (1) Open the display which has the most prominent moire effect. (2) Select “Moire” from the submenu dialog box. (3) Press “Center” of the operation pad and open t…
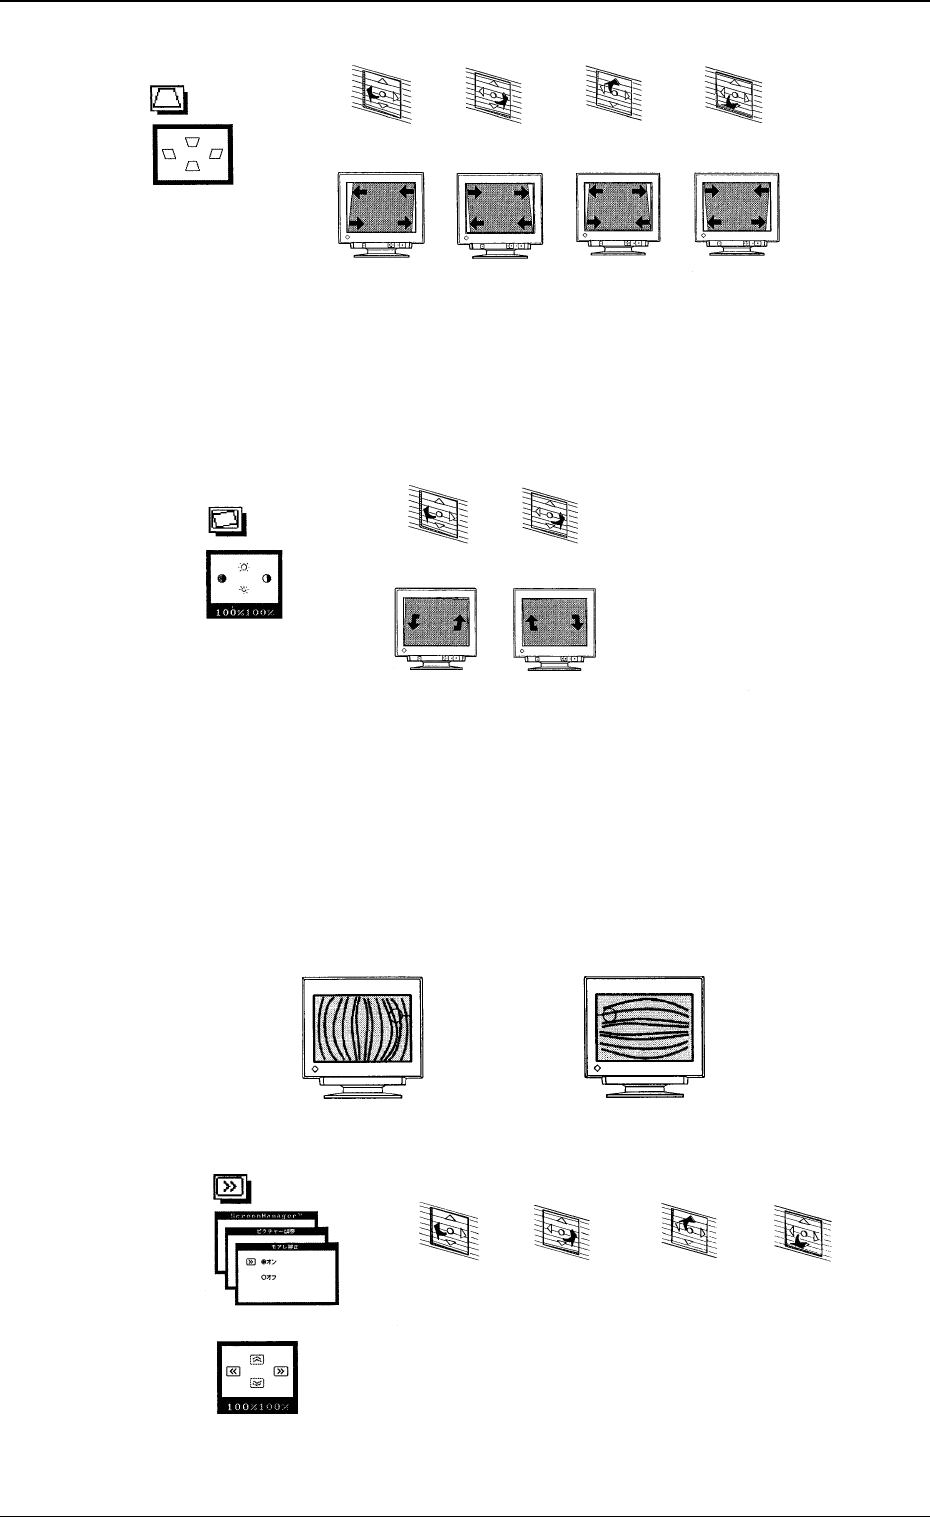
Fig. 1.9
Tilt
• The tilting of the display screen can be adjusted.
Fig. 1.10
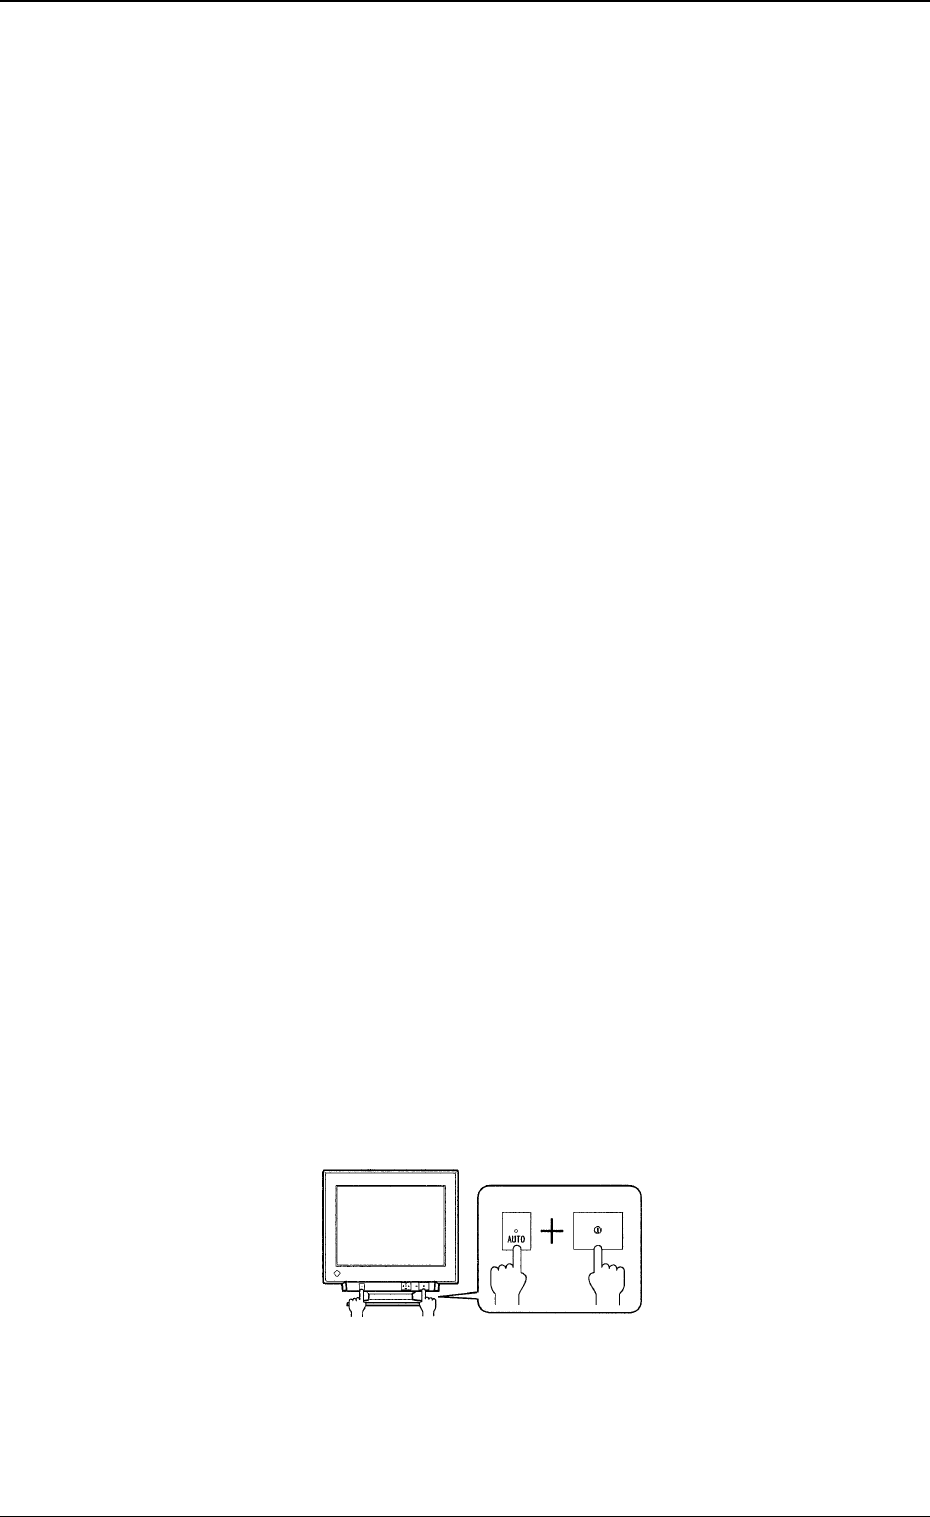
Moire Effect on Display Screen
• When the picture has diagonal lines as part of the image, poor interlac-
ing makes them appear to be interwoven in the moire effect. This effect
is more evident in diagonal picture information, when the interlacing
varies in successive frames.
The poor interlacing can be corrected to reduce this moire effect.
Fig. 1.11
Fig. 1.12
"Parallelogram"
Trapezoid/Parallelogram
The upper
portion
shrinks and
the lower one
s
p
reads out.
The upper
portion
spreads out
and the lower
one shrinks.
The
parallelogram
distortion can
be adjusted.
The
parallelogram
distortion can
be adjusted.
Press this to
the bottom.
Press this to
the top.
Press this to
the right.
Press this to
the left.
"Tilt"
The display
screen tilts
left.
The display
screen tilts
right.
Press this to
the right.
Press this to
the left.
Horizontal Moire Vertical Moire
ON/OFF Selection
"Moire"
The vertical moire can be
reduced.
Adjust the poor interlacing until
the moire effect becomes most
unnoticeable.
The horizontal moire can be
reduced.
Adjust the poor interlacing until
the moire effect becomes most
unnoticeable.
Press this to
the bottom.
Press this to
the top.
Press this to
the right.
Press this to
the left.
3. Settings
0005-002 1-7 Tg0250-PM-MD
Automatic Sizing
Button
Power Switch
Adjustment Procedure
(1) Open the display which has the most prominent moire effect.
(2) Select “Moire” from the submenu dialog box.
(3) Press “Center” of the operation pad and open the “ON/OFF Selection”
dialog box.
(4) Select “ON” and press “Center” of the operation pad. The display for
moire correction appears on the screen.
Note: When “ON” is selected for the moire correction function, the repro-
duced picture may look as if it is wavering.
Select “OFF” when the stability and distinction of the reproduced pic-
ture are required prior to the correction of moire effect.
Ref.: The moire effect can also be reduced by adjusting the incorrect aspect
ratio (insufficient width and height) at the “Size” dialog box.
3.2 Color Adjustment
Standard Mode Adjustment
• Select “Color Temperature” and adjust the colors of the reproduced picture.
The color temperature can be selected in “500K” increments, with 4000K
as the minimum temperature and 10000K as the maximum one.
(The default “9300K” is exceptional.)
Adjustment Procedure
(1) Follow the hierarchical sequence - “Screen Manager” → “Color Adjust-
ment” → “Standard” → “Color Adjustment”.
(2) Move “Arrow” right and left by pressing the operation pad right and left
to set the color temperature.
(3) After the desired color temperature is selected, press “Center” of the op-
eration pad to determine the selected temperature. The submenu dialog
box resumes.
4. Adjustment Lock Function
• Use the adjustment lock function to lock the adjusted settings.
After the adjusted settings are locked, the settings cannot be changed tem-
porarily with the operation pad on the front panel.
Setting
Turn on the power switch of the monitor while pressing the automatic sizing
button.
Fig. 1.13
Cancellation
Turn off the power switch once. Then, turn it on again while pressing the
automatic sizing button.
4. Adjustment Lock Function
0005-002 1-8 Tg0250-PM-MD

Section 2
Adjustment of P.C.B. Positioning Section
9910-001 2-1 Tg0250-PM-MD