5OM-1064-001.pdf - 第14页
Colo r Adjus tment Sta ndar d Mode (S electi on of Color T empera tu r e) Cu stom Mode (C rea ti on of Color T ones) P i c t u r e ( Sc r een ) A d j u s t men t C ontr ast /Br ightness Size Position Parallel…
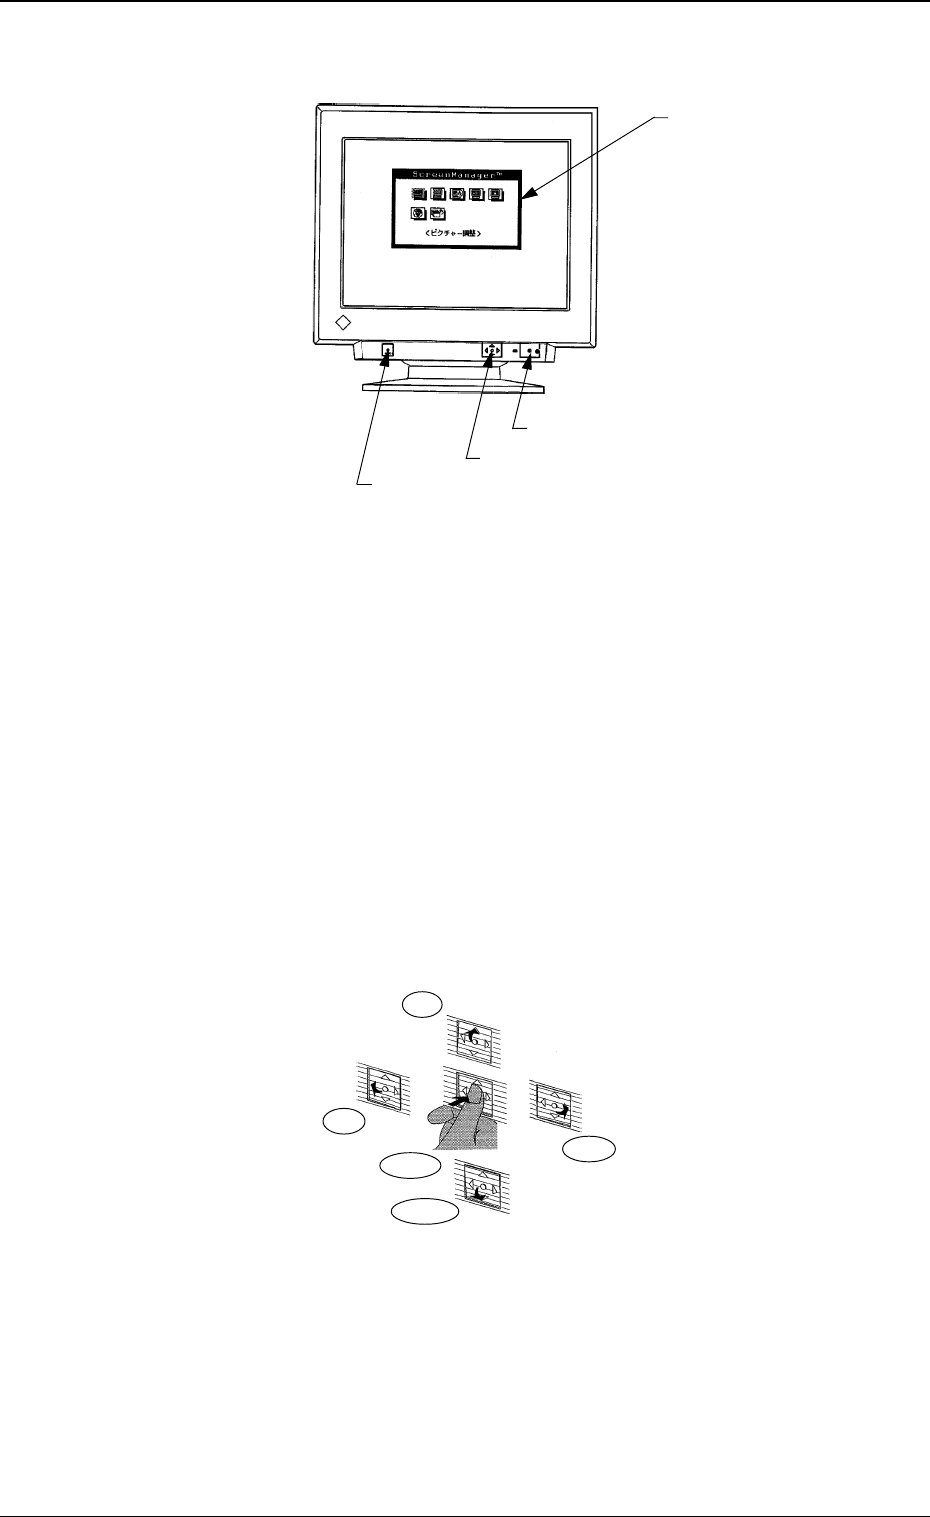
2. Name of Each Section
It is required to perform the following adjustment for normal use of the
recognition monitor.
*1 Power Switch
Every time this switch is pressed, the power is turned ON or OFF.
Keep the power “ON” in normal cases.
The power to the monitor can be controlled on the machine side.
*2 Automatic Sizing Button
Use this button to adjust the size and position of the screen.
Press this button when an image is displayed. The size and position are
automatically adjusted.
*3 Operation Pad
Use this pad to perform various kinds of settings.
Imprinted on the pad are five directions - Center, Top, Bottom, Right, and
Left.
*4 Screen Manager
Manipulate the operation pad to make various settings while viewing the
menus on the monitor.
*4 Screen Manager
*2 Automatic Sizing Button
*1 Power Switch
*3 Operation Pad
Top
Left
Right
Bottom
Center
Fig. 1.1
Fig. 1.2
2. Name of Each Section
0005-002 1-3 Tg0250-PM-MD
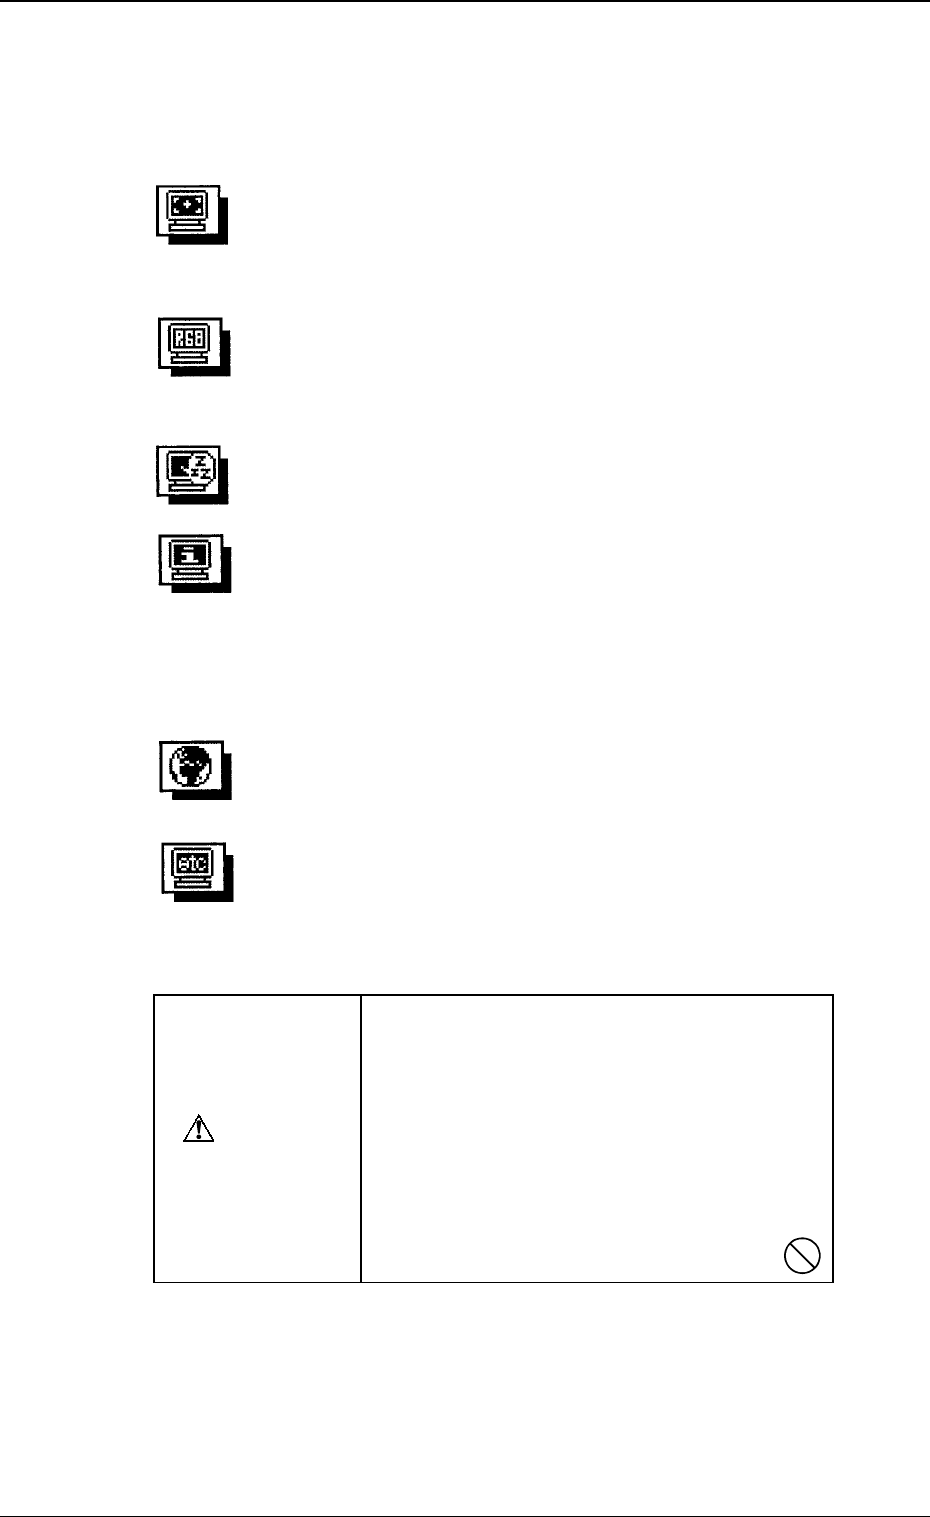
Color Adjustment
Standard Mode (Selection of Color Temperature)
Custom Mode (Creation of Color Tones)
Picture (Screen) Adjustment
Contrast/Brightness Size
Position Parallelogram
Pincushion Tilt
Moire
Information
The present settings can be checked.
The information is divided into four pages which can be opened by
pressing "Center" of the operation pad. Each page is numbered as 1/4,
2/4, 3/4 and 4/4.
Each page contains the information as follows.
1/4: Vertical/Horizontal Frequency and Moire Effect Correction
2/4: Color Mode and Temperature
3/4: Setting of Power Manager
4/4: Bee
p
Others
Degaussing Beep
Menu Position Menu Contrast
Reset
Language Selection
Japanese or English can be selected for expressions in "Screen
Manager".
Power Manager (Setting of Power-Save Mode)
3. Settings
• Use “Screen Manager” to adjust the recognition monitor.
• Menus of Screen Manager
CAUTION
Do not change the following settings unless
necessary. The monitor is factory-adjusted
upon shipment.
• Custom Mode of “Color Adjustment”
• Power Manager (Power-Save Mode: OFF)
• Language Selection
• Others
If the above settings are not made correctly,
the monitor may not work normally.
Ref.: Before performing any adjustment, keep the monitor intact for more
than 30 minutes after the power is supplied.
It takes approximately 30 minutes before the cathode-ray tube gets
warm enough, the internal electrical components are stabilized and the
colors develop in stable condition.
Fig. 1.3
3. Settings
0005-002 1-4 Tg0250-PM-MD
3.1 Picture Adjustment
When [Picture Adjustment] is selected at the “Screen Manager” dialog box
and “Center” of the operation pad is pressed, the menus for picture adjustment
appear in the dialog box.
Select the item to be adjusted and press “Center” of the operation pad.
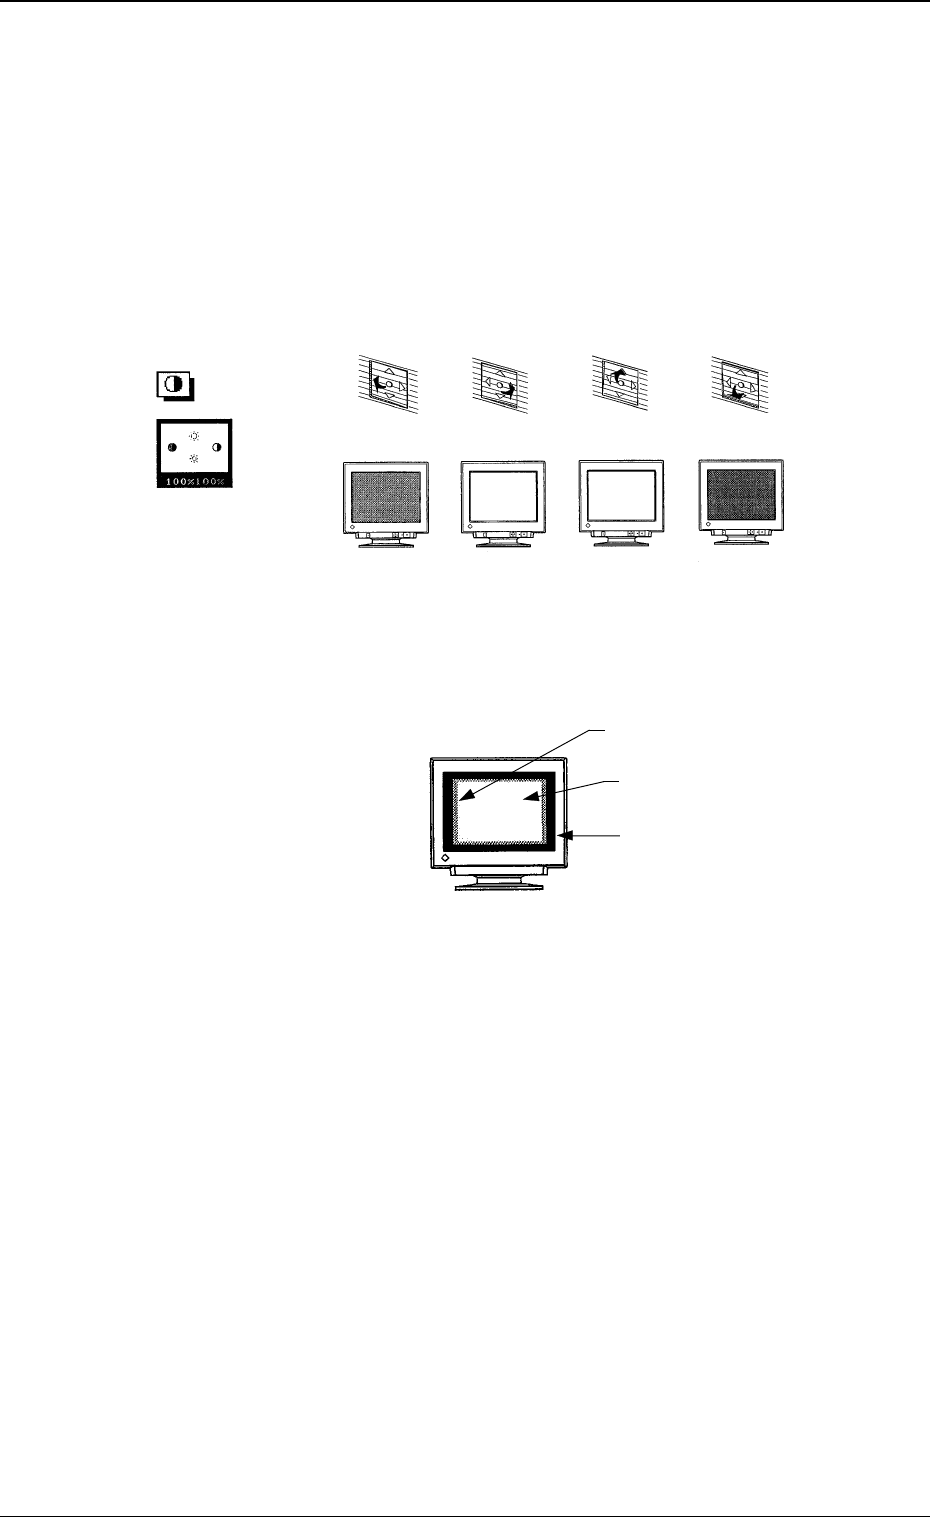
Contrast/Brightness
• The contrast (difference in intensity) and brightness of the reproduced
picture can be adjusted.
Fig. 1.4
Ref.:
Adjustment Procedure for Average Brightness
Fig. 1.5
(1) Select “Contrast/Brightness” for maximum brightness.
(2) Select “Size” at “Picture Adjustment” of the “Screen Manager” dia-
log box.
When the screen size is reduced to the minimum, a glimmer frame
(raster) appears outside the reproduced picture.
(3) Select “Contrast/Brightness”.
Decrease the brightness until the raster has the same brightness as
the available picture area (until the raster disappears).
The brightest picture will be reproduced with great contrast.
(4) Resume the original size and adjust the contrast to the desired one.
The brightness
increases.
The brightness
decreases.
The contrast
increases.
The contrast
decreases.
"Contrast
and Brightness"
Press this to
the bottom.
Press this to
the top.
Press this to
the right.
Press this to
the left.
3. Settings
0005-002 1-5 Tg0250-PM-MD
Raster
Reproduced Picture
Available Picture Area