5OM-1064-001.pdf - 第16页
Size • The screen size can be adjusted. Fig. 1.6 Position • The raster on the display screen can be positioned. Fig. 1.7 Distortions (Barrel/Pincushion and T rapezoid/Parallelogram) • Distortions of the raster can be adj…
3.1 Picture Adjustment
When [Picture Adjustment] is selected at the “Screen Manager” dialog box
and “Center” of the operation pad is pressed, the menus for picture adjustment
appear in the dialog box.
Select the item to be adjusted and press “Center” of the operation pad.
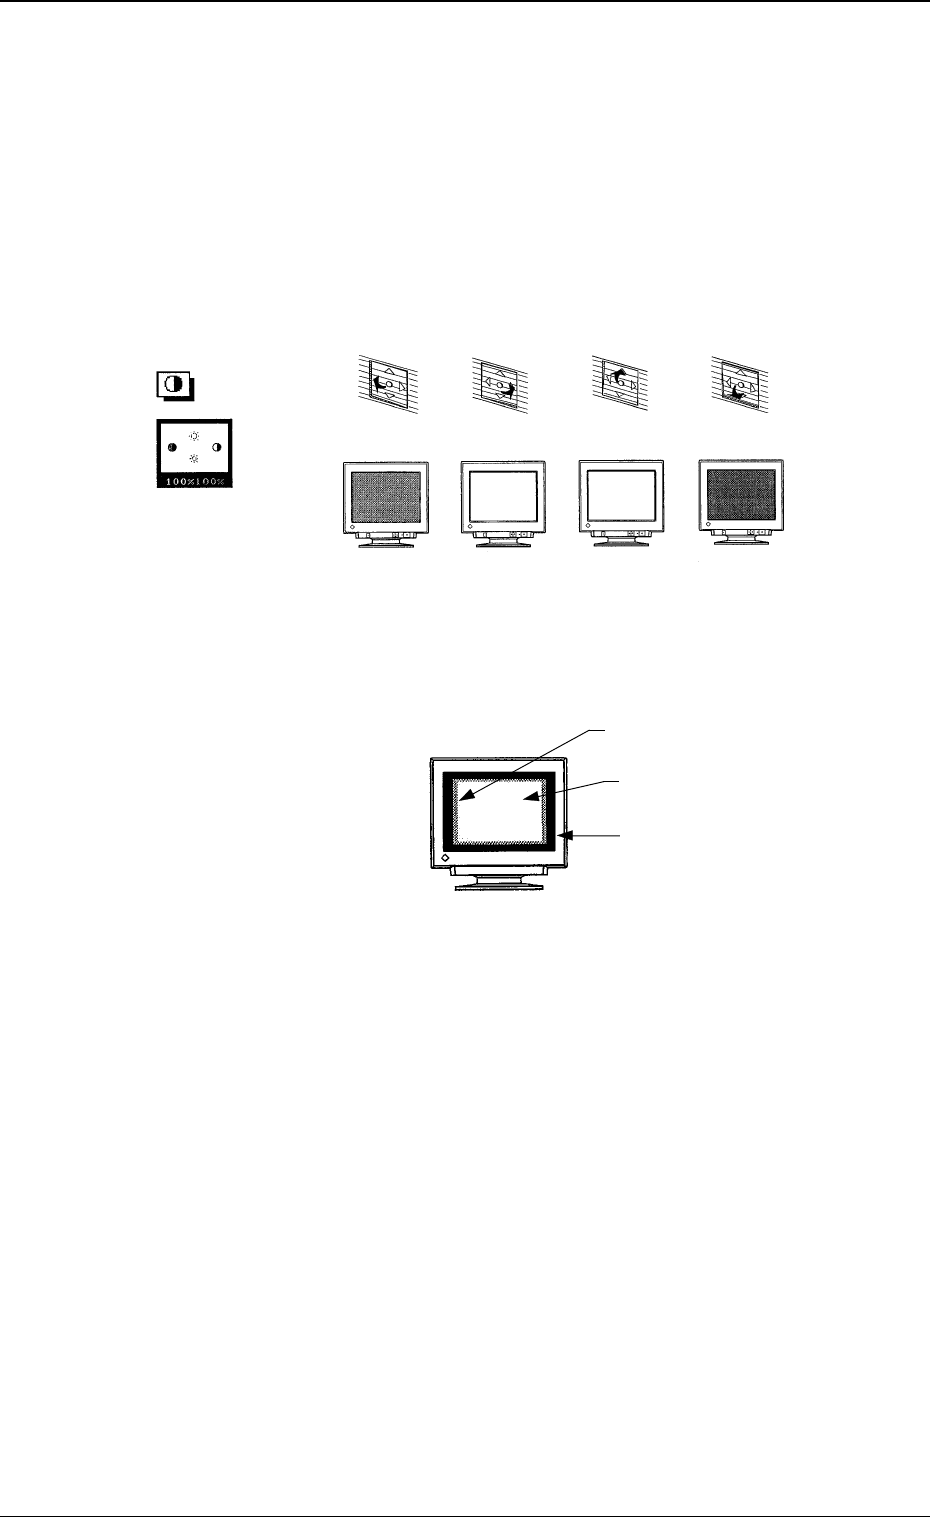
Contrast/Brightness
• The contrast (difference in intensity) and brightness of the reproduced
picture can be adjusted.
Fig. 1.4
Ref.:
Adjustment Procedure for Average Brightness
Fig. 1.5
(1) Select “Contrast/Brightness” for maximum brightness.
(2) Select “Size” at “Picture Adjustment” of the “Screen Manager” dia-
log box.
When the screen size is reduced to the minimum, a glimmer frame
(raster) appears outside the reproduced picture.
(3) Select “Contrast/Brightness”.
Decrease the brightness until the raster has the same brightness as
the available picture area (until the raster disappears).
The brightest picture will be reproduced with great contrast.
(4) Resume the original size and adjust the contrast to the desired one.
The brightness
increases.
The brightness
decreases.
The contrast
increases.
The contrast
decreases.
"Contrast
and Brightness"
Press this to
the bottom.
Press this to
the top.
Press this to
the right.
Press this to
the left.
3. Settings
0005-002 1-5 Tg0250-PM-MD
Raster
Reproduced Picture
Available Picture Area
Size
• The screen size can be adjusted.
Fig. 1.6
Position
• The raster on the display screen can be positioned.
Fig. 1.7
Distortions (Barrel/Pincushion and Trapezoid/Parallelogram)
• Distortions of the raster can be adjusted.
Two kinds (barrel/pincushion and trapezoid/parallelogram) of distor-
tions can be adjusted.
Fig. 1.8
Barrel/Pincushion
"Pincushion"
The pincushion
distortion can be
adjusted.
The pincushion
distortion can be
adjusted.
The barrel
distortion can
be adjusted.
The barrel
distortion can
be adjusted.
Press this to
the bottom.
Press this to
the top.
Press this to
the right.
Press this to
the left.
"Size"
The raster on the
display screen
becomes wider for
the correct
proportions of
width to height.
The raster on the
display screen
becomes narrower
for the correct
proportions of
width to height.
The raster on the
display screen
becomes shorter for
the correct
proportions of
height to width.
The raster on the
display screen
becomes taller for
the correct
proportions of
height to width.
Press this to
the bottom.
Press this to
the top.
Press this to
the right.
Press this to
the left.
"Position"
The raster on the
display screen
moves to the right.
The raster on the
display screen
moves to the left.
The raster on the
display screen
moves to the
bottom.
The raster on the
display screen
moves to the top.
Press this to
the bottom.
Press this to
the top.
Press this to
the right.
Press this to
the left.
3. Settings
0005-002 1-6 Tg0250-PM-MD
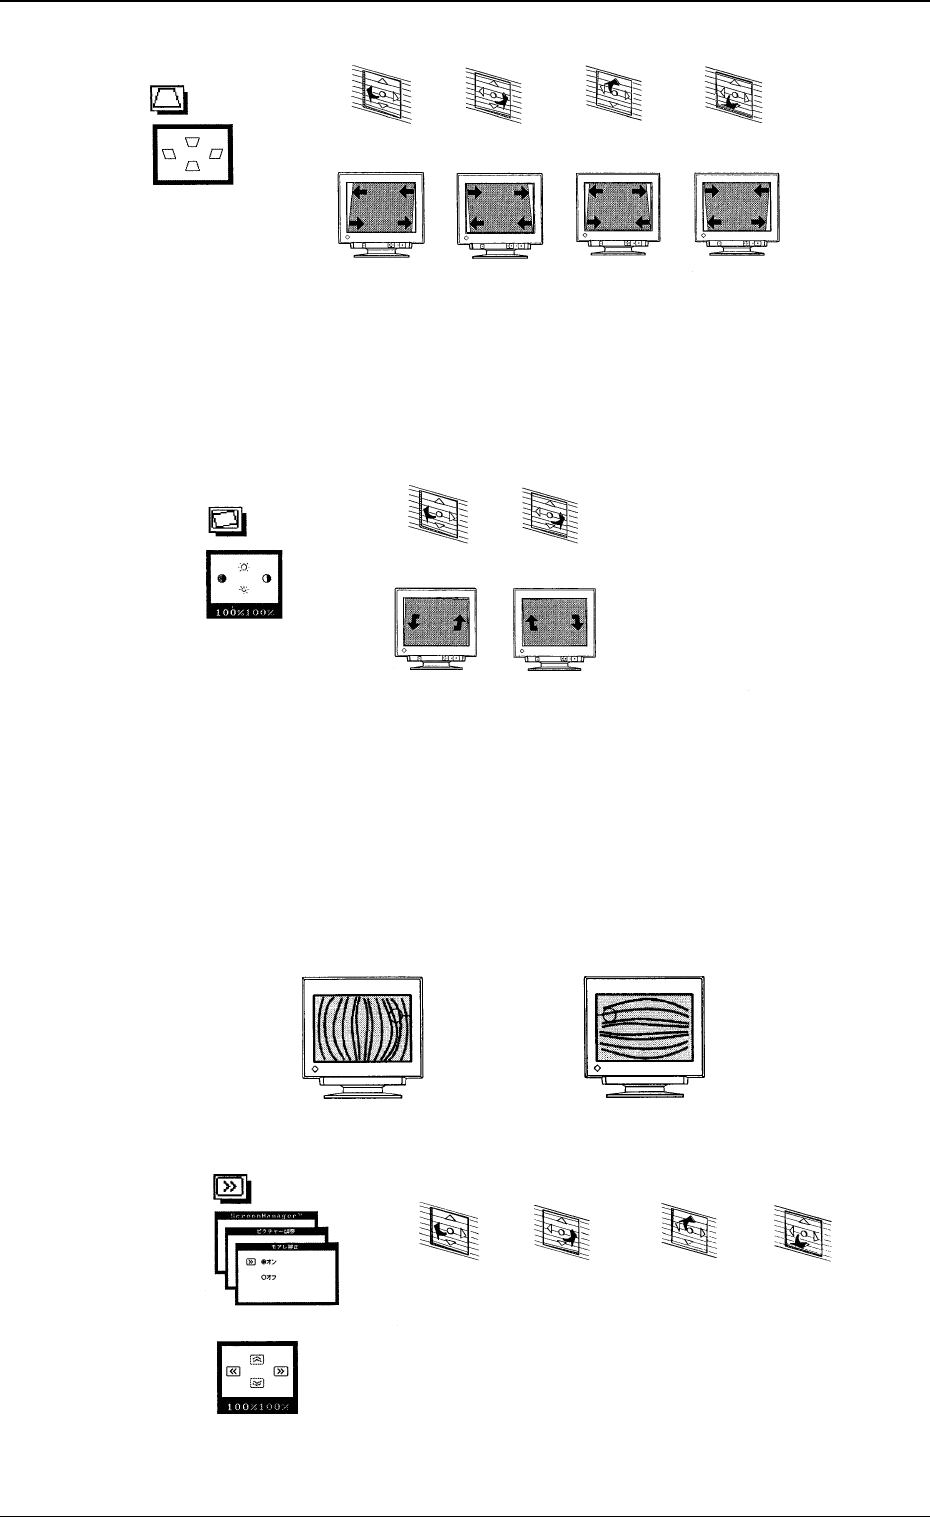
Fig. 1.9
Tilt
• The tilting of the display screen can be adjusted.
Fig. 1.10
Moire Effect on Display Screen
• When the picture has diagonal lines as part of the image, poor interlac-
ing makes them appear to be interwoven in the moire effect. This effect
is more evident in diagonal picture information, when the interlacing
varies in successive frames.
The poor interlacing can be corrected to reduce this moire effect.
Fig. 1.11
Fig. 1.12
"Parallelogram"
Trapezoid/Parallelogram
The upper
portion
shrinks and
the lower one
s
p
reads out.
The upper
portion
spreads out
and the lower
one shrinks.
The
parallelogram
distortion can
be adjusted.
The
parallelogram
distortion can
be adjusted.
Press this to
the bottom.
Press this to
the top.
Press this to
the right.
Press this to
the left.
"Tilt"
The display
screen tilts
left.
The display
screen tilts
right.
Press this to
the right.
Press this to
the left.
Horizontal Moire Vertical Moire
ON/OFF Selection
"Moire"
The vertical moire can be
reduced.
Adjust the poor interlacing until
the moire effect becomes most
unnoticeable.
The horizontal moire can be
reduced.
Adjust the poor interlacing until
the moire effect becomes most
unnoticeable.
Press this to
the bottom.
Press this to
the top.
Press this to
the right.
Press this to
the left.
3. Settings
0005-002 1-7 Tg0250-PM-MD