00194329-03.pdf - 第176页
Replacement instructions - Gantry c able and hose carrier SIPLACE HS / S / F 01/2007 Edition 176 : Place the nylon t ape between th e compressed air h o ses and ribbon cab les so that it closes the cap flush with the X-c…
Replacement instructions - Gantry cable and hose carrier SIPLACE HS / S / F
01/2007 Edition
175
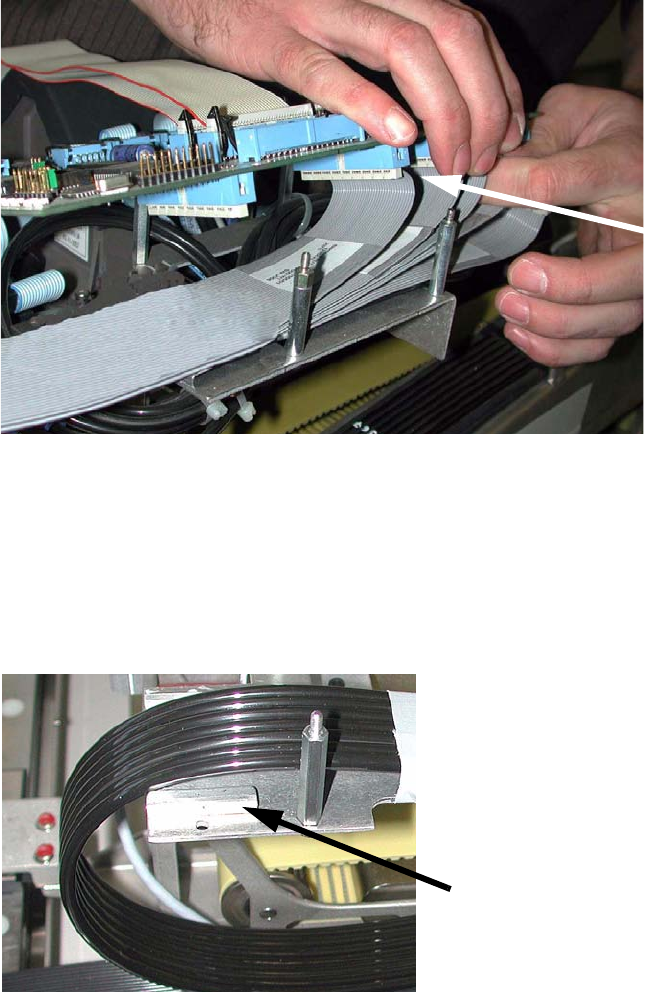
: Plug the new ribbon cables into the head board.
2
2
: If new air hoses are used, cut them to the right length with reference to the old hoses and attach
them to the vacuum generator.
2
: Run the compressed air hoses between the clamp recesses.
2
2
2
2
2
2
Attach cables
Recess for the clamp
Replacement instructions - Gantry cable and hose carrier SIPLACE HS / S / F
01/2007 Edition
176
: Place the nylon tape between the compressed air hoses and ribbon cables so that it closes the
cap flush with the X-cable clamp.
2
2
: If a short piece of ribbon cable was enclosed with the cable and hose carrier, enclose it once
more.
2
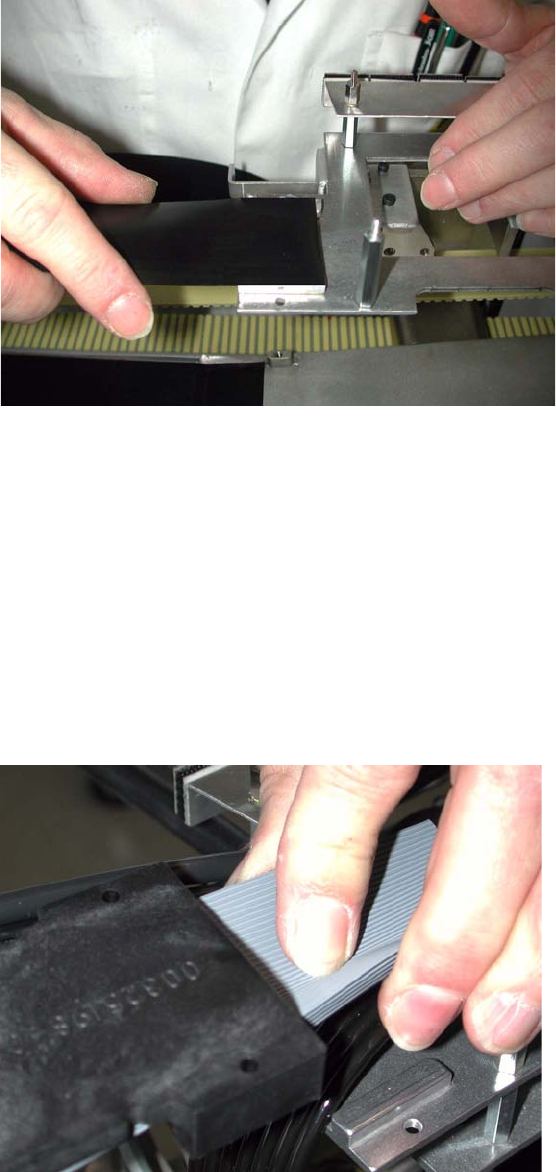
: Loosely attach the clamps from below using two screws.
Secure the screws with Loctite 241.
Lightly press the flat ribbon cable set together when you apply the X-cable clamp so as not to
damage the insulation.
It must still be possible to move the ribbon cables, nylon tape and compressed air hoses.
2
Replacement instructions - Gantry cable and hose carrier SIPLACE HS / S / F
01/2007 Edition
177
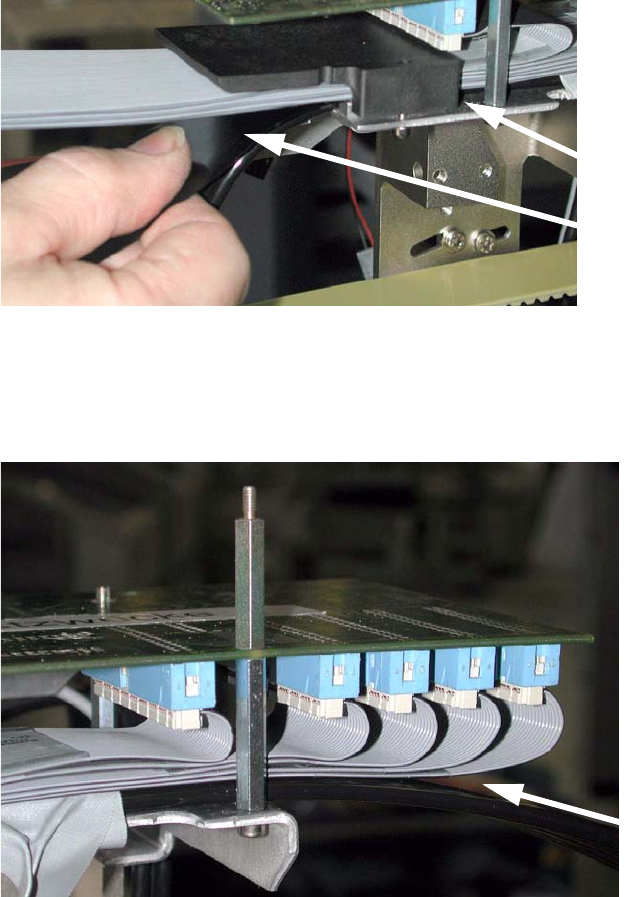
: Loosely fix the cable and hose carrier to the gantry arm using a clamp, making sure that it is
still loose enough to align.
The nylon tape should end flush with the end of the clamp. 2
2
2
: Pull the ribbon cable back until it runs in a gentle arc with no tension and that the arc of cable
does not touch the following connectors.
2
2
2
2
2
2
Nylon belt
The nylon belt
should end here
Run cables in a
gentle arc