00193687-03.pdf - 第28页
3 Installation des SIPLACE Explorer Installati ons- und Konfigurationsanleitung SIPLACE Explor er 3.2 Installationsvorgang Java 2 SDK 1.4 Ausgabe 02/2005 DE 28 3 Abb. 3 - 3 Installations-V aria nte: Insellösung 3.2 Inst …

Installations- und Konfigurationsanleitung SIPLACE Explorer 3 Installation des SIPLACE Explorer
Ausgabe 02/2005 DE 3.1 Standardinstallations-Varianten
27
3.1.4 Insellösung
Bei dieser Installations-Variante kann SIPLACE Explorer komplett mit allen Systemkomponenten
auf dem vorhandenenden SIPLACE Line Server installiert werden. 3
Software-Voraussetzungen SIPLACE Line-Server:
– Systemumgebung, eine der nachfolgenden Versionen:
– Windows 2000 Workstation mit SP3 oder SP4
– Windows XP Professional mit SP1 oder SP2
– MSDE 2000
– Explorer-Installation:
– Runtime Environment
– Tomcat Webserver
–JAVA 2 SDK
– Werks-Konfiguration
Hardware-Voraussetzungen SIPLACE Line-Server:
– alle Voraussetzungen des schon vorhandenen SIPLACE Line-Servers
– Rechner mit 2.4 GHZ CPU-Takt
– 2 GB Hauptspeicher
– 10 GB freie Festplattenkapazität
3
HINWEIS
Achten Sie darauf, dass Sie bei dieser Installations-Variante nur eine Applikation pro Linie
überwachen können. 3
3 Installation des SIPLACE Explorer Installations- und Konfigurationsanleitung SIPLACE Explorer
3.2 Installationsvorgang Java 2 SDK 1.4 Ausgabe 02/2005 DE
28
3
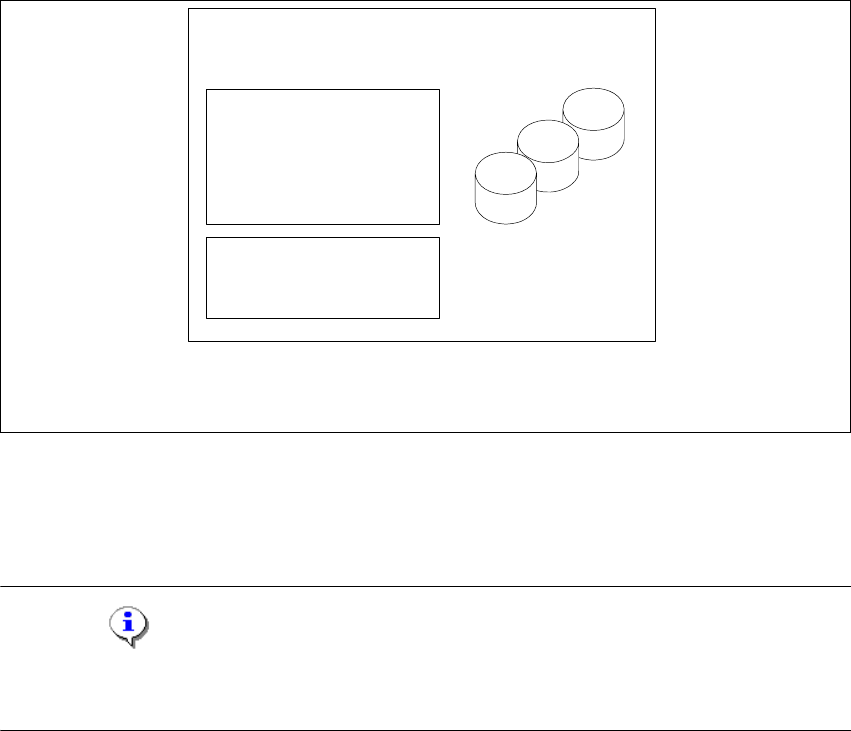
Abb. 3 - 3 Installations-Variante: Insellösung
3.2 Installationsvorgang Java 2 SDK 1.4
HINWEIS
Sie müssen über Windows 2000 Administrator-Rechte verfügen, um die Installation ausführen zu
können. 3
→ Legen Sie die SIPLACE Explorer CD in Ihr CD-Rom-Laufwerk ein.
nur für 1 Applikation
pro Linie
- MSDE 2000
- Tomcat
- Werks-Konfiguration
- Java 2 SDK
- RTE pro Linie
Berichts-Generierung:
- MSXM
- Excel
alle Datenbanken, alle
Linien-Datenbanken
SIPLACE Line Server
(schon vorhanden)
Installations- und Konfigurationsanleitung SIPLACE Explorer 3 Installation des SIPLACE Explorer
Ausgabe 02/2005 DE 3.2 Installationsvorgang Java 2 SDK 1.4
29
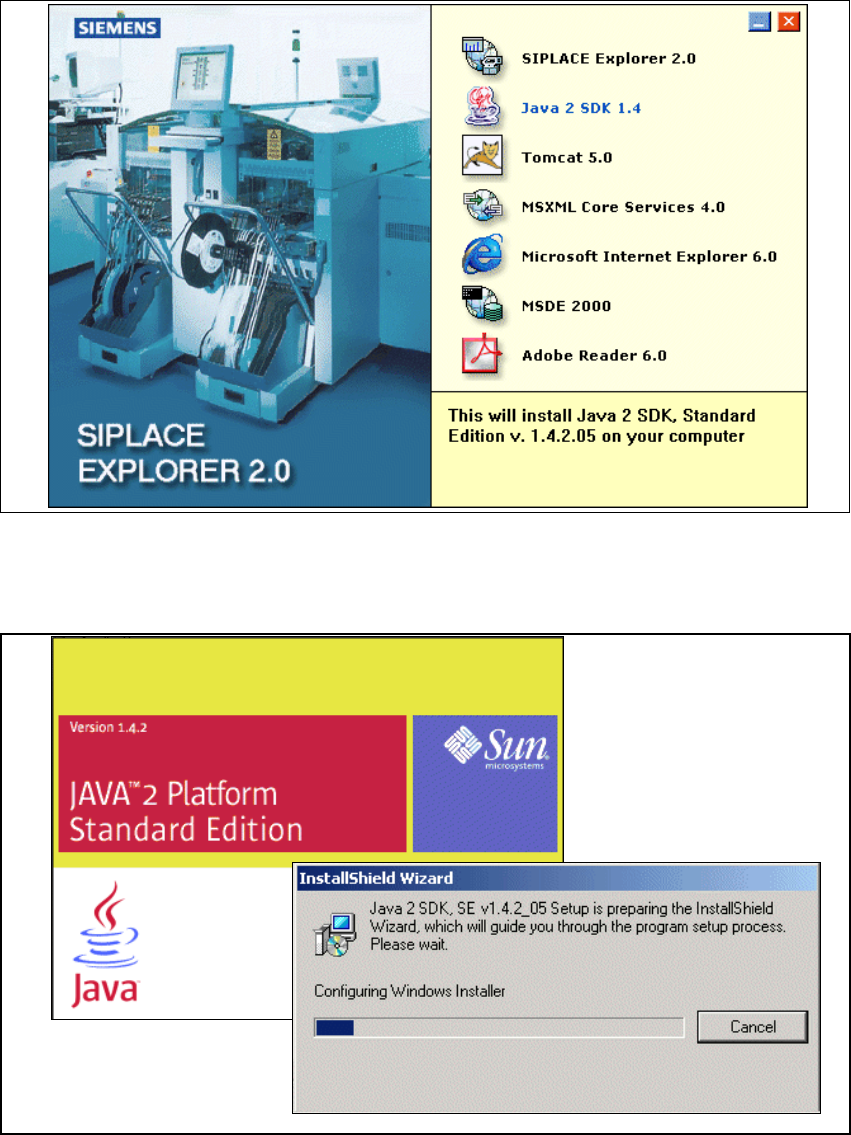
→ Es erscheint der Start Screen.
3
Abb. 3 - 4 SIPLACE Explorer setup - Start Screen
→ Wählen Sie Java 2 SDK 1.4 aus. Die benutzergeführte Installation von Java 2 SDK wird
gestartet.
3
Abb. 3 - 5 Installshield Wizard - Vorbereitung der Installation