00193687-03.pdf - 第40页
3 Installation des SIPLACE Explorer Installati ons- und Konfigurationsanleitung SIPLACE Explor er 3.3 Installationsvorgang SIPLACE Explorer 2.0 Ausgabe 02/2005 DE 40 → Das Dialogfenster Select Features (Installation sopt…

Installations- und Konfigurationsanleitung SIPLACE Explorer 3 Installation des SIPLACE Explorer
Ausgabe 02/2005 DE 3.3 Installationsvorgang SIPLACE Explorer 2.0
39
→ Um die Auswahl des Zielordners zu bestätigen, klicken Sie im Dialogfenster Choose
Destination Location (Zielinstallationsordner auswählen) die Schaltfläche Next (Weiter) an.
3
Abb. 3 - 20 SIPLACE Explorer Setup - Dialogfenster 'choose folder' (’Ordner auswählen’)
→ Wenn Sie einen Ordner ausgewählt haben, der noch nicht existiert, erscheint die folgende
Mitteilung.
3
Abb. 3 - 21 SIPLACE Explorer Setup - Dialogfenster Ordner anlegen
→ Bestätigen Sie mit Ja, wenn der Ordner vom System erstellt werden soll. Ansonsten wählen
Sie Nein. In diesem Falls müssen Sie im Dialogfenster Choose Destination Location
(Zielinstallationsordner auswählen) einen korrekten Ordner angeben.

3 Installation des SIPLACE Explorer Installations- und Konfigurationsanleitung SIPLACE Explorer
3.3 Installationsvorgang SIPLACE Explorer 2.0 Ausgabe 02/2005 DE
40
→ Das Dialogfenster Select Features (Installationsoptionen auswählen) wird angezeigt. Wählen
Sie aus den folgenden drei Komponenten aus: SIPLACE Explorer Runtime Environment,
Factor Configuration Utility (Werks-Konfigurations-Utility) und SIPLACE Explorer
Development Environment.
3
Abb. 3 - 22 SIPLACE Explorer Setup - Dialogfenster 'Select Features' (Installationsoptionen auswählen)
HINWEIS
Bei der Auswahl der Komponenten können Sie diese zusammenstellen, wie Sie es
benötigen. Allerdings ist es nicht empfehlenwert, "SIPLACE Explorer V.2.0 Runtime
Environment" und "SIPLACE Explorer V.2.0 Development Environment" auf dem gleichen
Computer zu installieren. 3
→ Haben Sie die entsprechenden Installationsoptionen ausgewählt, klicken Sie die Schaltfläche
Next (Weiter) an.
Installations- und Konfigurationsanleitung SIPLACE Explorer 3 Installation des SIPLACE Explorer
Ausgabe 02/2005 DE 3.3 Installationsvorgang SIPLACE Explorer 2.0
41
→ Das nachfolgende Dialogfenster wird angezeigt.
3
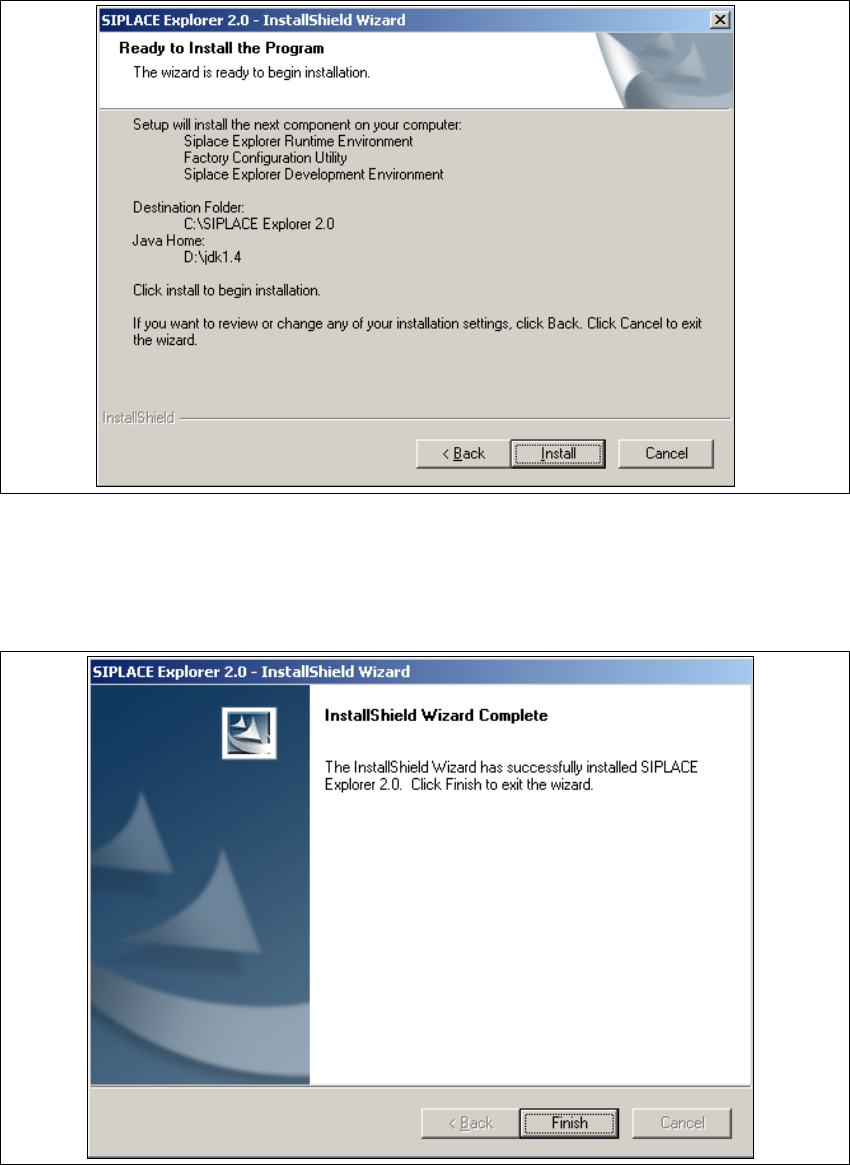
Abb. 3 - 23 SIPLACE Explorer Setup - Dialogfenster 'Ready to Install' (Bereit für die Installation)
→ Betätigen Sie die Sie die Schaltfläche Install, die eigentliche Installation von SIPLACE
Explorer V2.0 beginnt.
→ Wenn die Installation beendet ist, erscheint nachfolgendes Dialogfenster.
3
Abb. 3 - 24 SIPLACE Explorer Setup - Installation beendet
→ Klicken Sie auf Finish.