TM1467_ReleaseNote_PSC乮Print Stability Control乯-SyringeType-Function.pdf - 第21页
SMT Software Engineeri ng Group IMOperationsYAMAHAMOTORCO. ,LTD. MD OC-SOFT50033 21/30 solder is suitable tem perature beforehand. Plea se confirm whet her to use the p in-type ba ckup or th e plan…
SMT Software Engineering Group
IMOperationsYAMAHAMOTORCO.,LTD.
MDOC-SOFT50033
20/30
5. Flow of production with PSC function
When PSC function is used, the loss of time in the solder setup can be decreased because the initial
solder supply and the solder supply while the Auto-running are executed automatically.
By executing the following procedure, the operations from the setup to the production are efficient.
STEP1 Select the board data
STEP2 Prepare the backup, squeegee, mask and solder
STEP3 Confirm supplying the solder and setting of supply pressure
STEP4 Execute the initial solder supply
STEP5 Execute the Rolling and Test-printing
STEP6 Start the production
STEP7 Clean after production
STEP1 Select the board data
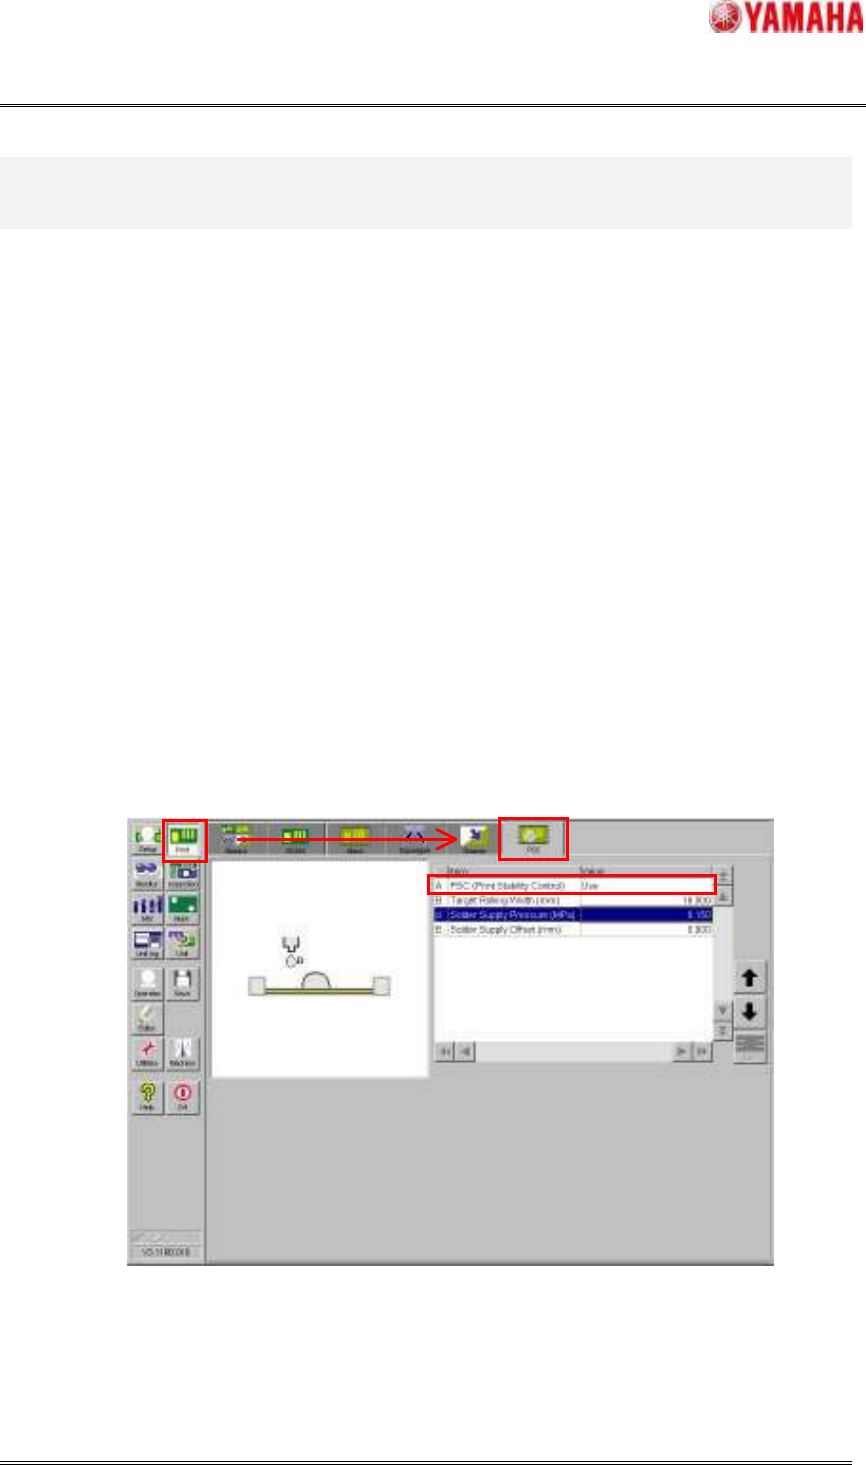
Please select the board data for production. Next, please confirm whether the “PSC (Print Stability
Control)” in window of [Print] – [PSC] is “Use”. If the “PSC (Print Stability Control)” is not use, the
following step is unnecessary. Please prepare the backup, squeegee and mask and the solder is supplied
manually and execute the Rolling action and Test-printing, and start the Auto-running.
Fig.5.1 [Print] - [PSC] window
STEP2 Prepare the backup, squeegee, mask and solder
Please prepare the necessary backup, squeegee, mask and solder. At this time, it is necessary that the

SMT Software Engineering Group
IMOperationsYAMAHAMOTORCO.,LTD.
MDOC-SOFT50033
21/30
solder is suitable temperature beforehand.
Please confirm whether to use the pin-type backup or the plane-type according to the production
board beforehand, and attach the backup correctly. If it is not attached correctly, the machine may
break.
Please prepare the squeegee selected by the "Squeegee Detail Type" in the window of [Print] –
[Basics] or [Print] – [Squeegee] correctly. If not, PSC action is not executed correctly.
Please prepare the mask selected by the "Mask Name" or “Mask Size” in the window of [Print] –
[Basics] or [Print] – [Mask] correctly and insert it to the machine and clamp it. If the Mask Adapter is
used, it is attached first and please clamp the mask.
Please attach the supply nozzle and the attachment to the solder syringe, and attach it in the PSC unit.
Afterwards, please insert the air joint until it clicks.
Fig.5.2 [Print] - [Basic] window
Fig.5.3 Preparing the solder syringe
Confirm the mask
Confirm the squeegee
Supply Nozzle
Attachment
Air Joint
SMT Software Engineering Group
IMOperationsYAMAHAMOTORCO.,LTD.
MDOC-SOFT50033
22/30
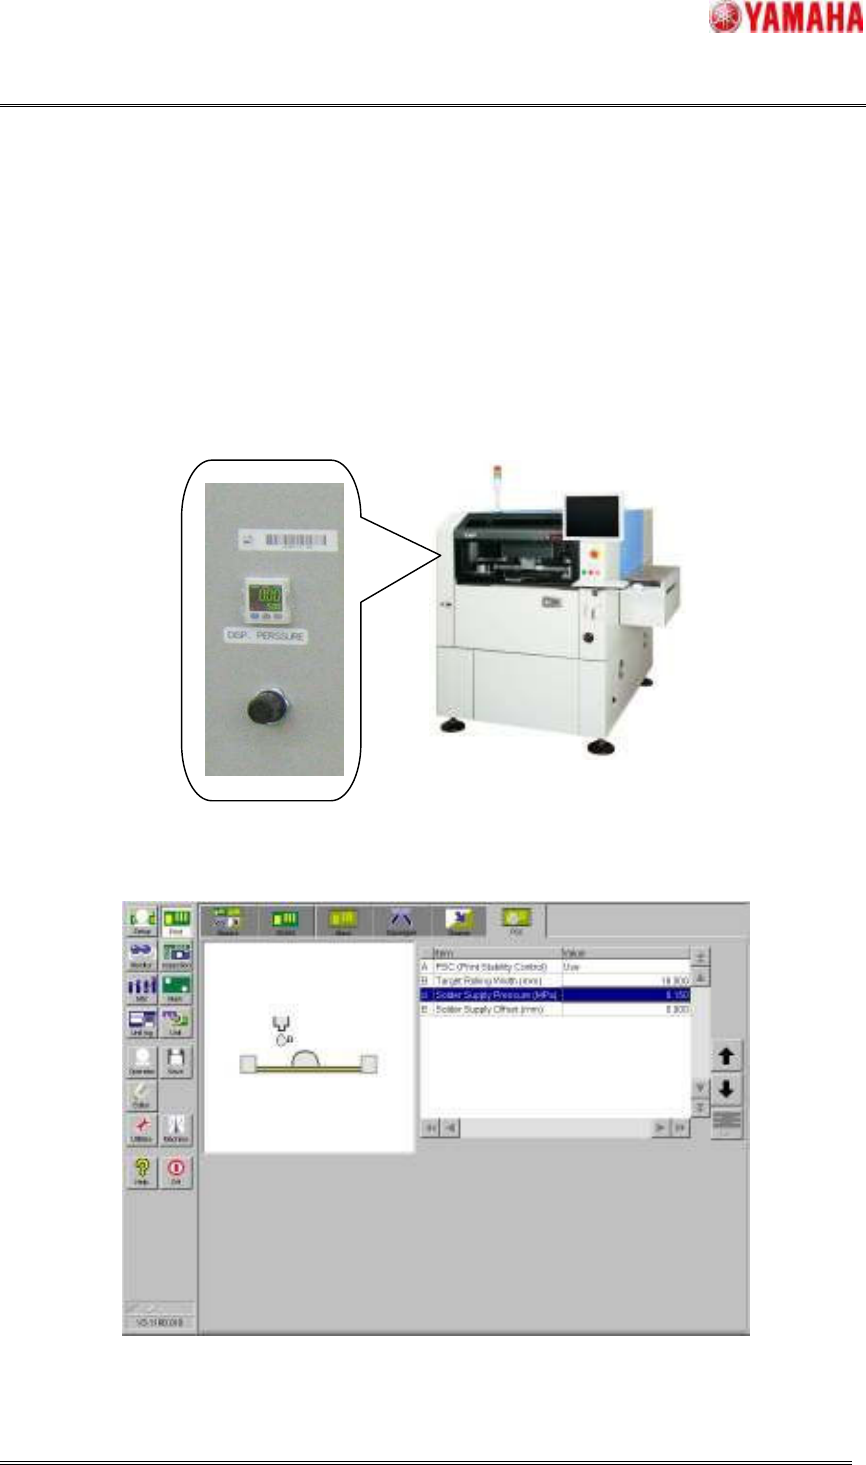
STEP3 Confirm supplying the solder and setting of supply pressure
Please adjust the pressure of the air regulator on the front of left cover of the machine according to
“Solder Supply Pressure (MPa)” in the window of [Print] – [PSC].
Please move the PSC unit to space easy to operate on the mask so that the solder doesn't fall in the
machine. And then, please push the “Solder Press” button in [Unit] – [PSC], confirm the solder to
supply from solder nozzle point. If not, return to STEP2, and confirm installation of the solder nozzle,
attachment and air joint and setting supply pressure.
Fig.5.4 The appearance of machine and air regulator
Fig.5.5 Confirm the supply pressure