Flexicut 英文 操作说明书.pdf - 第23页
FL E XIC UT U se r' s G ui de Version 2 22 Flexicut mode (no table installed) In this mode, the machine i s a precision micr o -cutter. Introduction t o the precision cu t ti ng page A : micrometric adju stment of t…
FLEXICUT User's Guide
Version 2
21
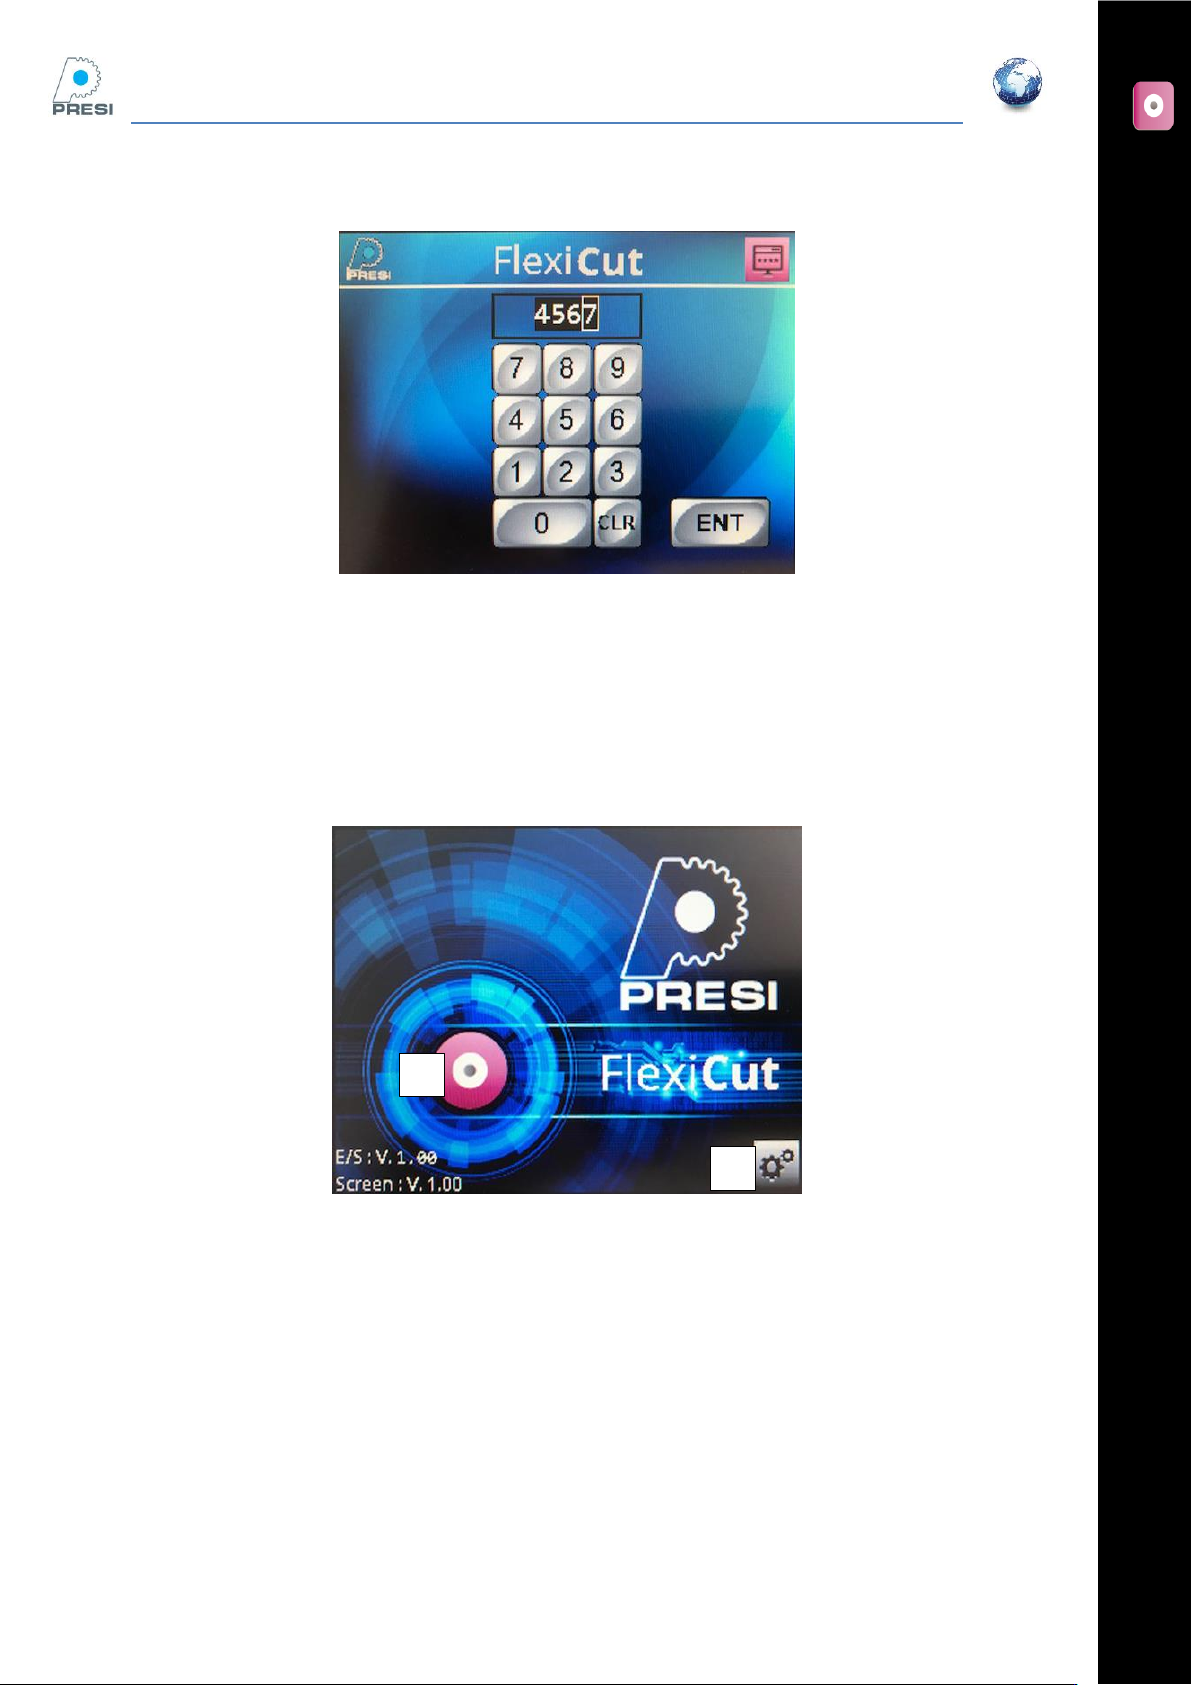
Enter the new code and press “Enter”.
Cutting
From the home screen, select “A” to reach the cutting parameters.
A
B
FLEXICUT User's Guide
Version 2
22
Flexicut mode (no table installed)
In this mode, the machine is a precision micro-cutter.
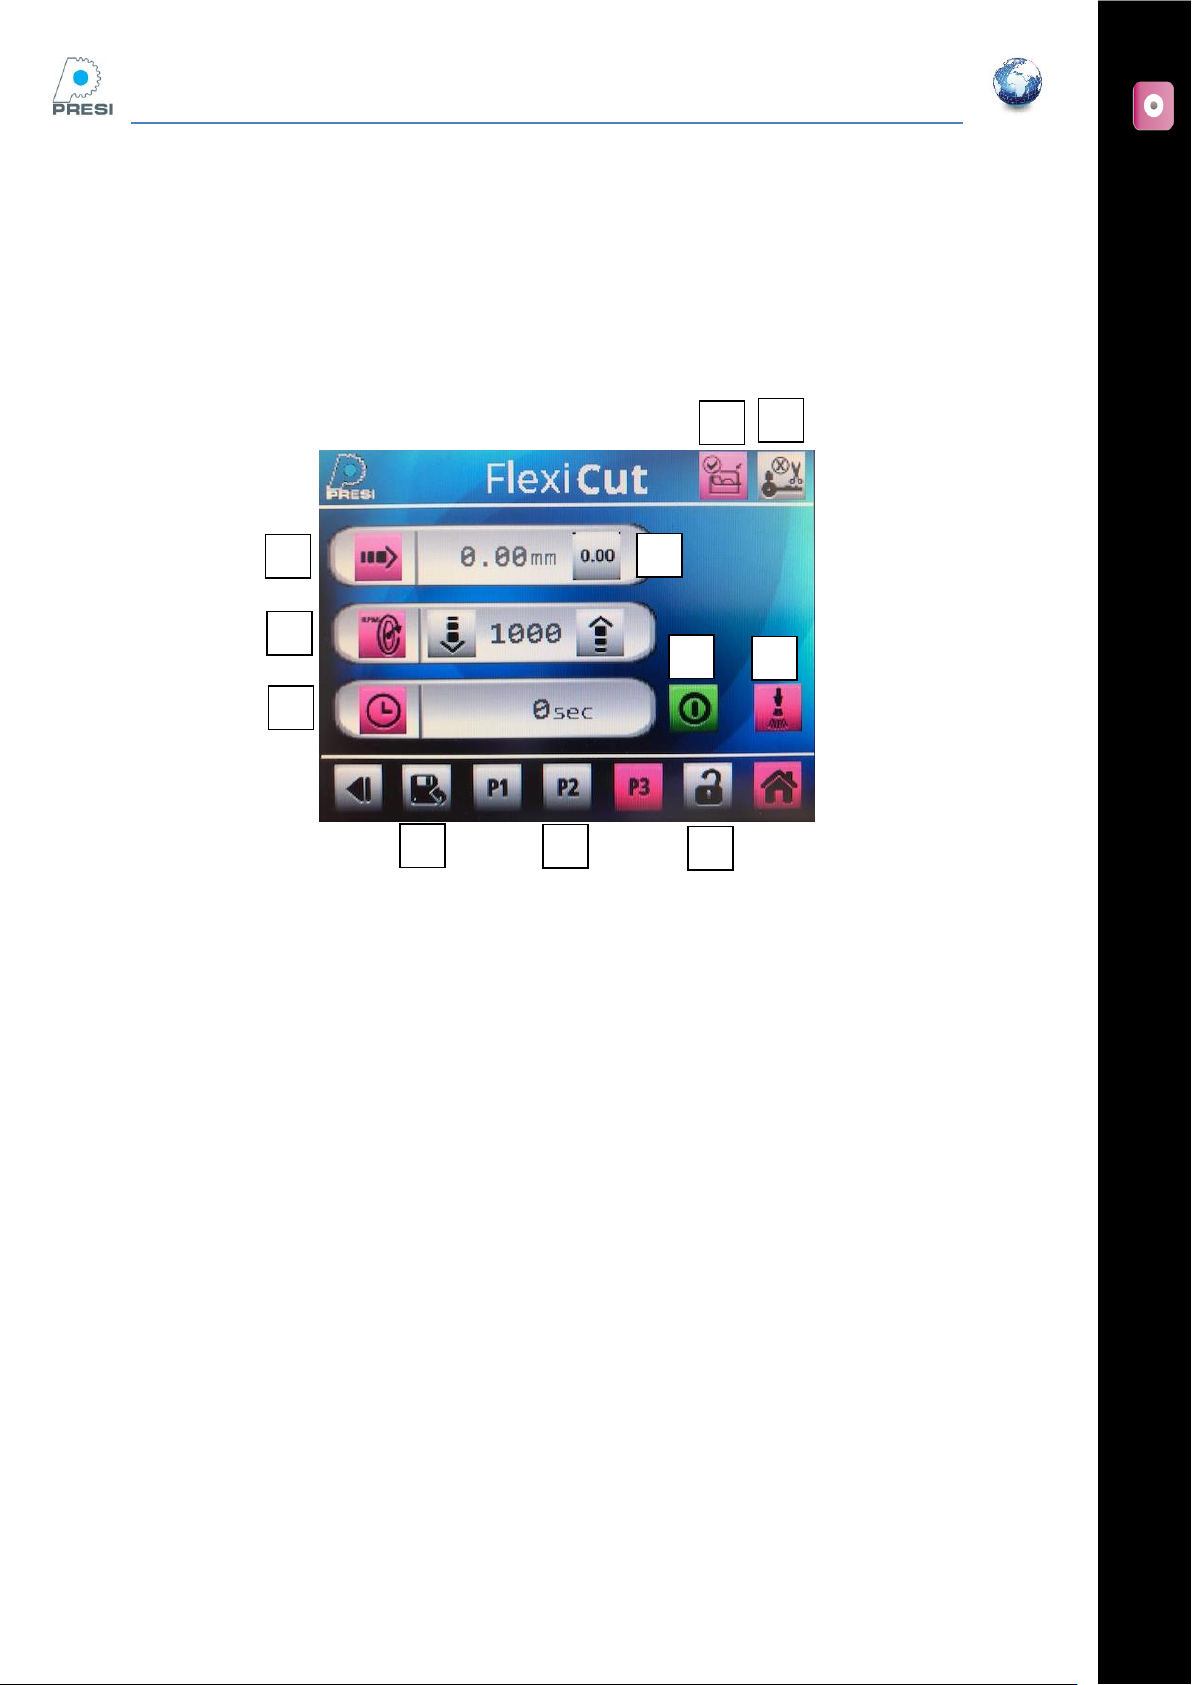
Introduction to the precision cutting page
A : micrometric adjustment of the arm;
B: Reset the field
C : Wheel speed (press the field to enter a value, or press the up/down arrows)
D : Cutting time
E : Limit switch
- Pink icon : cutting in operation or ready to use
- Grey icon: machine is stopping or cannot start
F : Hood
- Pink Icon : The hood is closed, machine is ready to use
- Grey Icon : The hood is open. Must be closed to start the cycle
G : Cooling
- Press on icon to activate the pump (pink). For a dry cut, de-activate the pump (grey icon).
H : P1,P2,P3, 3 programs available.
- A short press will select the program. The selected program is pink
I : To save a program, push ‘I’ then on the program where you went to save your parameters
J : press this icon to freeze the screen. Push again to release it.
K : Start / Stop
A
B
C
D
E
F
G
H
J
K
I
FLEXICUT User's Guide
Version 2
23
How to use the arm
Before starting the cutting cycle (hood open), it is possible to move the arm equipped with a sample chuck,
in order to present the material to cut using the wheel in the required position.
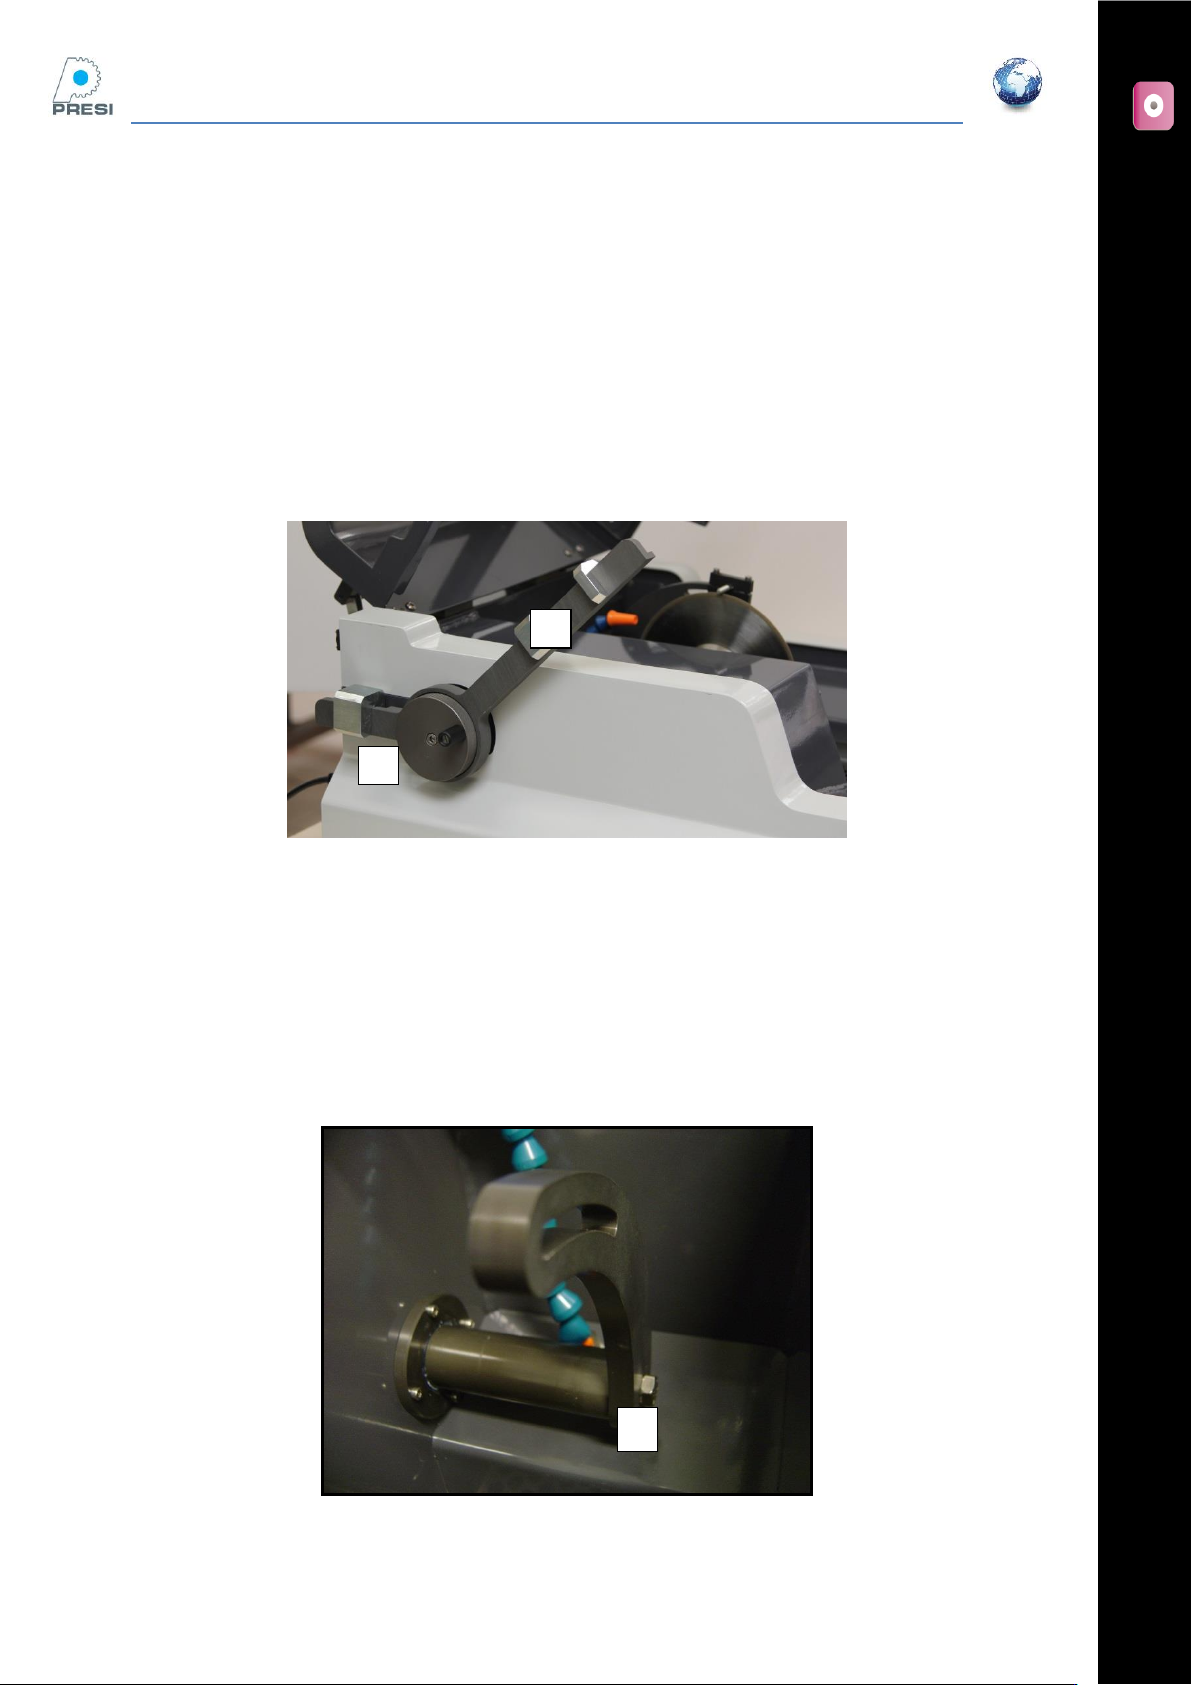
To move the arm from left to right or vice-versa, turn the wheel on the left hand side of
the machine. Move the wheel to locate the sample chuck on the desired cutting position.
Press « 0.00 » to reset (zero) the position if a precise slice thickness is needed (after a
second cut)
A : Counterbalanced arm
B : Micrometric lateral movement wheel
It is possible to set the arm position by unscrewing in « A », set the position, and tight
the screw when in position. This procedure allow you to set the end stroke of the arm.
A
A
B