Flexicut 英文 操作说明书.pdf - 第24页
FL E XIC UT U se r' s G ui de Version 2 23 How to use the arm Before starting th e cutting cycle (hood o pen), it is p ossible to move the arm equ ipped with a sample chuck, in order to present the material to cut u…
FLEXICUT User's Guide
Version 2
22
Flexicut mode (no table installed)
In this mode, the machine is a precision micro-cutter.
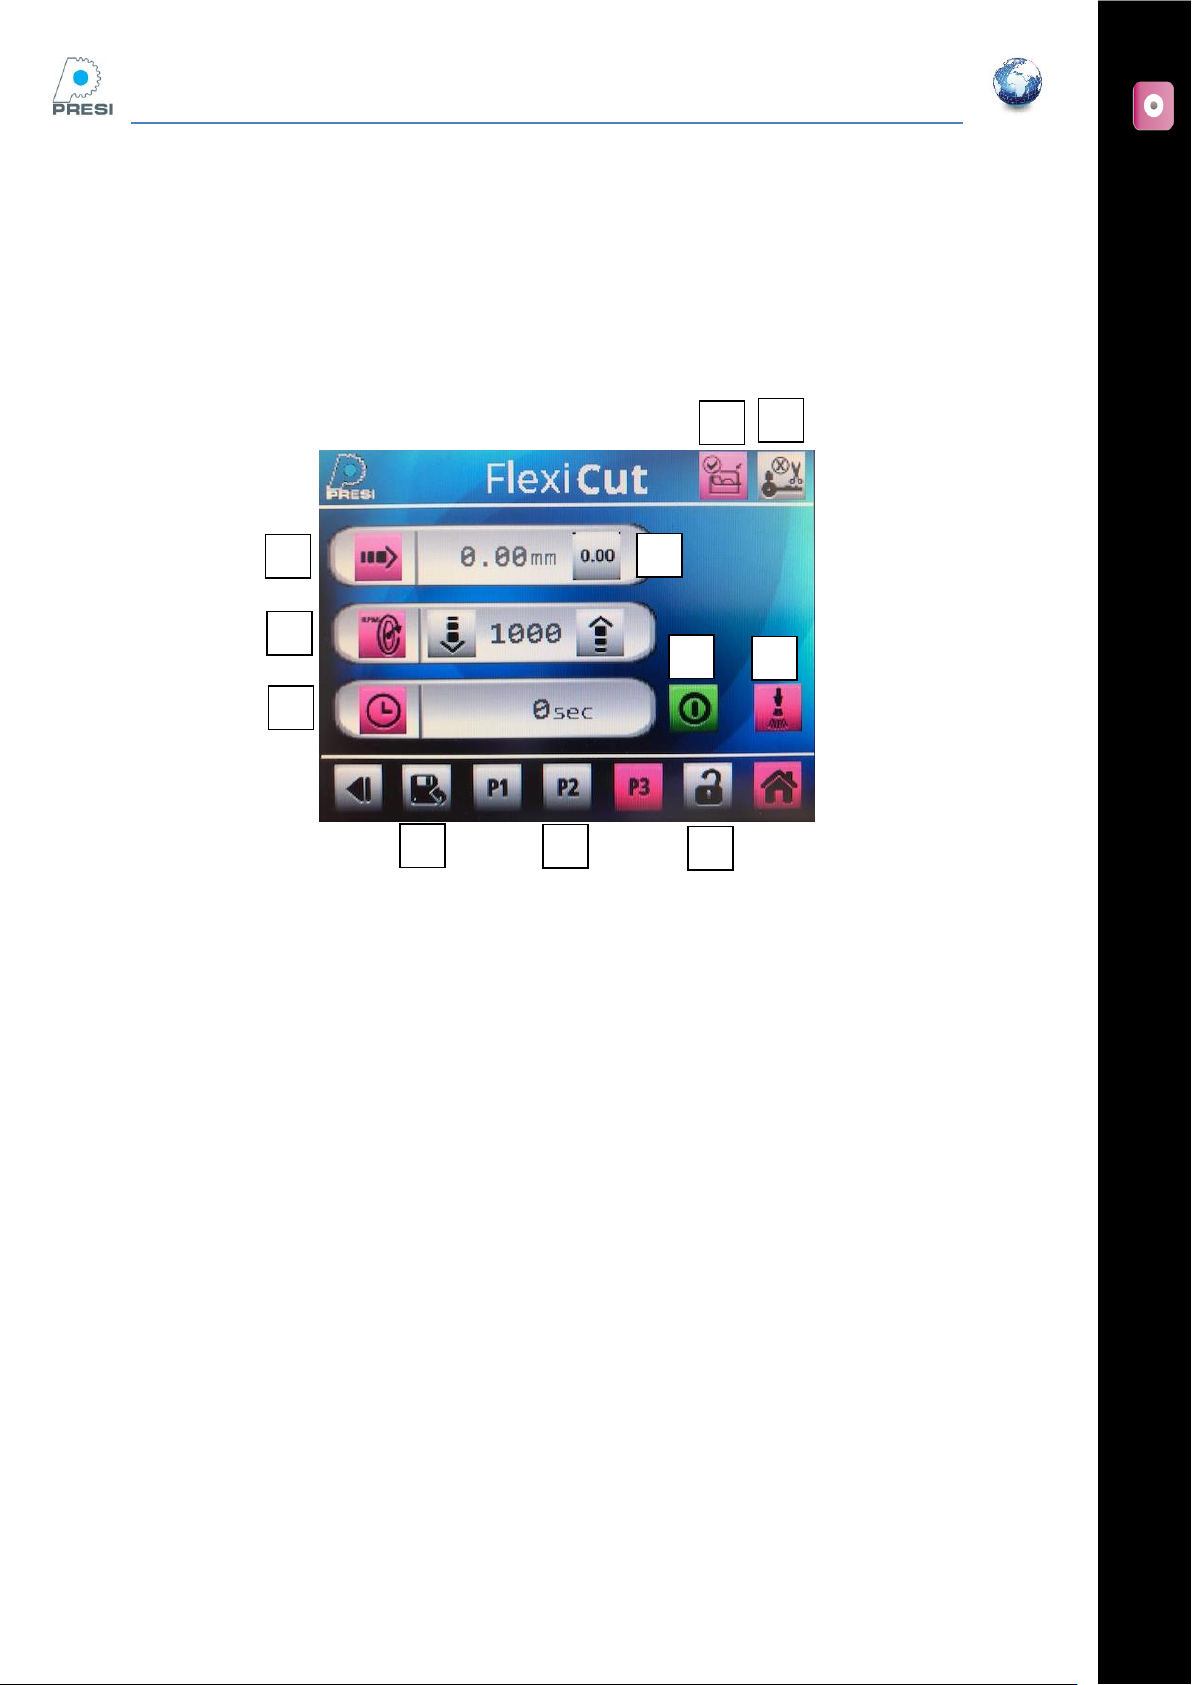
Introduction to the precision cutting page
A : micrometric adjustment of the arm;
B: Reset the field
C : Wheel speed (press the field to enter a value, or press the up/down arrows)
D : Cutting time
E : Limit switch
- Pink icon : cutting in operation or ready to use
- Grey icon: machine is stopping or cannot start
F : Hood
- Pink Icon : The hood is closed, machine is ready to use
- Grey Icon : The hood is open. Must be closed to start the cycle
G : Cooling
- Press on icon to activate the pump (pink). For a dry cut, de-activate the pump (grey icon).
H : P1,P2,P3, 3 programs available.
- A short press will select the program. The selected program is pink
I : To save a program, push ‘I’ then on the program where you went to save your parameters
J : press this icon to freeze the screen. Push again to release it.
K : Start / Stop
A
B
C
D
E
F
G
H
J
K
I
FLEXICUT User's Guide
Version 2
23
How to use the arm
Before starting the cutting cycle (hood open), it is possible to move the arm equipped with a sample chuck,
in order to present the material to cut using the wheel in the required position.
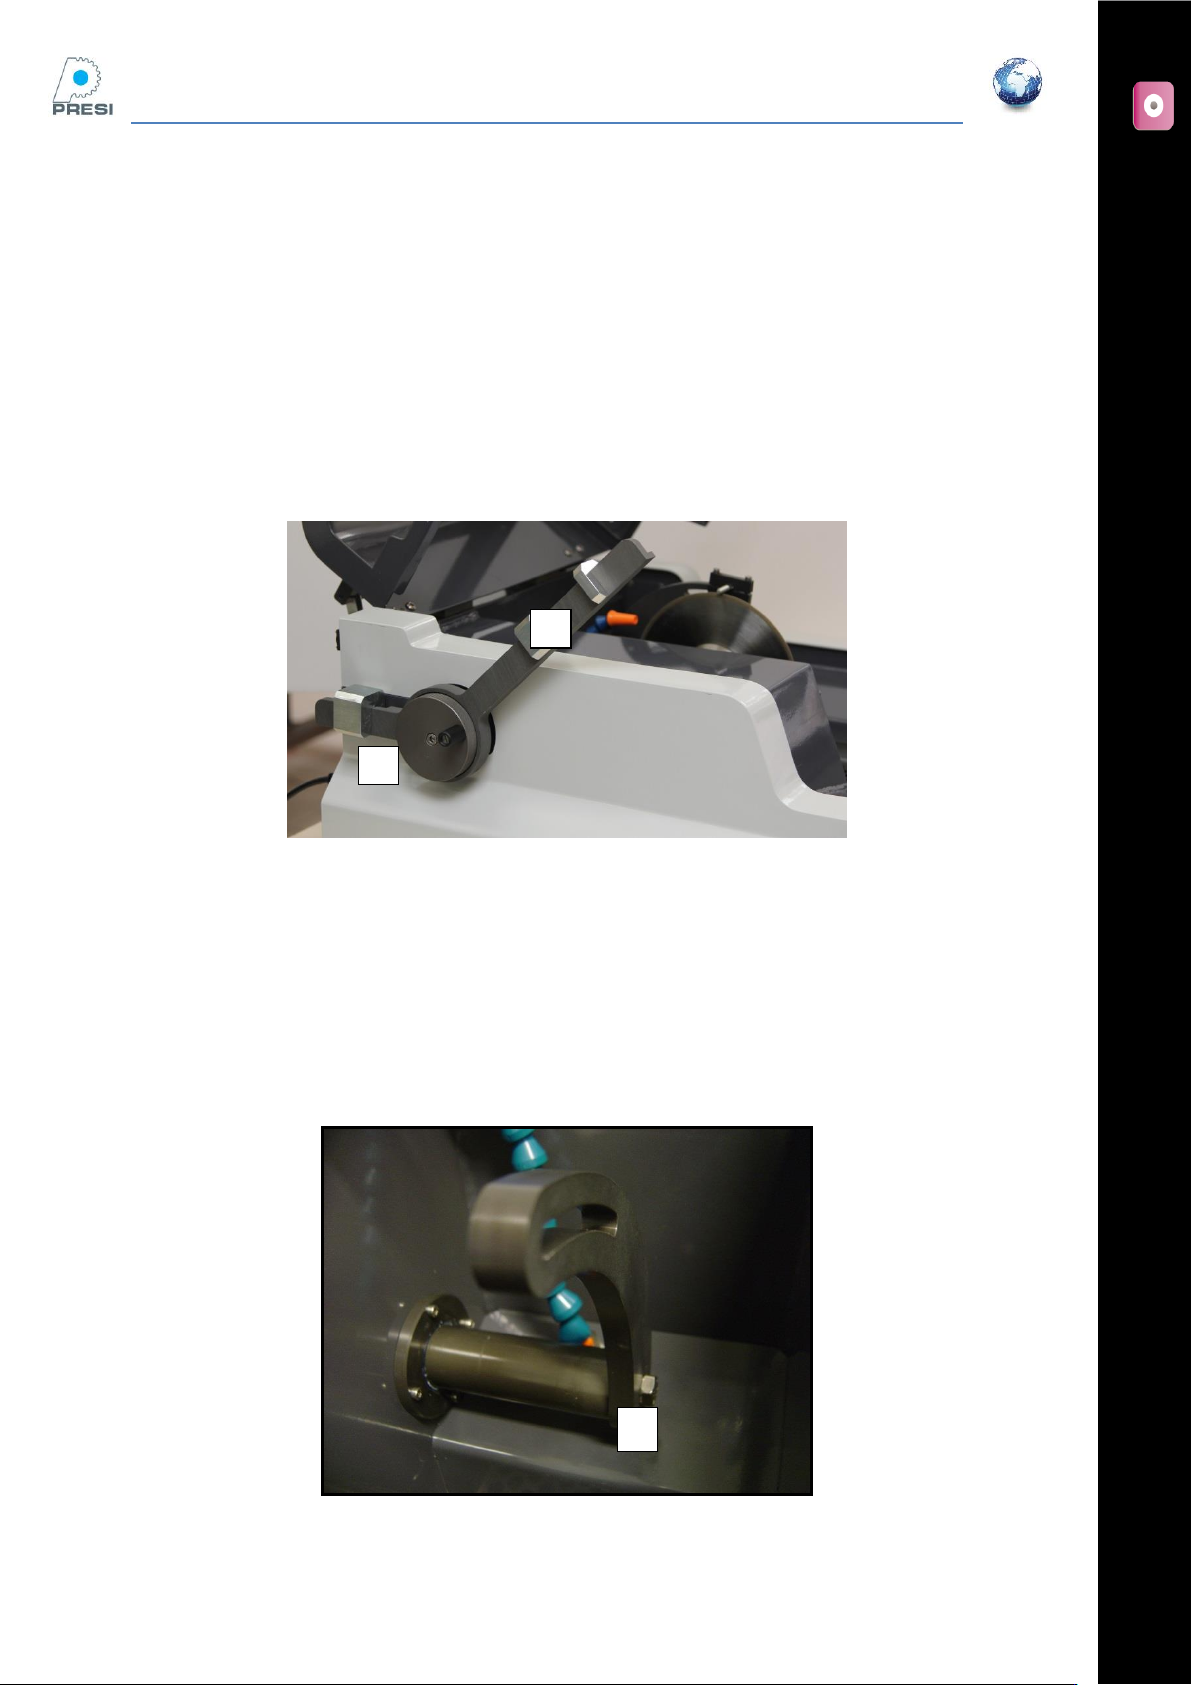
To move the arm from left to right or vice-versa, turn the wheel on the left hand side of
the machine. Move the wheel to locate the sample chuck on the desired cutting position.
Press « 0.00 » to reset (zero) the position if a precise slice thickness is needed (after a
second cut)
A : Counterbalanced arm
B : Micrometric lateral movement wheel
It is possible to set the arm position by unscrewing in « A », set the position, and tight
the screw when in position. This procedure allow you to set the end stroke of the arm.
A
A
B
FLEXICUT User's Guide
Version 2
24
Cutting speed
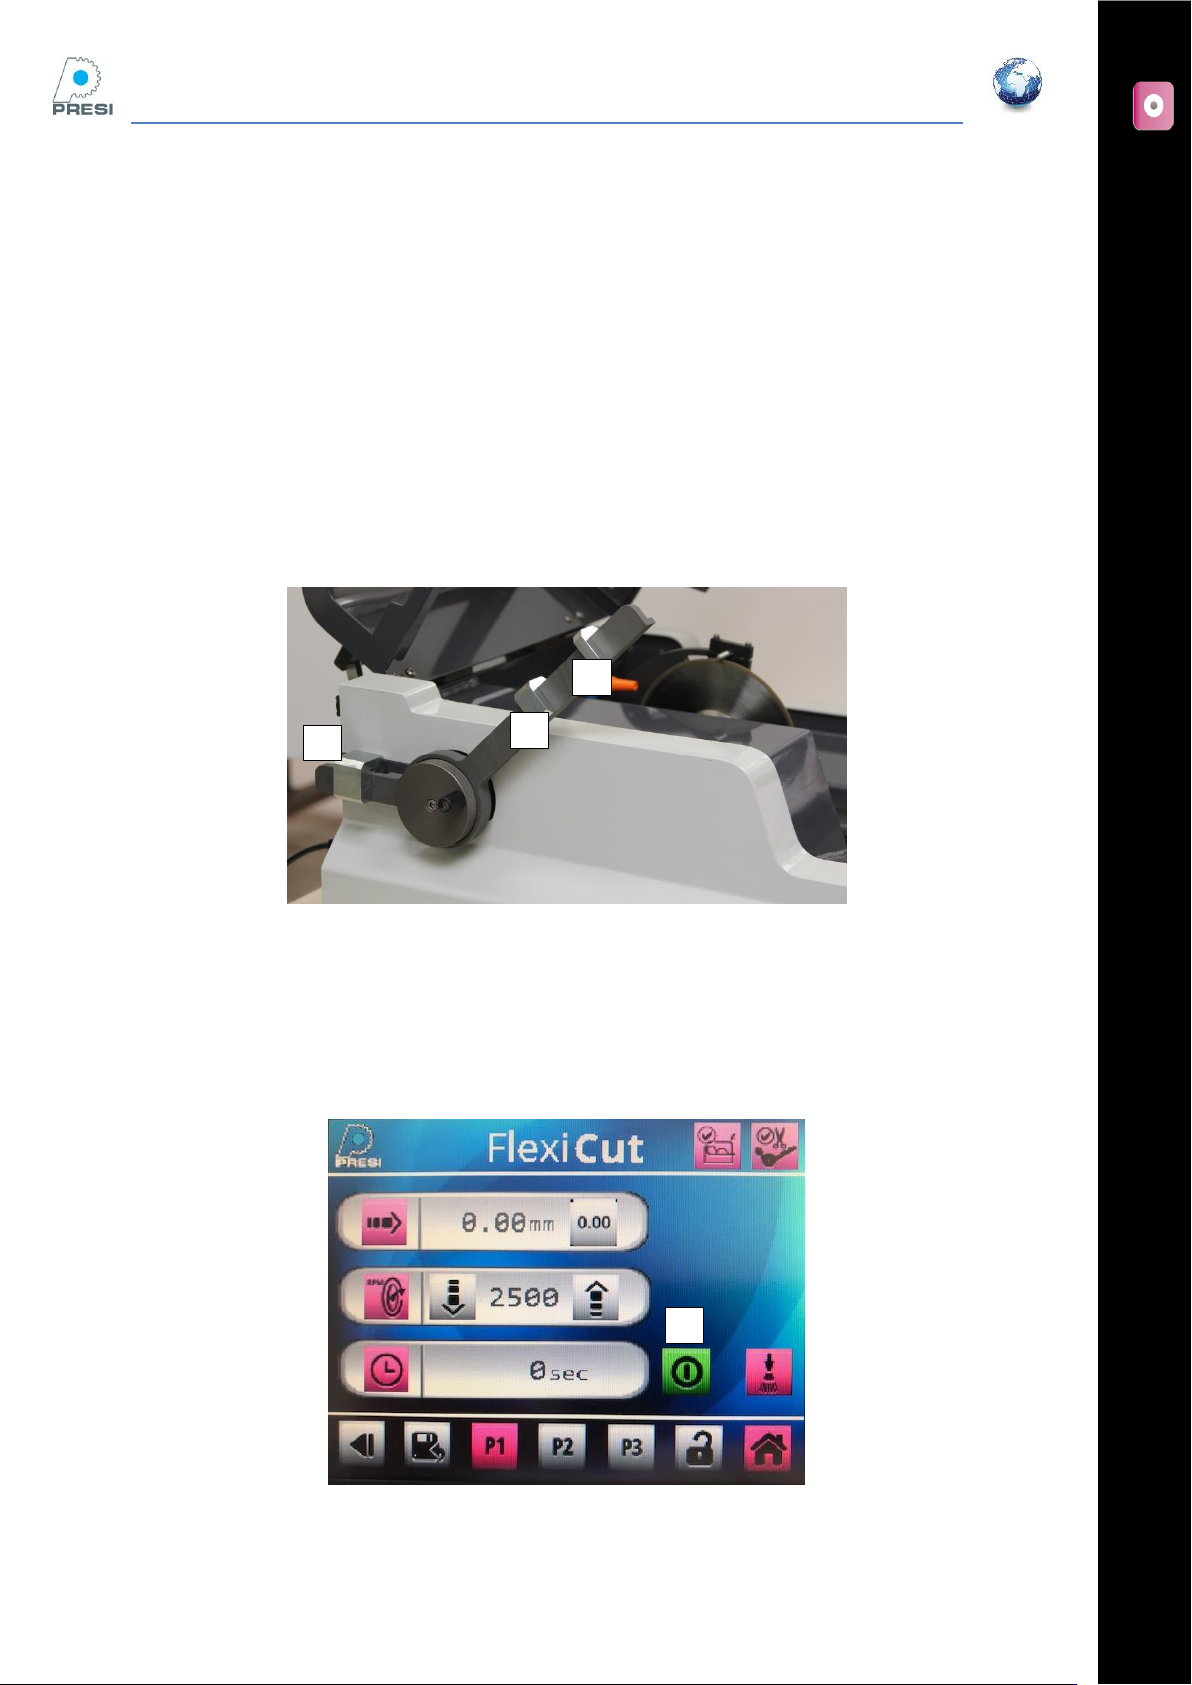
The Flexicut benefits from 3 movable weights (50/100/250g), on the action arm, left hand side of the
machine. Moving the weight along the arm will change the load on the cut, and consequently, change the
cutting speed.
The chucks and vices are mounted on the swinging arm.
Move one weight onwards and one backwards, until you find the balance position
When balanced, move the third weight onwards, to increase the load
The load depends on the distance between the 2 front weight.
Mount the cutting wheel and set the chuck position.
Set the balance between the front and back weight.
« A » (250g) must be placed behind the arm axis. »B” (100g), in front of the arm axis. “A” and “B” are used to
find the correct balance (the sample to cut must be on the arm). “C” (50g), is used to set a load on the arm.
The cutting speed will be linked to this load.
Cutting cycle
A
B
C
A