SMEDBFeeder_UserGuide_EN.pdf - 第40页
2-14 SM-Series SME DB Tape Feeder User's Manual 2.2.4.1. Adjusting Vinyl Guide Position It is possible to set th e vinyl guide depending o n the pocket s ize of the tape to be used. Move the (2) vinyl guide while p …
2-13
Operation of the Feeder
2.2.4. Locking
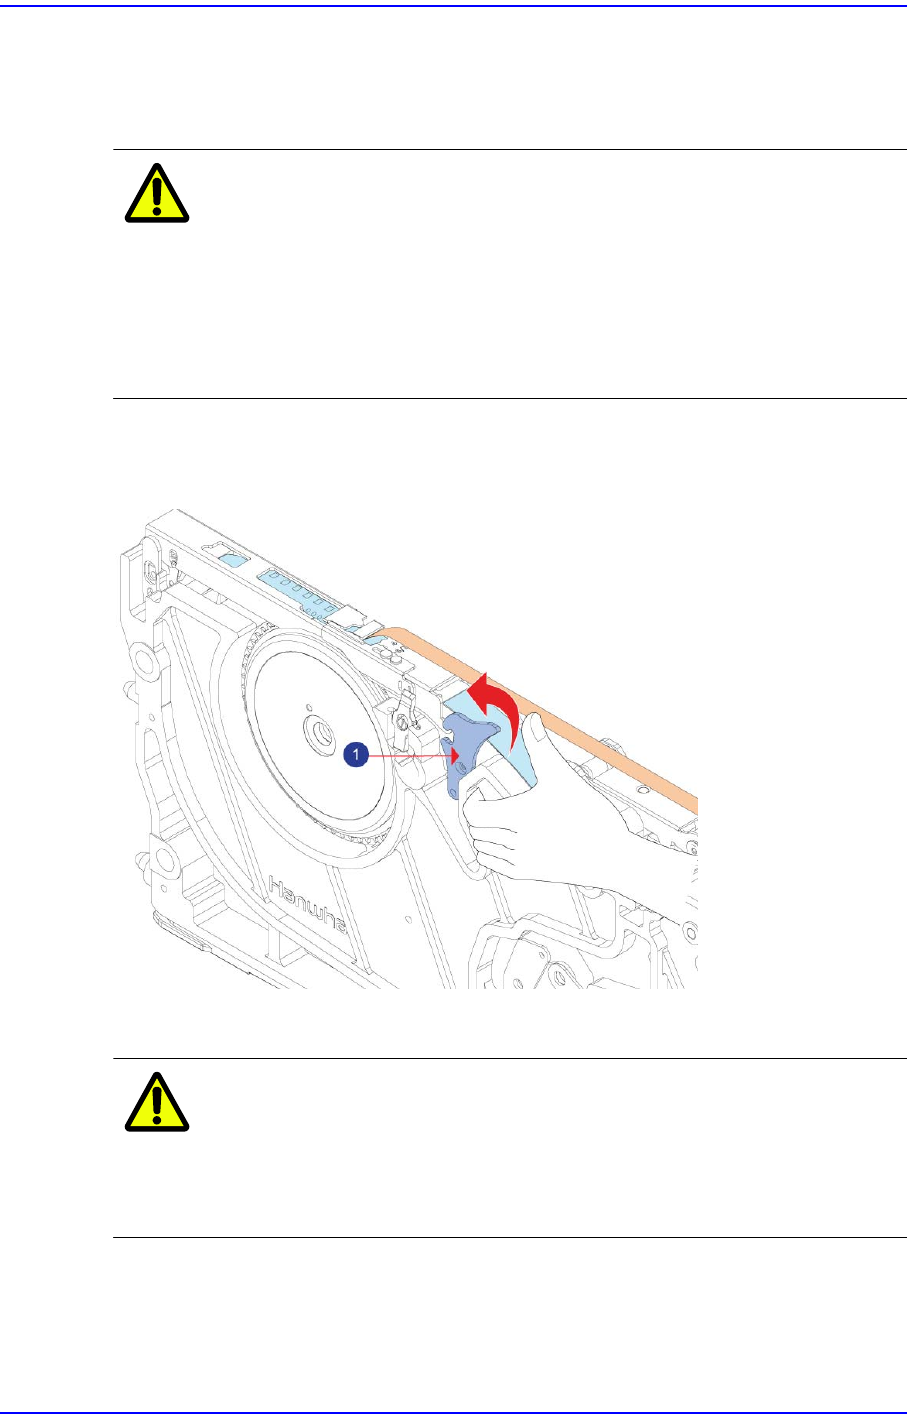
Move the tape guide down after having sprockets mesh with the transfer slots of the carrier
tape and check that the carrier tape has been properly meshed with the sprockets.
Caution Before lowering the tape guide, check whether a chip or
foreign material exists between the tape guide and main
body.
After checking whether sprockets mesh with the transfer
slots of the carrier tape, check whether the carrier tape is
transferred properly.
Ensure that the tape guide and the locker are properly locked.
Figure2.16 Checking the locking state of the tape guide and the locker
1: Locker
Caution If the tape guide and locker are not firmly secured, tape may
not be supplied or may collide with the main frame.
Therefore, be sure to check that the tape guide is secured
properly.
2-14
SM-Series SME DB Tape Feeder User's Manual
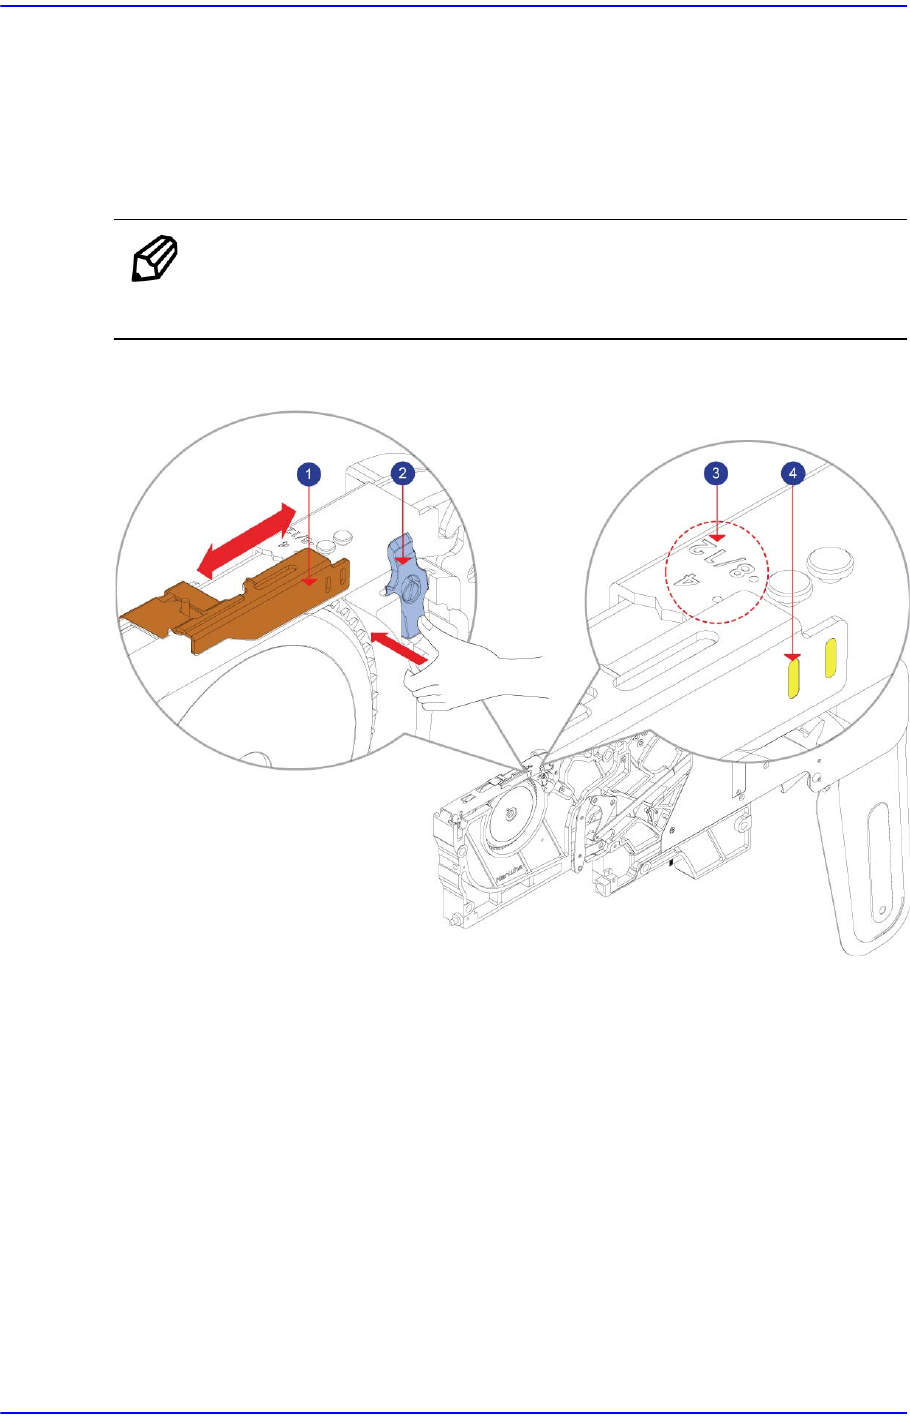
2.2.4.1. Adjusting Vinyl Guide Position
It is possible to set the vinyl guide depending on the pocket size of the tape to be used.
Move the (2) vinyl guide while pressing the locker by hand and set the (4)vinyl guide
home of the (1) vinyl guide locker. Then release the force that presses the vinyl guide
locker to secure the vinyl guide.
Note Referring to the (3) pitch indicated on the tape guide, move the vinyl
guide to set the pitch.
Figure2.17 Adjusting Vinyl Guide Position
1: Vinyl Guide
2: Vinyl Guide Locker
3: Pitch
4: Vinyl Guide Groove
2-15
Operation of the Feeder
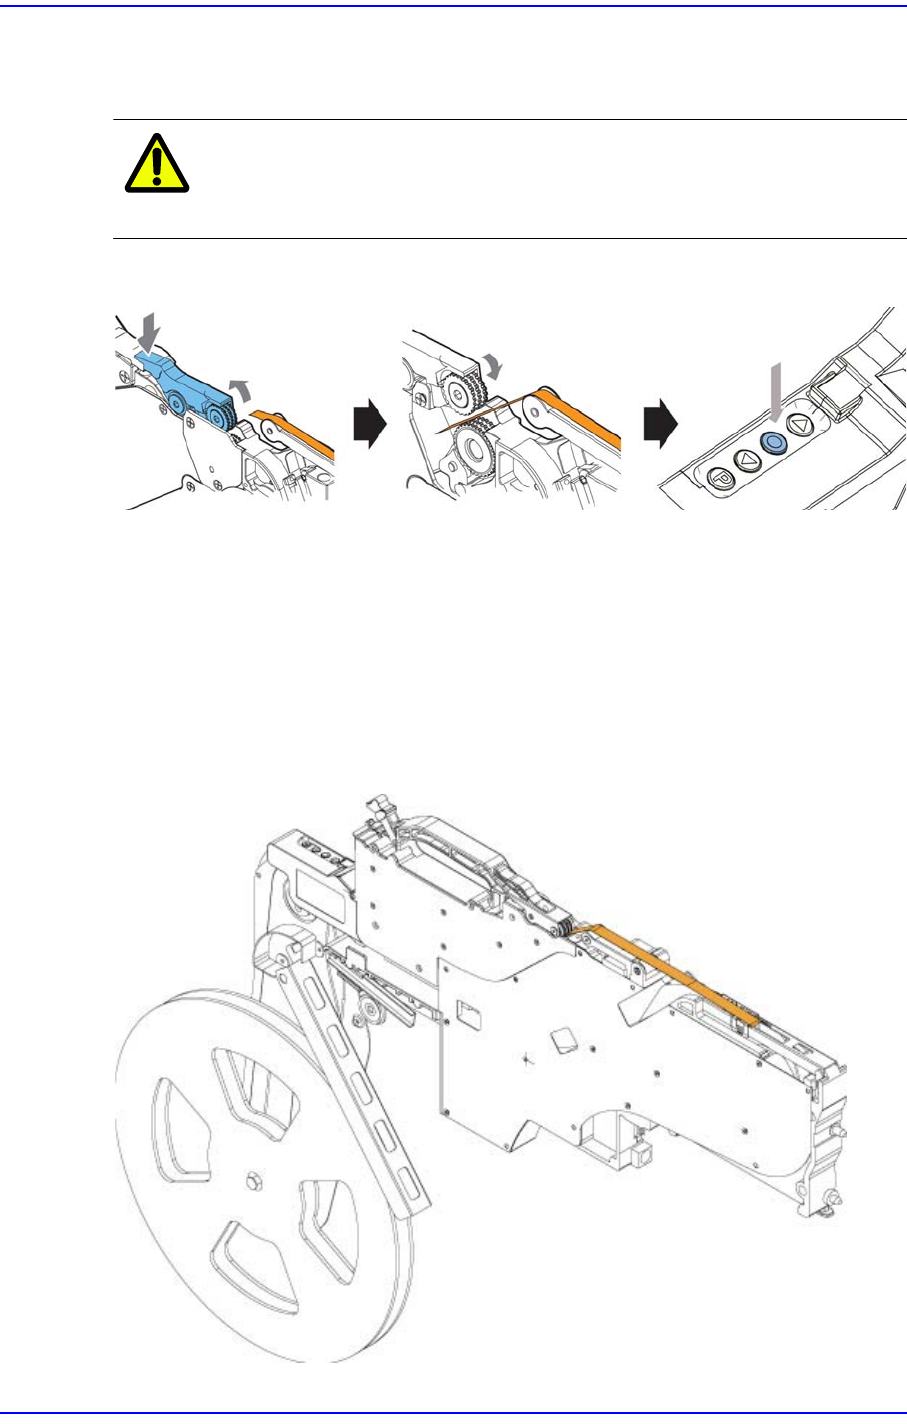
2.2.5. Fixing the Vinyl Tape
Secure the vinyl tape that passed through the tape guide to the drain gear.
Caution When securing the vinyl tape to the drain gear, exercise
care so that the vinyl tape is not twisted.
Figure2.18 Secure the vinyl tape of the 12~88mm tape feeder
1) After placing the vinyl tape discharged from the vinyl guide slit over the drain
tensioner, press the drain handle to create a gap between the drain handle and drain
gear.
2) Insert the vinyl tape through the gap between the drain handle and drain gear.
3) Release the force pressing the drain handle to secure the vinyl tape and check that the
vinyl tape on the tensioner is not twisted. Then pressing the home button will stop the
vinyl tape discharge motor after pulling the vinyl tape until certain tension is formed
on the vinyl tape by driving the vinyl tape discharge motor.