00196449-04_UM_FCCS_digital_DE_EN.pdf - 第58页
3 Camera Calibration in SW 605.xx Stations 3.1 Preparations 58 Operating Manual / Bedienungsanleitung Camera Calibration FCCS digital Kamerakalibrierung FCCS digital 04/2020 Fig.13: CALIBRATE ILLUMINATION ► Open CALIBRA…
3 Camera Calibration in SW 605.xx Stations
3.1 Preparations
Operating Manual / Bedienungsanleitung Camera Calibration FCCS digital Kamerakalibrierung FCCS digital 04/2020 57
3 Camera Calibration in SW 605.xx Stations
3.1 Preparations
NOTICE
Dry run
To ensure the successful camera calibration for the complete line, it is recommended to
perform a dry-run of the camera calibration without saving the calibration values.
This is necessary, because aborting the calibration will lead to different illumination values
for the cameras in the line. The reliable detection of components throughout the whole line
cannot be ensured until the camera in question has been replaced and all cameras in the
line have been re-calibrated.
To ensure that customer setups do not need to be changed, a black calibration tool carrier is
moved into PCB conveyor 1, is optically centered and clamped into place, the presence of the
white balance calibration tools is checked and illumination calibration (white balance process) is
started.
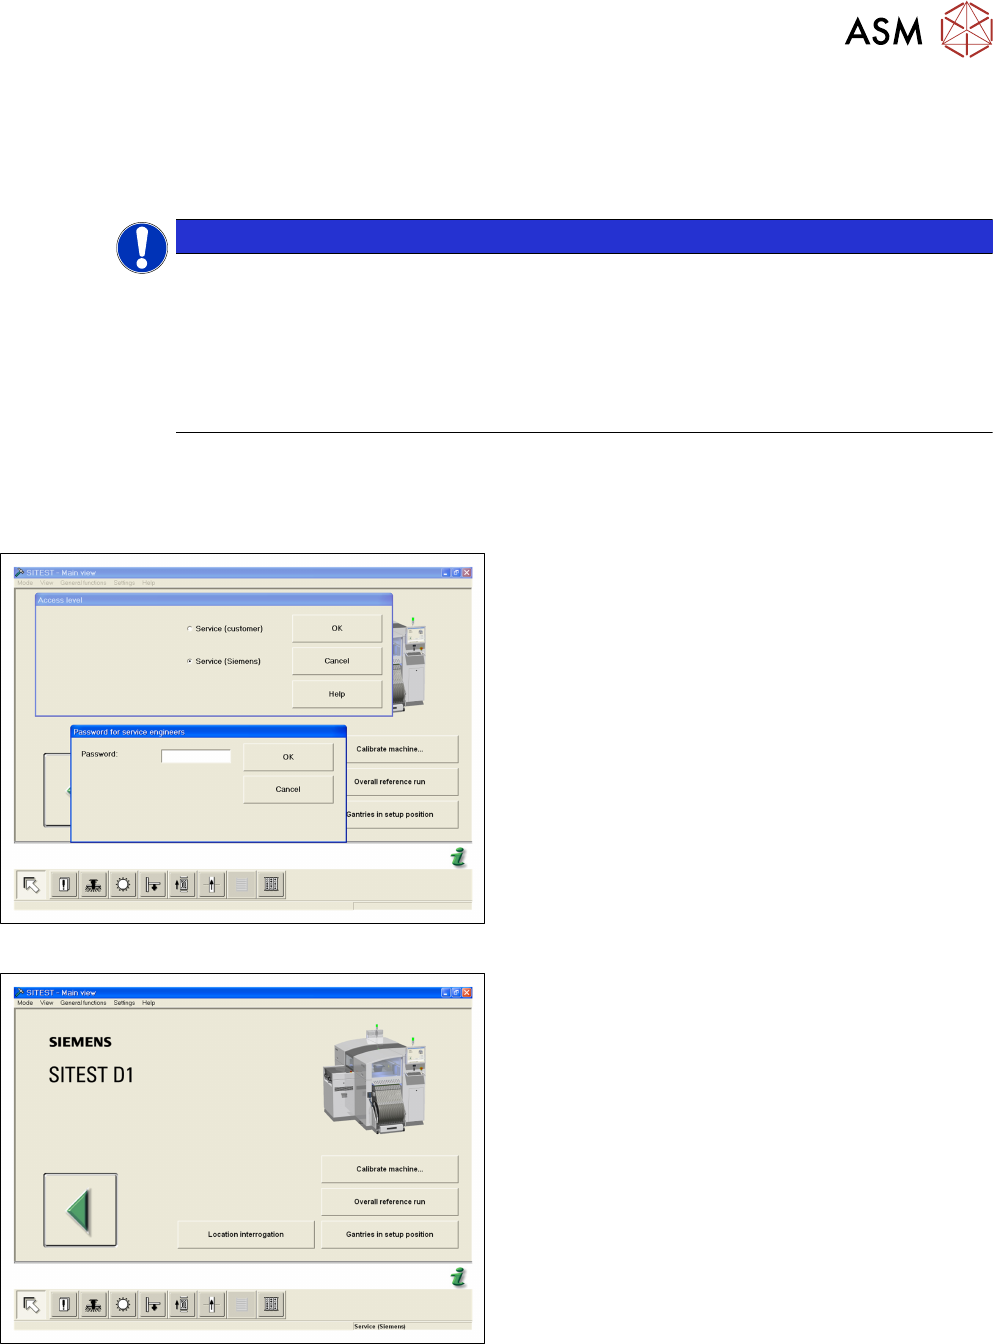
Fig.11: Login SITEST
► Start the SITEST program.
► Log in via the service (SIPLACE) password.
Fig.12: Start OVERALL REFERENCE RUN
► Start the OVERALL REFERENCE RUN.
3 Camera Calibration in SW 605.xx Stations
3.1 Preparations
58 Operating Manual / Bedienungsanleitung Camera Calibration FCCS digital Kamerakalibrierung FCCS digital 04/2020
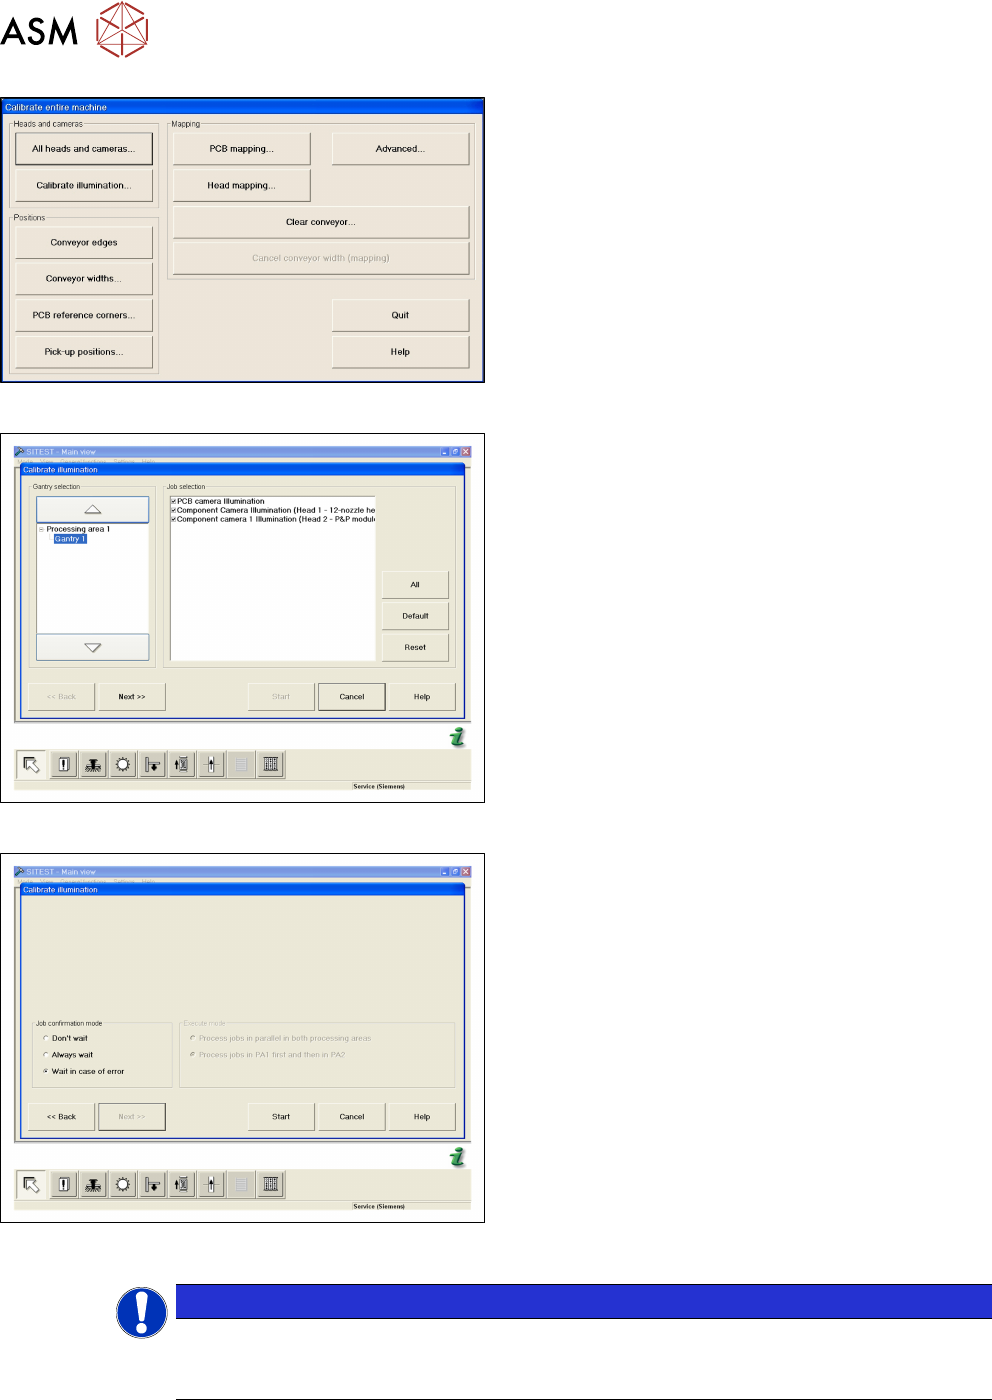
Fig.13: CALIBRATE ILLUMINATION
► Open CALIBRATE ILLUMINATION in the Cali-
brate entire machine menu.
Fig.14: Select cameras and placement areas
► Select the cameras to be calibrated and the rel-
evant placement areas.
► Confirm the selection with NEXT.
Fig.15: Select START
► Select the execution properties during the cali-
bration.
► Confirm the selection with START.
► For the further steps, follow the instructions as
you are guided through the menu.
●
Setting the width adjustment
●
Checking the nozzle configuration
●
Inserting the carrier with the white standard
NOTICE
Nozzle configuration
You can leave the SW wizard at any time in order to pick up the required nozzle types via
the single menus.
3 Camera Calibration in SW 605.xx Stations
3.2 Calibration Sequence in SW 605.xx
Operating Manual / Bedienungsanleitung Camera Calibration FCCS digital Kamerakalibrierung FCCS digital 04/2020 59
3.2 Calibration Sequence in SW 605.xx
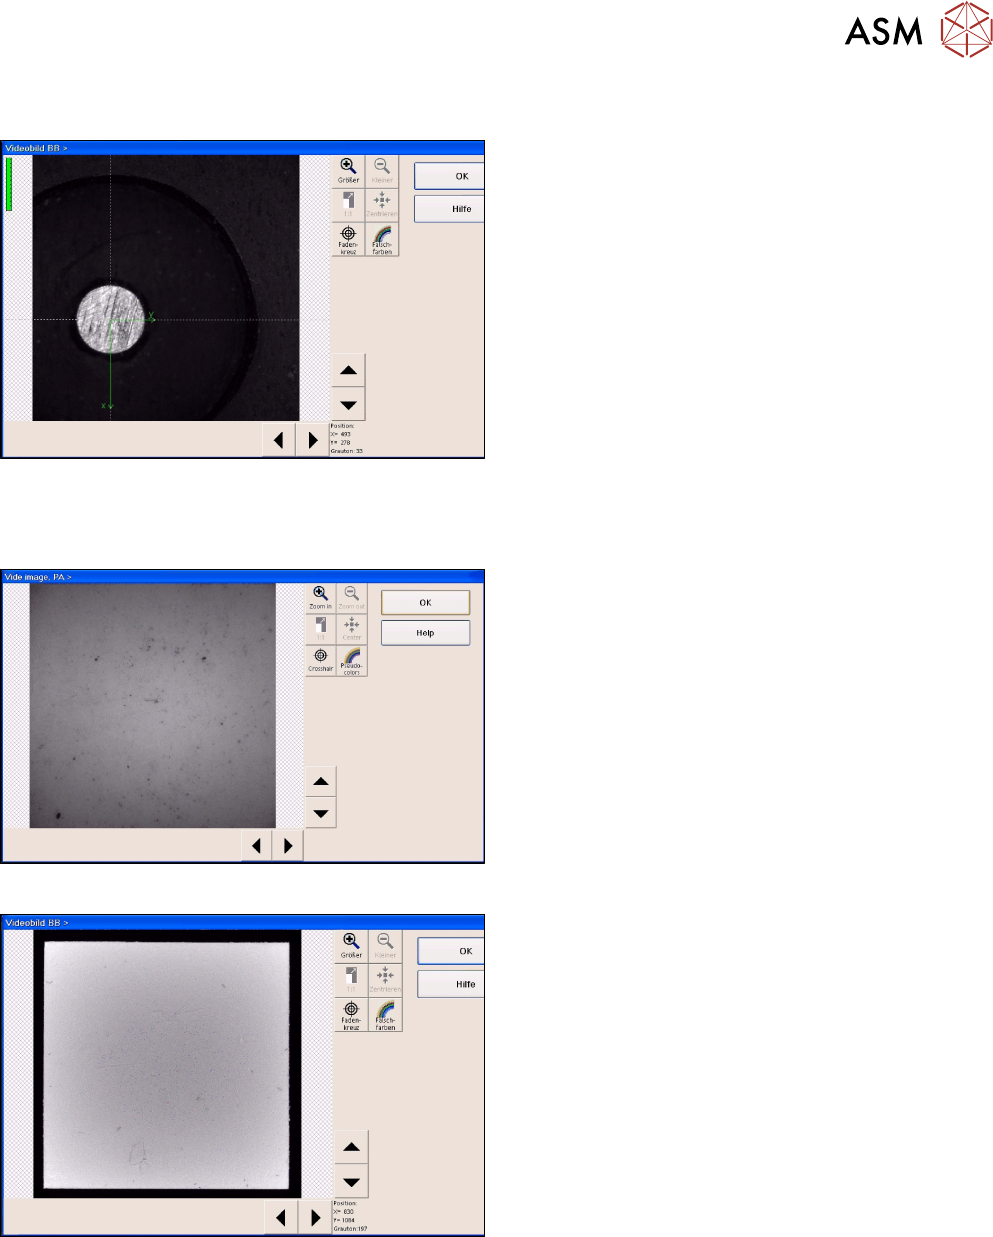
Fig.16: Position recognition of calibration tool carrier
► The PCB camera centers the 3 fiducials for posi-
tion recognition of the calibration tool carrier.
► The PCB camera is positioned to check the presence of the calibration components. Fiducial
recognition determines whether all the calibration tools are present.
Fig.17: Illumination calibration for PCB camera
► Illumination calibration is now performed for the
PCB camera. (see diagram of standard PCB
camera)
► Tray position recognition is performed again.
► The gantry placement head picks up its appro-
priate calibration tool for the component camera.
Fig.18: Video image of the component camera (C&P6 as an
example)
► The calibration tool is placed under or above the
respective component camera, the balance pro-
cess is performed and the calibration tool is re-
turned to where it was picked up from.
► The calibration procedure is repeated for the
cameras of the 2nd gantry in the placement area
or for the 2nd placement head of the gantry con-
cerned.
3.3 Final Work
► Confirm the finalization of the calibration process. The carrier with the white standards will be
transported to the output conveyor.
► Remove the tray and close SITEST.