CP-842E-842ME Operator's Guide-Preliminary-CP842-10E.pdf - 第44页
4. Set the feeder on the pallet. Be sure the guide ridge on the bottom of the feeder fits properly into the slot on the pallet. Push the feeder forward and then push down to clamp the feeder in place. In the case of 13, …
Feeder Settings
Refer to the production program device data so that no mistakes are made
when feeders are loaded.
Procedure
WARNING
Be sure to turn the 200V power off before performing this
procedure.
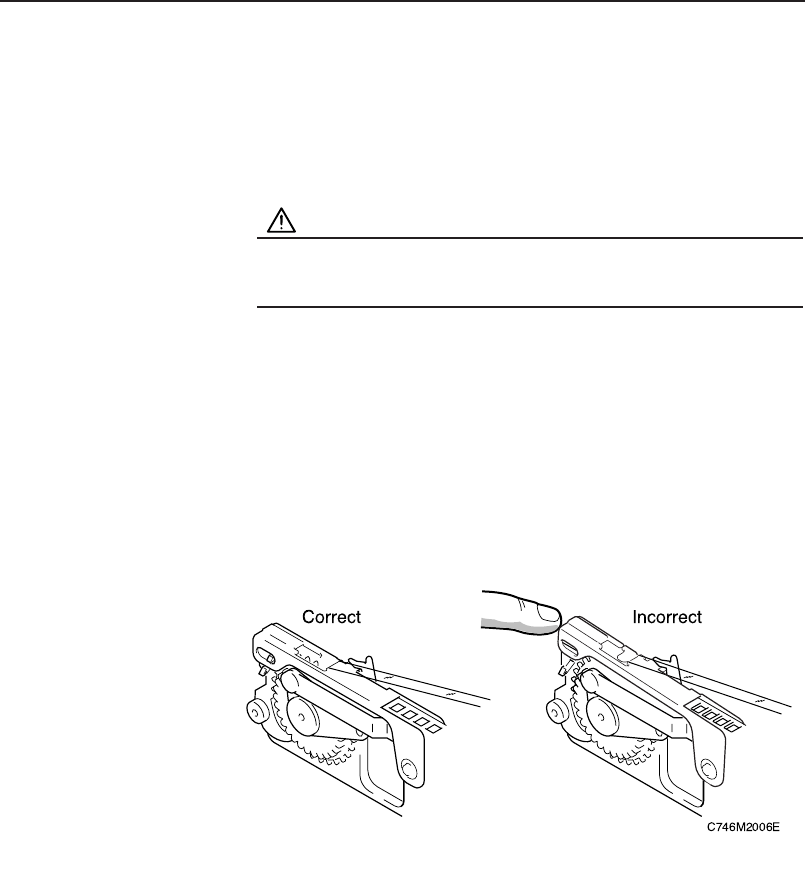
1. Verify that the tape guide is not deformed.
2. Place the various part tapes in their dedicated feeders.
If a part tape is placed in the wrong feeder, the tape guide may not close
properly.
3. Check that there are no foreign objects in the pallet groove or on
the base of the feeder, and use a cloth to wipe the surfaces
clean as required.
Chapter 3: Preparing for Production
Preliminary
3-13CP-842E/842ME Operator’s Guide
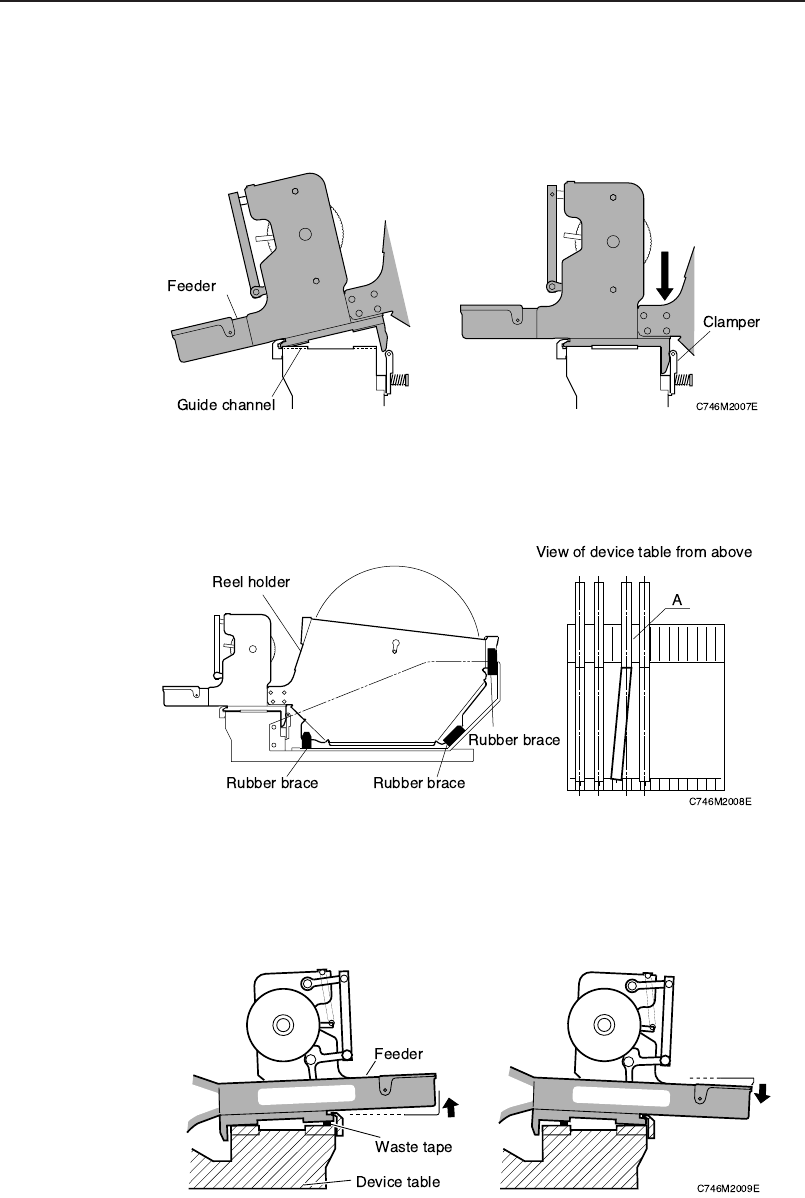
4. Set the feeder on the pallet. Be sure the guide ridge on the
bottom of the feeder fits properly into the slot on the pallet. Push
the feeder forward and then push down to clamp the feeder in
place.
In the case of 13, 15-inch parts reels, fix the reel holder using the steady braces
on the pallet (3 places). Ensure that the feeder itself and the reel holder are in
the same device slot, as failure to set correctly (see feeder A below) can cause
feeder errors.
5. When setting a feeder on a device table, be sure that there is no
foreign matter (waste tape, etc) between the feeder and the
device table. Remove any foreign matter which has adhered to
the device table grooves or to the bottom of the feeder.
Chapter 3: Preparing for Production
Preliminary
3-14 CP-842E/842ME Operator’s Guide

Pallet Settings <Option for CP-842ME>
Procedure for Pallet Unloading
1. Align the height of the PCU forks (at the end of the PCU) with
the fork slots on the machine.
Turn the handle and raise the upper section of the PCU.
Note: Use the label next to the handle to determine the height of the PCU forks.
Adjust the height so that the base of the moveable plate is within ±10 mm
of the label center.
2. Push the PCU to insert the forks into the machine, then clamp
it. Select the [Cange Pallet] command from the [Main] screen,
then press the [Stage1 Clamp].
Note: The setting of a pallet on D1 (Stage 1) is described here.
3. Close the rear door and select the [Stage1 Start] command,
then press the START button.
The D-axis pallet moves to the change position and is unclamped.
Chapter 3: Preparing for Production
Preliminary
3-15CP-842E/842ME Operator’s Guide