00900057-02_IM_Performance_Monitor_2.1_EN.pdf - 第20页
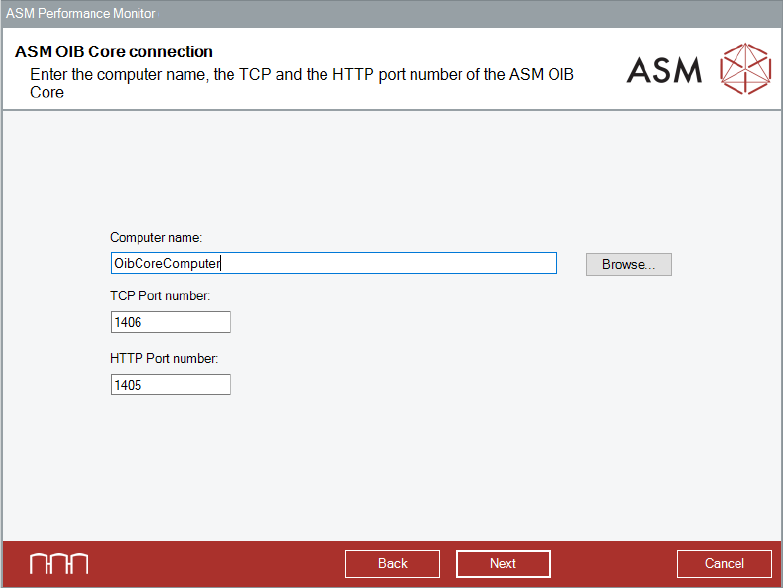
ASM Performance Monitor 2.1 / Installation Manual 01/2021 Edition 20 4.5 Specifying ASM OIB Core Connection Figure 4-9: ASM OIB Core connec tion dialog ► Enter the computer name and port numbers of the computer on whi ch…
ASM Performance Monitor 2.1 / Installation Manual 01/2021 Edition
19
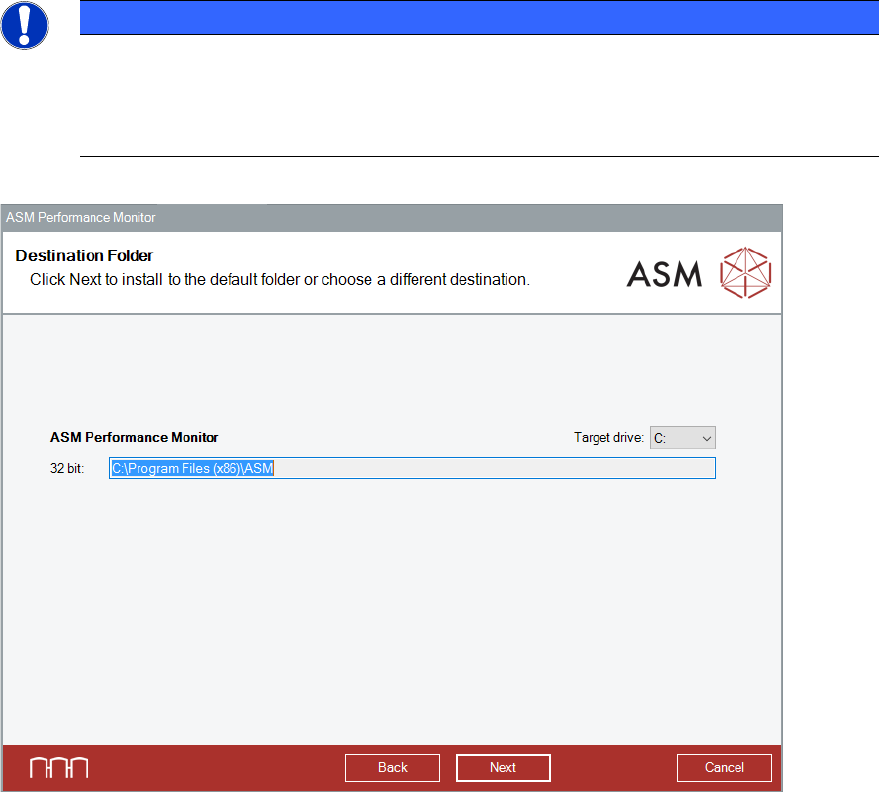
4.4 Selecting Destination Folder
NOTICE
Location of the database
This selection only affects the installation drive of the package. If you want to change the
location of the APMFactory database or its backup files, you must click the checkbox
displayed later to change the database settings.
Figure 4-8: Destination Folder dialog
► Select the drive in which you want to install the package.
► Click the Next button to continue the installation procedure.
The ASM OIB Core connection dialog is displayed.
ASM Performance Monitor 2.1 / Installation Manual 01/2021 Edition
20
4.5 Specifying ASM OIB Core Connection
Figure 4-9: ASM OIB Core connection dialog
► Enter the computer name and port numbers of the computer on which the ASM OIB Server
component is installed.
► Click the Next button.
The Connect to SQL server dialog is displayed.
ASM Performance Monitor 2.1 / Installation Manual 01/2021 Edition
21
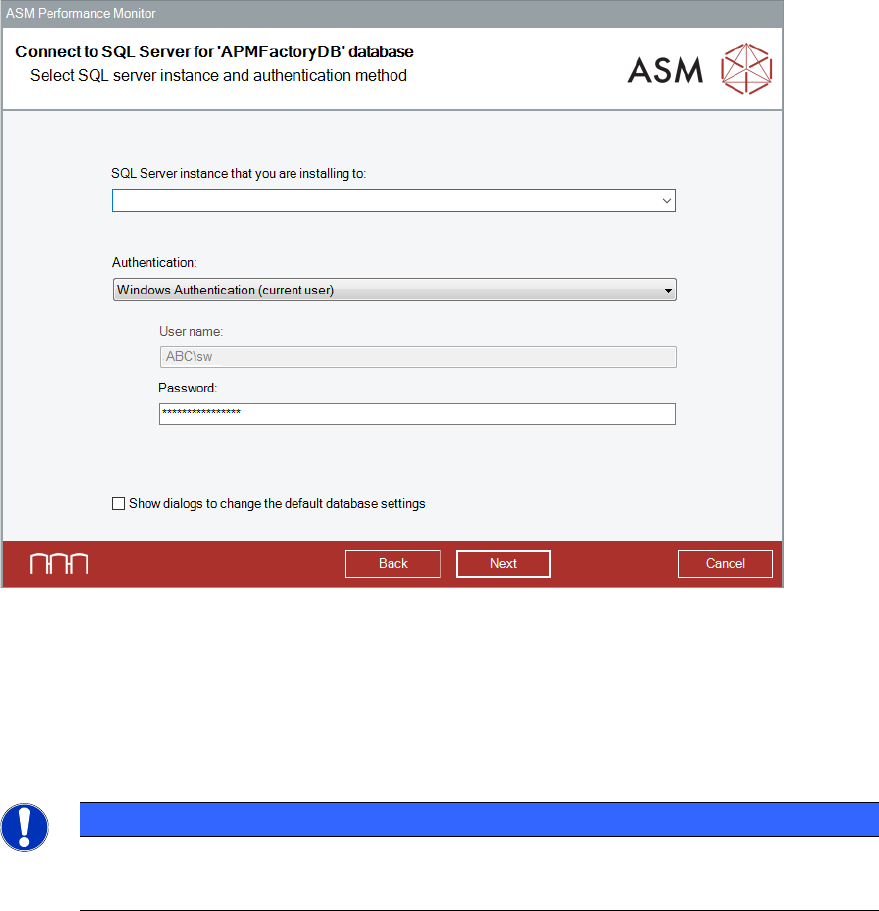
4.6 Connection to SQL Server for 'APMFactoryDB' Database
In the Connect to SQL Server dialog, you enter the information required to connect to the SQL
server and database.
If the check results in errors, error messages will be displayed and the setup cannot continue. The
setup can only continue after selecting another SQL server or after restoring the database in an
error-free state.
Figure 4-10: Connect to SQL Server for 'APMFactoryDB' database dialog
► Select the SQL Server instance that you are installing to: from the drop-down menu.
All locally installed SQL Server instances are listed.
► Select <Browse for more…> to select a remote SQL server for a remote installation.
The Browse for SQL Servers dialog is displayed.
NOTICE
Browser service enabled
Only SQL servers with browser service enabled are displayed.
Alternatively, you can edit the SQL Server instance that you are installing to: drop-down menu
and manually enter the path and the name.
► Select the desired authentication method from the Authentication drop-down list and enter the
required login parameters:
Windows Authentication (current user)
The currently logged in user name is automatically applied.
The operating system or, if present, the domain controller performs the authentication.