00900057-02_IM_Performance_Monitor_2.1_EN.pdf - 第42页
ASM Performance Monitor 2.1 / Installation Manual 01/2021 Edition 42 Figure 5-1: SQL Server Login di alog ► Select the SQL server in stance and the authentication met hod. Please refer to section 4.6 fo r detailed inform…

ASM Performance Monitor 2.1 / Installation Manual 01/2021 Edition
41
5 Installing Database on a Remote SQL Server
Optionally, the APMFactoryDB database that is created in section 4.14.1 can be installed on a
different computer than the ASM Performance Monitor server. The setup wizard will set up the
necessary account for ASM Performance Monitor. In this case the following requirements must be
met:
Requirements
– The SQL installation on the remote computer must be an SQL server edition. SQL Express
editions are not supported.
– The user account for the SQL server requires the Replace a process level token permission.
This is a Microsoft group policy. For further information, please refer to the following Microsoft
website: https://docs.microsoft.com/en-us/windows/security/threat-protection/security-policy-
settings/replace-a-process-level-token.
The SQL server does not need to run under the local system account.
– The APM_SSIS user must exist with identical passwords on both the computer where ASM
Performance Monitor is installed and the SQL server computer. On the computer where ASM
Performance Monitor is installed, the user must have local administrator rights. The APM_SSIS
user may be a domain user.
– Local administrator rights are also required for the account with which the installation is
performed on the SQL server computer.
– After the ASM Performance Monitor database has been installed, ASM Support Media must be
executed on the remote computer with the ASM Net – SQL Server Prerequisites – Apply
ASM SQL settings profile.
► Create a login for the APM_SSIS user on the remote SQL server computer by using the SQL
Server Management Studio with "sysadmin" rights.
► Create the SSISDB database as follows:
► Right-click on Integration Services Catalog.
► Select Create Catalog.
► Enter any password in the password fields.
► Start the installation as described in section 4.2 and follow the instructions until the SQL Server
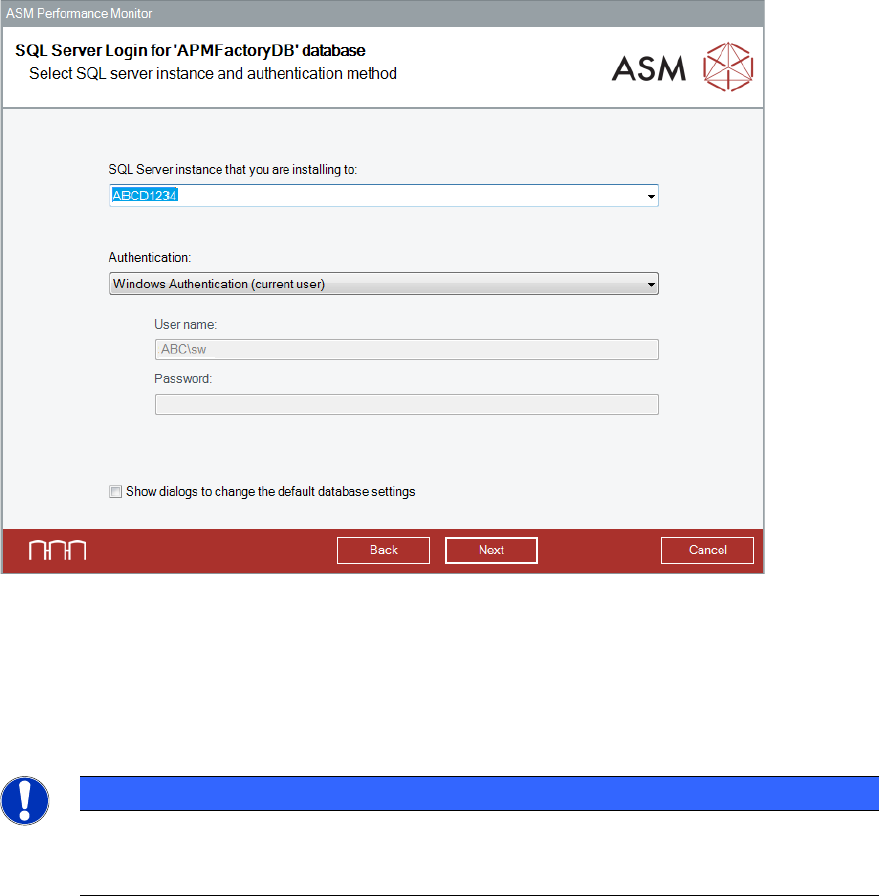
Login for 'APMFactoryDB’ Database dialog is displayed. The default database settings can
be changed in this dialog.
ASM Performance Monitor 2.1 / Installation Manual 01/2021 Edition
42
Figure 5-1: SQL Server Login dialog
► Select the SQL server instance and the authentication method. Please refer to section 4.6 for
detailed information.
► Click the Next button.
The installation proceeds as described in section 4.14ff.
NOTICE
When ASM Performance Monitor is installed along with a remote SQL server instance,
the installer will display warnings. These warnings serve as a reminder to check whether
the prerequisites have been fulfilled on the remote SQL system.

ASM Performance Monitor 2.1 / Installation Manual 01/2021 Edition
43
6 First Booting After Installation
After successful installation, ASM Performance Monitor WebSite shortcuts are available on the
desktop, in the Start menu and in the Windows taskbar. The Website URL is:
http://<webserver_hostname><port_no>/Asm.As.PerformanceMonitor
NOTICE
<webserver_hostname> is the server host on which WebApp is installed. The default
value for <port_no> is 80. If you want to use a different port number, the change has to
be done manually in the IIS and the URL.
6.1 Screen Resolutions
All ASM Performance Monitor screens are designed with 1366 x 768 pixels resolution. This is the
recommended solution. Additionally, following resolutions are supported:
– 1024 × 576 pixels
– 1152 x 648 pixels
– 1280 x 720 pixels
– 1600 x 900 pixels
– 1920 x 1080 pixels
– 2560 x 1440 pixels (3k)
– 3840 x 2160 pixels (4k)
6.2 Configuring ASM Performance Monitor
ASM Performance Monitor can be configured in the Menu of the ASM Performance Monitor
software.
To change any settings in the Menu, you must be logged in and have the needed user
authorization. The user authorization settings are configured in the OIB User Manager. For further
information, please refer to the OIB documentation, item no. [00900027-xx].
After installation, you must enable the lines to be monitored.