JO-072-006_w.pdf - 第106页
4-20 AKBEG-ID (20) After all measurements are completed, the following dialog box opens. When it is not necessary to change the pickup height data, press the [Cancel] button. T o change the pickup height data, enter the …
4-19
AKBEG-ID
(16) Press the [Space] key on the keyboard or the [X/Y Measurement] button
in the window to perform the measurement of the pickup position.
When this operation is performed, the master tape is automatically fed
to the next pickup position after the measurement is completed.
(17) After that, align the hole of the master tape with the center of the
crosshair again.
(18) Follow the same procedure as in (16) and perform the
measurement.
(19) The measurement is repeated the specied number of times.
The defaults (measurement counts) are specied as follows.
Table D6
Models Measurement Counts
G*-0808 10 times
G*-12160 or more 9 times
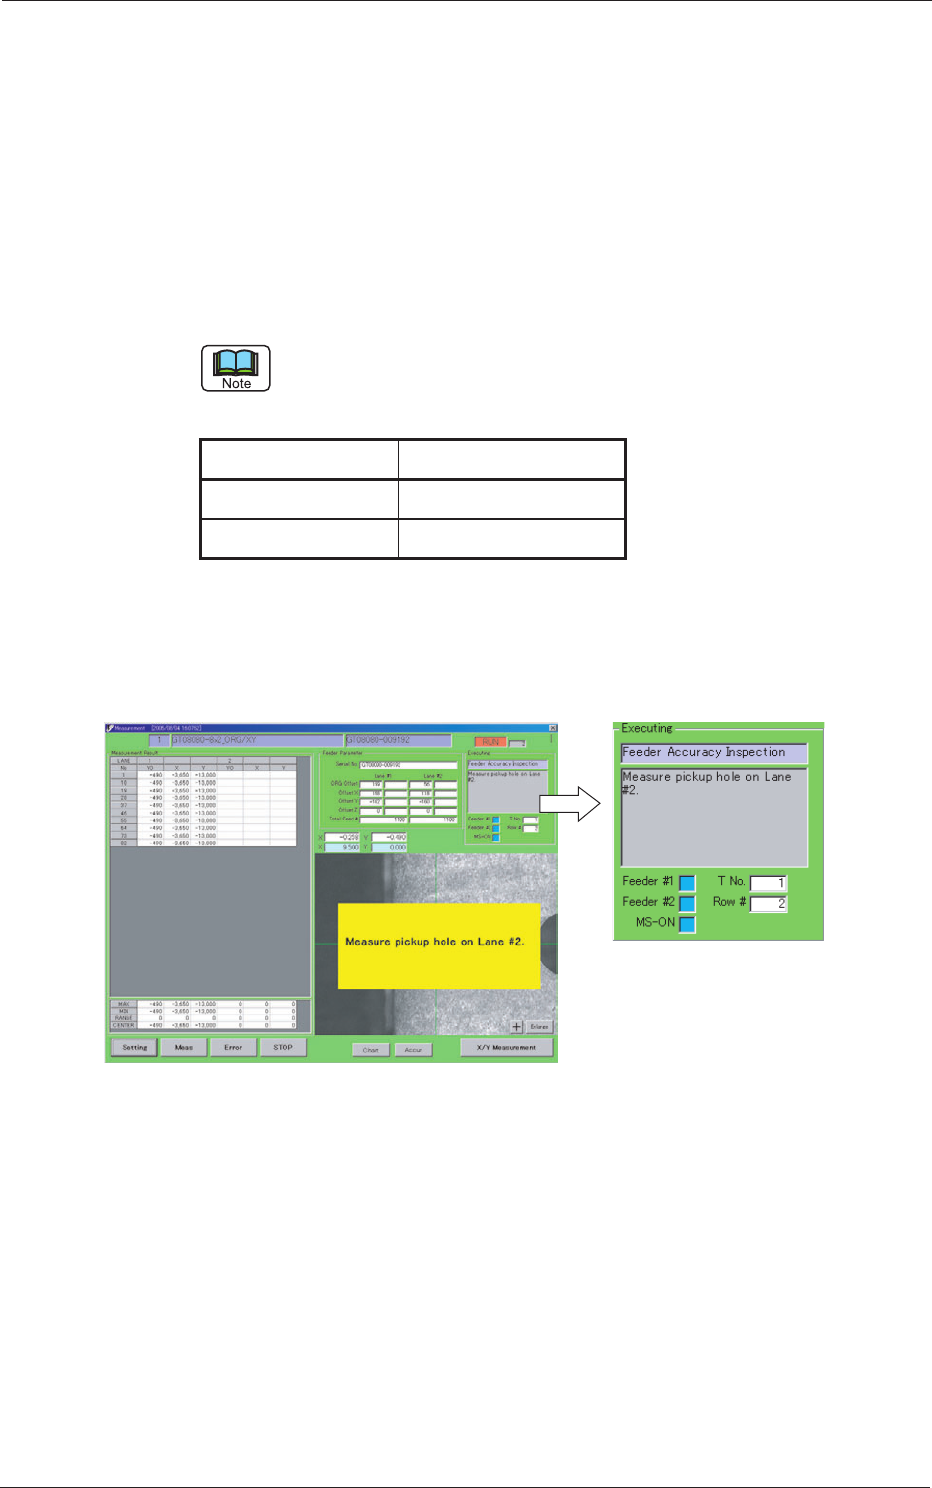
In the case of "8 mm Feeder", the following message box appears after
the measurement (repeated the above-described number of times).
Subsequently, follow the same procedure to perform the measurement
for the lane #2 side.
Fig. D24
0508-001
2. Feeder Measurement
4-20
AKBEG-ID
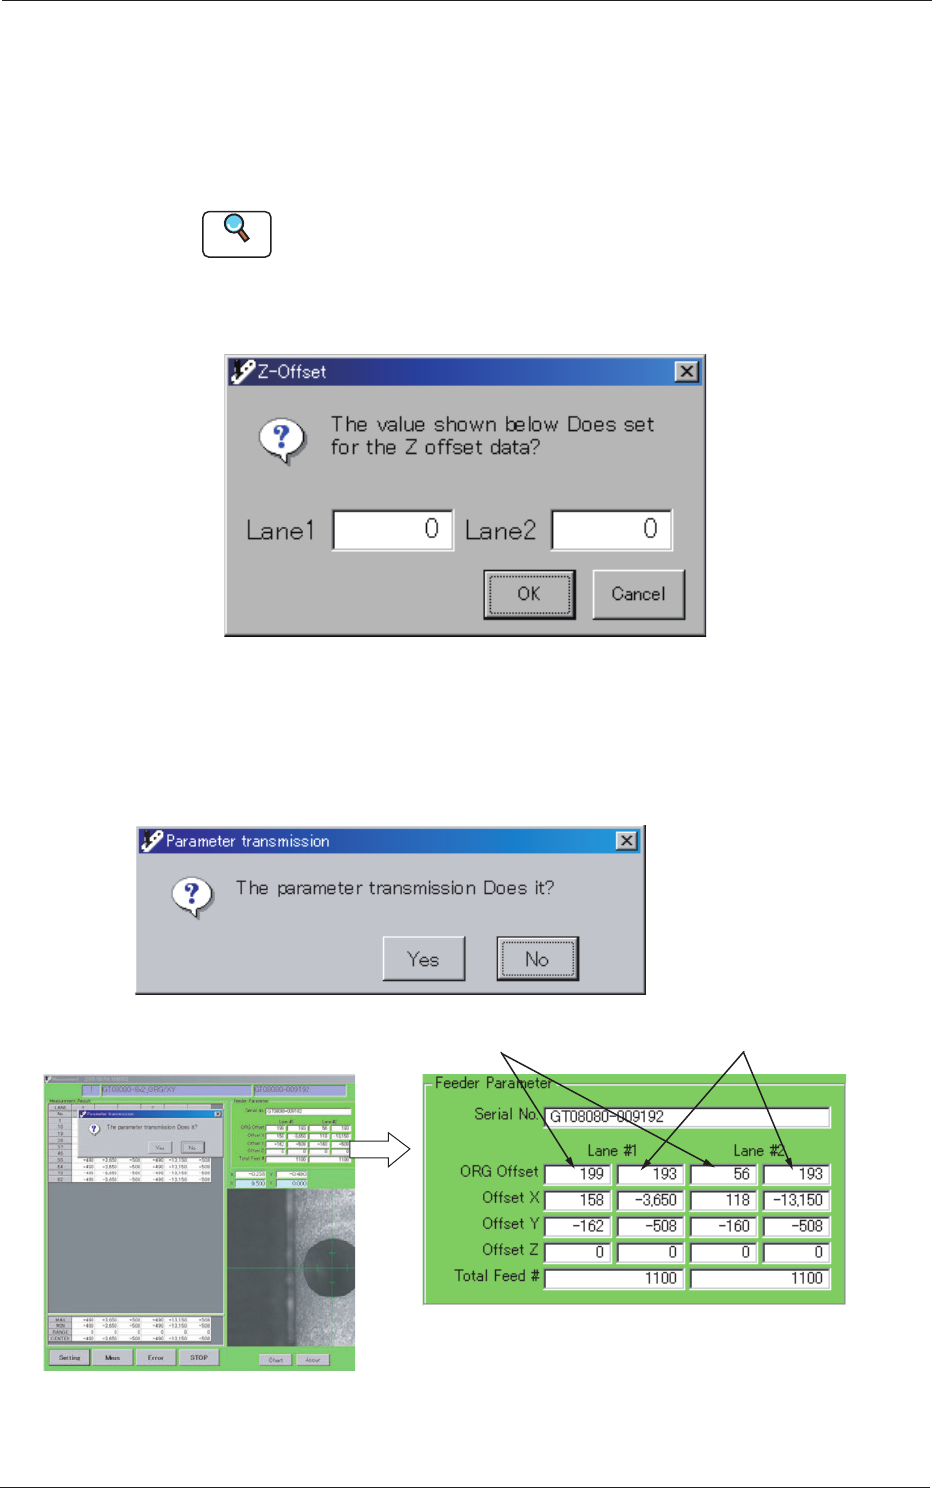
(20) After all measurements are completed, the following dialog box opens.
When it is not necessary to change the pickup height data, press the
[Cancel] button.
To change the pickup height data, enter the offset values and press the
[OK] button.
Reference
Refer to "3. Measurement of Pickup Position Height" in "Section 4" for details.
As for the models "G*-12160" or higher, the pickup height offsets are
required only for Lane #1.
Fig. D25
(21) Subsequently, the following dialog box appears.
Press the [Yes] button to transmit the results of the measurement.
Otherwise, press the [No] button.
Results of Measurement
Data before Measurement
Fig. D26
0508-001
2. Feeder Measurement
4-21
AKBEG-ID
(22) Detach the master tapes rst, then the tape feeder from the jig. Now, the
measurement is completed.
To measure another feeder (same model) subsequently, follow the proce-
dures starting with the master tape setting described in (5).
To measure another feeder (different model), follow the procedures start-
ing with the program change described in (3).
CAUTION
If you detach the tape feeder with the master tapes
being attached from the jig, you may cut your nger
with sharp edges of the master tapes or damage the
tapes by bending the master tapes, etc.
Be sure to detach the master tapes rst, then the
tape feeder from the jig.
Reference
Refer to
"
2.1 Attachment and Detachment of Master Tapes
"
in
"
Section 4
"
for how to attach the master tapes.
0508-001
2. Feeder Measurement