00197469-02_SM_Twin_Kunde_EN.pdf - 第34页
4 Pneumatic and pressure control valve (PRV) 4.3 Calibrating the digital PRV 34 Service Manual SIPLACE TwinStar (Twin, Twin HF, Twin VHF) 07/2020 4.3.3 Checking the Pressure Tightness of the Vacuum System Fig.43: Select…
4 Pneumatic and pressure control valve (PRV)
4.3 Calibrating the digital PRV
Service Manual SIPLACE TwinStar (Twin, Twin HF, Twin VHF) 07/2020 33
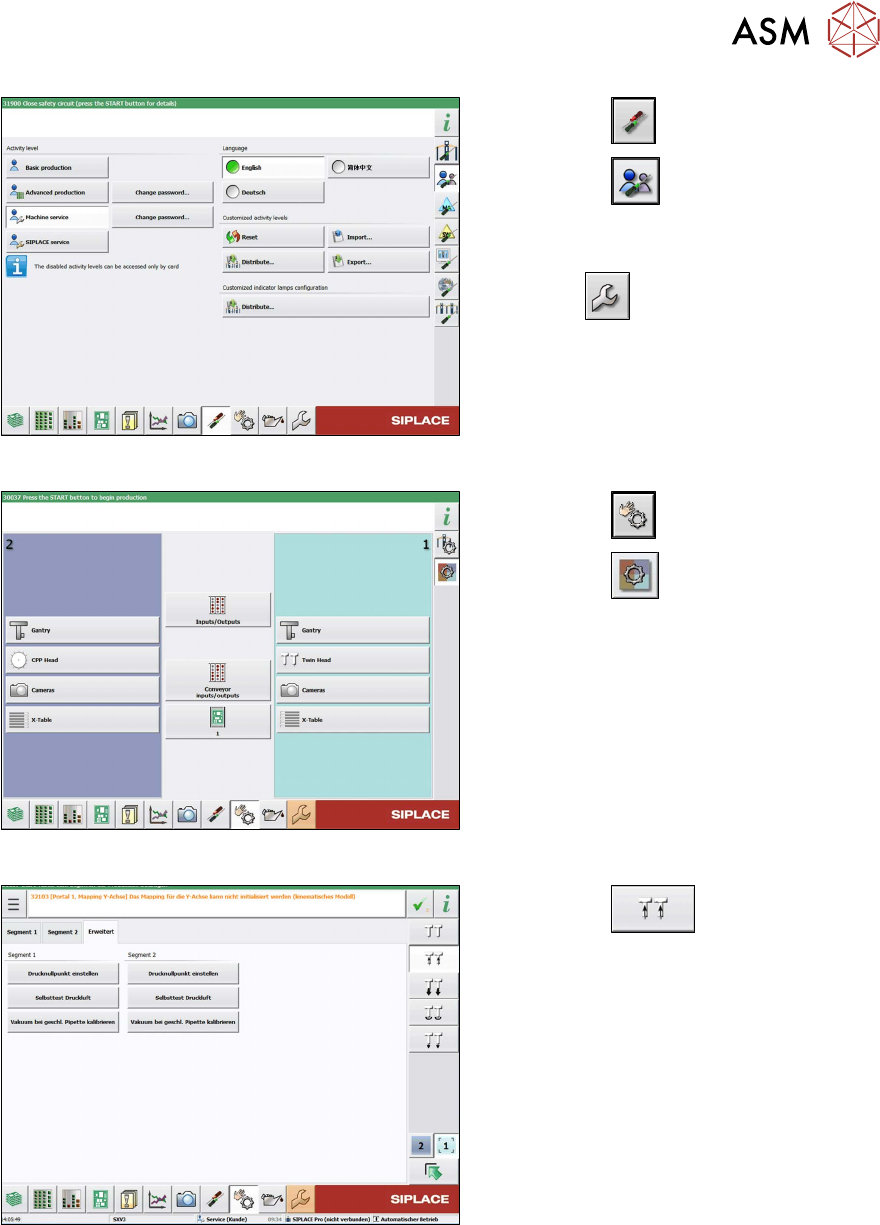
Fig.40: Select operator level
► Select the button.
► Select the button.
► Switch over to the operator level Ma-
chine service.
ð The button will be shown.
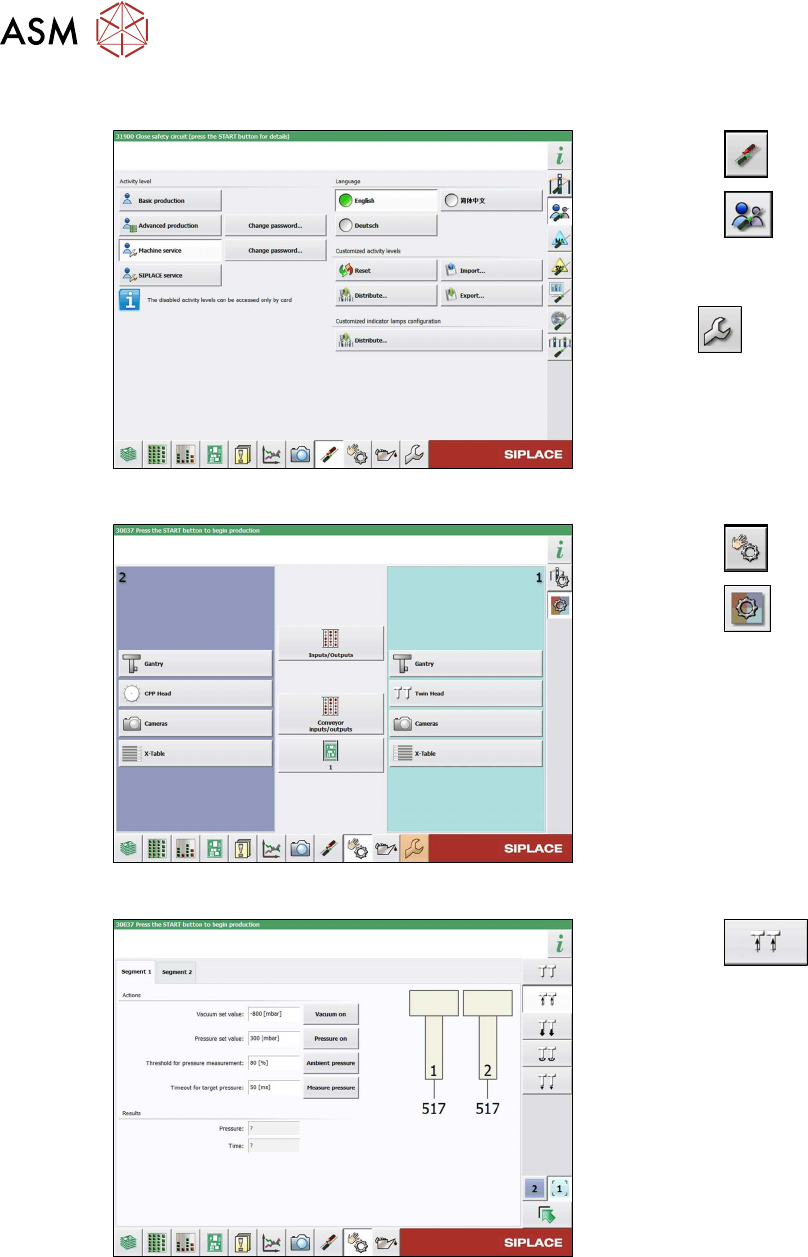
Fig.41: Sensors and Functions menu
► Select the button
► Select the button.
► Select the placement head.
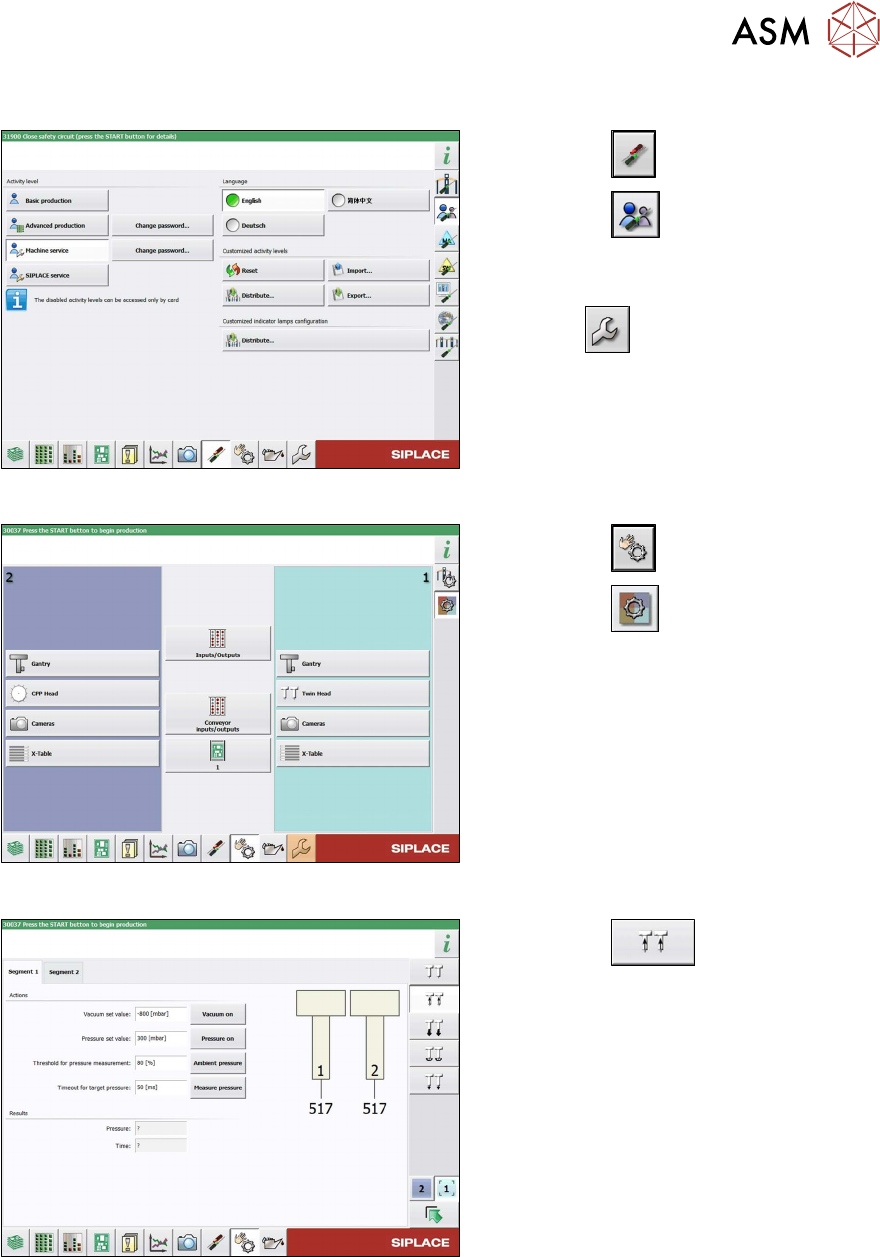
Fig.42: Vacuum functions - Specialized (SW713)
► Select the button.
► Go to the Specialized tab.
► Select the Calibrate vacuum with
closed nozzle button for the relevant
segment (Twin module).
4 Pneumatic and pressure control valve (PRV)
4.3 Calibrating the digital PRV
34 Service Manual SIPLACE TwinStar (Twin, Twin HF, Twin VHF) 07/2020
4.3.3 Checking the Pressure Tightness of the Vacuum System
Fig.43: Select operator level
► Select the button.
► Select the button.
► Switch over to the operator level Ma-
chine service.
ð The button will be shown.
Fig.44: Sensors and Functions menu
► Select the button
► Select the button.
► Select the placement head.
Fig.45: Vacuum Functions menu
► Select the button.
► Switch over to the Segment 1 or Seg-
ment 2. tab.
► Select the Vacuum on. button.
► Seal the nozzle with a finger and select
the Measure pressure
button.
4 Pneumatic and pressure control valve (PRV)
4.3 Calibrating the digital PRV
Service Manual SIPLACE TwinStar (Twin, Twin HF, Twin VHF) 07/2020 35
4.3.4 Checking the Air Blast
Fig.46: Select operator level
► Select the button.
► Select the button.
► Switch over to the operator level Ma-
chine service.
ð The button will be shown.
Fig.47: Sensors and Functions menu
► Select the button
► Select the button.
► Select the placement head.
Fig.48: Vacuum Functions menu
► Select the button.
► Switch over to the Segment 1 or Seg-
ment 2. tab.
► Select the Switch pressure on button.
► Seal the nozzle with a finger and select
the Measure pressure
button.