00197469-02_SM_Twin_Kunde_EN.pdf - 第38页
4 Pneumatic and pressure control valve (PRV) 4.4 Replace hoses 38 Service Manual SIPLACE TwinStar (Twin, Twin HF, Twin VHF) 07/2020 4.4.1.1 Replacement of elbow version 1 ► Dismantle the buffer on the return unit. 3.1 &q…
4 Pneumatic and pressure control valve (PRV)
4.4 Replace hoses
Service Manual SIPLACE TwinStar (Twin, Twin HF, Twin VHF) 07/2020 37
Removal/installation
NOTICE
► We recommend dismantling the return unit buffer when replacing all hoses.
3.1
"Replacing the return unit buffer" [}17]
► We recommend removing the pressure control valve when replacing the green or
blue hose.
4.2
"Replacing the pressure control valve (PRV)" [}27]
► If replacing the orange hose see section 4.4.1 "Replacing the silicone hose
4.5x2.5x26" [}37].
See also
2 3.2 "Replacing the Z axis return unit" [}19]
4.4.1 Replacing the silicone hose 4.5x2.5x26
Overview
See 4.4 "Replace hoses" [}36]
Preparation
► Remove the head from the machine. For details about removing and fitting the placement
head, refer to the service manual for your machine.
Removal
► Select the applicable version:
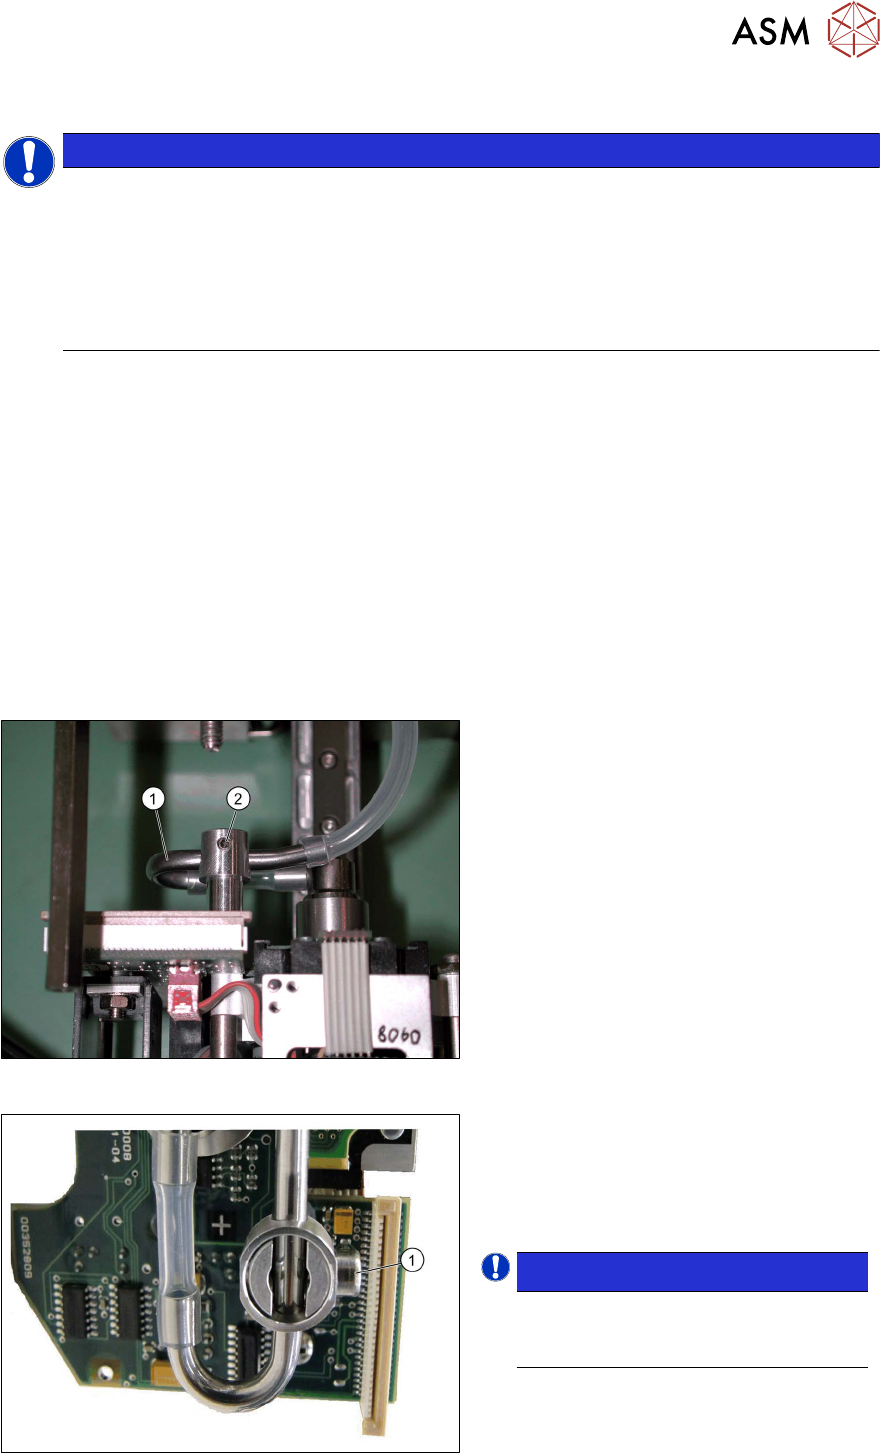
Fig.51: Elbow version 1 (example of Twin / Twin HF shown)
For elbow version 1:
► If the elbow(1) is fixed with a grub
screw(2)
, see section 4.4.1.1 "Replace-
ment of elbow version 1" [}38].
Fig.52: Elbow version 2 (example of Twin / Twin HF shown)
For elbow version 2:
► If you have a Twin with a new elbow
fixture(1)
, please read section4.4.1.2
"Replacement of elbow version
2" [}40].
NOTICE!
Version 2 of the elbow fixture can be
retrofitted. Contact the SIPLACE Ser-
vice team for details.
.
4 Pneumatic and pressure control valve (PRV)
4.4 Replace hoses
38 Service Manual SIPLACE TwinStar (Twin, Twin HF, Twin VHF) 07/2020
4.4.1.1 Replacement of elbow version 1
► Dismantle the buffer on the return unit.
3.1 "Replacing the return unit buffer" [}17]
► If replacing the trick and feather unit, dismantle the control cable first.
5.5 "Replacing the control cable" [}76]
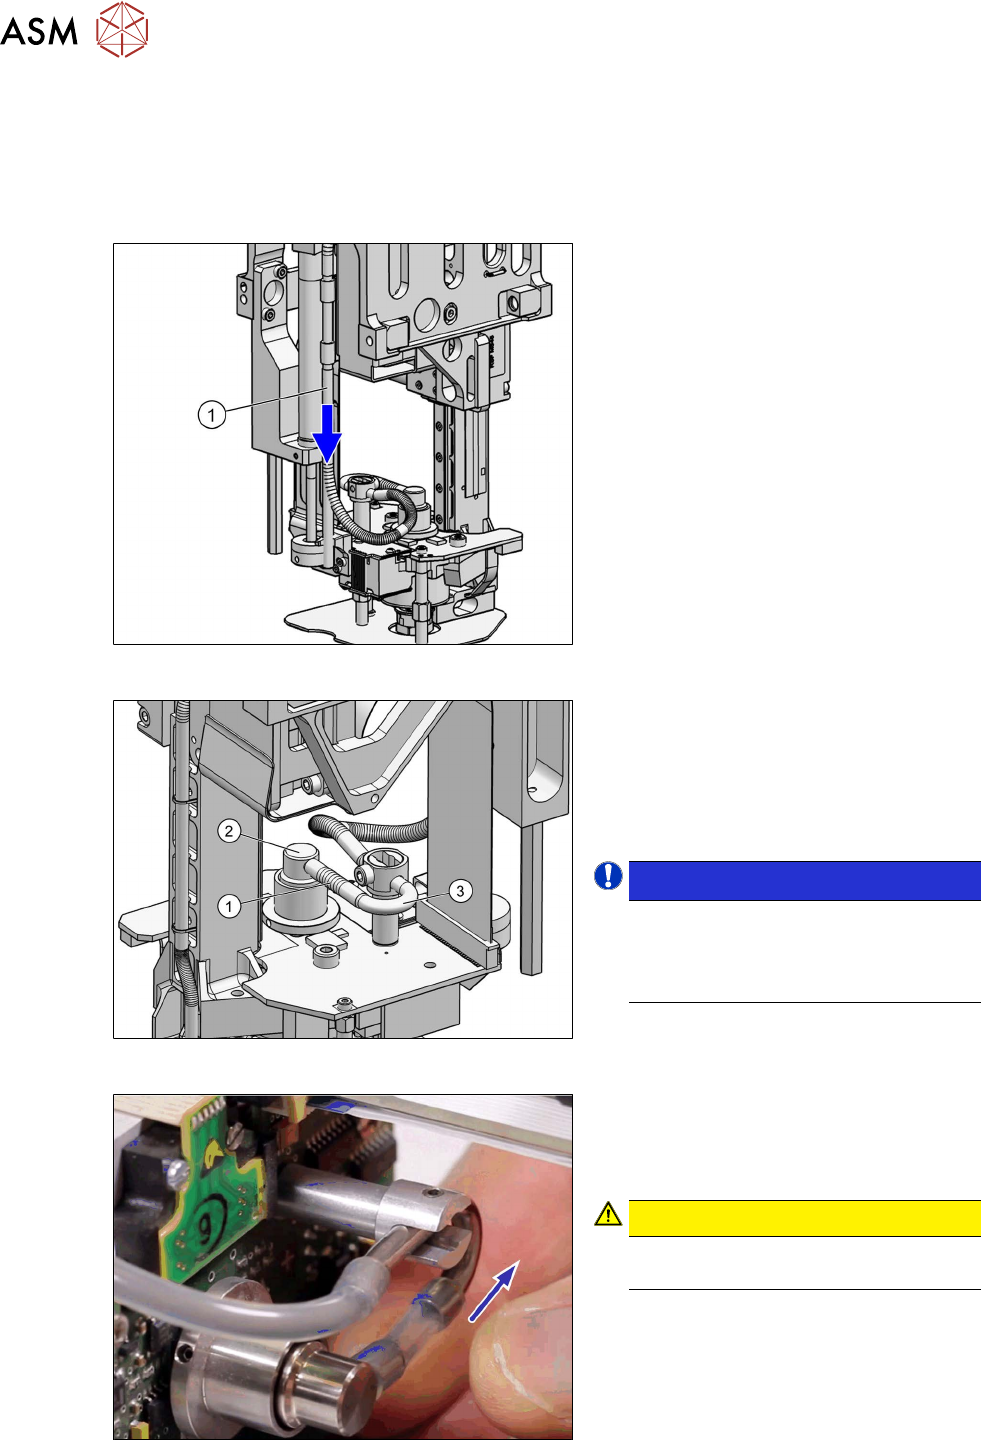
Fig.53: Disconnecting the hose
► Pull the long hose(1) down and off the
precision tube.
(silicone hose 4.5x2.5.96
[03046416‑xx])
Fig.54: Disconnecting the hose
► Pull the silicone hose 4.5x2.5x26
[03046203‑xx](1)
off the pneumatic
rotary supply(2)
and off the elbow (3).
► Fit the new silicone hose 4.5x2.5x26
[03046203‑xx] onto the rotary supply.
This is 26 mm long.
NOTICE!
Push the hose onto the pneumatic
rotary supply as far as the stopper.
For all other connections, press on ap-
prox. 4-5 mm of the hose.
.
Fig.55: Silicone hose 4.5x2.5x26
► Fit the hose from the pneumatic rotary
supply onto the elbow. Connect the
hose so that no tension is applied to
the pneumatic rotary supply.
CAUTION!
The new hose must be mounted abso-
lutely twist-free!
.
4 Pneumatic and pressure control valve (PRV)
4.4 Replace hoses
Service Manual SIPLACE TwinStar (Twin, Twin HF, Twin VHF) 07/2020 39
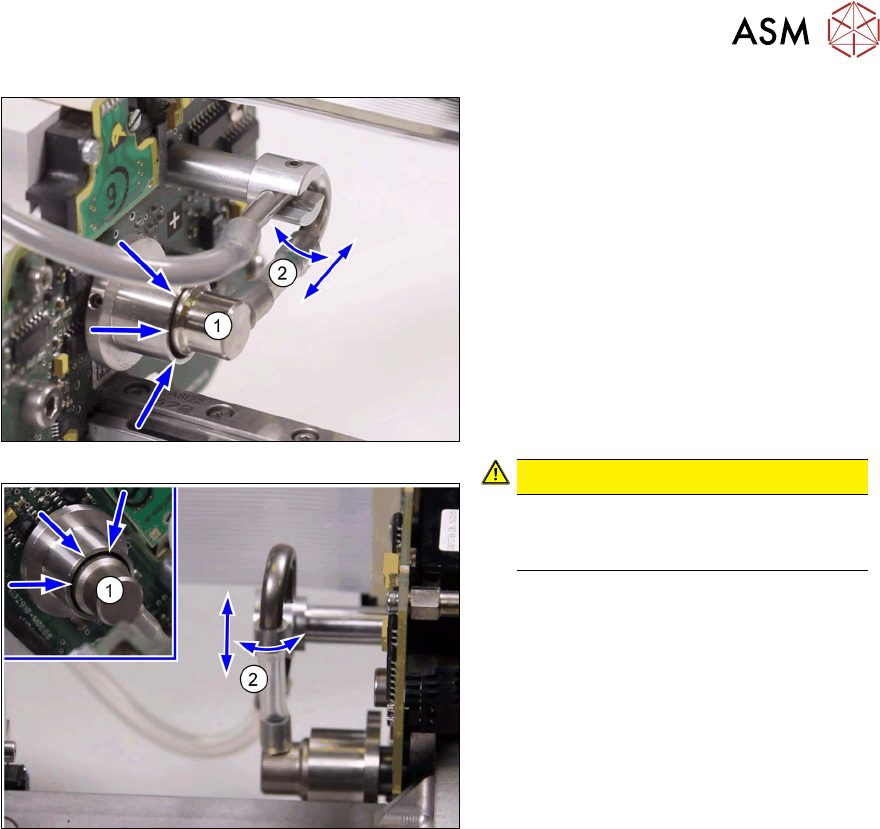
Fig.56: Hose on elbow (old version)
Fig.57: Hose on elbow (new version)
Check the following points:
► The pneumatic rotary supply and the Z
axis must be centered in their guidance
(1)
.
► The short hose must always remain
against the pneumatic rotary supply
stopper.
Press or move the hose on the elbow
to set its position.
Press the hose onto the elbow connec-
tion or away from it, until the axis is po-
sitioned in the center.
► The short hose must also run horizont-
ally(2)
to the elbow, without tension.
CAUTION!
An eccentric position of the Z axis can
alter the balance of forces and lead to
placement errors.
.
► Reconnect the long hose at the top.
► Fit the buffer on the return unit.
3.1 "Replacing the return unit buffer" [}17]
► Fit the control cable.
5.5 "Replacing the control cable" [}76]