00198051-01_IM_SetupCenter_8.0_EN.pdf - 第86页
Docking Station Installation Connections on the Docking Station 7.2.3 Compressed Air and Powe r Supplies 86 Installation Manual SIPLACE Setup Center 8.0 Docking Station SX 1. Set Compre ssed Air 2. Compresse d Air Connec…
Docking Station Installation
7.2.3 Compressed Air and Power Supplies Connections on the Docking Station
Installation Manual SIPLACE Setup Center 8.0 85
7.2.3
7.2.3 Compressed Air and Power Supplies
Compressed Air and Power Supplies
► Connect to the compressed air supply.
► Set the pressure reducer on the pneumatic connection (external) to 5.5 bar.
► Switch off the power supply and connect the CAN Bus cable to the device.
► Switch on the power supply.
► You will find a control lamp on the front of the device. This will shine when power is correctly supplied
to the device.
NOTICE
The compressed air and power connections can be found on the back of the docking station.
DANGER
Never cover the air discharge opening in the integrated fan and the ventilation slits on the side
of the device!
Covering these could lead to overheating and destruction of the power pack.
DANGER
Make sure that nobody is using the connected change over table when you switch the power
on.
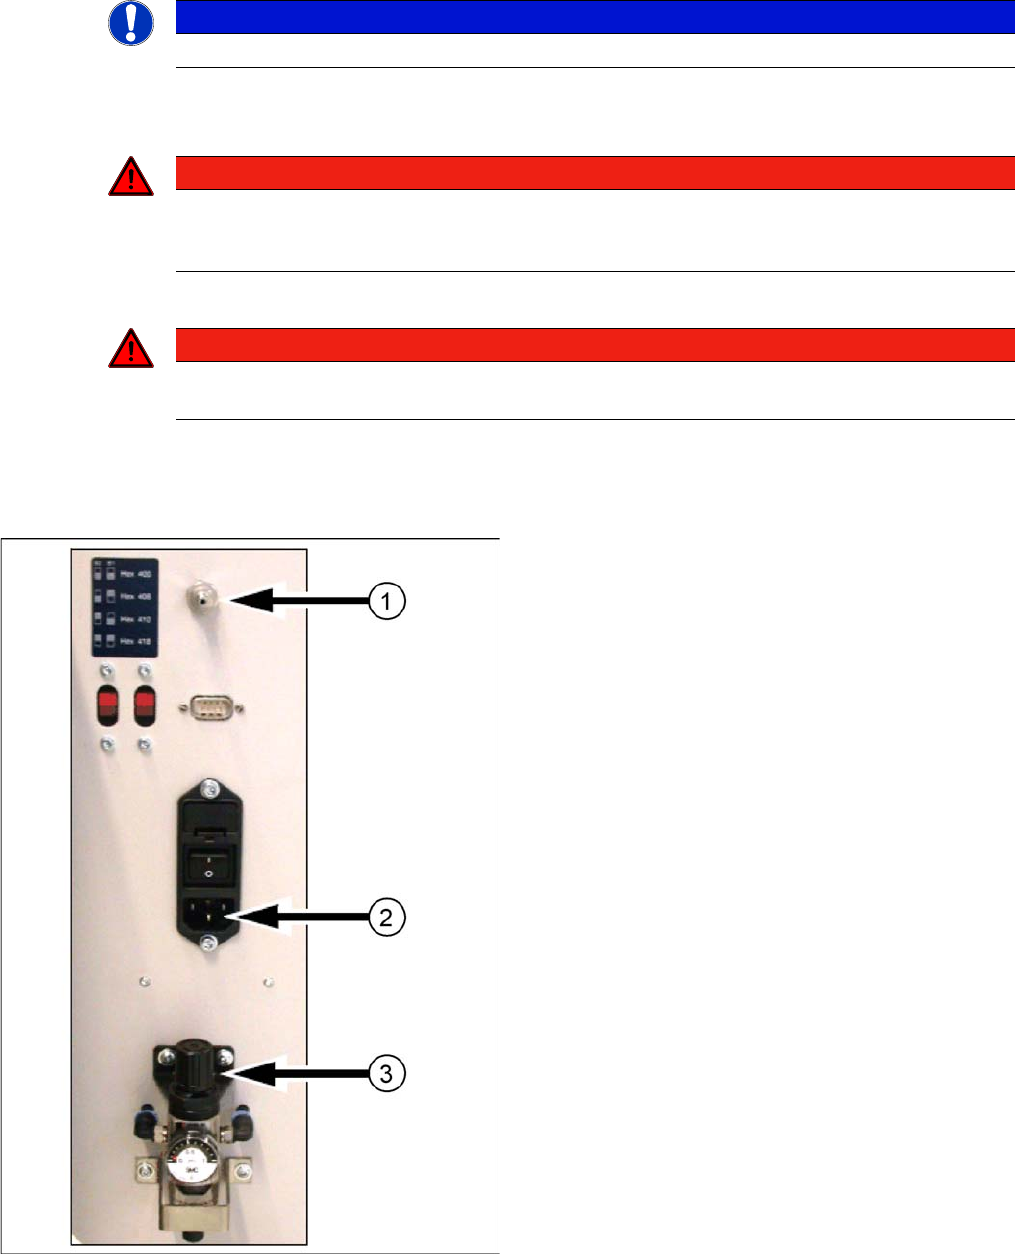
Docking station: compressed air and power supplies
Docking Station X
1. Compressed Air Connection
2. Power Connection
3. Set Compressed Air
Docking Station Installation
Connections on the Docking Station 7.2.3 Compressed Air and Power Supplies
86 Installation Manual SIPLACE Setup Center 8.0
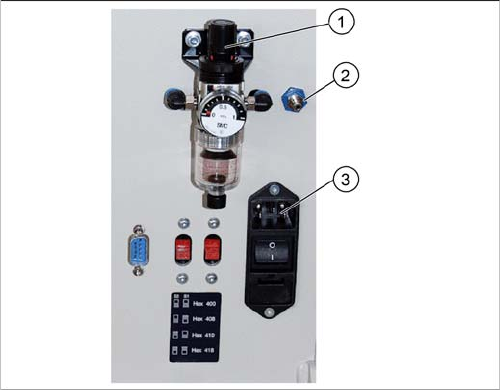
Docking Station SX
1. Set Compressed Air
2. Compressed Air Connection
3. Power Connection
Docking Station Installation
7.3.1 Installing the CAN Card in the PC Data Connection with PC-CAN Card
Installation Manual SIPLACE Setup Center 8.0 87
7.3
7.3 Data Connection with PC-CAN Card
Data Connection with PC-CAN Card
7.3.1
7.3.1 Installing the CAN Card in the PC
Installing the CAN Card in the PC
The data connection between the Setup Center PC, on which the Setup Center software is to be in
-
stalled, and the docking station is realized via a CAN Bus. This requires installation of a CAN card in the
Setup Center Computer. This CAN card is included in the delivery of docking station (optional).
► Open the Setup Center Computer housing according to the manufacturer's instructions.
► Select a free PCI slot in your Setup Center Computer for installing the CAN card.
► Plug the CAN card into the selected PCI slot.
► Close the Setup Center Computer housing according to the manufacturer's instructions.
► The drivers for the CAN card are contained on the Setup Center software installation CD. These
need to be installed separately. For a detailed description, please see Section " Installing the CAN
Bus driver and API".
NOTICE
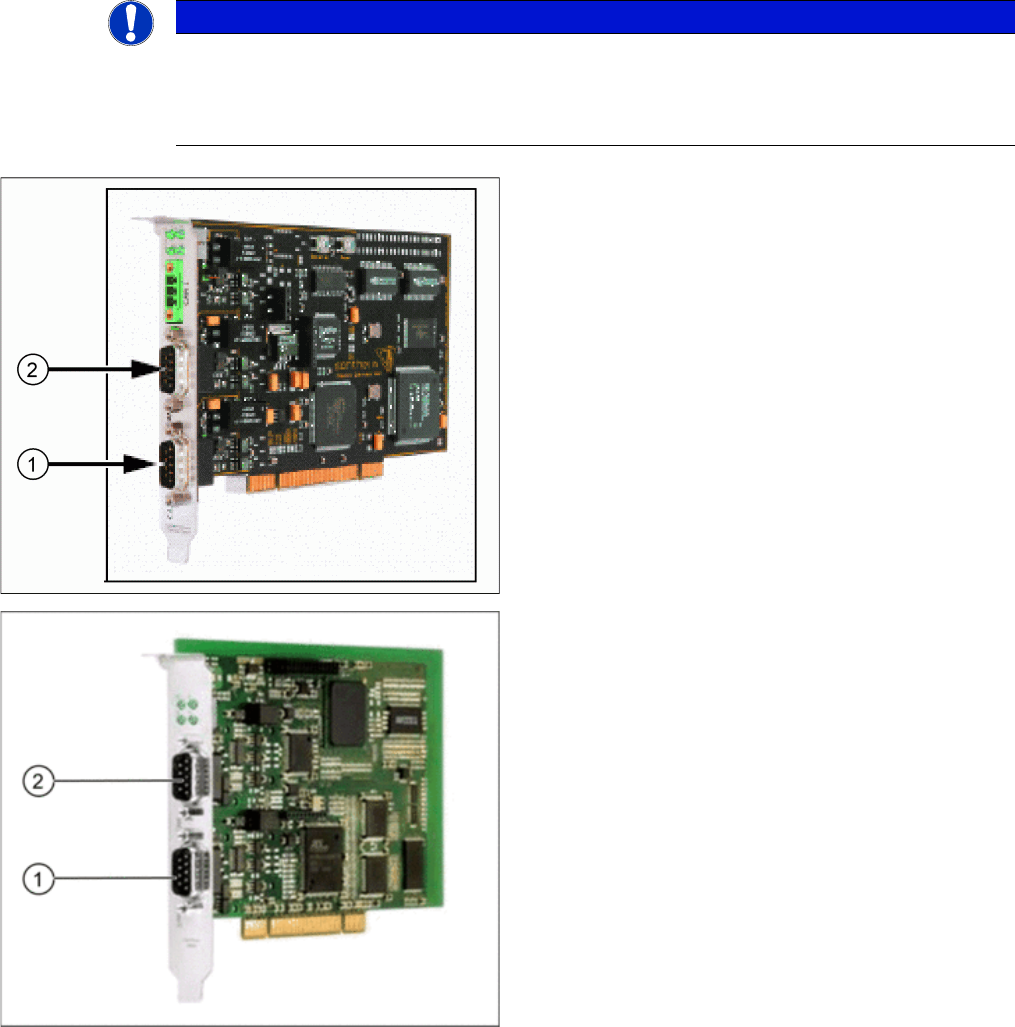
There are two different models of CAN cards available:
The CAN card Power CAN PCI supports only 32 bit operating systems, the newer version Pow
-
er CAN PCI COM 168 V2 supports 32 bit as well 64 bit operating systems. The driver and API
installation package is supporting both CAN card models.
CAN Card - Power CAN PCI
1. Bus 1
2. Bus 2
CAN Card - Power CAN PCI COM 168 V2
1. Bus 1
2. Bus 2