ThermoFlex-Manual.pdf - 第107页
Section 8 ThermoFlex 8-5 Thermo Scientific xx.x xx.x xx xx r1 H r1 L r1 H r1 L xx.x C mode rtd1 PrES1 Flo r rtd A in Aout1 CAL enter enter enter enter enter enter StorE mode indicates the controller display is alternating…
Section 8
8-4 ThermoFlex
Thermo Scientific
Internal Fluid
Temperature Sensor
(rdt1) Calibration
The ThermoFlex has been designed to minimize the need for calibration.
However, if calibration is desired or recommended by our Sales, Service and
Customer Support, please use the following procedure.
This procedure requires a running chiller and a calibrated reference
thermometer.
Note Uninsulated applications may cause the internal temperature and
an external reference temperature to differ and to uctuate. If inaccurate
calibration is suspected, place the reference thermometer as close to the
ThermoFlex process outlet as possible.
Note If it is more convenient, perform the low-end calibration before doing
the high-end.
Do not pick calibration points that are outside the safe operating limits of the
uid in your application. For example with water, 40°C and 5°C are typical
high and low calibration points.
Run the temperature to a suitable high-end calibration point. Place a
calibrated reference thermometer in the reservoir. Ensure the uid
temperature is stabilized.
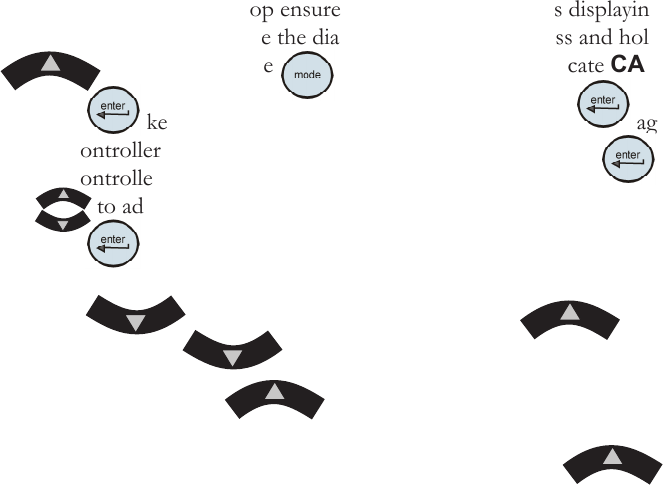
To enter the Calibration Loop ensure the controller display is displaying the
process uid temperature, see the diagram on next page. Press and hold the
and then press the key. The display will indicate CAL.
Press the key and the controller will display rtd1. Press again
and the controller will display r1 H (high-end calibration). Press again
and the controller will ash between r1 H and the temperature.
Use to adjust the temperature to match the reference thermometer.
Press the key again to accept the value.
Press the key until StorE is displayed, press to save
the new value, press to not save it.
Note After pressing the button at the StorE prompt wait several
seconds before proceeding to ensure that a bad calibration message (Er 16)
does not appear. Premature use of the keypad after pressing may
cancel the bad calibration error message.
Run the temperature to a suitable low-end calibration point. At the r1 L (low-
end calibration) display repeat the procedure.
Section 8
ThermoFlex 8-5
Thermo Scientific
xx.x
xx.x
xx
xx
r1 H
r1 L
r1 H
r1 L
xx.x C
mode
rtd1
PrES1
Flo
r rtd
A in
Aout1
CAL
enter
enter
enter
enter
enter
enter
StorE
mode
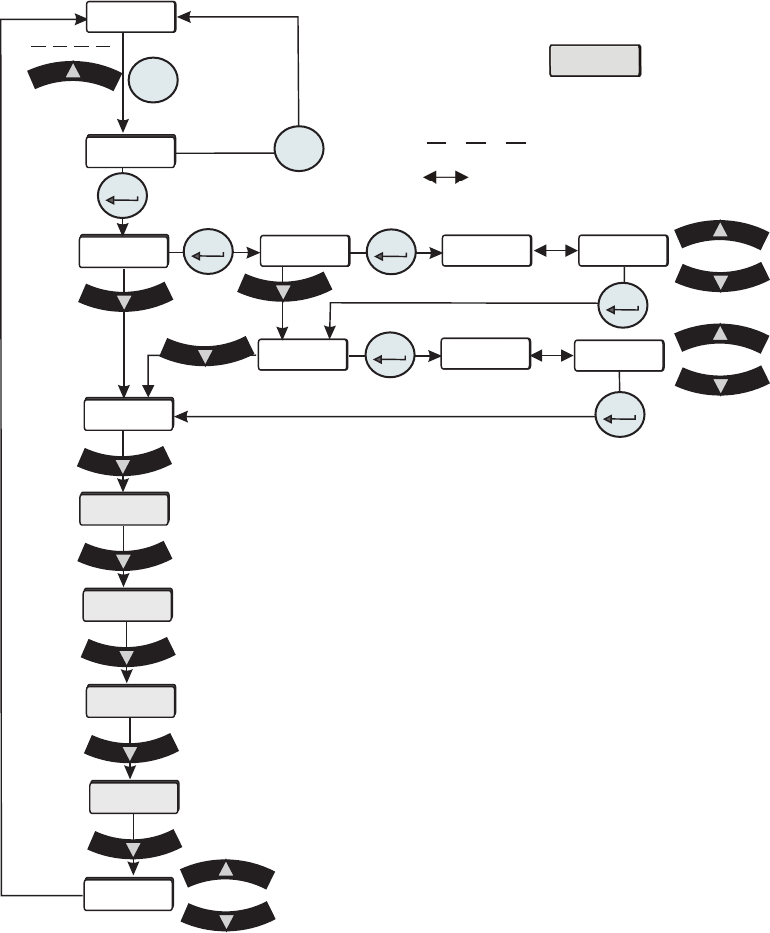
indicates the controller display is alternating
between the two displays.
indicates press and hold.
Figure 8-3 Internal Temperature Sensor Calibration
Shaded displays only appear on
chillers equipped with that option.
If you have any questions please contact Thermo Fisher Scientic's Sales, Service
and Customer Support.
Save calibration
Do not save calibration
Section 8
8-6 ThermoFlex
Thermo Scientific
Process Fluid
Pressure (P1)
Transducer
Calibration
The ThermoFlex has been designed to minimize the need for calibration.
However, if calibration is desired or recommended by our Sales, Service
and Customer Support, please use the following procedure.
This procedure requires a running chiller, a calibrated reference pressure
gauge and an external ow control valve.
Connect a calibrated reference pressure gauge to the outlet line. Using an
external ow control valve, increase the pressure to a suitable high-end
calibration point by closing the valve. Ensure the pressure is stabilized.
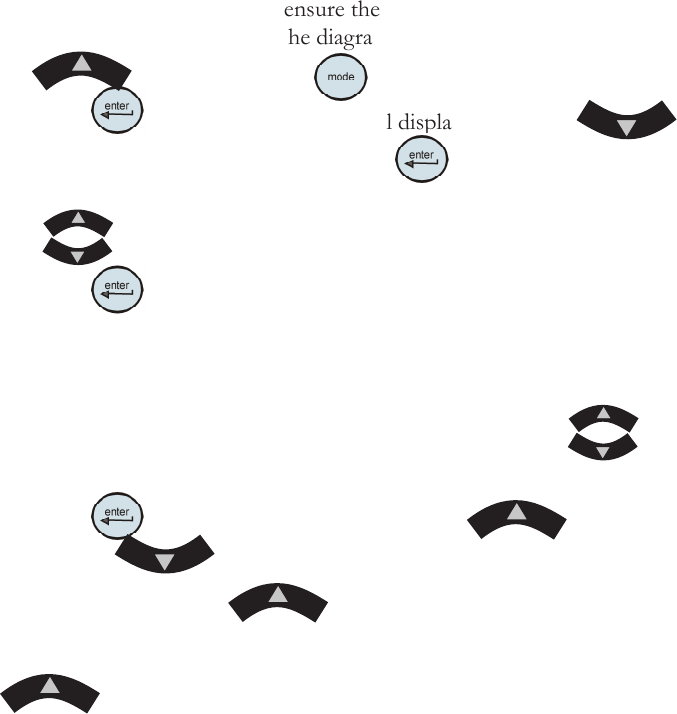
To enter the Calibration Loop ensure the controller display is displaying the
process uid temperature, see the diagram on the next page. Press and hold
the and then press the key. The display will indicate CAL.
Press the key and the controller will display rtd1. Press
until the controller displays PrES1. Press and the controller will
ash between P1H and the pressure.
Use to adjust the rate to match the reference pressure gauge.
Press the key to accept the value.
Decrease the pressure to a suitable low-end calibration point (avoid a zero
pressure). Ensure the pressure is stable.
The controller will ash between P1L and the pressure. Use to
adjust the rate to match the reference pressure gauge.
Press the key and StorE is displayed, press to save both
values, press to not save them.
Note After pressing the button at the StorE prompt wait
several seconds before proceeding to ensure that a bad calibration message
(Er 16) does not appear. Premature use of the keypad after pressing
may cancel the bad calibration error message.