Cognex_Scanner_HS-60_HF_X-_D_S_F -05.pdf - 第45页
2 Assembly instructions Special design Cognex Scanner SIPL ACE HS-60 / HF-serie s / X-series / D-series / S / F 06/2008 Edition 47 o Change to the “Dat a Formatting” view and make the following se ttings: 2 2 o Under “Le…
2 Assembly instructions Special design Cognex Scanner SIPLACE HS-60 / HF-series / X-series / D-series / S / F
06/2008 Edition
46
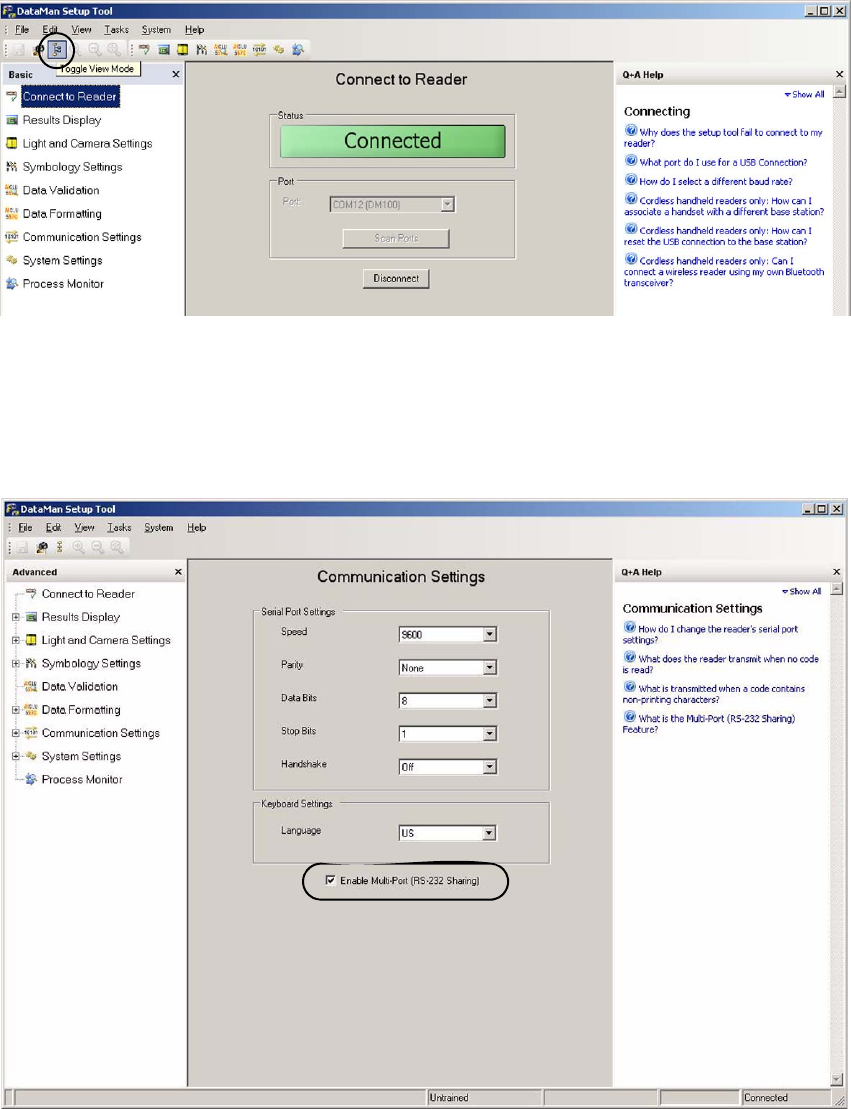
o By clicking the toggle “View Mode” you can see the tree structure.
2
2
o Set the follwing values in the “Communication Settings” view.
If more than one scanner is connected, the tick has to be set at “Enables Multi-Port (RS 232 –
Sharing).
2
2 Assembly instructions Special design Cognex Scanner SIPLACE HS-60 / HF-series / X-series / D-series / S / F
06/2008 Edition
47
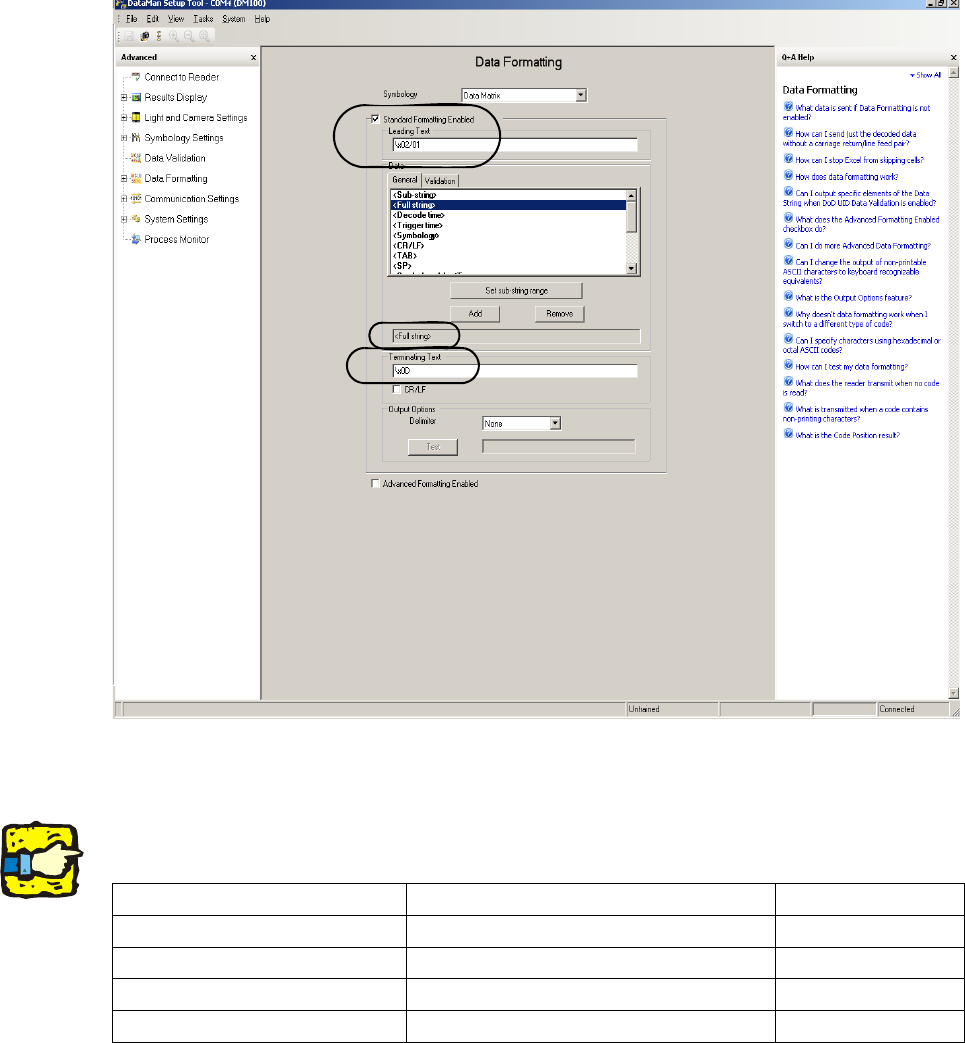
o Change to the “Data Formatting” view and make the following settings:
2
2
o Under “Leading Text” has to be put in the following command: “\x02/0A”.
2
The “A” stands for the installation position of the scanner. Depending on the installation position
the A has to be displaced by “1”, “2”, “3” or “4”. 2
Scanner position Figure for scanner position Command
Single conveyor upper 1 \x02/01
Single conveyor lower 2 \x02/02
Double conveyor upper 3 \x02/03
Double conveyor lower 4 \x02/04
2 Assembly instructions Special design Cognex Scanner SIPLACE HS-60 / HF-series / X-series / D-series / S / F
06/2008 Edition
48
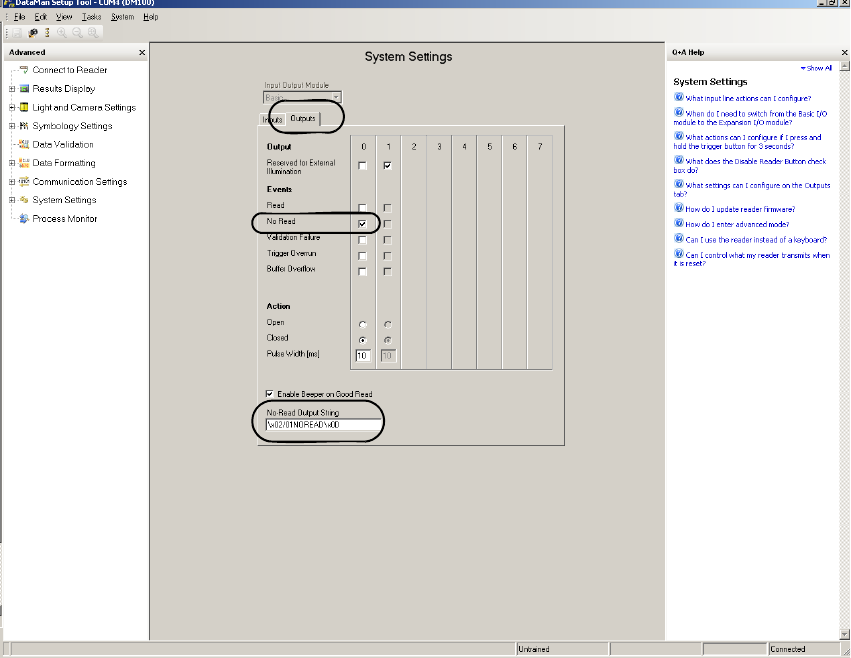
o Change to the “System Settings” --> "Outputs" view and make the following settings:
Under "No-Read Output String" has to be put in the following command:
"\x02/0ANOREAD\x0D".
The first "A" stands as discribed in the fomer table for the installation position of the scanner.
2
2
2
After these settings the scanner is able to send the data in the correct format to the machine. 2
2
2