Cognex_Scanner_HS-60_HF_X-_D_S_F -05.pdf - 第47页
2 Assembly instructions Special design Cognex Scanner SIPL ACE HS-60 / HF-serie s / X-series / D-series / S / F 06/2008 Edition 49 o By the “Result Display” view and clicking the “T rigger” b utton (Offline mod e), you c…
2 Assembly instructions Special design Cognex Scanner SIPLACE HS-60 / HF-series / X-series / D-series / S / F
06/2008 Edition
48
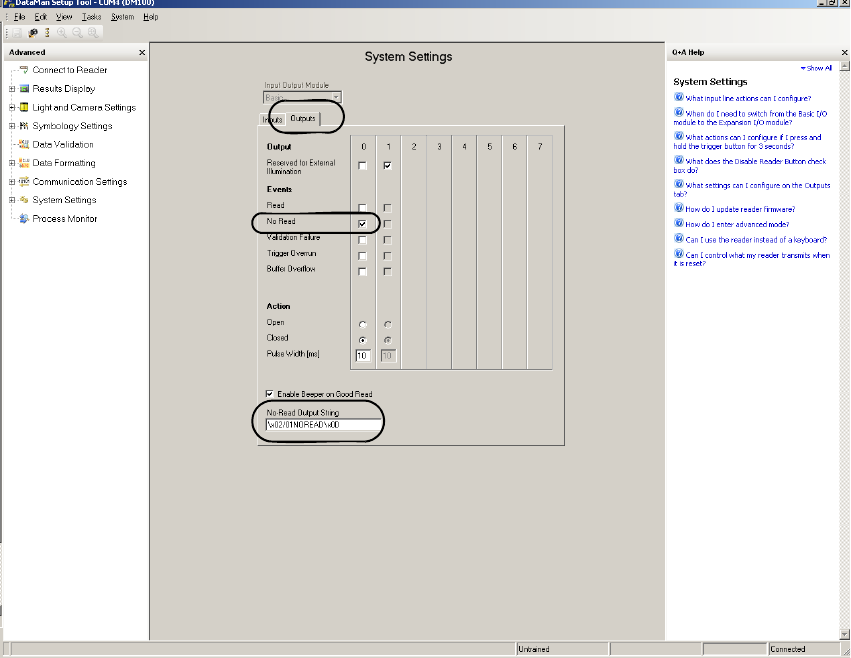
o Change to the “System Settings” --> "Outputs" view and make the following settings:
Under "No-Read Output String" has to be put in the following command:
"\x02/0ANOREAD\x0D".
The first "A" stands as discribed in the fomer table for the installation position of the scanner.
2
2
2
After these settings the scanner is able to send the data in the correct format to the machine. 2
2
2
2 Assembly instructions Special design Cognex Scanner SIPLACE HS-60 / HF-series / X-series / D-series / S / F
06/2008 Edition
49
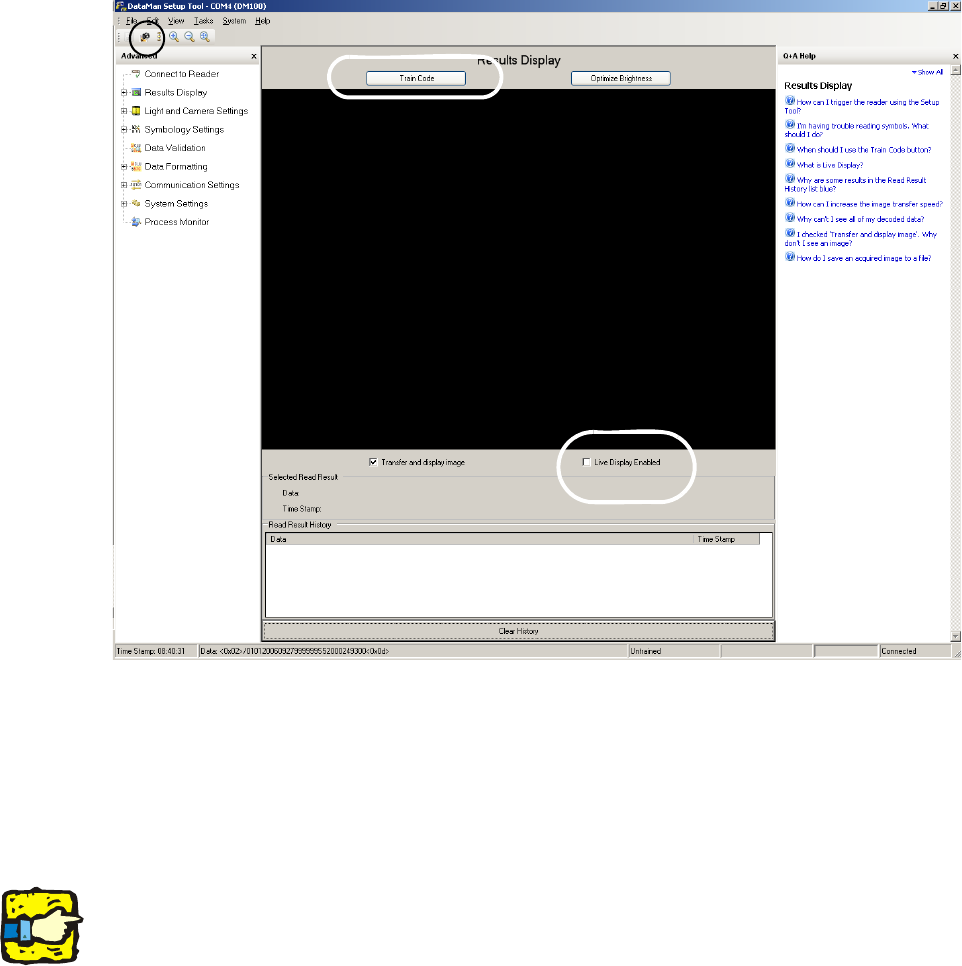
o By the “Result Display” view and clicking the “Trigger” button (Offline mode), you can make
pictures or when the PCB drives into the machine and you can check the settings.
In this case the trigger signal is sent automatically by the machine. The second possibility
should only be used when the barcode was trained before.
When you tick on the "Live Display Enabled" you get a live picture.
2
2
o For training the barcodes, hold the relevant barcode under the flashing green light beam of the
scanner.
Then click to “Train Code” above the black screen. The button “Train Code” changes to “Un-
train Code”. The scanner now has learned all information which it requires.
2
If the scanner is trained for a special barcode size, he is unable to read other barcode sizes. 2
2
2
2
2 Assembly instructions Special design Cognex Scanner SIPLACE HS-60 / HF-series / X-series / D-series / S / F
06/2008 Edition
50
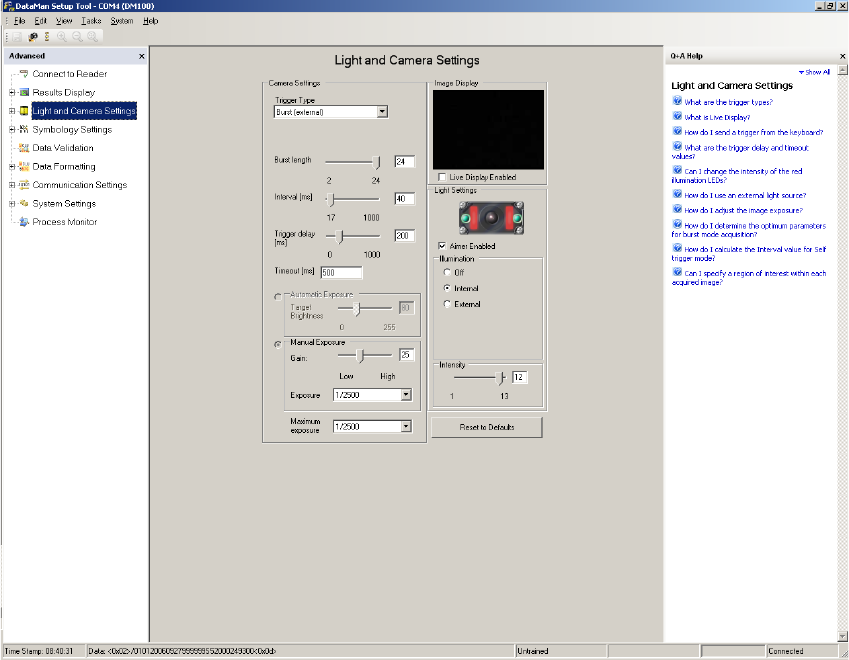
o In the view “Light and Camera Settings” you can make the general necessary settings like trig-
ger delay, exposure time and intensity.
o Via the field “Trigger Delay” the delay time of the trigger of the machine can be set up. That
means that the start of the record will be delayed by this time.
o The “Trigger-Type” has to be set to “Burst (external)”.
o The “Burst length” is the maximum amount of pictures, which are taken.
o The “Intervall” is the time between the single pictures.
o The “Maximum exposure” is the maximum exposure time. It always should be higher than 1/
2000s, to make sure that the pictures are sharp.
2
2