00197815-04_JC_PM_WF2_SX12_EN.pdf - 第29页
7 WF2 SX1/2 Clean the X-Axis loose bearing, contact surface and scale and replace the lubrication system. 2.75 min 1 / 3 C A U T I O N ! R e f e r t o s a f e t y i n s t r u c t i o n s i n u s e r m a n u a l b e f o…
6 WF2 SX1/2 Check and clean the X- and Y-Axis magnets. 1.5 min 2 / 2
CAUTION! Refer to safety instructions in user manual before commencing Maintenance
Machine Status OFF Transport Empty
NOTICE! ESD guidelines are to be followed Tool:
T3
Wear Part: Consumables:
C3
www.asm-smt.com
7 Repeat all steps at the other gantry.
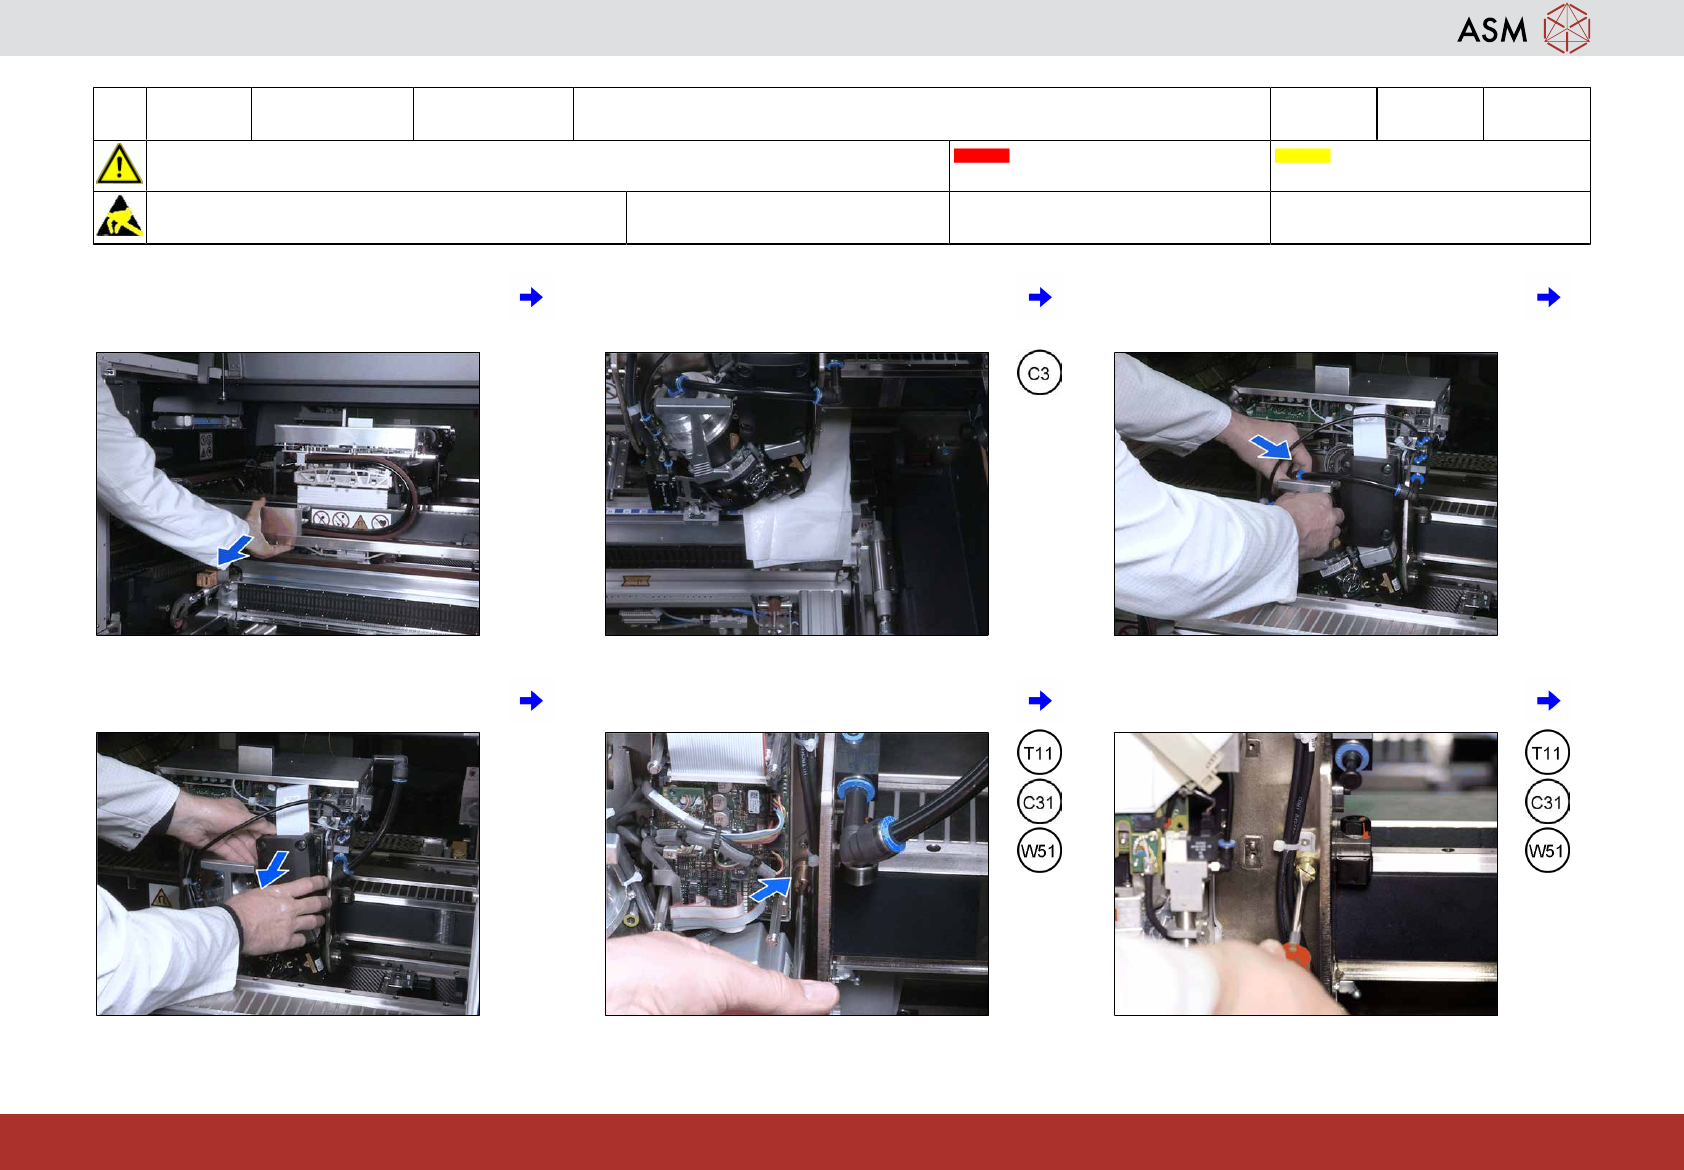
7 WF2 SX1/2 Clean the X-Axis loose bearing, contact surface and scale and replace
the lubrication system.
2.75 min 1 / 3
CAUTION! Refer to safety instructions in user manual before commencing Maintenance
Machine Status OFF Transport Empty
NOTICE! ESD guidelines are to be followed Tool:
T11
Wear Part:
W51
Consumables:
C3, C4, C5, C31
www.asm-smt.com
1 Move all gantries to the end limit. 2 Insert a cloth below the head to catch the
lubrication system in case it drops when
removing it.
3 Unplug the hose from the head (only with
C&P20x).
4 Remove the protection cover (only with
C&P20x).
5 Unscrew the old lubrication system (only
with C&P20x).
6 Unscrew the old lubrication system (only
with CPP).
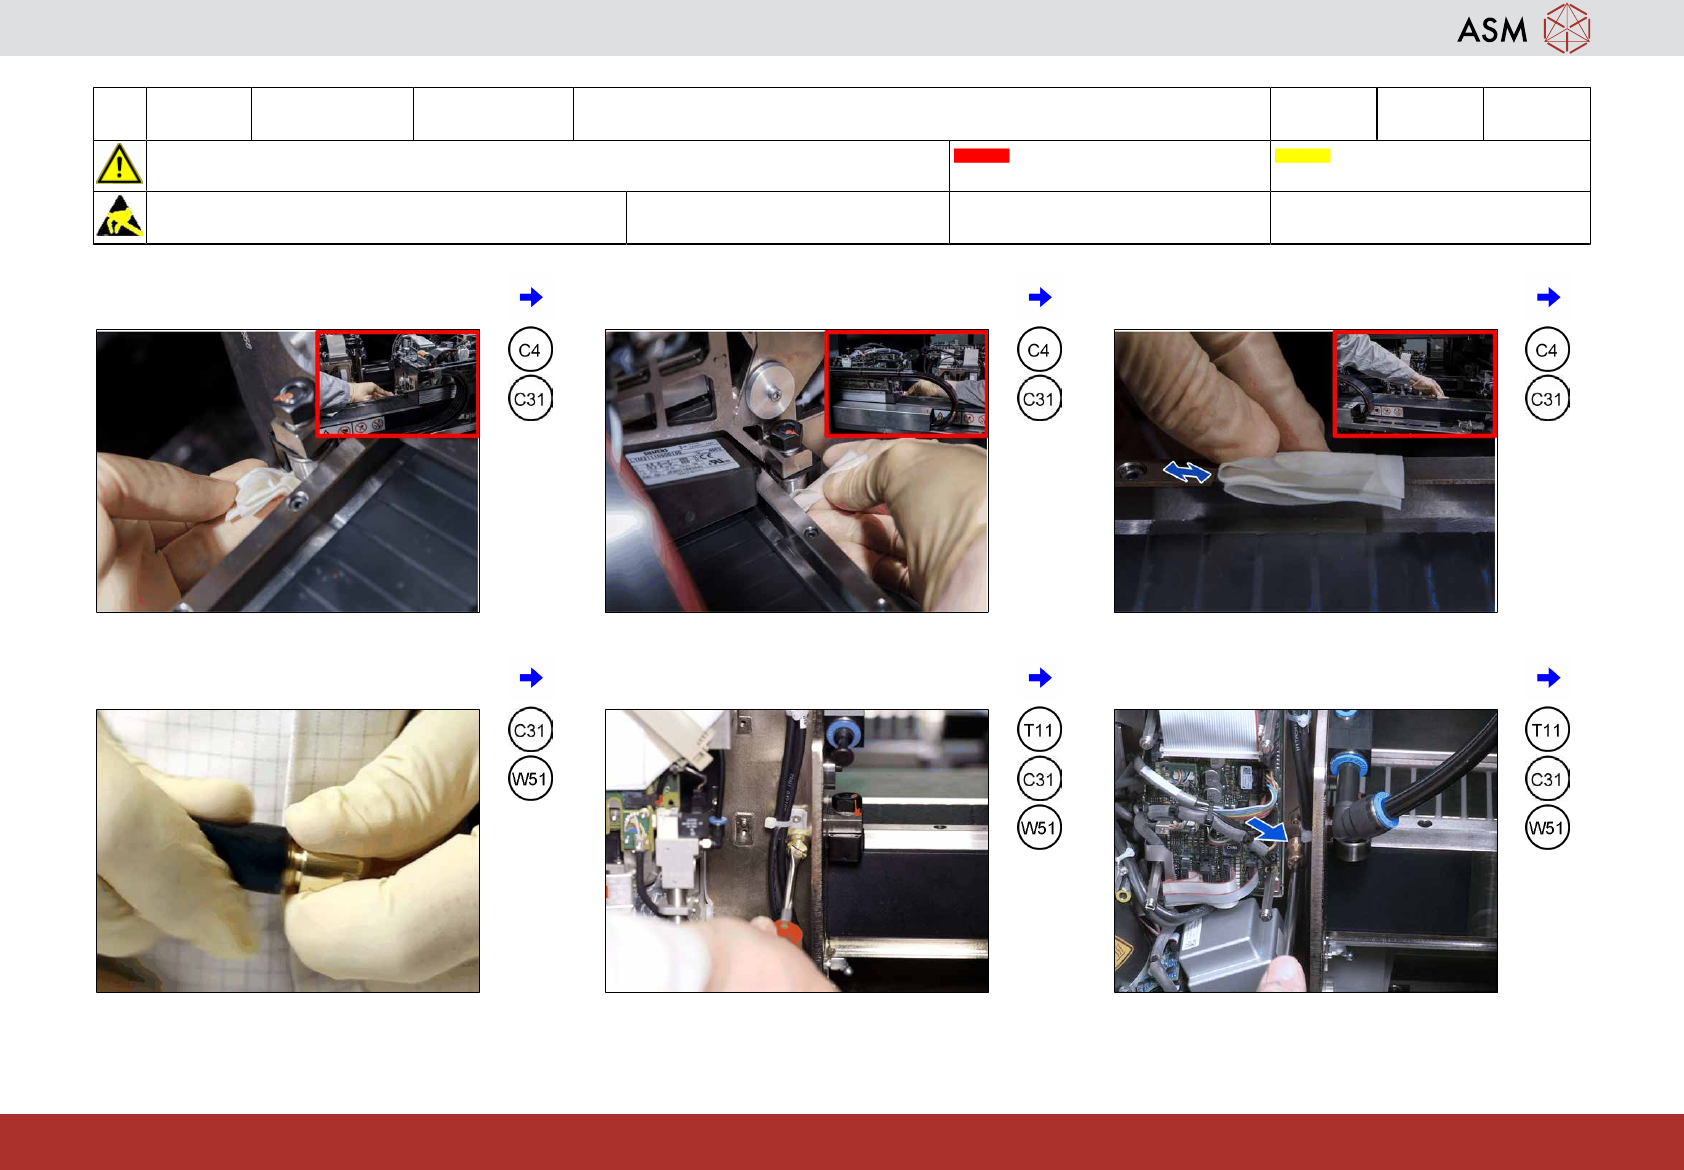
7 WF2 SX1/2 Clean the X-Axis loose bearing, contact surface and scale and replace
the lubrication system.
2.75 min 2 / 3
CAUTION! Refer to safety instructions in user manual before commencing Maintenance
Machine Status OFF Transport Empty
NOTICE! ESD guidelines are to be followed Tool:
T11
Wear Part:
W51
Consumables:
C3, C4, C5, C31
www.asm-smt.com
7 Clean the loose bearing at the left side of
the head.
8 Clean the loose bearing at the right side of
the head.
9 Clean the contact surface over the entire
length.
10 Take off the protection cap. 11 Screw in the new lubrication system (only
with CPP).
12 Screw in the new lubrication system (only
with C&P20x).