00197815-04_JC_PM_WF2_SX12_EN.pdf - 第76页
22 WF2 SX 1/2 - Appendix: Calibrate the TwinHead 8 min 2 / 9 C A U T I O N ! R e f e r t o s a f e t y i n s t r u c t i o n s i n u s e r m a n u a l b e f o r e c o m m e n c i n g M a i n t e n a n c e Machine Statu…
22 WF2 SX 1/2 - Appendix: Calibrate the TwinHead 8 min 1 / 9
CAUTION! Refer to safety instructions in user manual before commencing Maintenance
Machine Status ON Conveyor Empty
NOTICE! ESD guidelines are to be followed Tool:
K01
Wear Part: Consumables:
www.asm-smt.com
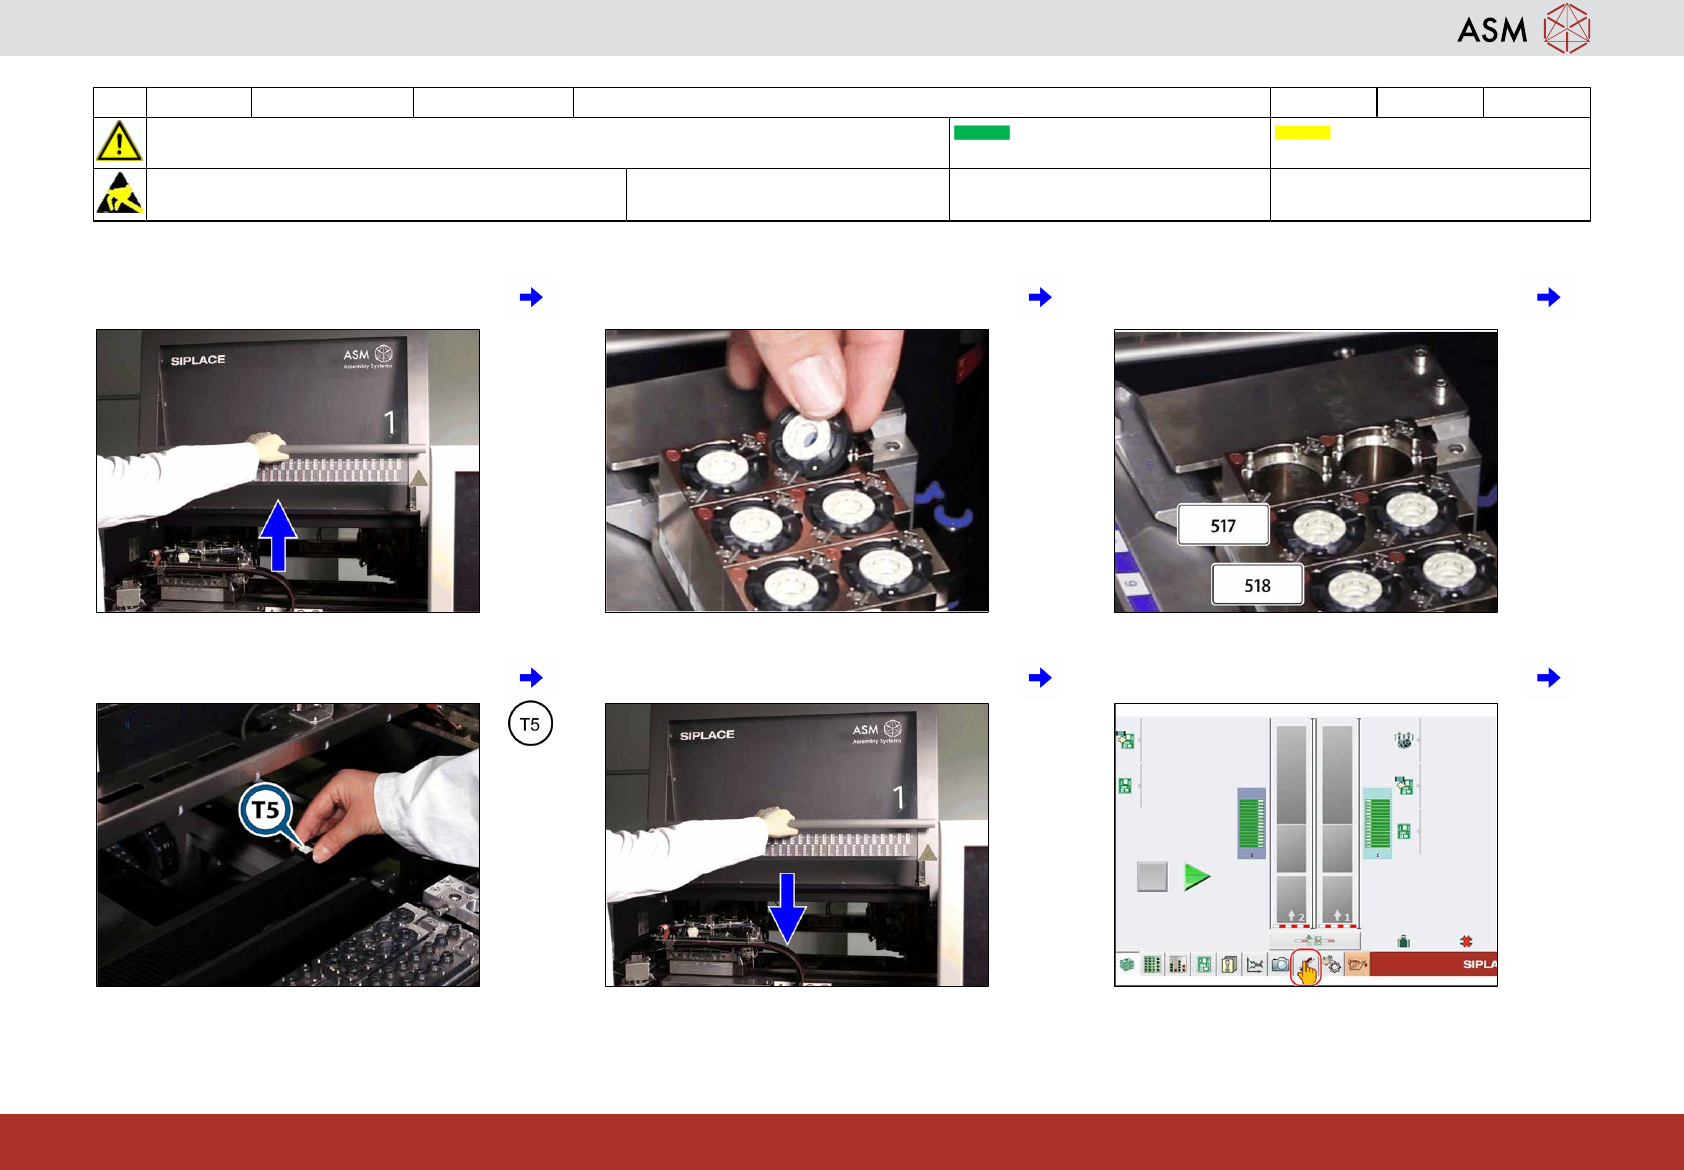
1 Open the cover. 2 Remove all nozzles from the nozzle
changer.
3 Insert nozzle type 517 into magazine 2
and nozzle type 518 into magazine 3.
4 Insert the calibration tool. 5 Close all covers. 6 Click on "Settings and options".
22 WF2 SX 1/2 - Appendix: Calibrate the TwinHead 8 min 2 / 9
CAUTION! Refer to safety instructions in user manual before commencing Maintenance
Machine Status ON Conveyor Empty
NOTICE! ESD guidelines are to be followed Tool:
K01
Wear Part: Consumables:
www.asm-smt.com
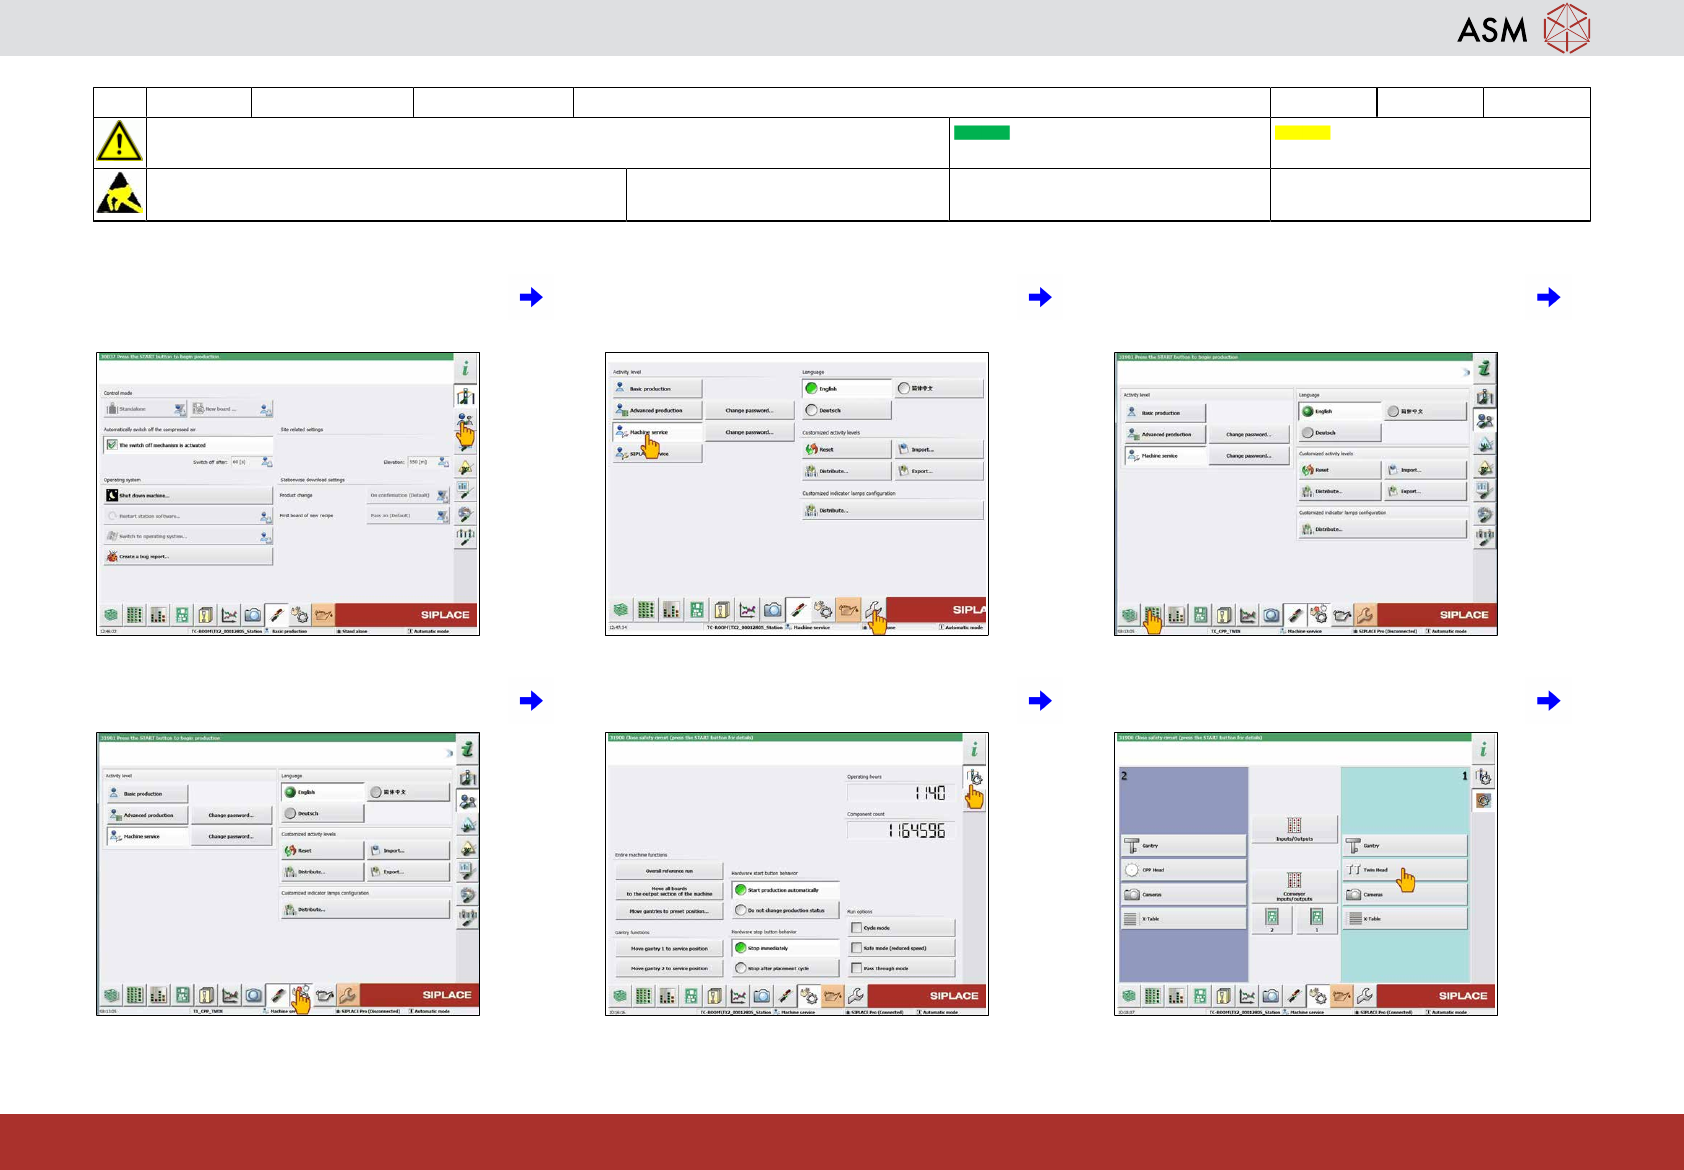
7 Click on "User settings". 8 Click on "Machine service" and "Cali-
bration".
9 If you mount the same head click on "Dis-
play, check and setup feeders" and con-
tinue with step 21.
10 If you mount a new head click on "Check
sensors and options".
11 Click on "Check sensors specific compon-
ents".
12 Select the "Twin head" returned to the
machine.
22 WF2 SX 1/2 - Appendix: Calibrate the TwinHead 8 min 3 / 9
CAUTION! Refer to safety instructions in user manual before commencing Maintenance
Machine Status ON Conveyor Empty
NOTICE! ESD guidelines are to be followed Tool:
K01
Wear Part: Consumables:
www.asm-smt.com
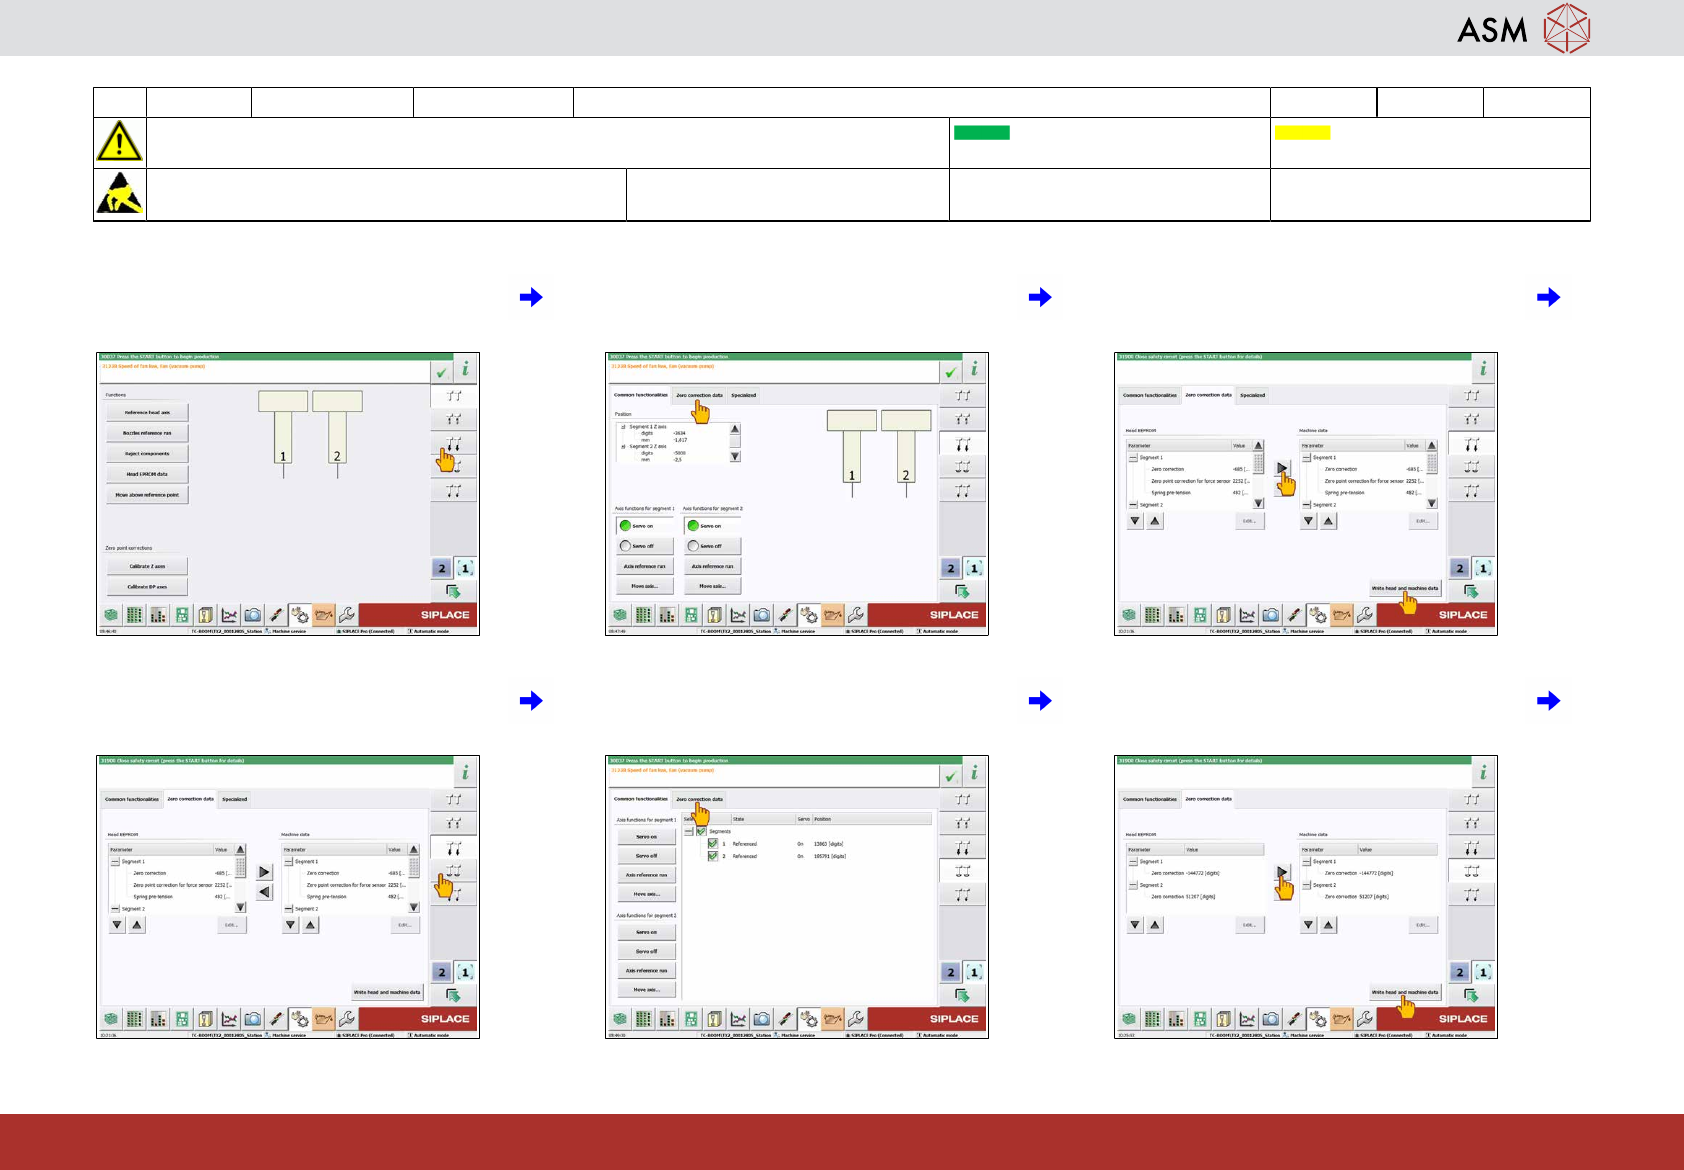
13 Click on "Check positions and functions of
Z-Axis".
14 Click on "Zero correction data". 15 Take over the data by click on the arrow to
the right and "Write head and machine
data".
16 Click on "Check positions and functions of
DP-Axis".
17 Click on "Zero correction data". 18 Take over the data by click on the arrow to
the right and "Write head and machine
data".