00197815-04_JC_PM_WF2_SX12_EN.pdf - 第62页
19 WF2 SX1/2 Appendix: CPP head exchange 3 min 4 / 4 C A U T I O N ! R e f e r t o s a f e t y i n s t r u c t i o n s i n u s e r m a n u a l b e f o r e c o m m e n c i n g M a i n t e n a n c e Machine Status OFF Tr…
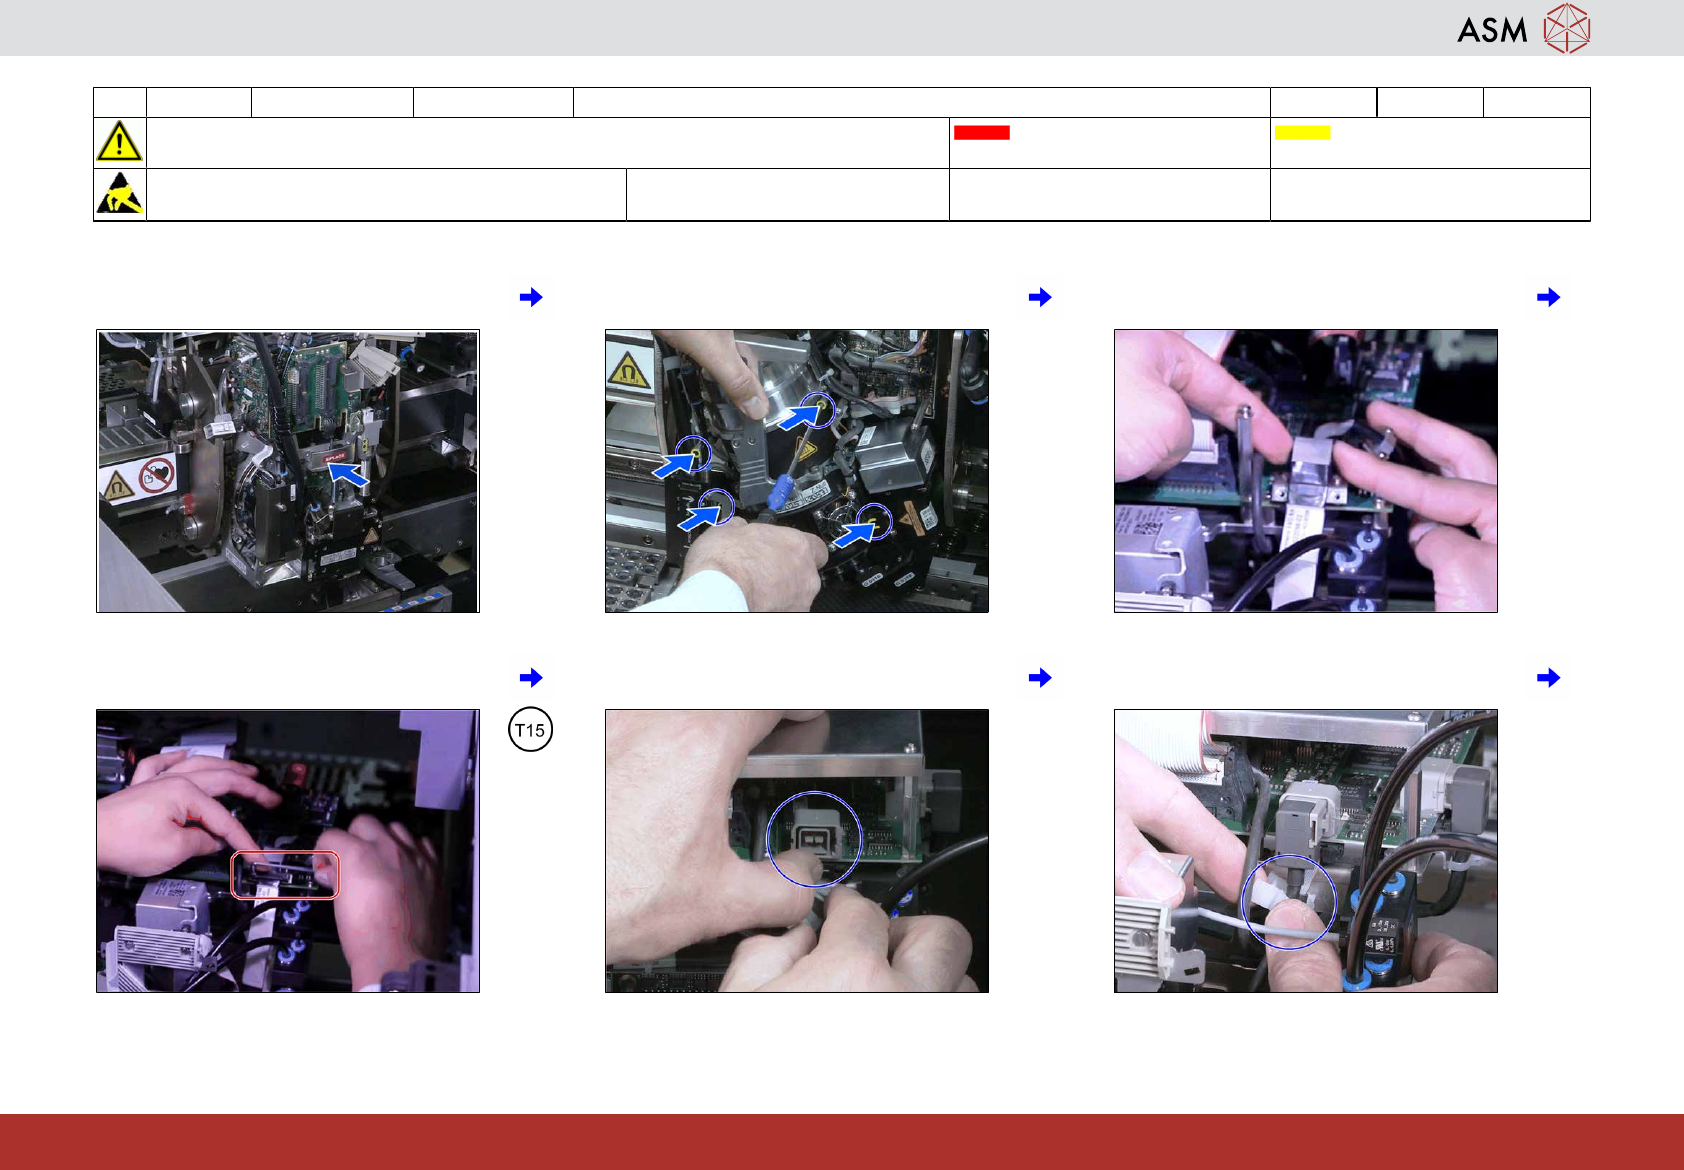
19 WF2 SX1/2 Appendix: CPP head exchange 3 min 3 / 4
CAUTION! Refer to safety instructions in user manual before commencing Maintenance
Machine Status OFF Transport Empty
NOTICE! ESD guidelines are to be followed Tool:
T58, K01
Wear Part: Consumables:
www.asm-smt.com
13 Place the head at the hook. 14 Insert the 4 screws to fix the head and
fasten them with a torque of 2.7Nm.
15 Connect both camera cables (HotLink
only).
16 Fasten the screws holding the strain relief
(HotLink only).
17 Connect the two camera cables (GigE
only).
18 Close the camera cable clip (GigE only).
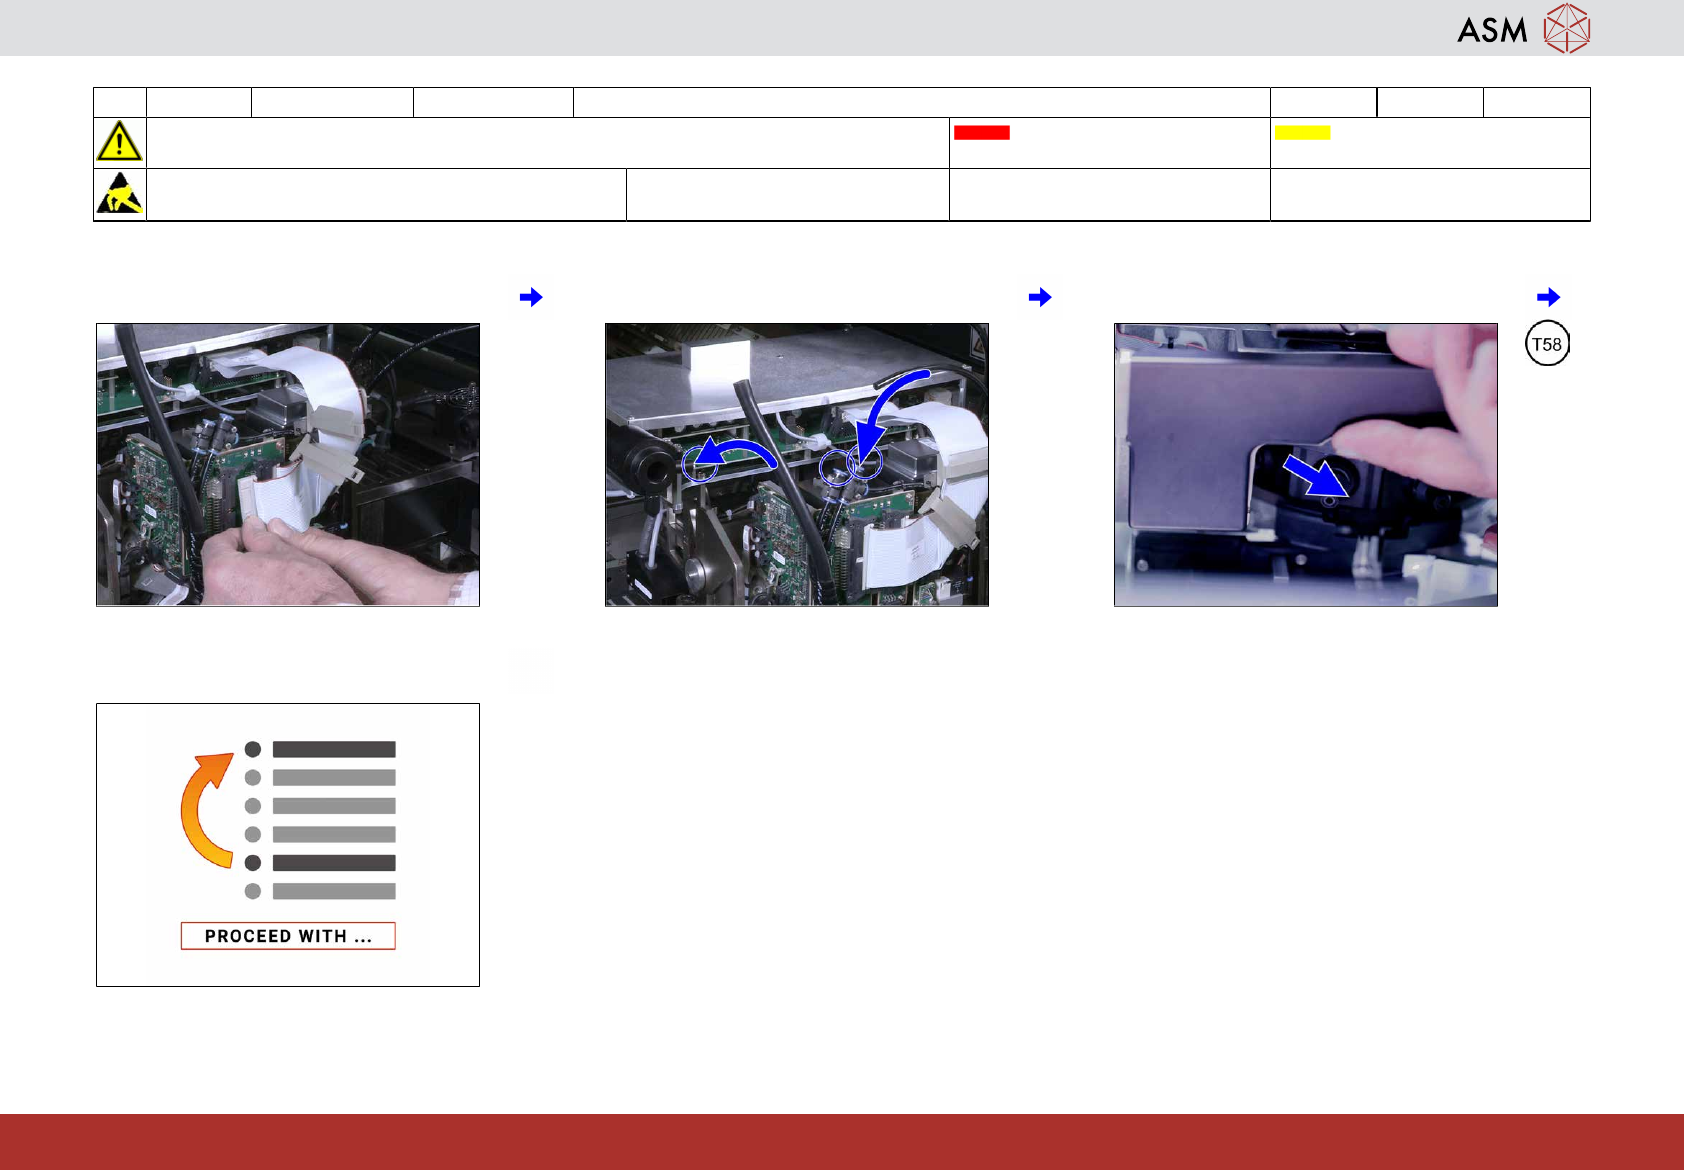
19 WF2 SX1/2 Appendix: CPP head exchange 3 min 4 / 4
CAUTION! Refer to safety instructions in user manual before commencing Maintenance
Machine Status OFF Transport Empty
NOTICE! ESD guidelines are to be followed Tool:
T58, K01
Wear Part: Consumables:
www.asm-smt.com
19 Connect both ribbon cables. 20 Connect the 3 air hoses. 21 Remove the component sensor protection.
22 Proceed with task “Clean the Z-Axis of the
remaining C&P20x”.
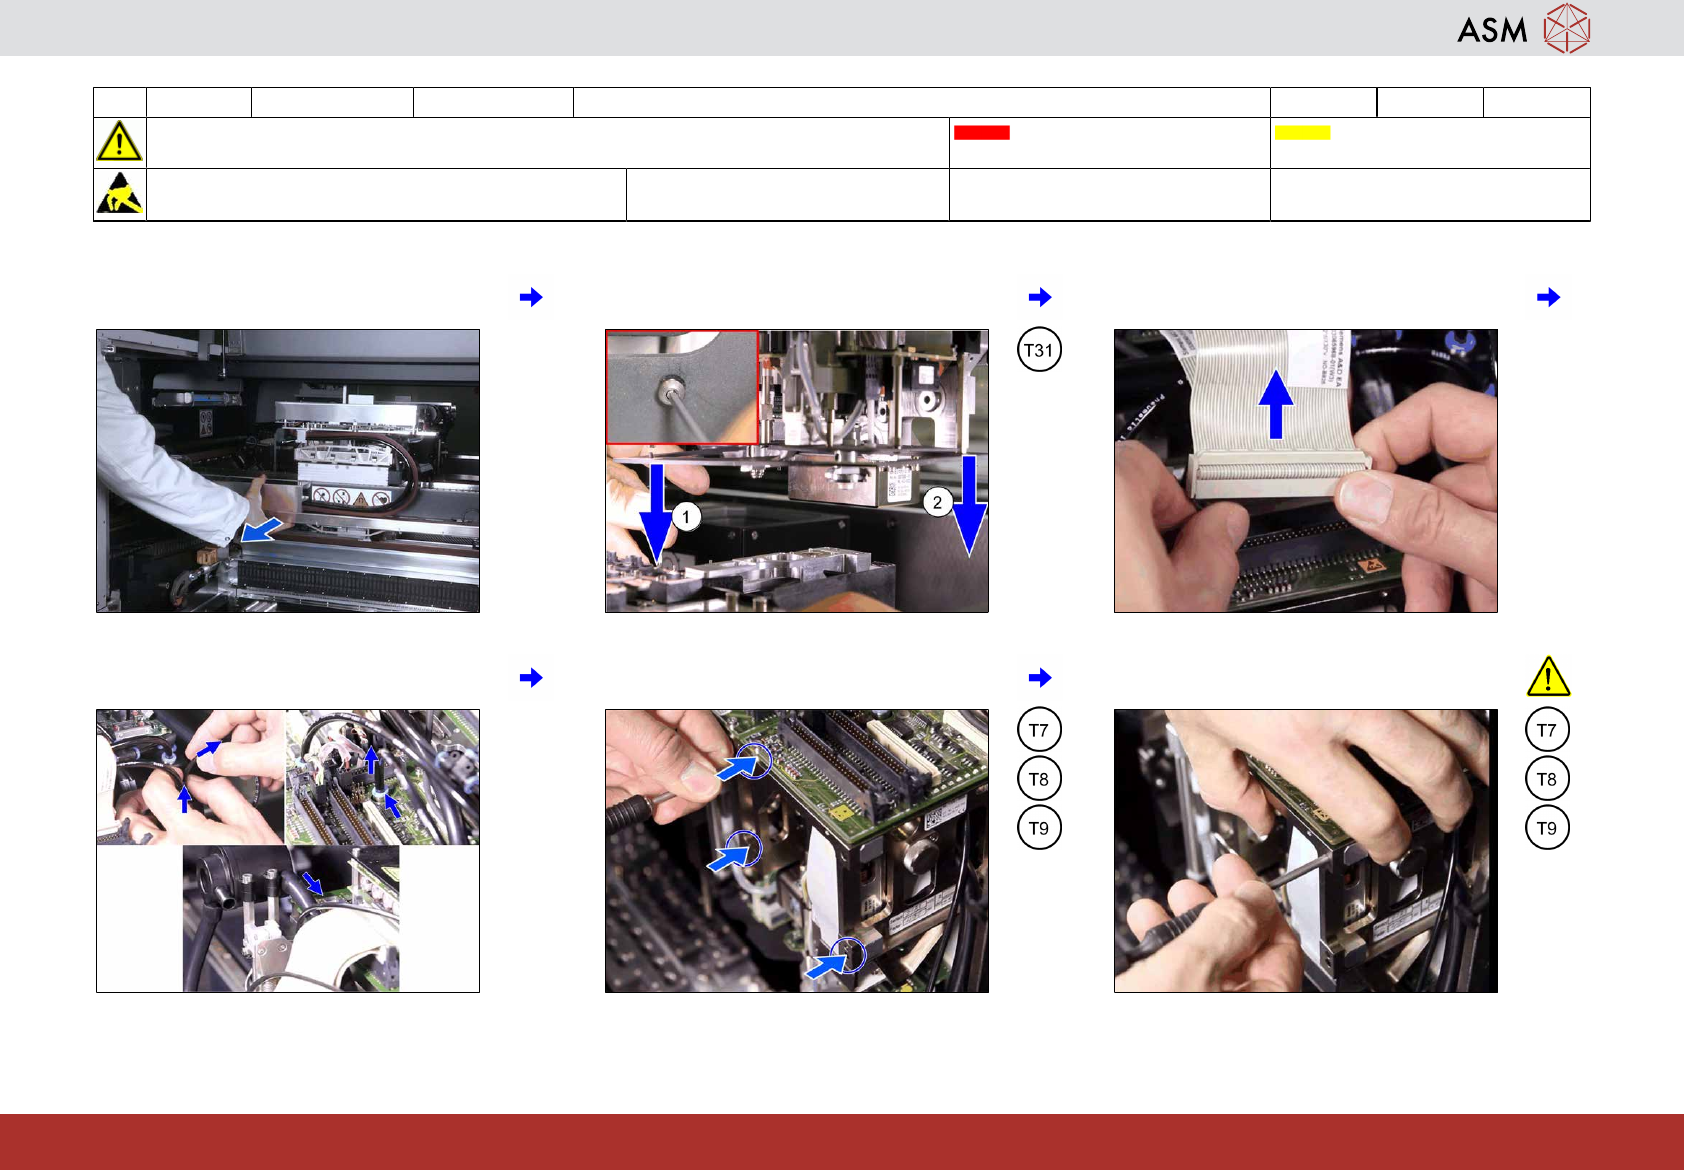
20 WF2 SX1/2 Appendix: TH head exchange 6.25 min 1 / 5
CAUTION! Refer to safety instructions in user manual before commencing Maintenance
Machine Status OFF Transport Empty
NOTICE! ESD guidelines are to be followed Tool:
T87, K01
Wear Part: Consumables:
www.asm-smt.com
1 Move the gantry with the head to be main-
tained to the end limit.
2 Loosen the 2 screws holding the camera
visual shield.
3 Disconnect the ribbon cables from the
right head segment.
4 Unplug the 3 air hoses from the right head
segment.
5 Remove the 3 screws fixing the right head
segment.
6 Hold the segment firmly, remove the last
screw and take the segment away.