YSM40 Mainte_E.pdf - 第75页
3-7 3 Periodic maintenance items n FL head e 1 Remo ve the nozzle. Remove the nozzle where the lead spring is to be replaced. c return all nozzles to the nozzl…
3-6
3
Periodic maintenance items
8
Secure the nozzle shaft.
Install the spring and mount block, and then
secure the nozzle shaft.
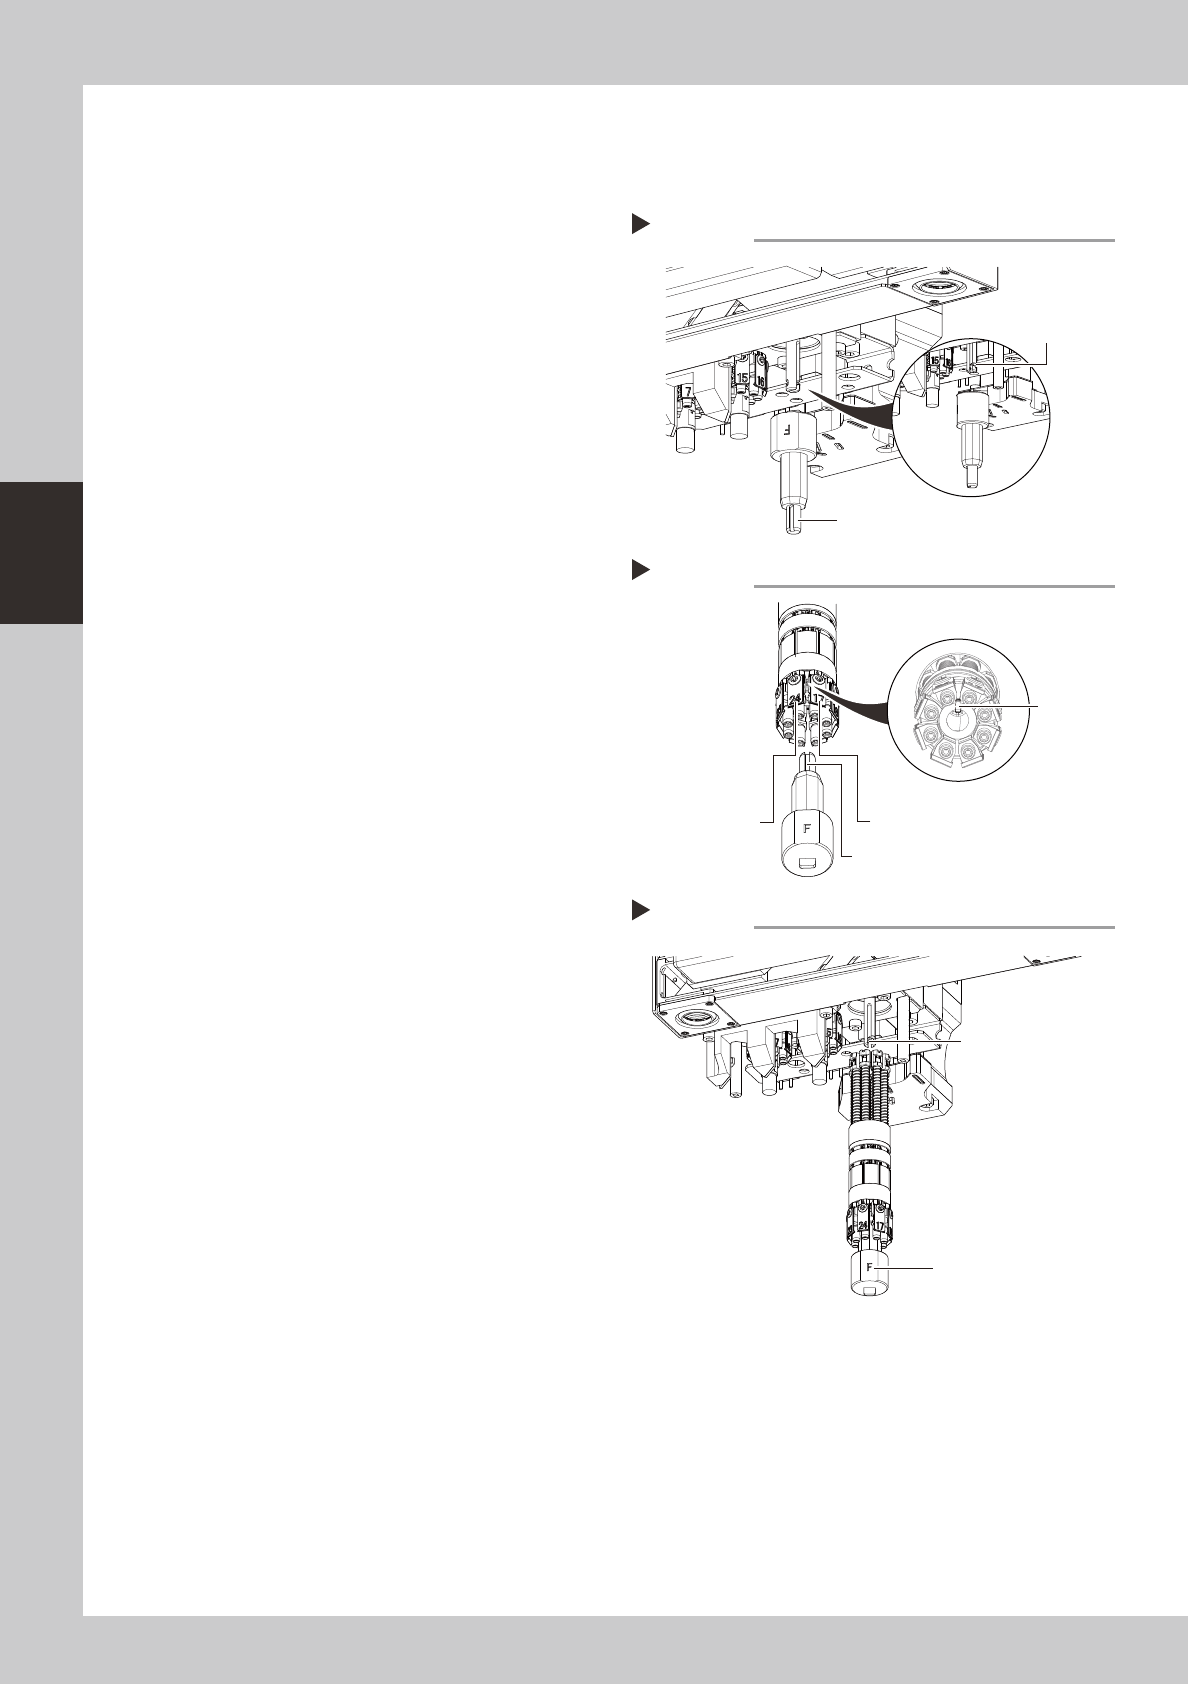
9
Change the orientation of the
keyway in the main shaft.
Use the rotary head attach/detach tool to
turn the keyway so that it directly faces this
machine. (The keyway in the main shaft is
located at twelve o'clock position when
viewed from the lower portion.)
533C1-N5-00
0
Install the rotary head attach/
detach tool.
Insert the rotary head attach/detach tool
into the rotary while aligning its keyway with
the rotary’s pin. The “F” side of the tool
should be positioned between the first and
last heads.
533C2-N5-00
q
Insert the rotary onto the main
shaft.
Align the “F” side of the rotary head attach/
detach tool with the keyway in the main
shaft, and then insert the rotary onto the
main shaft.
533C3-N5-00
w
Pull out the rotary head attach/
detach tool.
e
Reattach the spring holder.
Reverse step 1 to reattach the spring holder.
r
Make sure the rotary is properly
installed.
Turn the rotary by hand one turn to the right
and one turn to the left. If the rotary does
not turn smoothly, then pull it out again.
Check the position of the mount block and
reinstall the rotary using the same procedure
from step 9.
Changing the main shaft orientation
Step 9
Main shaft keyway
Rotary head attach/detach tool
Installing the tool
Step 10
Pin
First head
Last head
Keyway
Installing the rotary
Step 11
Main shaft keyway
“F” marking
3-7
3
Periodic maintenance items
n
FL head
e
1
Remove the nozzle.
Remove the nozzle where the lead spring is
to be replaced.
c
return all nozzles to the nozzle station.
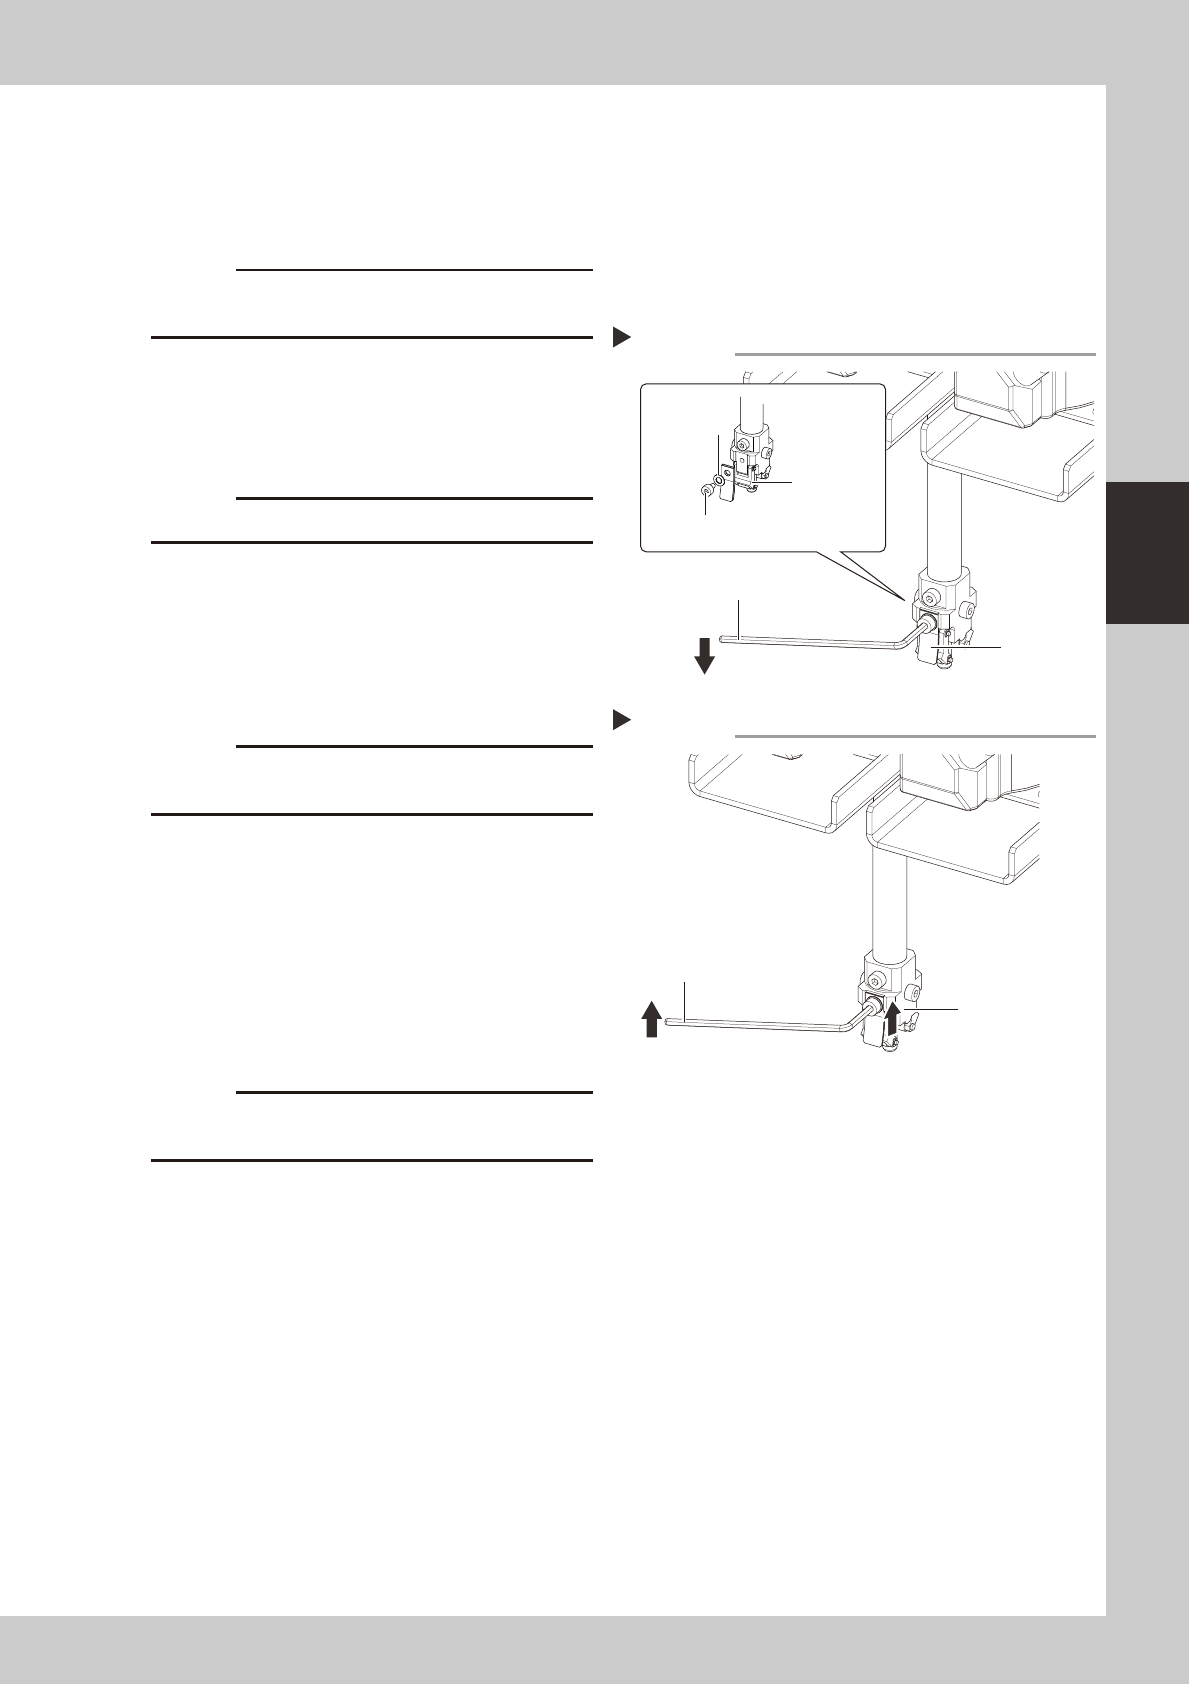
2
Remove the leaf springs.
Use a hex wrench (1.5) to remove the
mounting screw and remove the lead spring.
53314-N5-00
c
3
Install the new leaf spring.
With the leaf spring kept pushed upward
along with the nozzle arm assembly, tighten
the screw mounting with the hex wrench
(1.5) to secure the leaf spring.
53315-N5-00
c
Always attach the leaf springs so that they become
parallel.
4
Reattach the nozzle.
5
Check that the nozzle is held
securely.
1. Check that there is no gap between the
leaf springs and the nozzle.
2. Attempt detaching and attaching the
nozzle several times to check that there
is no looseness.
c
return all nozzles to the nozzle station.
Removing the leaf spring
Step 2
Hex wrench
Leaf spring
Leaf spring mounting screw
Washer
Nozzle arm
assembly
Installing the leaf spring
Step 3
Hex wrench
Push the leaf
spring upward.
3-8
3
Periodic maintenance items
1.2 Nozzle cleaning
ThefollowingdescribesthecleaningprocedureforType50XGroupnozzles.Usethesameprocedurewhen
cleaningType51XGroupandType60XGroupnozzles.
1.2.1 Cleaning the nozzle buffing area
e
1
Remove the nozzle from the head.
Always first press the emergency stop button
and then remove the nozzle from the head.
The machine must be in emergency stop to
ensure safety during work.
2
Clean the slide section.
Apply IPA (isoprophyl alcohol) or ethanol to
the slide section. Push the nozzle tip several
times to repeat the buffing action (spring
action) to clean the slide section. After
cleaning, blow sufficient air to remove IPA or
ethanol.
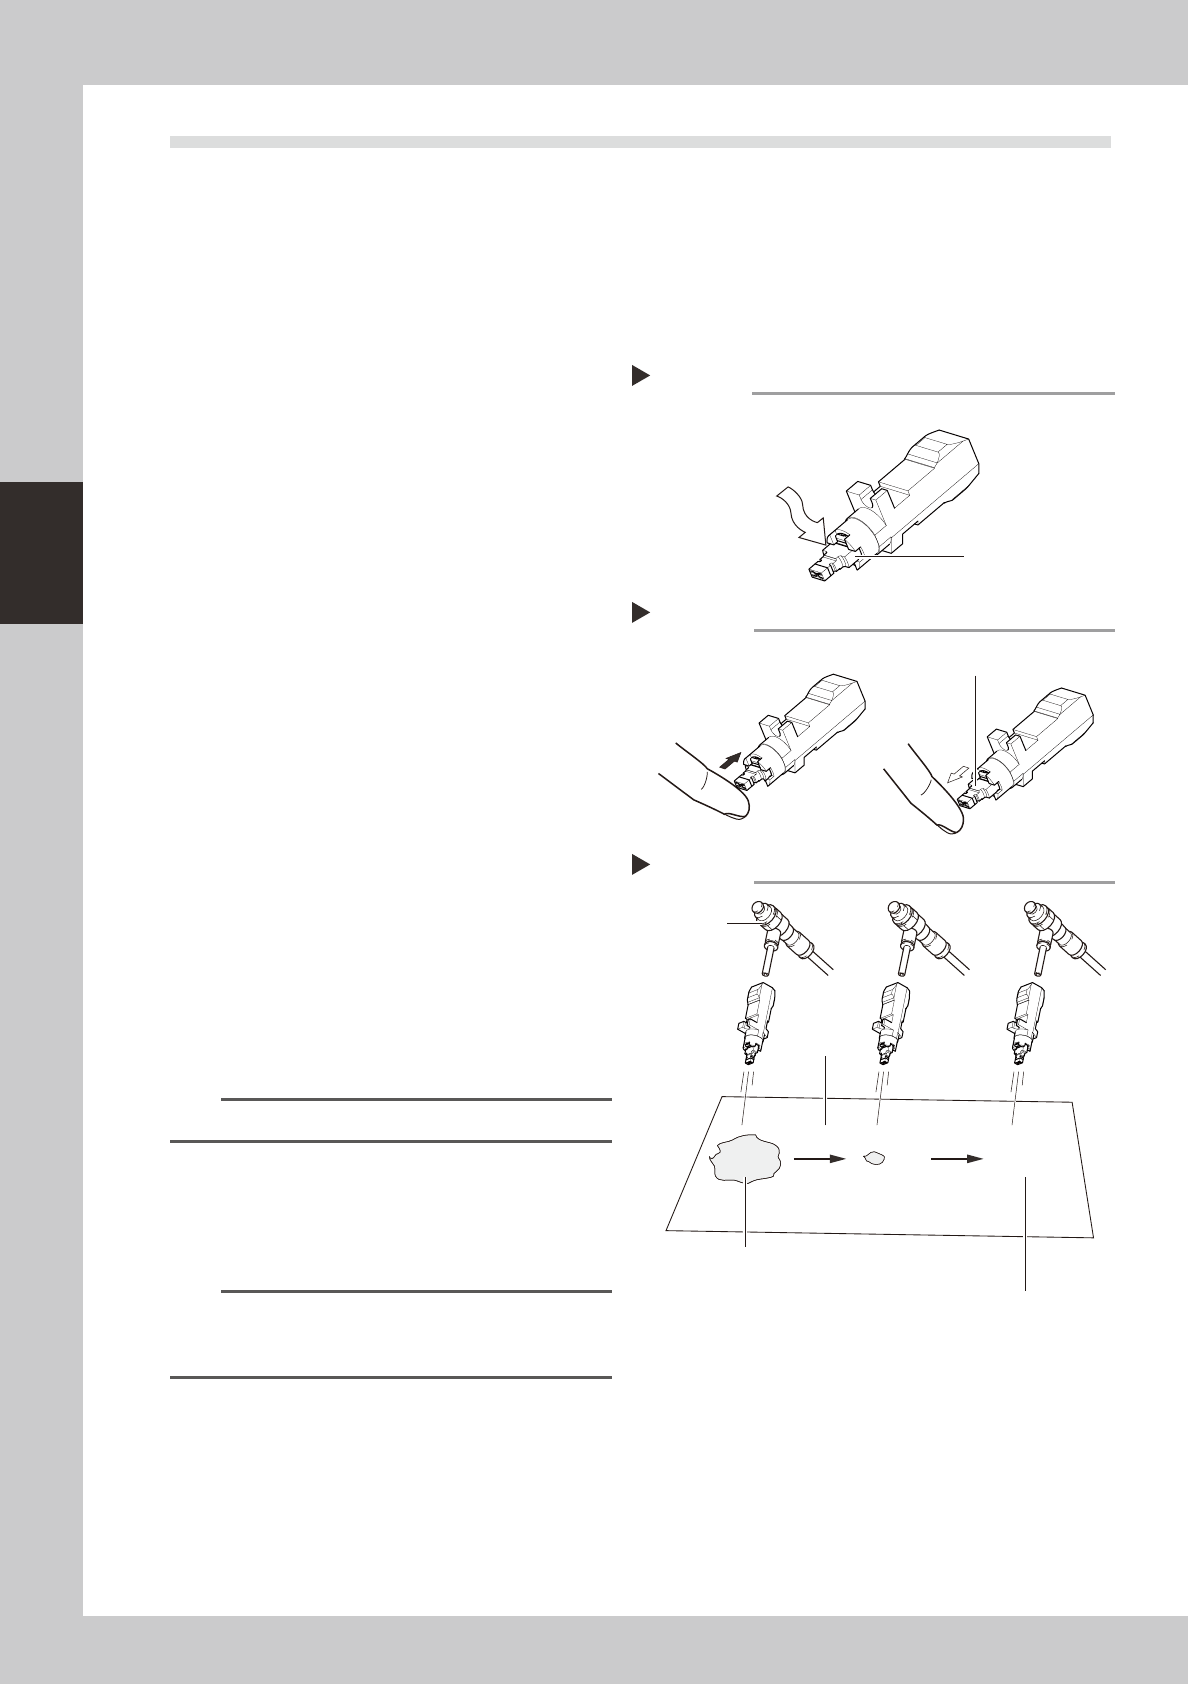
3
Lubricate the slide section.
Using a precision screwdriver or similar tool
with a pointed tip, apply a small amount of
turbine oil (just enough so that it sinks in) to
the slide section.
53301-N5-00
4
Check the buffing action (spring
action).
Push the nozzle tip several times to repeat
the buffing action and spread turbine oil.
Use a lint-free cleaning cloth to wipe away
excess oil from around the nozzle.
53302-N5-00
5
Remove excess oil remaining in the
nozzle.
Air blow with the aIr blow tool for
approximately 5 seconds from the nozzle tip
side, and approximately 5 seconds from the
nozzle mounting side. Repeat this process a
few times to remove excess turbine oil
remaining in the nozzle.
n
NOTE
A thin coat of oil is enough to lubricate the slide section.
6
Check that the oil was removed.
Blow air through the nozzle again while
placing commercially-available oil blotting
paper over the opposite end of the nozzle,
and check for residual oil in the nozzle.
n
NOTE
Performing step 5 is usually sufficient to remove oil
remaining in the nozzle. However, if oil still remains then
blow air through the nozzle once again.
53303-N5-00
7
Return the nozzle to its original
position.
After verifying again that the nozzle is free of
oil, return the nozzle to its original position
(head or nozzle station).
Lubricating the slide section
Step 3
Buffing area
Use a precision screwdriver
to apply a small amount of
turbine oil.
Checking the spring action
Step 4
Spring action at nozzle tip
Checking for residual oil
Step 6
Oil will appear after blowing air (first time) for
about 5 seconds from the nozzle tip.
Repeat the air blow for about 5 seconds
each from the nozzle tip and from the
attachment side.
This task is finished when oil no
longer appears.
Oil blotting
paper
AIr blow tool