YSM40 Mainte_E.pdf - 第97页
3-29 3 Periodic maintenance items 2.3.2 Cleaning and lubricating the Y -axis guide (2-beam type) 1 Make the prepar ations for the cleaning and greasing work. 1. Take off all a ccessories susceptible to the magnetic field…
3-28
3
Periodic maintenance items
3
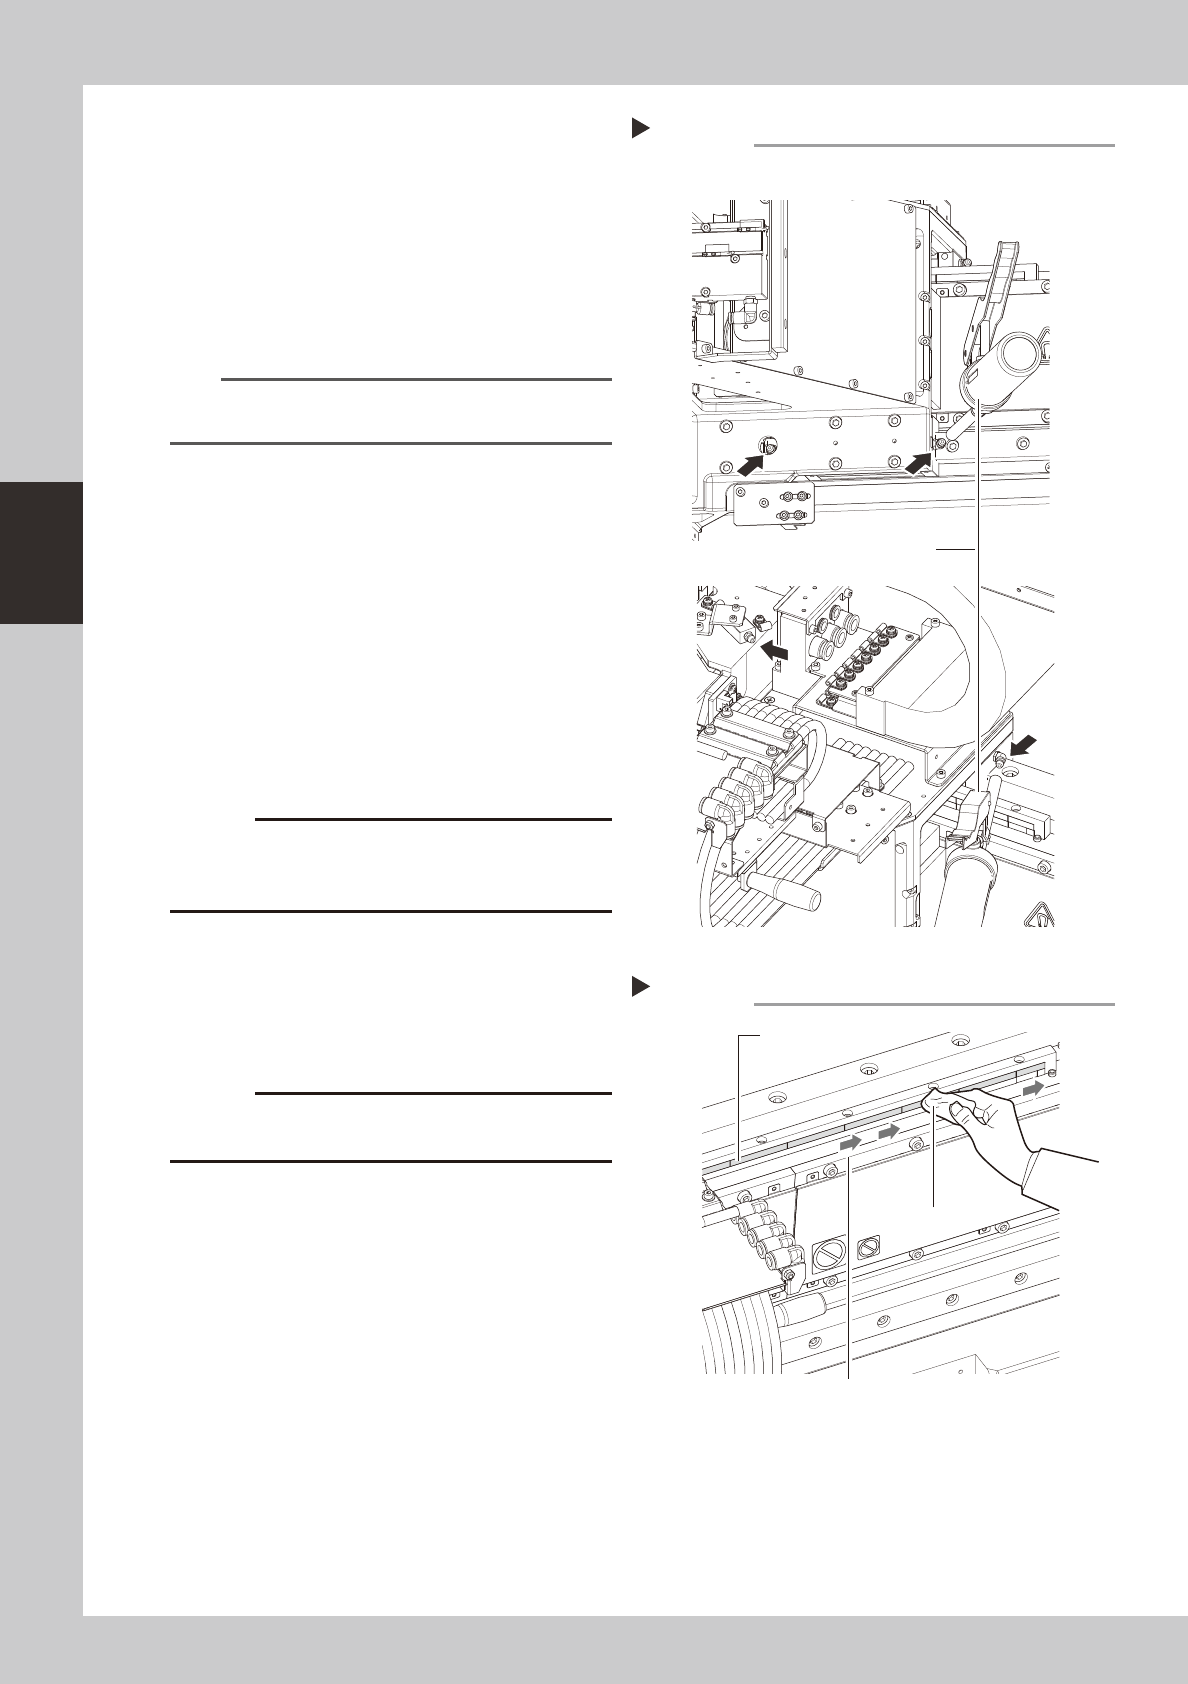
Inject the grease.
Using a grease gun (standard type), inject
the prescribed grease (NSL) at the Y-axis
guide's grease nipples (4 nipples).
1. 2 nipples at front bottom side and rear
bottom side.
2. 2 nipples at front top side and rear top
side.
53365-N5-00
n
NOTE
Inject until the grease begins to seep out from the gap
when the X-axis is pressed.
4
Wipe off the excess grease.
Rotate the axis several times by hand and
wipe off the excess grease.
5
Check the grease condition.
1. Close the cover, attach the batch
change carriage, then release the
"Emergency Stop" status.
e
2. Open the Warm-up screen, and perform
the warm-up operation for approximately
8 minutes. After the machine stops, wipe
off grease which has collected on the
guide and the guide end face.
c
Repeat Step 5 until grease accumulations no longer
present could cause the grease to spatter.
6
Clean the linear scale.
Use a dry cloth to dry-wipe the linear scale.
If significant soiling exists, use an IPA to wipe
it in one direction, then dry-wipe the area.
53366-N5-00
c
rubbing it with excessive force.
Injecting the grease
Step 3
Front bottom, rear bottom
Front top, rear top
Grease gun (standard)
Cleaning the linear scale
Step 6
Cloth
Linear scale
Wipe in one direction
3-29
3
Periodic maintenance items
2.3.2 Cleaning and lubricating the Y-axis guide (2-beam type)
1
Make the preparations for the cleaning and greasing work.
1. Take off all accessories susceptible to the magnetic fields, such as a wristwatch and/or magnetic ID
card.
e
2. Press the emergency stop button to put the machine in the emergency stop state.
3. Using the carriage UP/DOWN switch, lower the carriage then detach it.
4. Place a square cloth on the push-up plate.
2
Clean the guide.
1. Move the Y-axis to one end, then use a
paper cloth which produces no lint, etc.,
(clean room type) to wipe the entire
guide.
2. Next, move the Y-axis to the opposite
side, then wipe the opposite-side guide.
3
Inject the grease.
Using a grease gun (standard type), inject
the prescribed grease (NSL) at the Y-axis
guide's grease nipples (4 nipples).
53397-N5-00
n
NOTE
Inject until the grease begins to seep out from the gap
when the X-axis is pressed.
4
Wipe off the excess grease.
Rotate the axis several times by hand and
wipe off the excess grease.
5
Check the grease condition.
1. Close the cover, attach the batch
change carriage, then release the
"Emergency Stop" status.
e
2. Open the Warm-up screen, and perform
the warm-up operation for approximately
8 minutes. After the machine stops, wipe
off grease which has collected on the
guide and the guide end face.
c
Repeat Step 5 until grease accumulations no longer
present could cause the grease to spatter.
6
Clean the linear scale.
1. Using a cleaning cloth moistened with
IPA, wipe the linear scale horizontally as
shown in the figure at right. Then, use a
dry cloth to dry-wipe the linear scale.
2. Using a cleaning cloth moistened with
IPA, wipe the area near the origin
position mark at least 3 times back and
forth vertically. Then, use a dry cloth to
dry-wipe that area.
53398-N5-00
c
rubbing it with excessive force.
Injecting the grease
Step 3
Grease nipple for upper guide
Grease nipple for lower guide
Cleaning the linear scale
Step 6
Cloth
Linear scale
Origin position mark (Vertical line)
3-30
3
Periodic maintenance items
2.4 Conveyor (and other areas)
Thissectionexplainsthecleaningproceduresfortheboardconveyorarea.Thisareaincludestheboard
detectionsensorsattransitpositions,theboarddetectionsensorsattheINandOUTports,andthefeederlift
sensor.
2.4.1 Board sensors
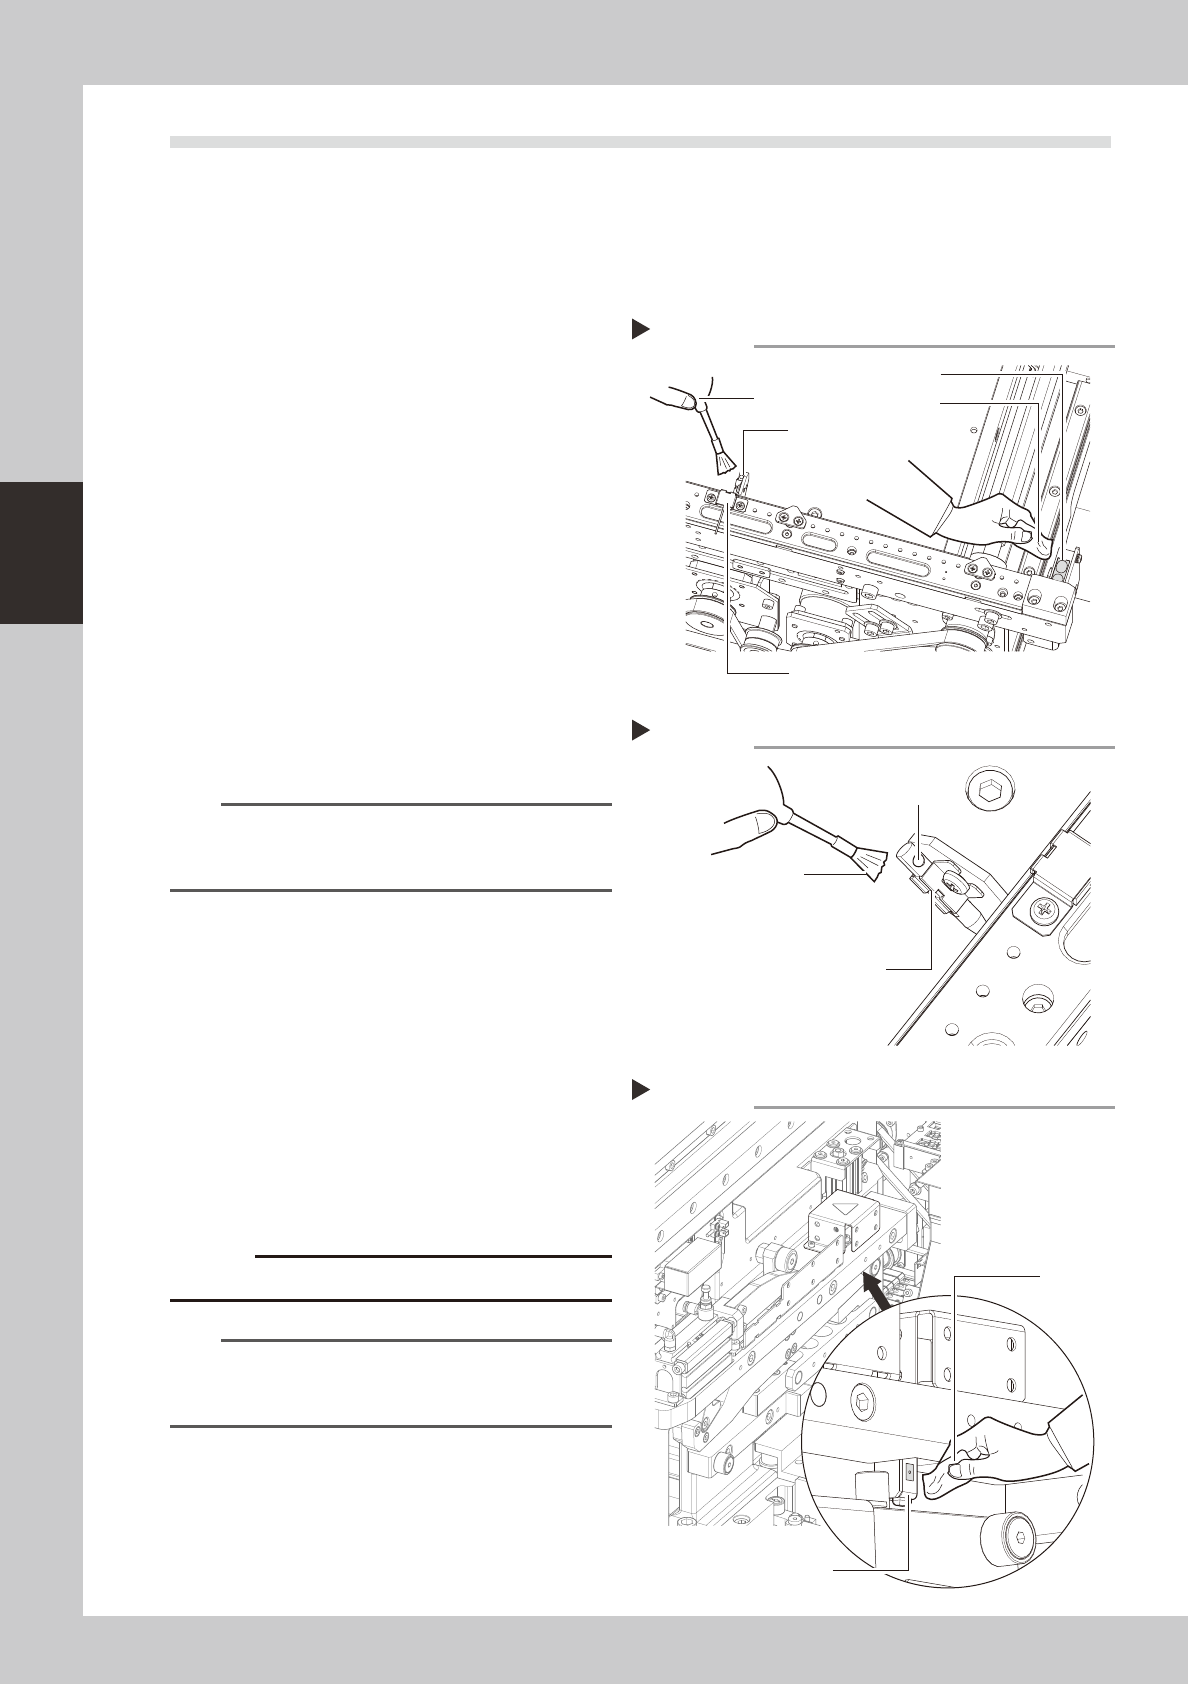
1
Clean the board detection sensors
at the IN and OUT ports.
1. Use an optical brush to clean the dust
from the top faces of the sensors.
2. Use either a cotton swab or a cloth
dampened with a small amount of IPA to
clean the top faces of the sensors.
53380-N5-00
2
Clean the transit position sensor
beam receiver.
Use an optical brush to clean the transit
position sensor beam receiver.
3
Clean the transit position sensor
beam emitter.
Use an optical brush to clean the end hole
of the transit position sensor beam emitter.
53381-N5-00
n
NOTE
If foreign matter other than dust is lodged inside the
laser beam emitter's end hole, use the vacuum
assembly (optional) to suck it out.
2.4.2 Feeder lift sensor
1
Detach the batch change carriage.
2
Wipe the dust from the sensor.
Use an optical brush to remove any dust
from the sensor area.
53382-N5-00
3
Clean the sensor.
Clean the sensor's surface using a cotton
swab or a cloth dampened with a small
amount of IPA.
c
Avoid using excessive force when cleaning the sensors.
n
NOTE
The cATS is also equipped with a feeder float sensor.
Clean that sensor with the same procedure as used for
the feeder exchange cart.
Cleaning the board sensors
Step 1
IN (OUT) port sensor
Optical brush
Cloth
Transit position sensor (laser beam receiver)
Transit position sensor
(laser beam emitter)
Cleaning the board sensor (laser beam emitter)
Step 3
Optical brush
End hole
Transit position sensor
(laser beam emitter)
Cleaning the feeder lift sensor
Step 2, 3
Feeder lift sensor
Cloth