Nordson_EFD_OptiSure_Operating_Manual.pdf - 第35页
OptiSure Automated Optical Inspection 35 www.nordsonefd.com info@nordsonefd.com +1-401-431-7000 Sales and service of Nordson EFD dispensing systems are available worldwide. # Click Step Reference Image 11 • Click RUN to …
OptiSure Automated Optical Inspection
34 www.nordsonefd.com info@nordsonefd.com +1-401-431-7000 Sales and service of Nordson EFD dispensing systems are available worldwide.
# Click Step Reference Image
8
>
>
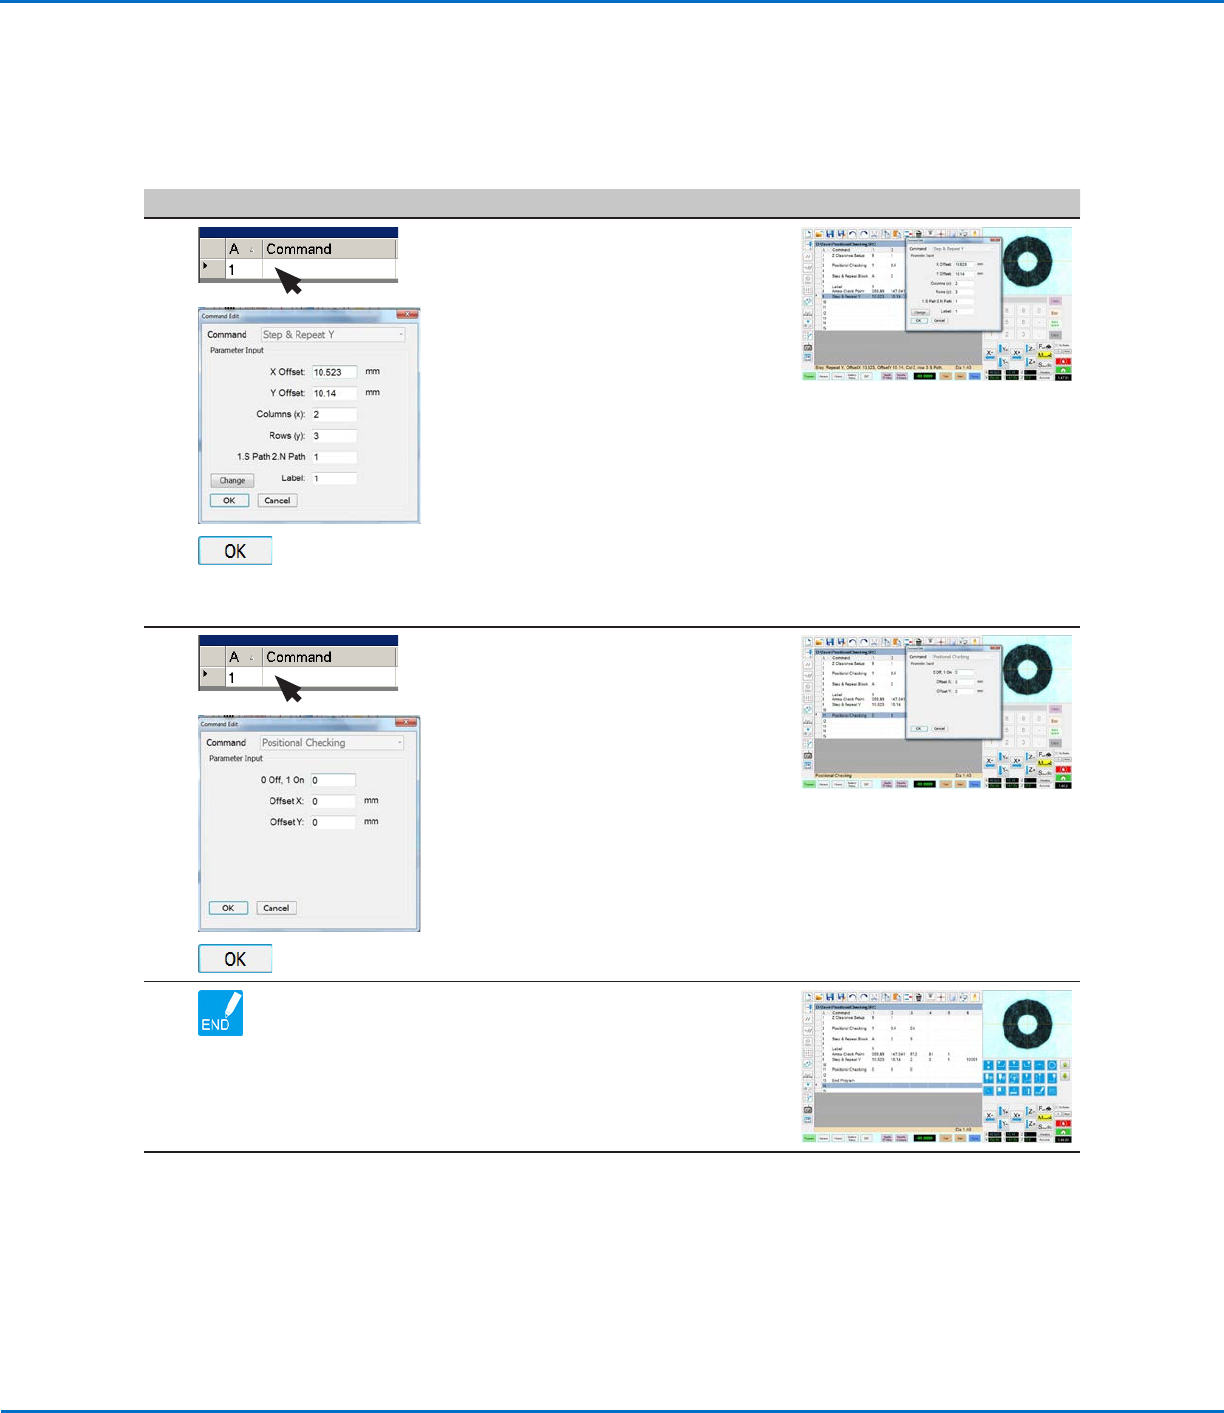
• Insert a Step & Repeat Y command
and enter the following:
- X OFFSET: Determined in step 7
on page33.
- Y OFFSET: Determined in step 7
on page33
- COLUMNS (x): 2
- ROWS (y): 3
- 1.S PATH 2.N PATH: 1
- LABEL: 1 (from step 3 on
page32)
NOTE: The Change button toggles
this parameter between Label and
Address.
• Click OK.
9
>
>
• Insert a Positional Checking
command and enter 0 to turn the
command OFF.
NOTE: Offset X and Offset Y can be
blank.
• Click OK.
10 • Insert an END PROGRAM command
to complete the program.
NOTE: The complete example
program is provided on page 36.
Continued on next page
Positional Checking Example (continued)
To Use Positional Checking in a Program (continued)
Using the Arrow Types (continued)
OptiSure Automated Optical Inspection
35www.nordsonefd.com info@nordsonefd.com +1-401-431-7000 Sales and service of Nordson EFD dispensing systems are available worldwide.
# Click Step Reference Image
11
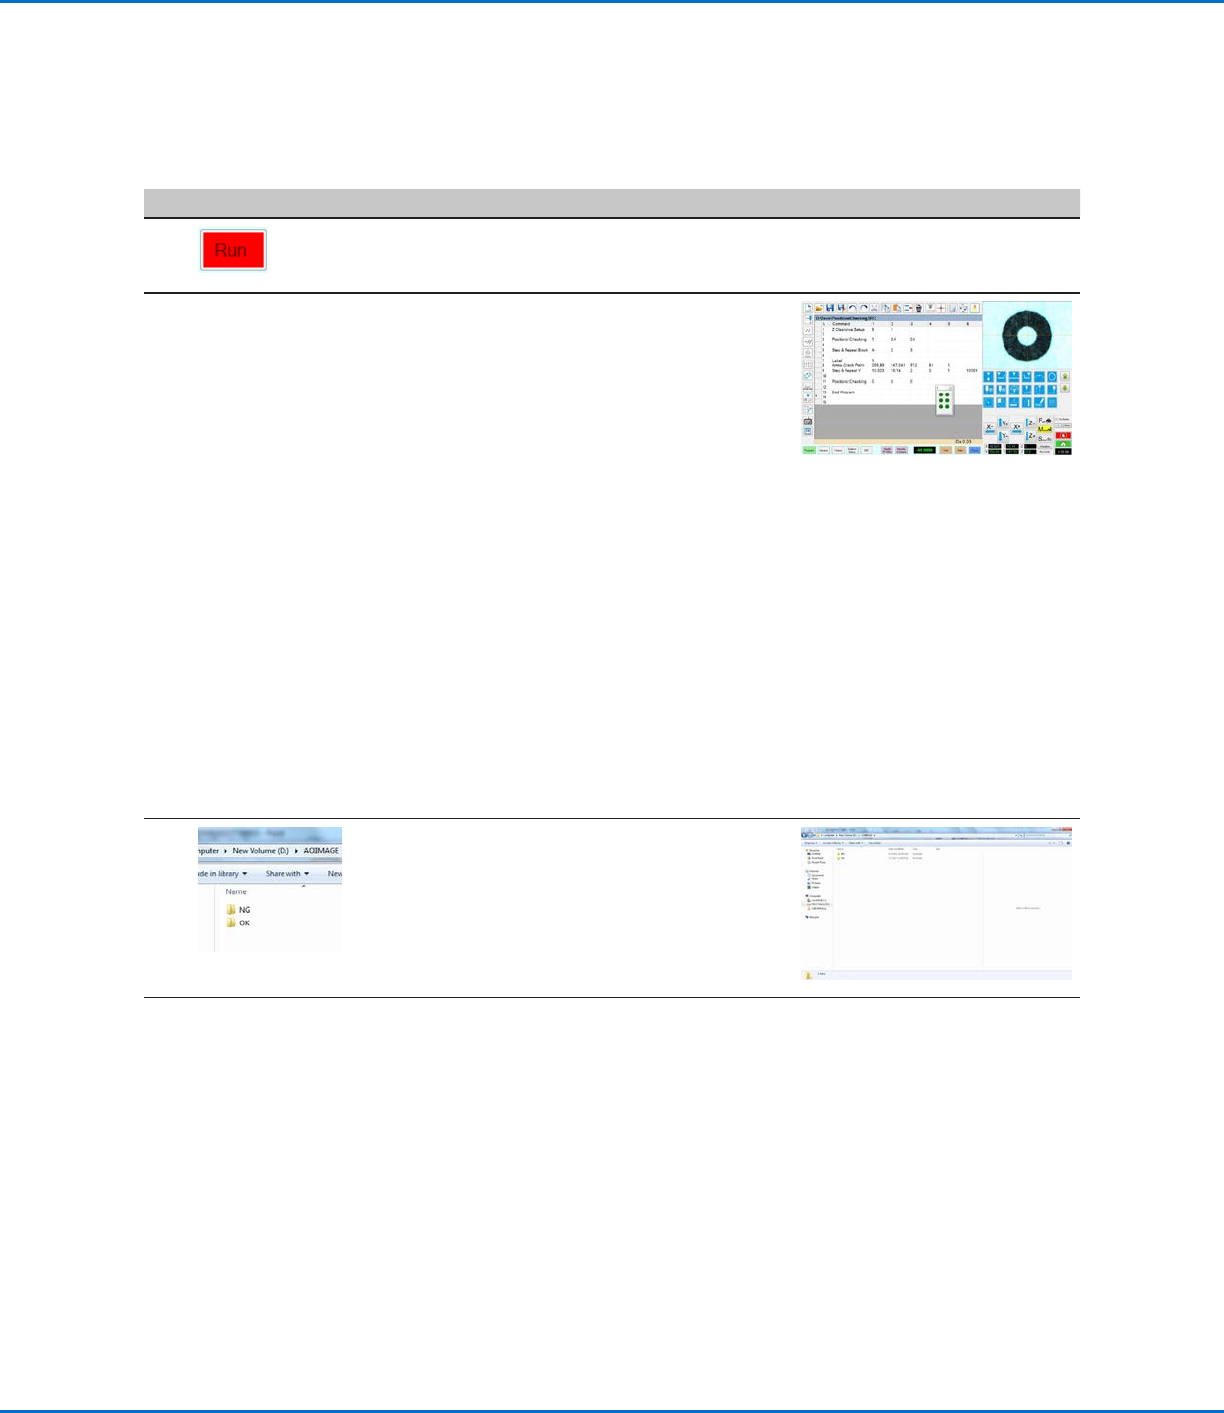
• Click RUN to view the program
and to observe the results of the
Positional Checking.
As the program runs, the following occurs:
• A window opens to show green or red dots (for this example, in a
grid of two columns and threerows), indicating whether a deposit
(the white dot) passes (green) or fails (red):
- Pass: The deposit is within both Offset X and Offset Y values.
- Fail: The deposit is outside one or both of the Offset X / OffsetY
values.
NOTES:
- The window is named A (from step 2 on page32).
- In this example, all dots are green because all white dots are
within the specified X and Y offsets.
• If a dot fails, the system takes the action specified by the Stop,
Skip, Pause, Ask parameter (Skip, in this example). Refer to “Arrow
Check Point” on page71 for details.
• Screen captures of both passed and failed dots are saved as
images and named automatically.
NOTE: If the screen captures are not automatically saved, ensure
that the Save Images checkbox in System Setup is selected. Refer
to “Setting Up the System to Save Images” on page9 for
details.
12 • To view the images of the marks,
use the file explorer application to
navigate to D:\AOIIMAGE:
- Dots that passed (green) are
saved in the OK folder.
- Dots that did not pass (red) are
saved in the NG folder.
Continued on next page
Using the Arrow Types (continued)
Positional Checking Example (continued)
To Use Positional Checking in a Program (continued)
OptiSure Automated Optical Inspection
36 www.nordsonefd.com info@nordsonefd.com +1-401-431-7000 Sales and service of Nordson EFD dispensing systems are available worldwide.
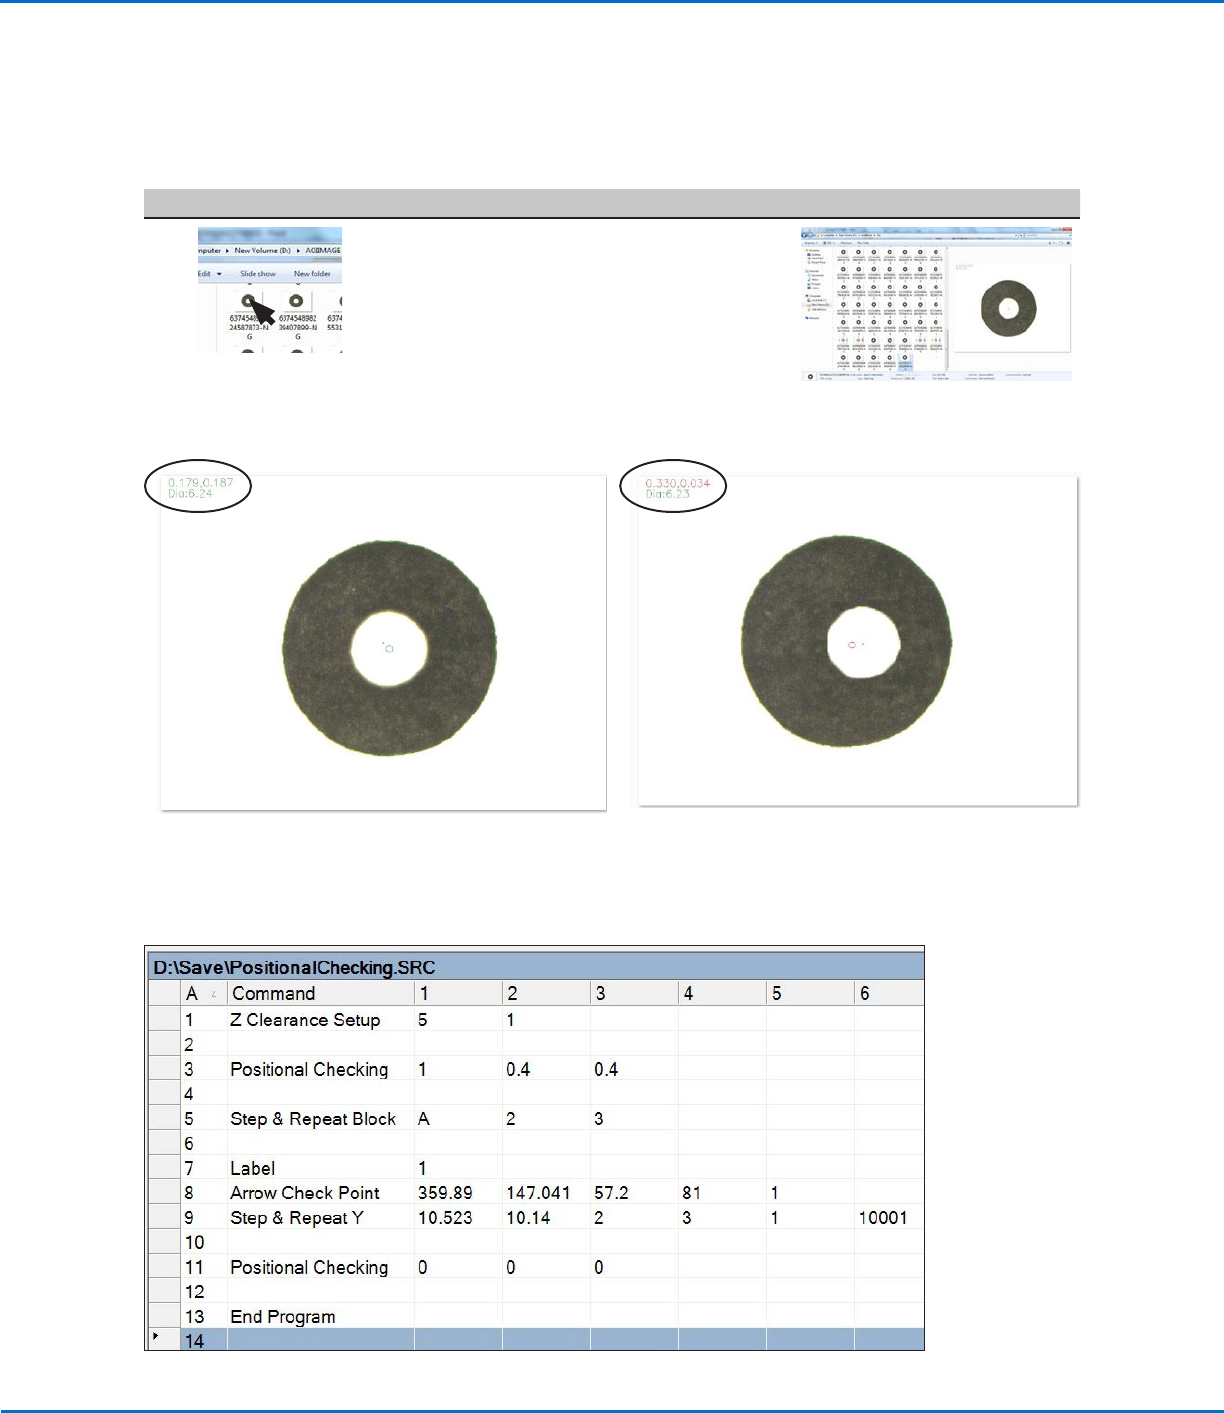
Example program using Positional Checking and Step & Repeat commands to check dispensed dots
# Click Step Reference Image
13
• Open an image to view more
information, including Diameter and
X and Y offsets. Example images
for both a passed and failed dot are
provided below.
Positional Checking Example (continued)
To Use Positional Checking in a Program (continued)
Using the Arrow Types (continued)
Location of diameter and offset details in the image of a dot that
PASSED a positional check
Location of diameter and offset details in the image of a dot
that FAILED a positional check