Nordson_EFD_OptiSure_Operating_Manual.pdf - 第65页
OptiSure Automated Optical Inspection 65 www.nordsonefd.com info@nordsonefd.com +1-401-431-7000 Sales and service of Nordson EFD dispensing systems are available worldwide. # Click Step Reference Image 7 • Click RUN to t…
OptiSure Automated Optical Inspection
64 www.nordsonefd.com info@nordsonefd.com +1-401-431-7000 Sales and service of Nordson EFD dispensing systems are available worldwide.
# Click Step Reference Image
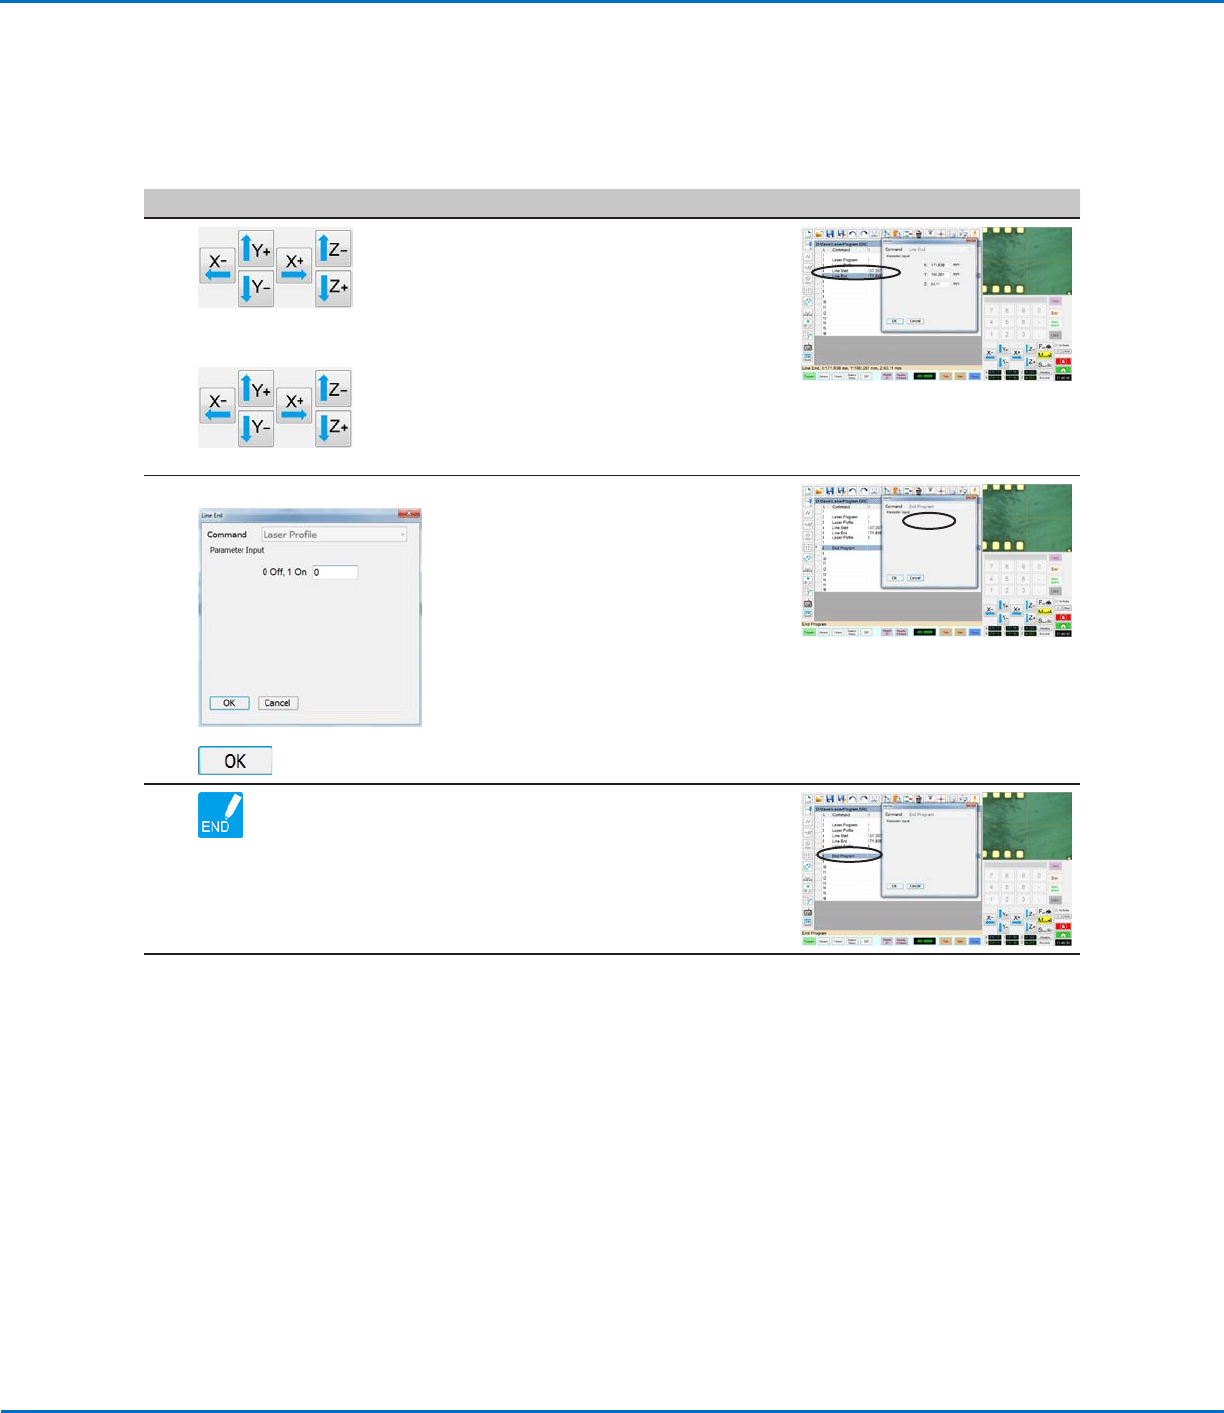
4
> LINE
START
> LINE
END
• Jog the camera to the location on the
workpiece where you want the laser
to start reading.
• Enter a LINE START command.
• Jog the camera to the location on the
workpiece where you want the laser
to stop reading.
• Enter a LINE END command.
5
LASER PROFILE >
>
• In the next empty command address,
insert a LASER PROFILE command.
• Enter 0 to turn Laser Profile OFF.
• Click OK.
6 • Insert an END PROGRAM command
to complete the program.
Continued on next page
Using the Laser to Measure and Record Profiles
(continued)
To Measure and Record the Profile of a Fluid or a Workpiece (continued)
OptiSure Automated Optical Inspection
65www.nordsonefd.com info@nordsonefd.com +1-401-431-7000 Sales and service of Nordson EFD dispensing systems are available worldwide.
# Click Step Reference Image
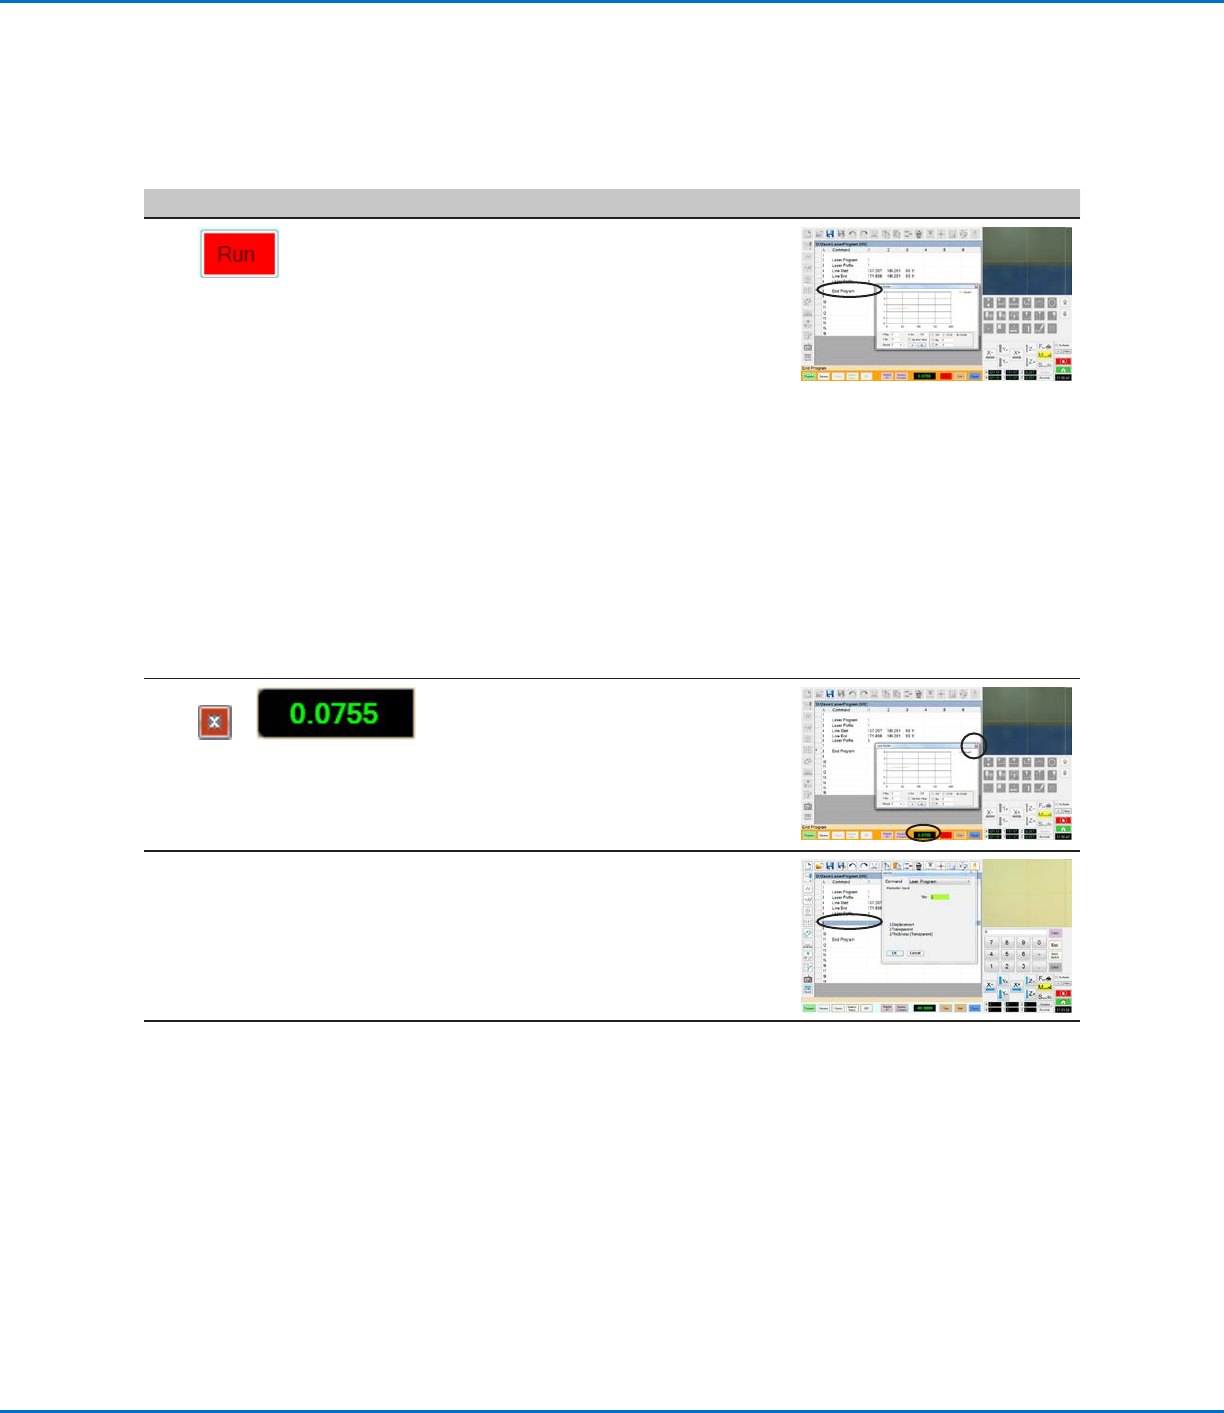
7
• Click RUN to test the program,
observing that the Laser Profile
window opens.
The laser uses the specified laser program to measure whatever is under
the camera, whether it is a dispensed fluid or a workpiece surface. For
correct laser measurement results, the laser program must be tailored to
the characteristics (transparency, thickness, etc.) of the fluid or workpiece
being measured.
NOTES:
- For details on the Laser Profile window, refer to “Laser Profile Window
Fields” on page67.
- To use the Laser Profile window to check whether laser measurements
are within a specified range of threshold values, refer to “To Check
Laser Measurements Against Threshold Values” on page67.
8
or
• Click the red X to close the Laser
Profile window.
• Double-click the LASER READ-OUT
field to re-open the Laser Profile
window.
9 • Optional: Repeat steps 2–5 and enter
another laser program selection in the
Laser Program command window;
also try different workpieces to test
other laser program settings.
Continued on next page
Using the Laser to Measure and Record Profiles
(continued)
To Measure and Record the Profile of a Fluid or a Workpiece (continued)
OptiSure Automated Optical Inspection
66 www.nordsonefd.com info@nordsonefd.com +1-401-431-7000 Sales and service of Nordson EFD dispensing systems are available worldwide.
Using the Laser to Measure and Record Profiles
(continued)
To Measure and Record the Profile of a Fluid or a Workpiece (continued)
# Click Step Reference Image
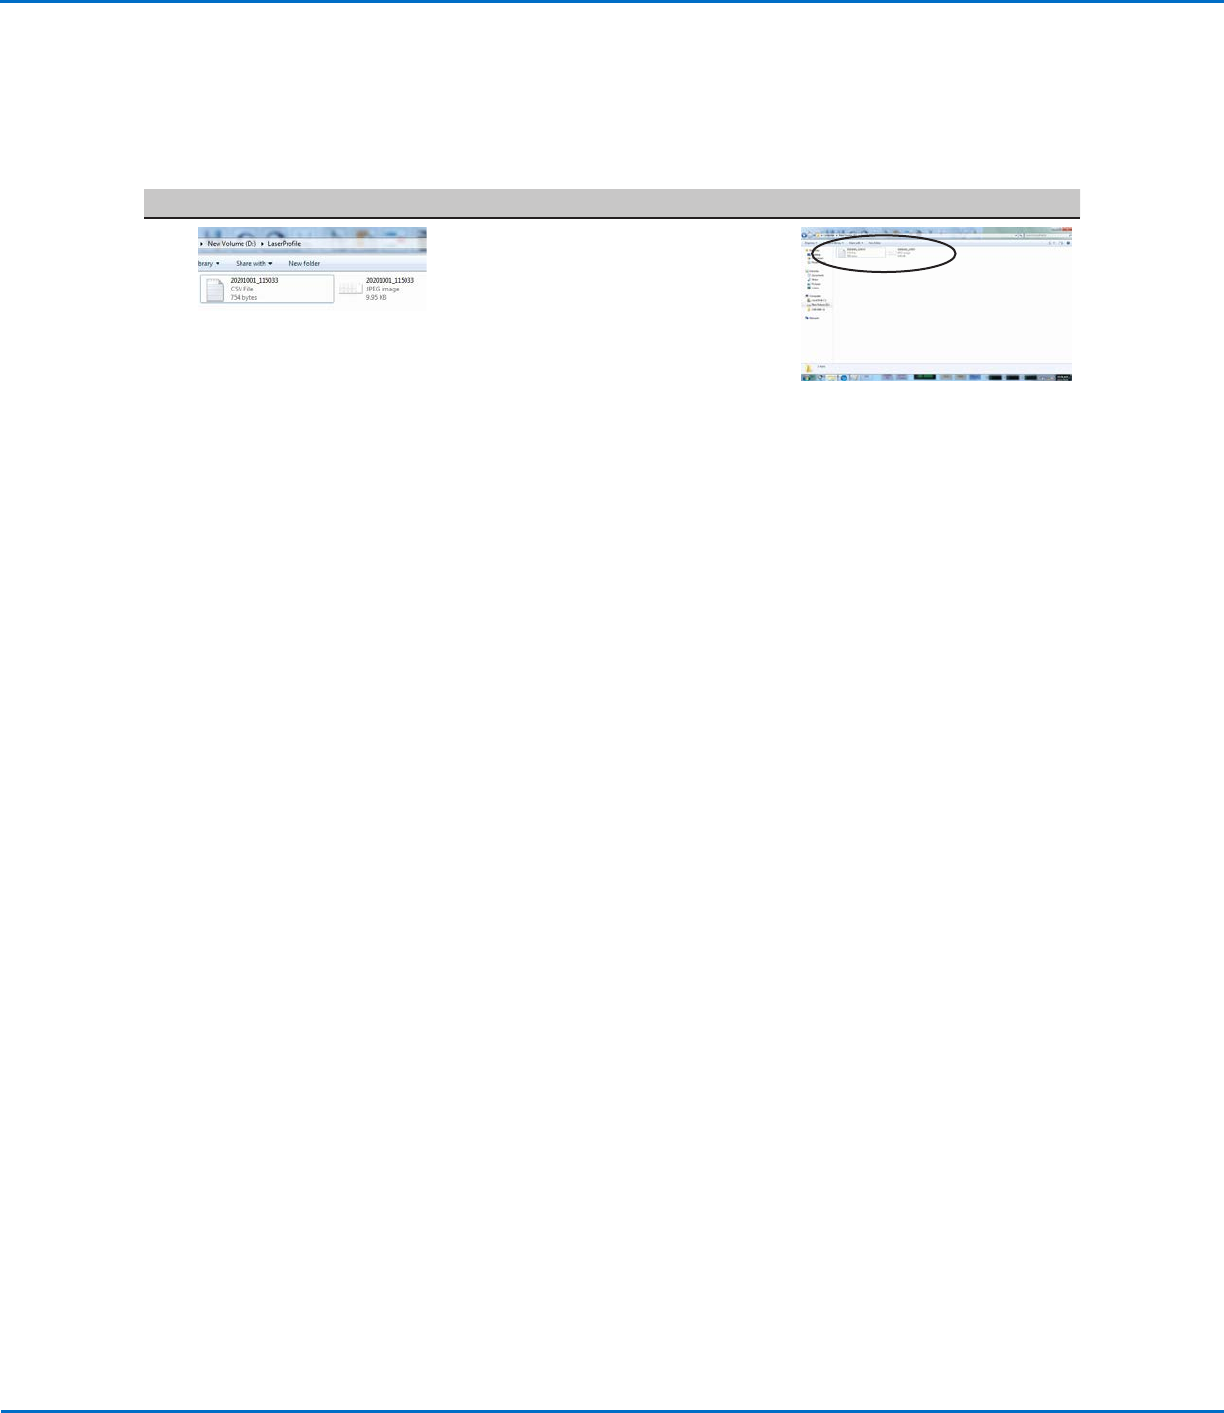
10
• Go to D:\Laser Profile to see
the saved graph and data point
(measurement data) files. Graphs and
data points are saved automatically
after every run cycle.
NOTES:
• All *.CSV and *.JPEG files are named with the date and time using the
following format:
- YYYYMMDD_HrMinSecs.CSV
- YYYYMMDD_HrMinSecs.JPEG
• Every subsequent laser program will have an underscore and a number.
For example:
YYYYMMDD_HrMinSecs_1.CSV, YYYYMMDD_HrMinSecs_1.JPEG
YYYYMMDD_HrMinSecs_2.CSV, YYYYMMDD_HrMinSecs_2.JPEG