YG100R_Mainte_E.pdf - 第38页
Chapter 3 Periodic maintenance items Contents 1 . We e k l y o r b i w e e k l y i n s p e c t i o n 3 - 1 1 . 1 C l e a n i n g " T y p e A " n o z z l e s 3 - 1 1 . 2 C l e a n i n g T y p e F n o z z l e s (…
2-7
2
Daily maintenance items
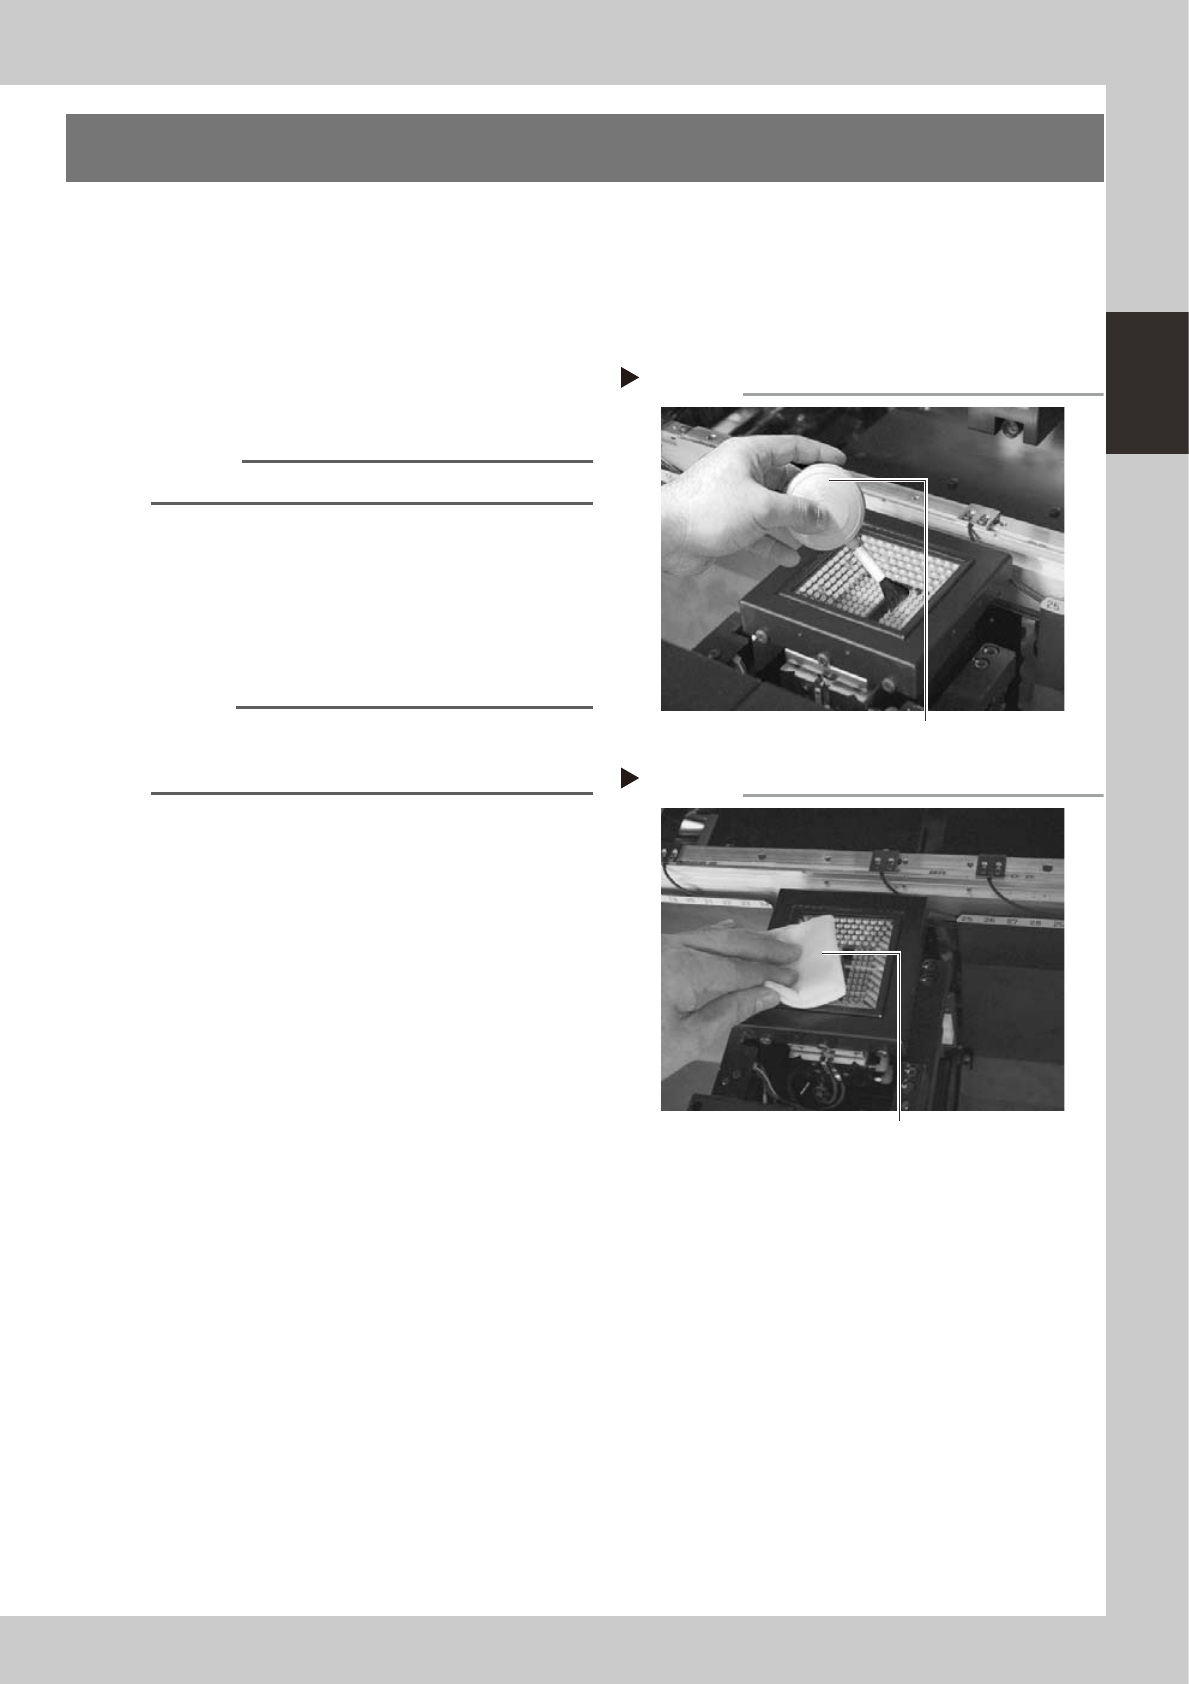
5. Cleaning the camera transparent cover
Dirt or dust particles sticking to the transparent cover of the multi-view camera can cause recognition errors.
Periodic inspection and cleaning are recommended to prevent this problem.
e
To ensure safety, make sure that the machine power switch is off or the emergency stop button is pressed
before starting work.
1
Remove dust on the transparent
cover with the lens blower brush.
53207-F9-00
Reference
A lens blower brush is available as an option.
2
Wipe the transparent cover with a
lint-free cloth.
Apply a few drops of lens cleaner to a
lint-free cleaning cloth or paper towel and
wipe the transparent cover.
53209-F9-00
n
NOTE
Use a lint-free cleaning cloth or paper wiper.
A lens cleaner is supplied with the machine. Do not use
other type of cleaner.
Blowing off dust with blower brush
Step 1
Lens blower brush
Wiping the transparent cover
Step 2
Lent-free cleaning cloth or paper wiper

Chapter 3 Periodic maintenance items
Contents
1. Weekly or biweekly inspection 3-1
1.1 Cleaning "Type A" nozzles 3-1
1.2 Cleaning Type F nozzles (YG100RA) 3-
3
1.2.1 Removing FNC nozzle assembly 3-3
1.2.2 Cleaning the FNC nozzle assembly 3-5
1.2.3 Cleaning the FNC lock pin 3-9
1.2.4 Reassembling the FNC nozzle assembly 3-10
2. Monthly or bimonthly inspection 3-13
2.1 Cleaning and lubricating a nozzle holder 3-13
2.2 Cleaning and greasing the X, Y and W axes 3-1
5
2.2.1 Cleaning and greasing the X, Y and W axis ball screws 3-15
2.2.2 Cleaning and greasing the X, Y and W axis linear guides 3-18
2.3 Cleaning and greasing the Z axis and rack gear 3-19
2.4 Inspecting and cleaning the air/mist filters 3-2
0
2.5 Cleaning the camera lens and lighting unit 3-2
2
2.6 Inspecting ball screws and linear guides of each axis 3-2
5
3. Six-month or one-year inspection 3-26
3.1 Cleaning and replacing the ejector filter 3-26
3.2 Cleaning and lubricating the inside of the spline shaft 3-2
7
3.2.1 Cleaning the inside of the spline shaft 3-27
3.2.2 Lubricating the slide section and checking the negative pressure 3-29
3-1
3
Periodic maintenance items
1. Weekly or biweekly inspection
Inspect and clean the nozzles weekly or biweekly as explained below.
1.1 Cleaning "Type A" nozzles
If solder adheres to a nozzle tip, the nozzle may be mistaken for a component or other problems may occur. If
nozzle spring-action is poor, pickup errors tend to occur frequently. To prevent these troubles, check the nozzle
condition and keep the nozzles clean.
e
1
Remove the nozzle from the head.
Always first press the emergency stop button
and then remove the nozzle from the head.
The machine must be in emergency stop to
ensure safety during work.
c
CAUTION
When the machine is equipped with a nozzle station,
make sure that the nozzles are returned to the nozzle
station after cleaning.
2
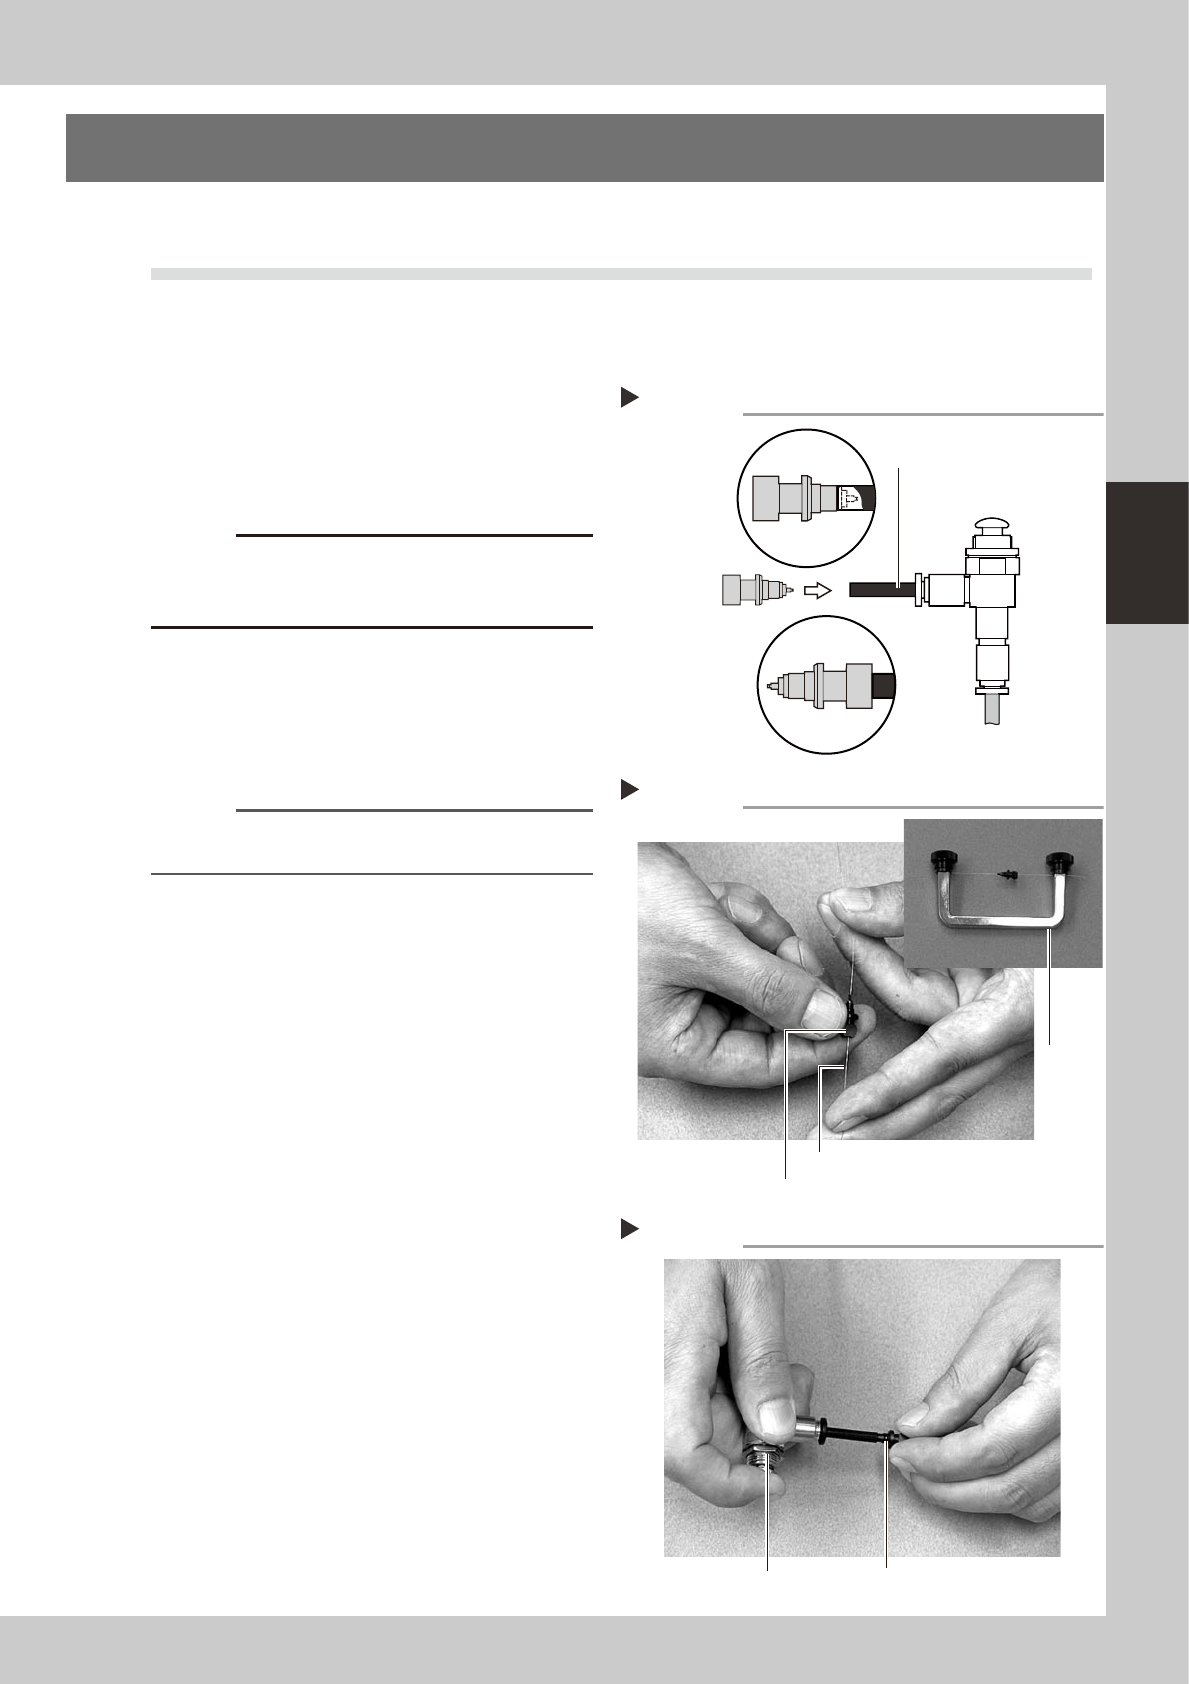
Blow air through the nozzle.
Using an air blow gun, blow air through the
nozzle from the nozzle tip and then from the
other end.
53300-F9-00
n
NOTE
If there are dust deposits in the nozzle, perform steps 3
and 4.
3
Clean the nozzle hole.
Pass the nozzle cleaning wire through the
nozzle hole and clean the nozzle hole. While
holding both ends of the wire with fingers as
shown or using a custom handle (option),
gently move the nozzle back and forth.
53301-F9-00
4
Blow air onto the nozzle tip again.
After removing the cleaning wire, blow air
through the nozzle with the air blow gun, just
as in step 2.
53302-F9-00
5
Clean the slide section.
Apply IPA (isoprophyl alcohol) or ethanol to
the slide section. Push the nozzle tip several
times to repeat the buffing action (spring
action) to clean the slide section. After
cleaning, blow sufficient air to remove IPA or
ethanol.
Cleaning a nozzle
Step 3
Custom
handle
(option)
Nozzle
Nozzle cleaning wire
Air blow
Step 4
NozzleAir blow gun (option)
Step 2
Air tube (black)
Air blow gun
(option)
Air tube (orange) connected to
air supply port
Air blow
Insert the
nozzle tip into
the air tube and
blow air.
Blow air from the
nozzle attachment
side.