YG100R_Mainte_E.pdf - 第53页
3-15 3 Periodic maintenance items 2 . 2 C l e a n i n g a n d g r e a s i n g t h e X , Y a n d W a x e s T o c l e a n a n d g r e a s e t h e b a l l s c r e w s a n d l i n e a r g u i d e s o f t h e X , Y a n d W a …
3-14
3
Periodic maintenance items
7
Wipe away excess oil.
Wipe away excess oil with a lint-free
cleaning cloth or paper towel.
8
Blow off excess oil remaining in the
nozzle holder.
As in step 5, insert the air blow gun into the
air joint section and blow air through the
spline shaft while holding a cleaning cloth or
paper towel against the lower end of the
head.
9
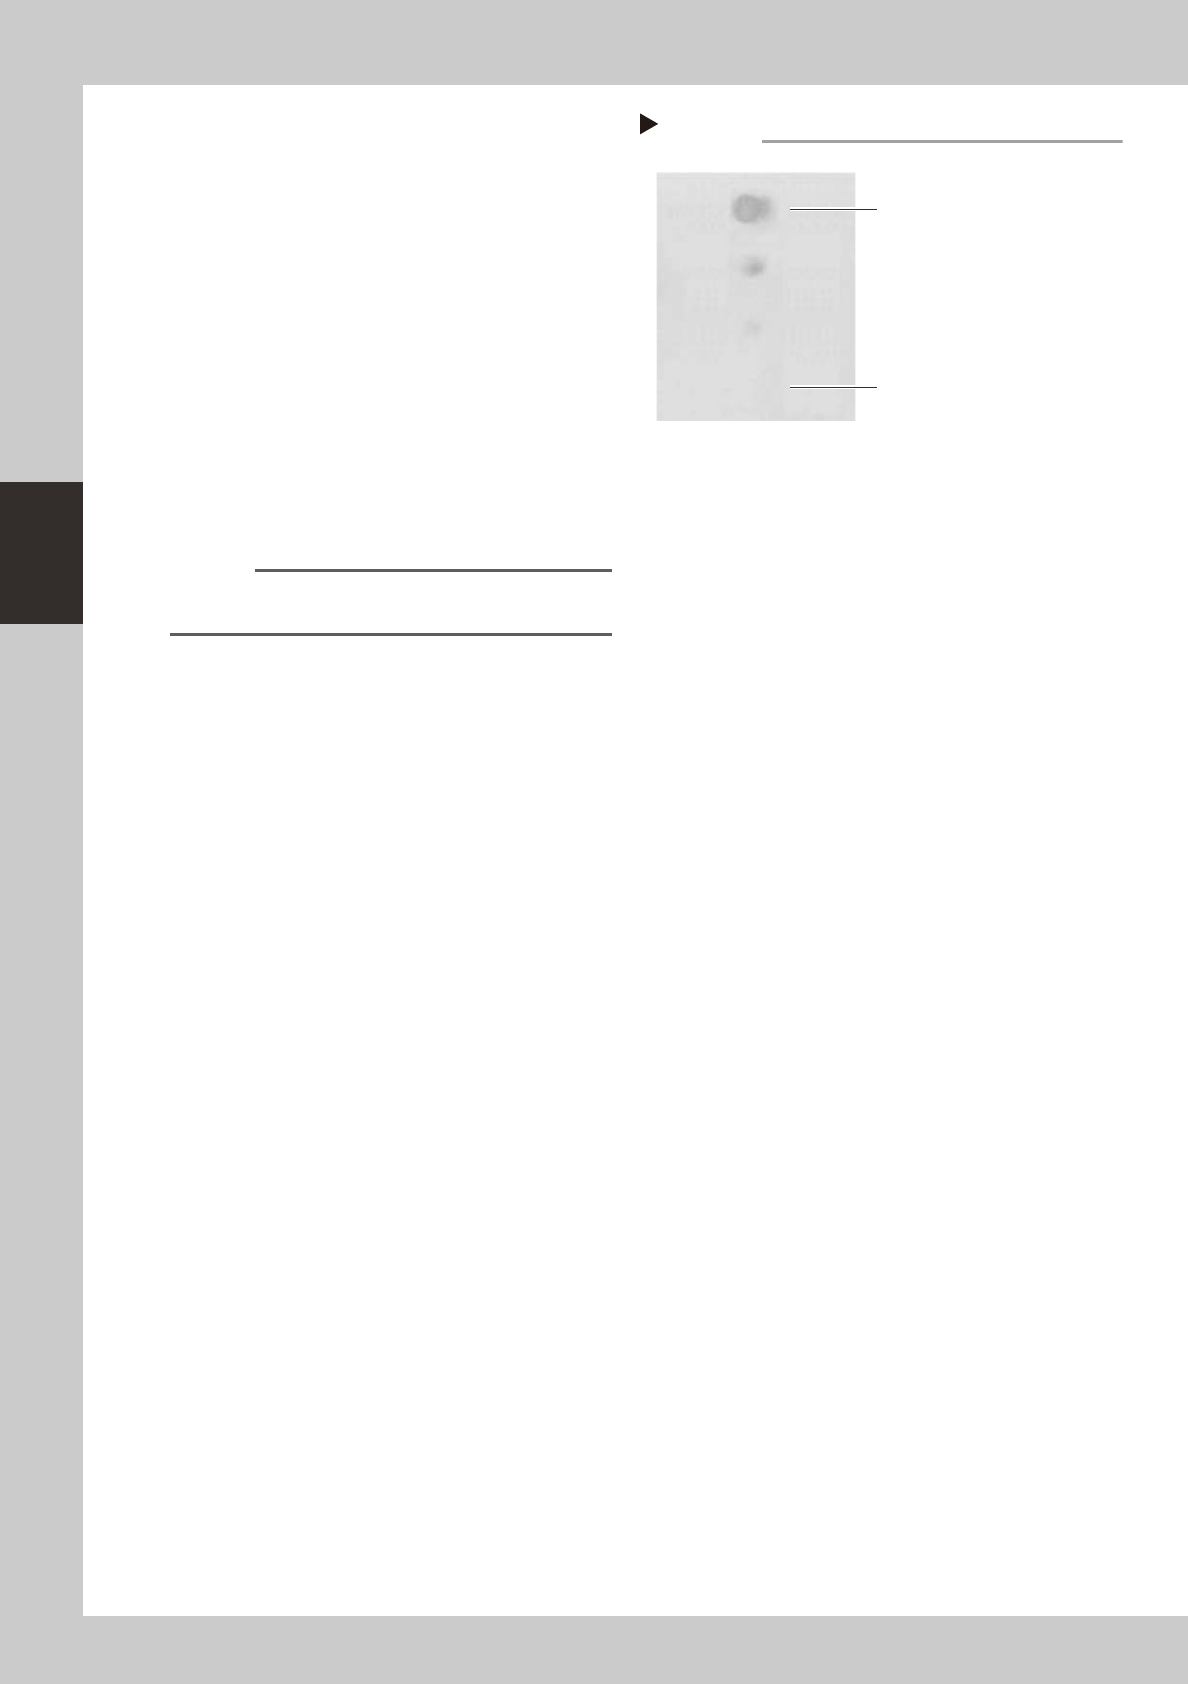
Check that the oil was removed.
Blow air through the spline shaft again while
using commercially-available oil blotting
paper, and check for residual oil in the
nozzle holder.
53396-F9-00
n
NOTE
Performing step 8 is usually sufficient to remove residual
oil. However, if oil still remains then blow air once again.
0
Reinstall the nozzle.
Reinstall the nozzle back onto the head or
the nozlle station (option).
Step 9
Checking for residual oil
Oil blotting paper
Repeat the air blow until oil no
longer appears.
Oil may appear after blowing air.
3-15
3
Periodic maintenance items
2.2 Cleaning and greasing the X, Y and W axes
To clean and grease the ball screws and linear guides of the X, Y and W axes, follow the steps below. Prepare a
grease gun and specified grease (NSL).
c
CAUTION
When handling grease or lubricant, read and follow the precautions listed in section 2.2.2, "Lubricating tools and
grease" in Chapter 1.
2.2.1 Cleaning and greasing the X, Y and W axis ball screws
e
1
Press the emergency stop button.
The machine must be in emergency stop to
ensure safety during work.
2
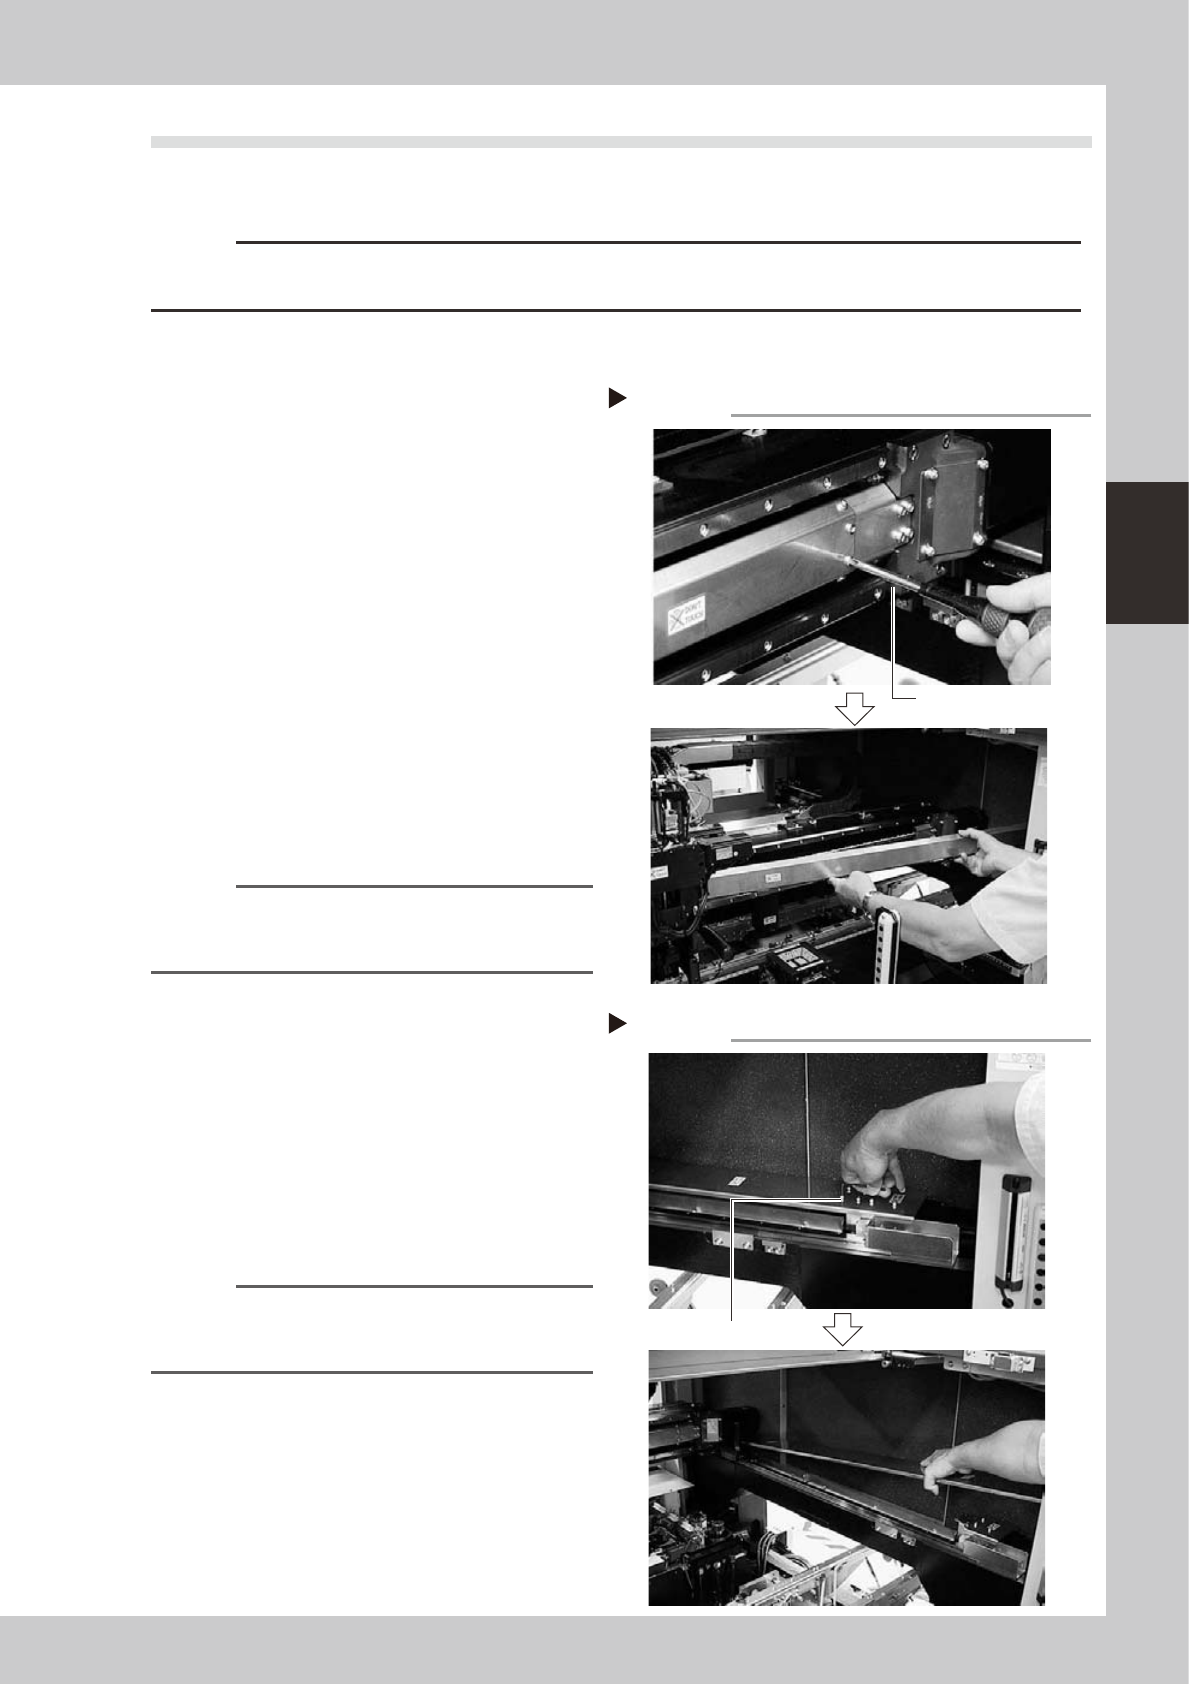
Remove the ball screw covers.
Remove the X-axis and Y-axis ball screw
covers used for preventing grease
spattering.
X-axis
1. Use a Phillips screwdriver to remove the
screws securing the left side of the
grease spattering prevention cover.
2. Move the head all the way to the left
side and remove the screws securing the
right side of the grease spattering
prevention cover.
3. Remove the grease spattering prevention
cover by pulling it to the right.
533A0-F9-00
Reference
When reattaching the X-axis grease spattering
prevention cover, use the reverse order of the above
procedure.
Y1 and Y2 axes
1. Use the M2.5 hex wrench to remove the
screws securing the rear side of the
grease spattering prevention cover.
2. Move the head all the way to the rear
side and remove the screws securing the
front side of the grease spattering
prevention cover.
3. Remove the grease spattering prevention
cover by pulling it to the front.
533A1-F9-00
Reference
When reattaching the Y-axis grease spattering
prevention covers, use the reverse order of the above
procedure.
Removing the X-axis grease spattering prevention cover
Phillips screwdriver
Step 2
Removing the Y-axis grease spattering prevention cover
M2.5 hex wrench
Step 2
3-16
3
Periodic maintenance items
3
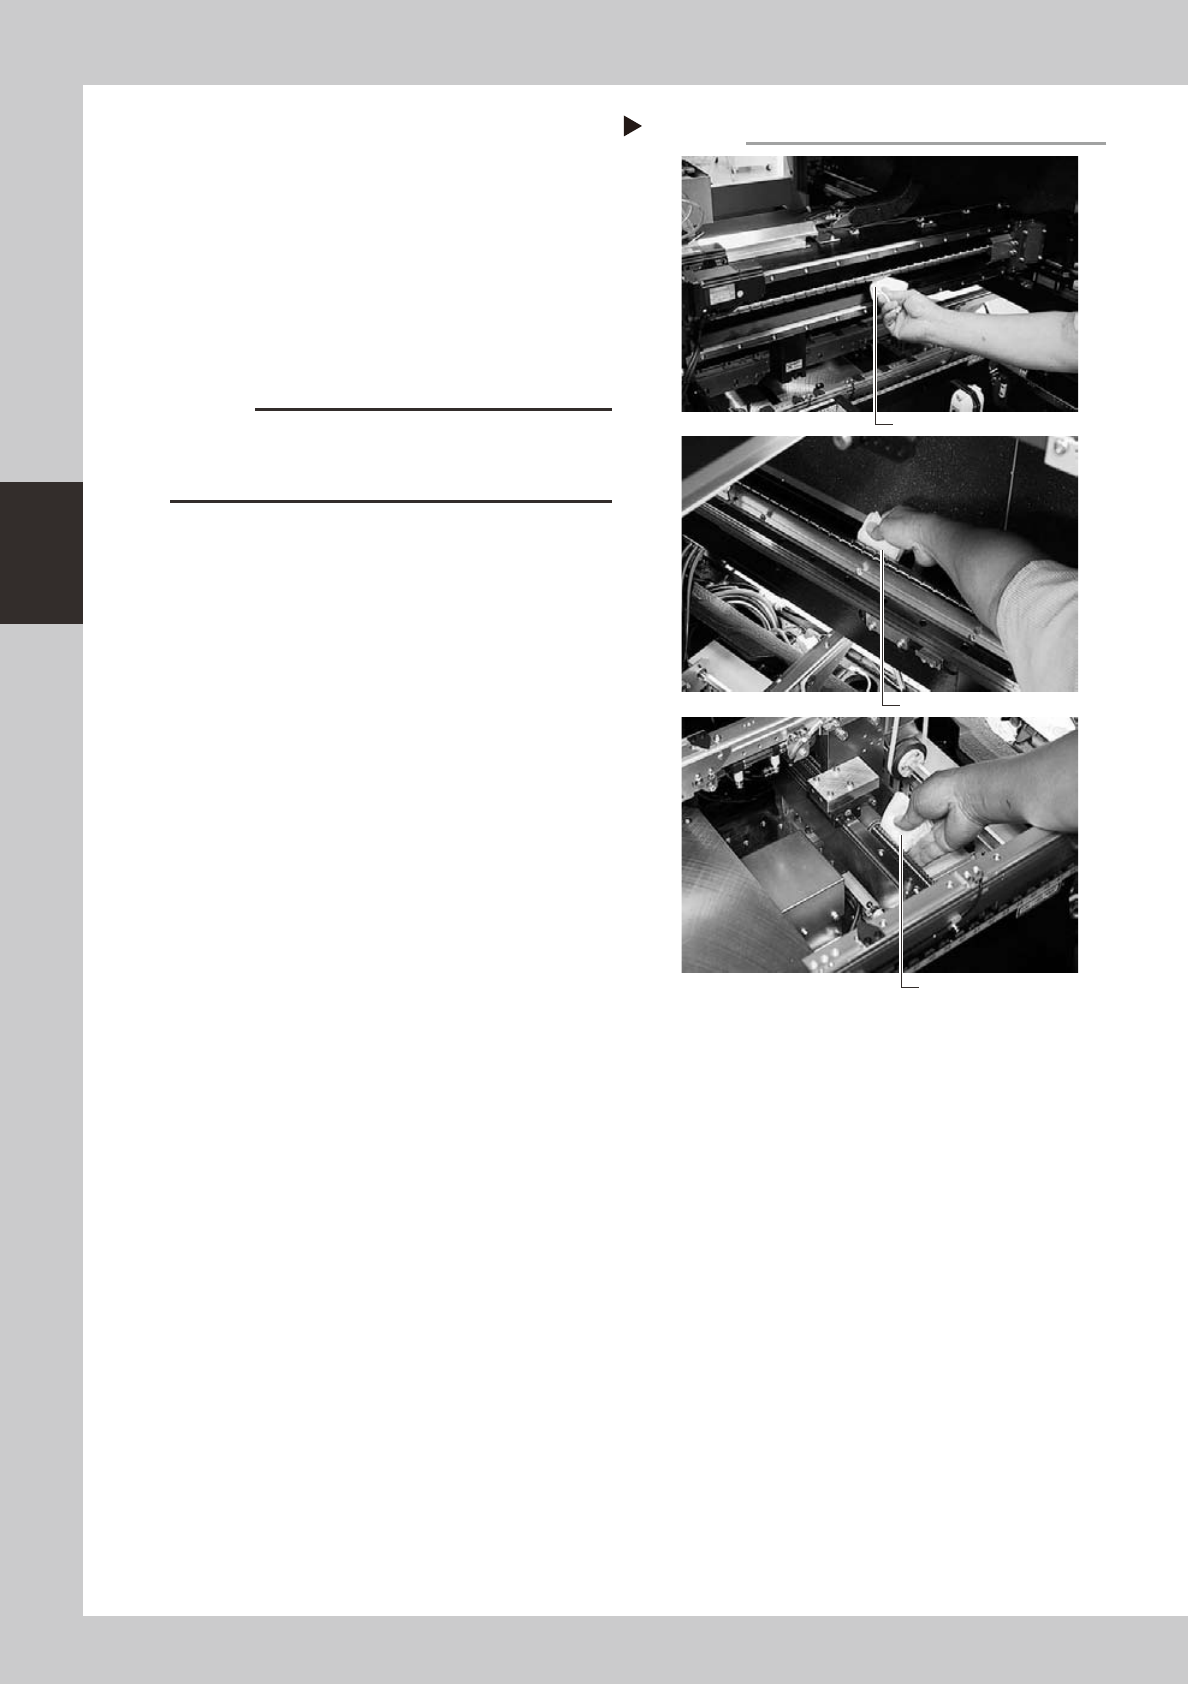
Clean the ball screws.
1. Using the handle, move the head to one
end of each axis (X and Y axes).
2. Wipe away the old grease and dirt from
the ball screw with a lint-free cloth or
paper towel (for clean room use).
3. Move the head to the opposite end of
each axis (X and Y axes) and wipe the
ball screw clean.
53317-F9-10
c
CAUTION
Wipe away the old grease and dirt in the lead groove
of the ball screw. Also check that no debris or residue
remains in the lead groove.
Cleaning the ball screws
Step 3
Wipe with cleaning cloth, etc.
X-axis
Y-axis
W-axis
Wipe with cleaning cloth, etc.
Wipe with cleaning cloth, etc.