YG100R_Mainte_E.pdf - 第58页
3-20 3 Periodic maintenance items 2 . 4 I n s p e c t i n g a n d c l e a n i n g t h e a i r / m i s t f i l t e r s A i r / m i s t f i l t e r s a r e u s e d t o p r e v e n t o i l , m i s t a n d o t h e r i m p u …
3-19
3
Periodic maintenance items
2.3 Cleaning and greasing the Z axis and rack gear
To clean and grease the Z axis used to raise and lower the spline shaft of each head and the rack gear used to
rotate the nozzles, follow the steps below. Prepare the specified grease (NSL).
1
Turn off the machine.
Quit the software and turn off the machine
power switch.
2
Remove the head assembly cover.
3
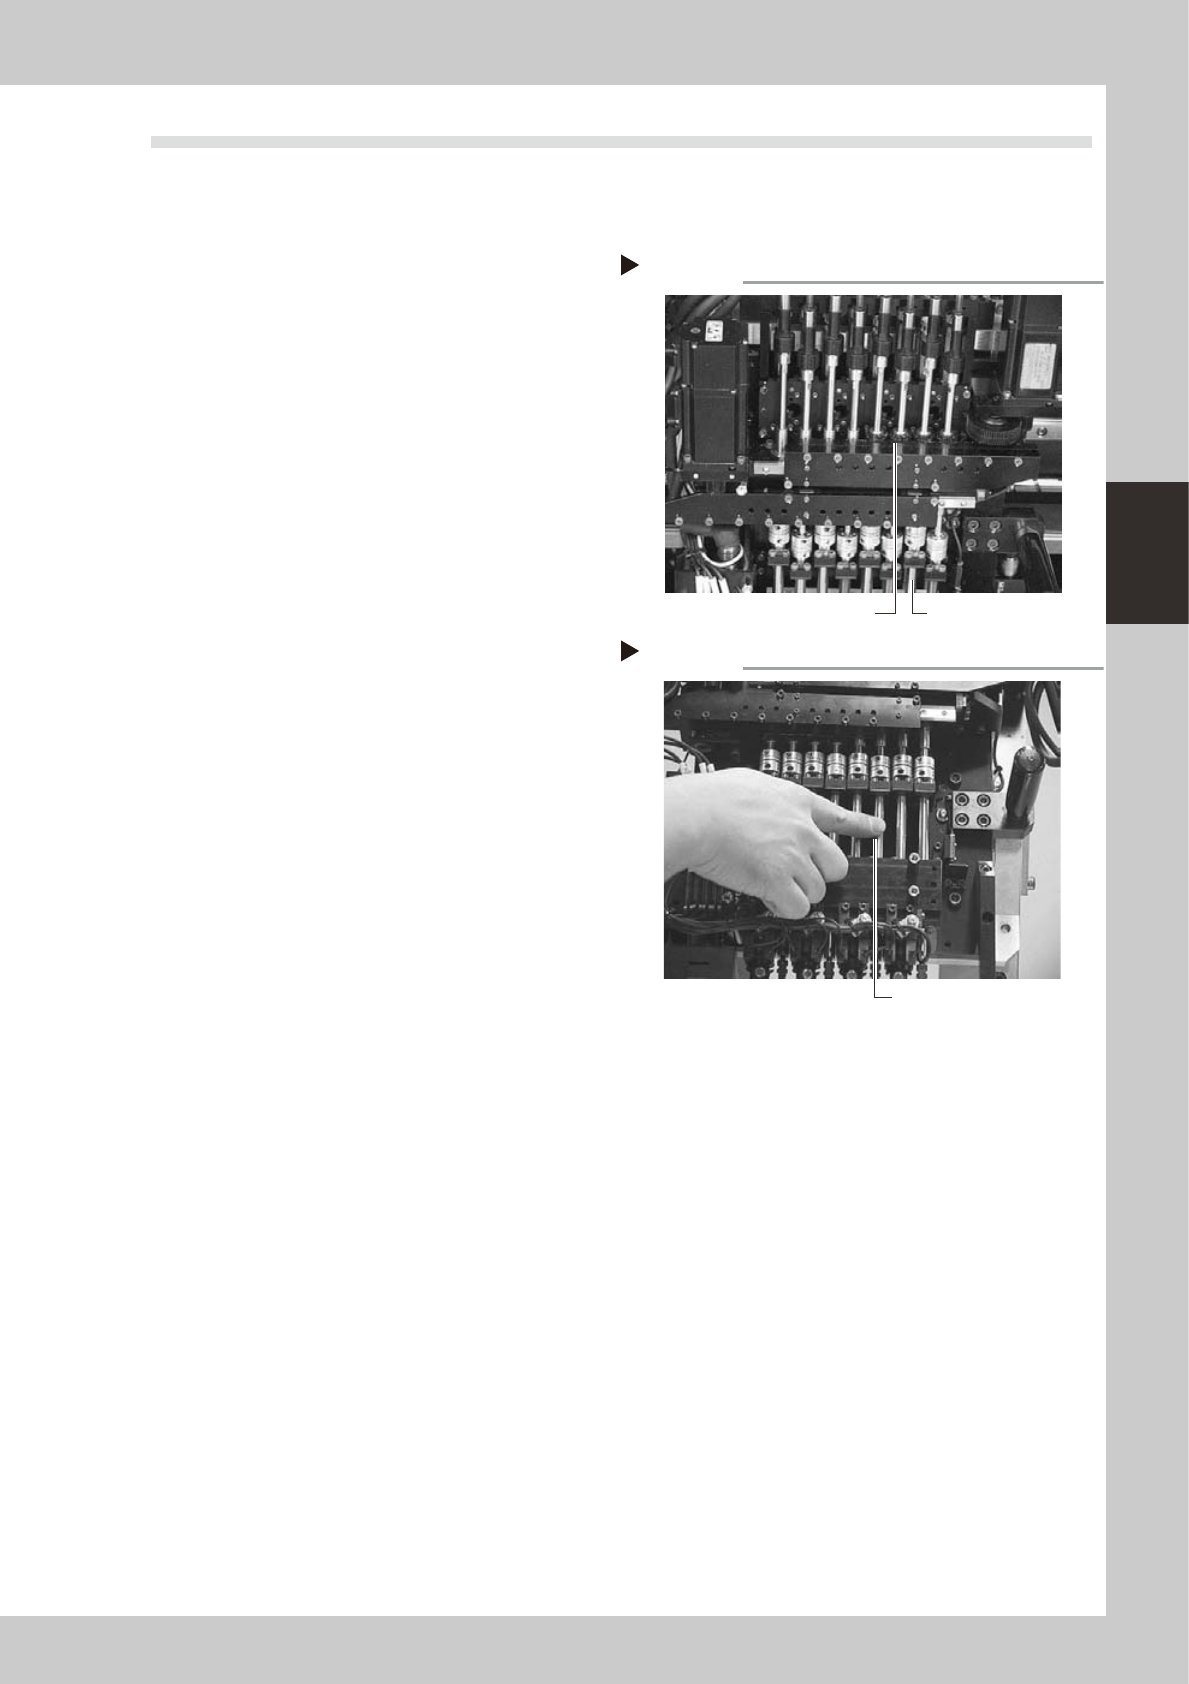
Clean the Z-axis shafts and rack
gears.
Using a lint-free paper wiper or cotton swab,
wipe the Z-axis shafts and rack gears.
Two rack gears are used: the upper one for
heads 1 to 4 and the lower one for heads 5
to 8.
Check that no hardened grease and debris
remain on the Z-axis shafts and rack gears.
53391-F9-00
4
Apply grease to the Z-axis shafts
and rack gears.
Apply a thin uniform coat of grease by hand
over the surface of each Z-axis shaft.
Using a lint-free cotton swab, apply a thin
uniform coat of grease over the surface of
each rack gear.
53392-F9-00
5
Remove excess grease.
After moving the Z-axis shafts and rack gears
a few times, wipe away excess grease.
6
Reattach the cover to the head
assembly.
Cleaning the Z-axis shafts and rack gears
Step 3
Rack gear
Z-axis shaft
Greasing the Z-axis shafts and rack gears
Step 4
Apply grease by hand.
3-20
3
Periodic maintenance items
2.4 Inspecting and cleaning the air/mist filters
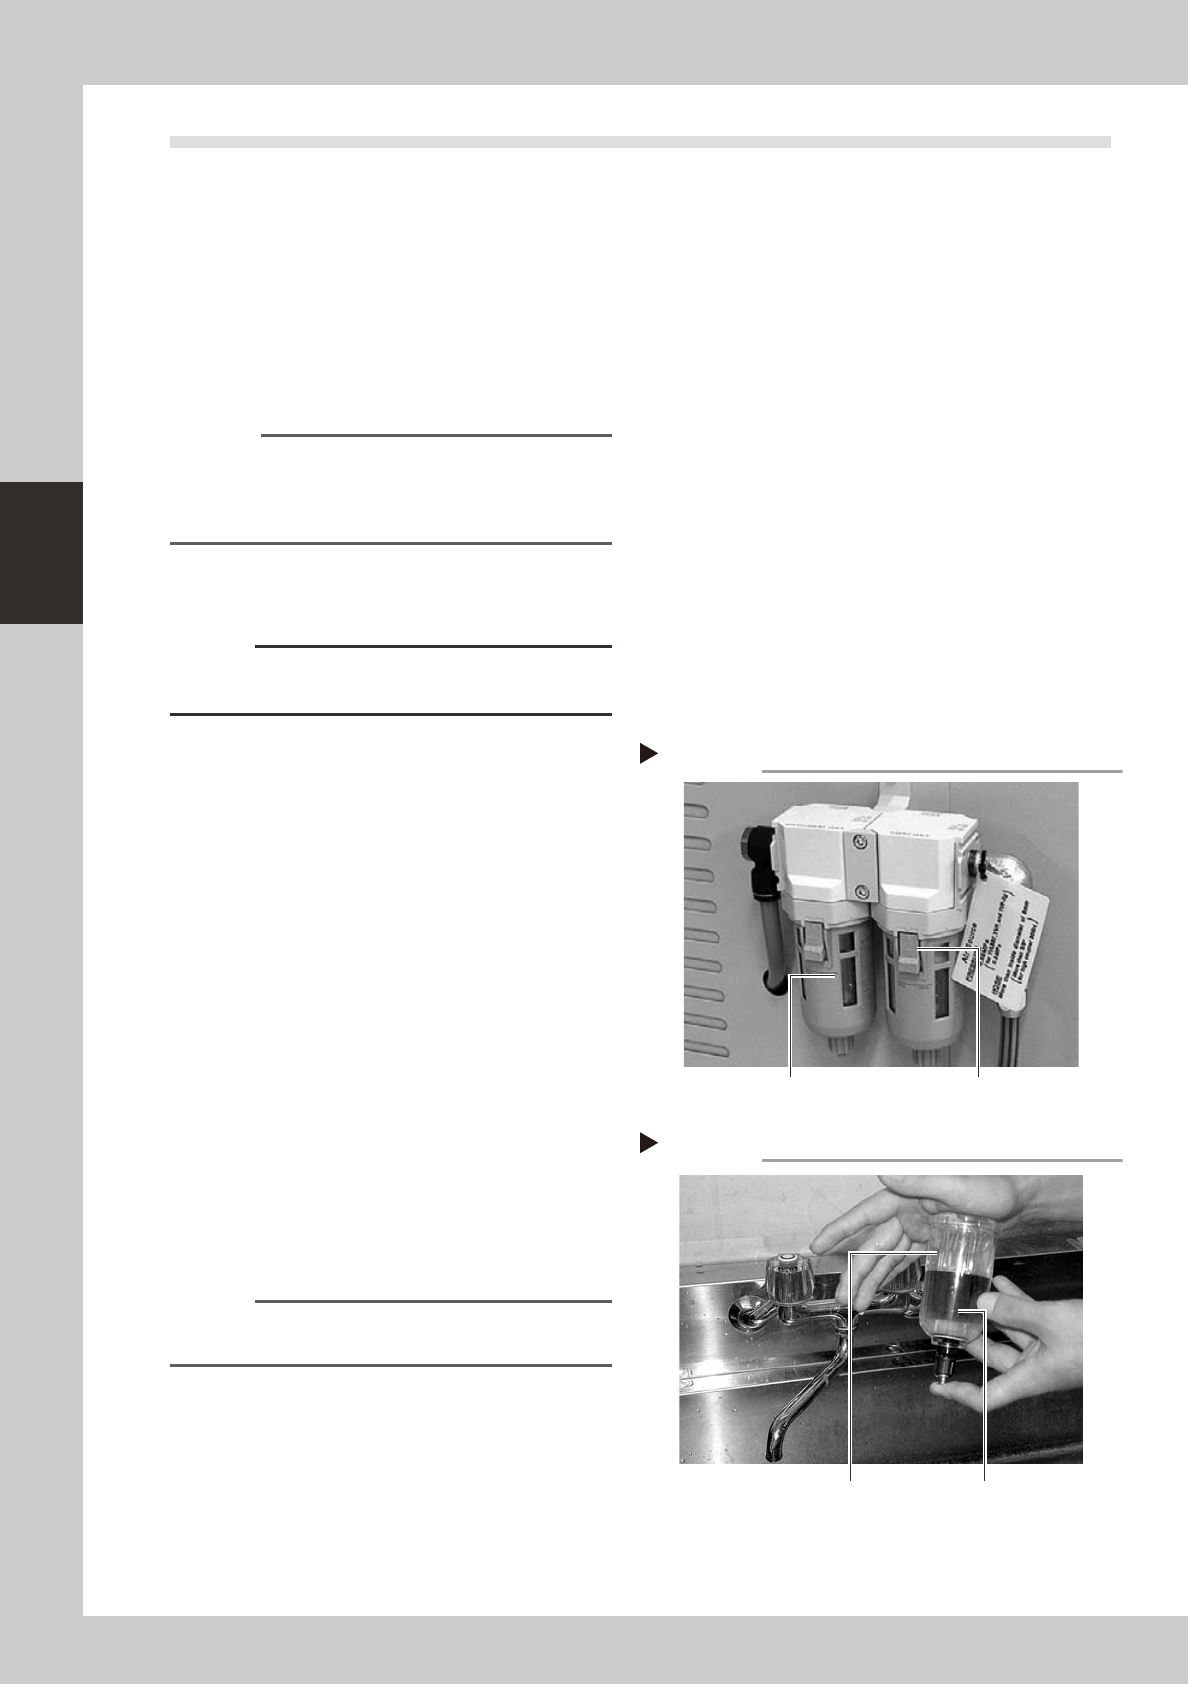
Air/mist filters are used to prevent oil, mist and other impurities in the air compressor from penetrating into the
machine. These filters should be inspected and cleaned periodically as instructed below. (The filter closer to
the air coupler is the air filter and the other one is the mist filter.)
n
Cleaning the filter cup
1
Check the inside of the filer cup.
Check for oil or water deposits in the filter
cup through the window. If the window is
dirty, follow the steps below to clean the
filter cup.
Reference
The drain cock at the bottom of the filter cup is an
auto-drain type. It automatically drains the oil or water
when deposited in the cup. We recommend
connecting a hose to this drain cock.
2
Disconnect the air hose from the
air coupler.
c
CAUTION
When disconnecting the air hose, be careful not to
allow oil, water or impurities to splash outwards.
3
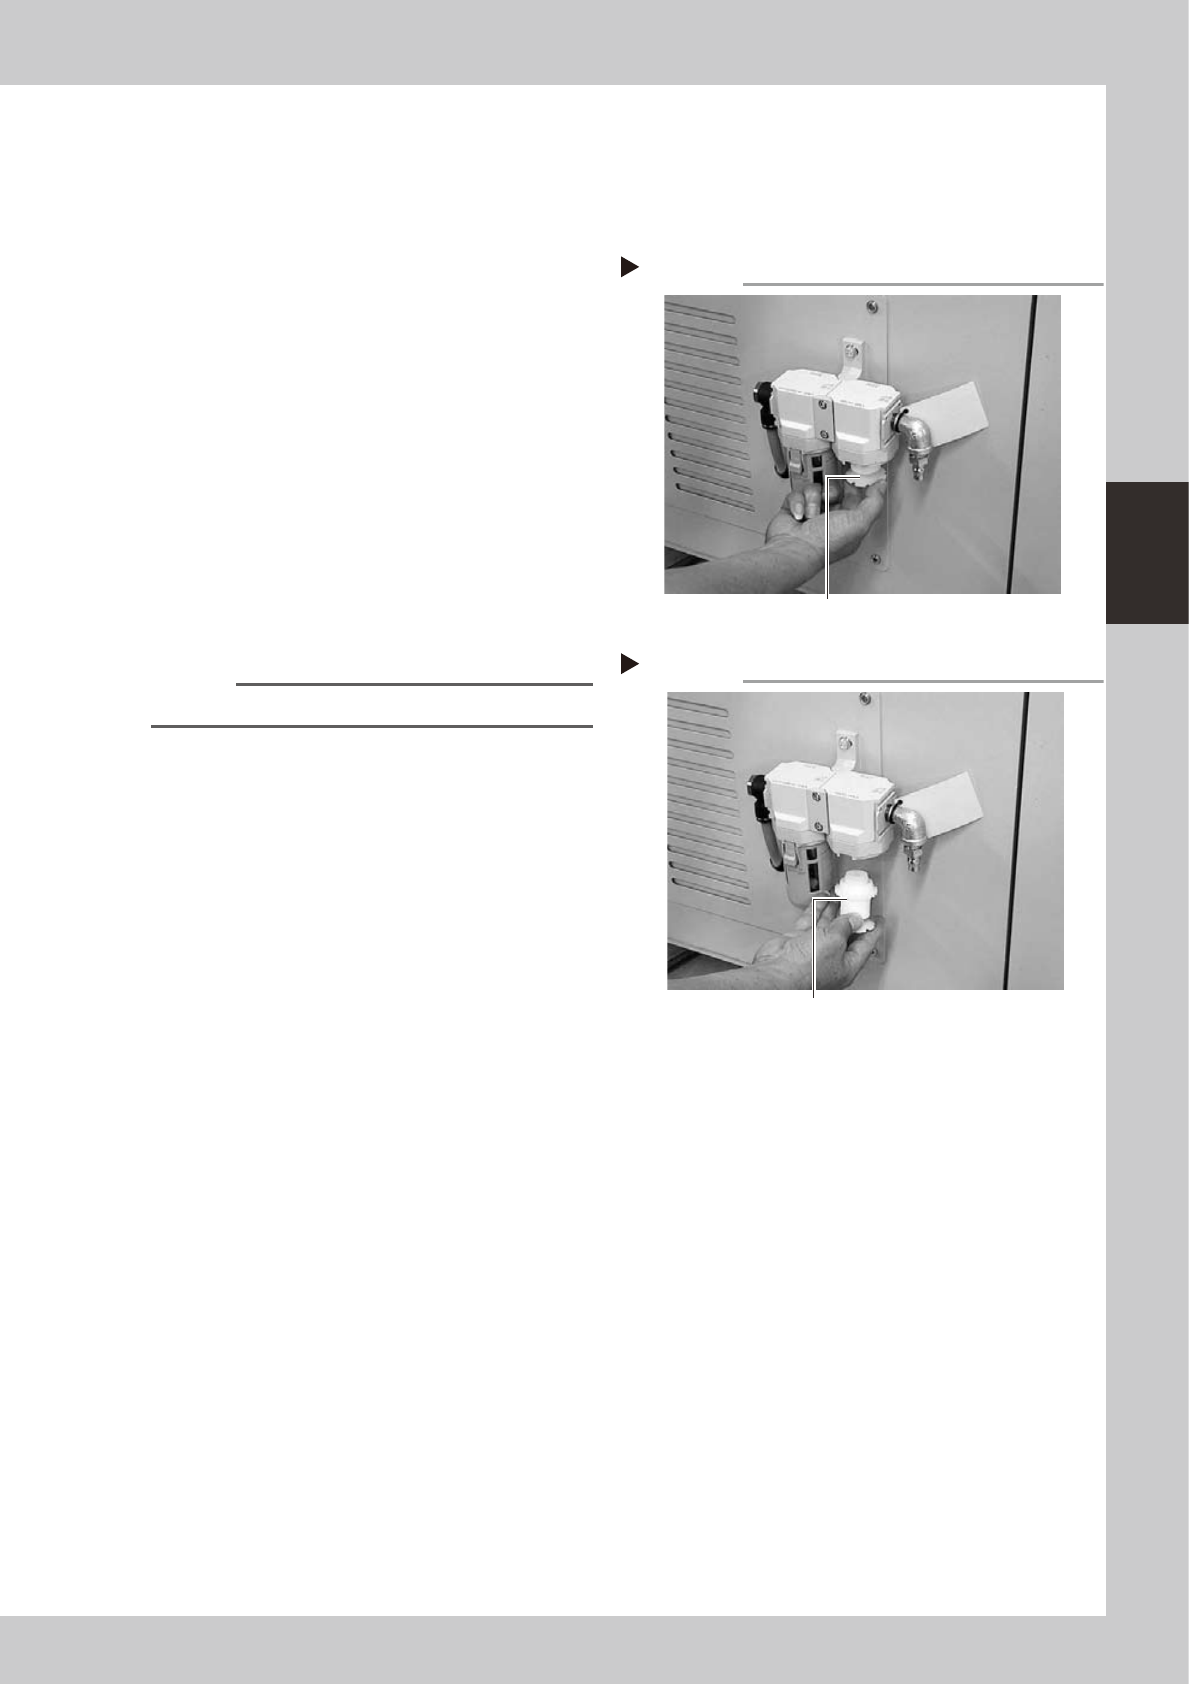
Remove the filter cup.
While pressing the button on the side of the
filter cup, turn it clockwise, and pull the filter
cup downwards.
53321-F9-10
4
Clean the inside of the filter cup.
1. Lightly clean the filter cup with water.
2. Then, pour water-diluted neutral
detergent into the filter cup and clean
the inside while shaking it.
3. Air blow the filter cup and wipe away
any moisture with clean cloth or paper.
53322-F9-00
5
Reattach the filter cup.
1. Align the button on the side of the cup
with the attach/detach position and
push the cup upwards.
2. Turn the cup counterclockwise until you
hear a click.
n
NOTE
Leave the filter cup removed to clean the air filter as
explained in the next procedure.
6
Reconnect the air hose to the air
coupler.
After connecting the air hose, check that no
air is leaking.
Removing the filter cup
Step 3
Filter cup Button
Cleaning the filter cup
Step 4
Filter cup
Water-diluted
neutral detergent
3-21
3
Periodic maintenance items
n
Cleaning the air filter
1
Remove the filter cup.
See the previous procedure in "Cleaning the
filter cup".
2
Remove the air filter.
Rotate the white disk clockwise as viewed
from the top and take out the air filter.
53323-F9-10
3
Clean the air filter.
Use an air blow gun to blow away dust and
impurities trapped by the air filter. If the filter
is excessively dirty and cannot be cleaned,
replace it with a new filter.
4
Reattach the air filter.
Screw the white disk back in to attach the
air filter to the original position.
53324-F9-10
5
Reattach the filter cup.
n
NOTE
When cleaning the mist filter, use the same procedure.
Removing the air filter
Step 2
Rotate the white disk clockwise
to loosen and remove it.
Reattaching the air filter
Step 4
Air filter