PC200_Manual_REV_G-1.pdf - 第20页
PC200 PVA Revis ion G (201 9) 20 of 56 Fig ure 23 : Remove Lip Seals From Flui d Secti on 27. Clean the lip seals. 28. Use th e hook and p ick set to re move th e O - ring in the air cylinde r. Fig ure 24 : Air Cy l inde…
PC200
PVA
Revision G (2019)
19 of 56
WARNING: Do not let the tap go through the sleeve bearing and into the
separation block.
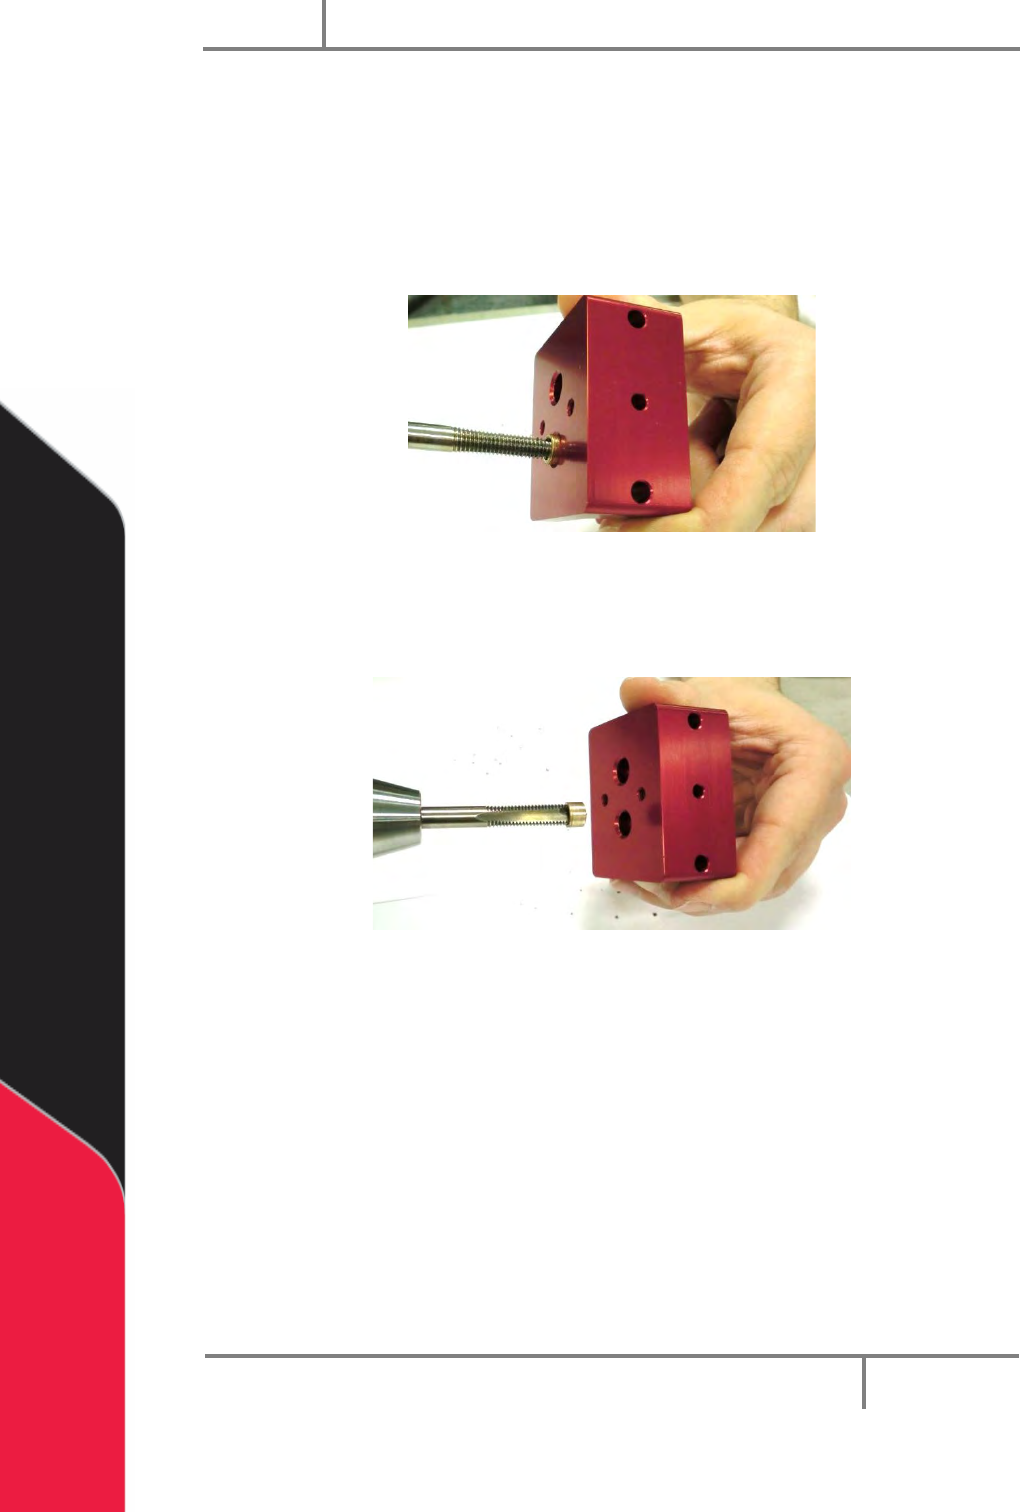
22. Continue to turn the tap clockwise and push in until the sleeve bearing starts to
spin when you turn the tap.
23. Continue to turn the tap clockwise and pull out as you turn. The sleeve bearing
will start to pull out of the separation block.
Figure 21: Turn the Tap and Pull Out
24. Pull the sleeve bearing out of the separation block. Do the procedure again for
the other sleeve bearing.
Figure 22: Remove the Sleeve Bearing
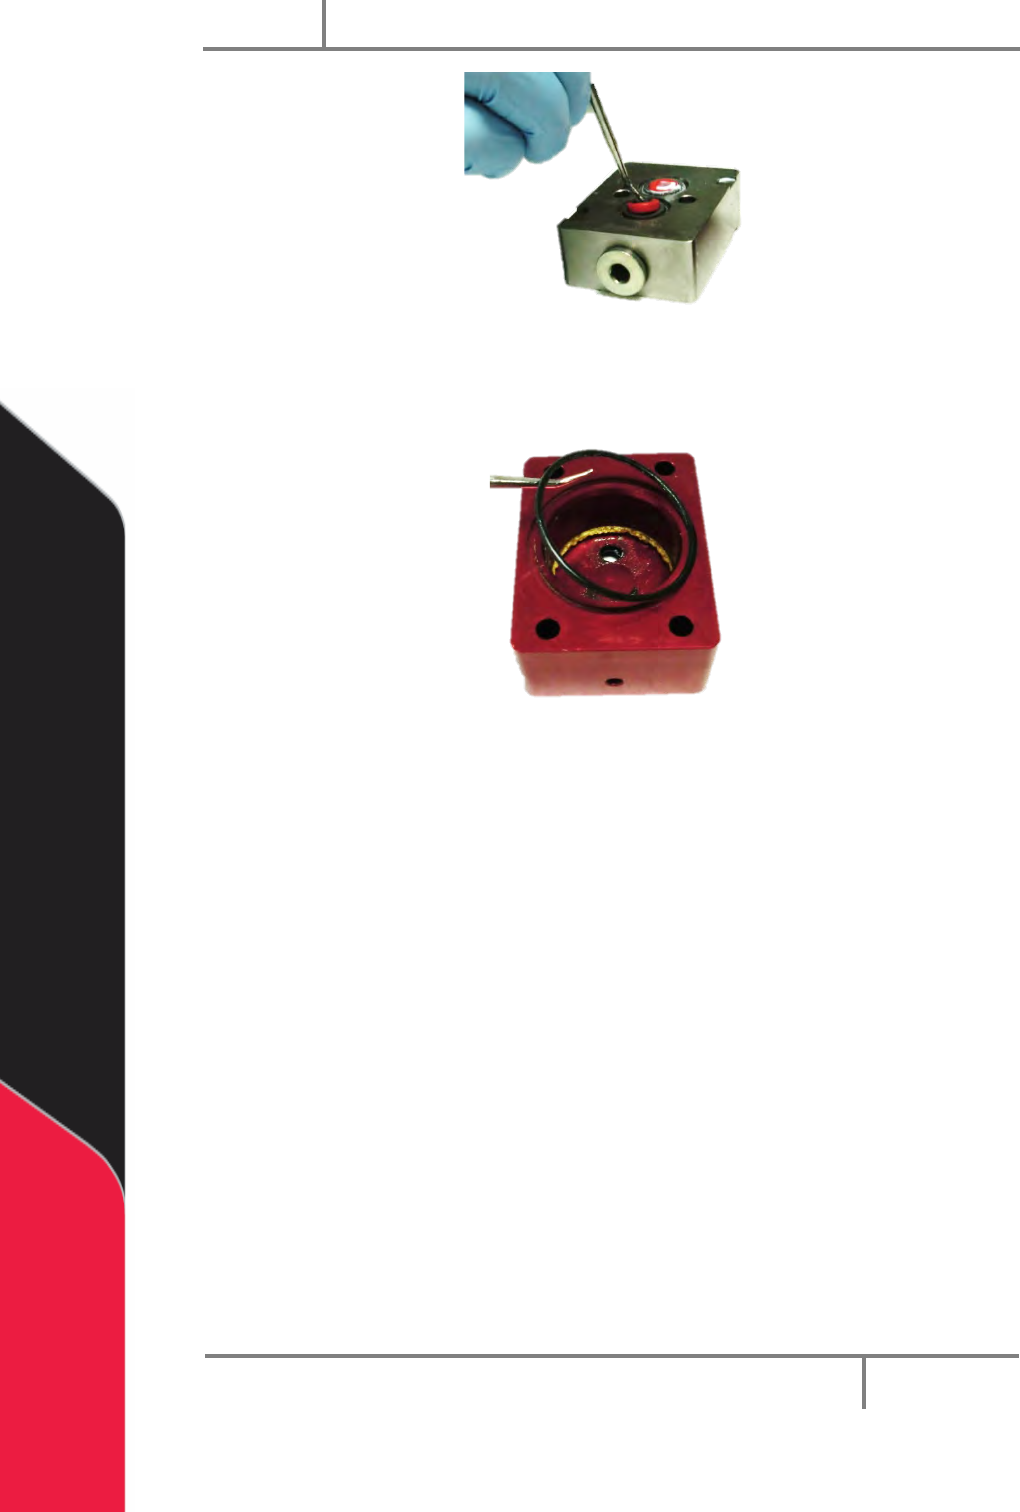
25. Clean any pieces of the sleeve bearings from the separation block.
26. Use the hook and pick set to remove the lips seals and the O-rings from the
fluid section.
PC200
PVA
Revision G (2019)
20 of 56
Figure 23: Remove Lip Seals From Fluid Section
27. Clean the lip seals.
28. Use the hook and pick set to remove the O-ring in the air cylinder.
Figure 24: Air Cylinder O-ring
29. Examine and clean the O-ring.
PC200
PVA
Revision G (2019)
21 of 56
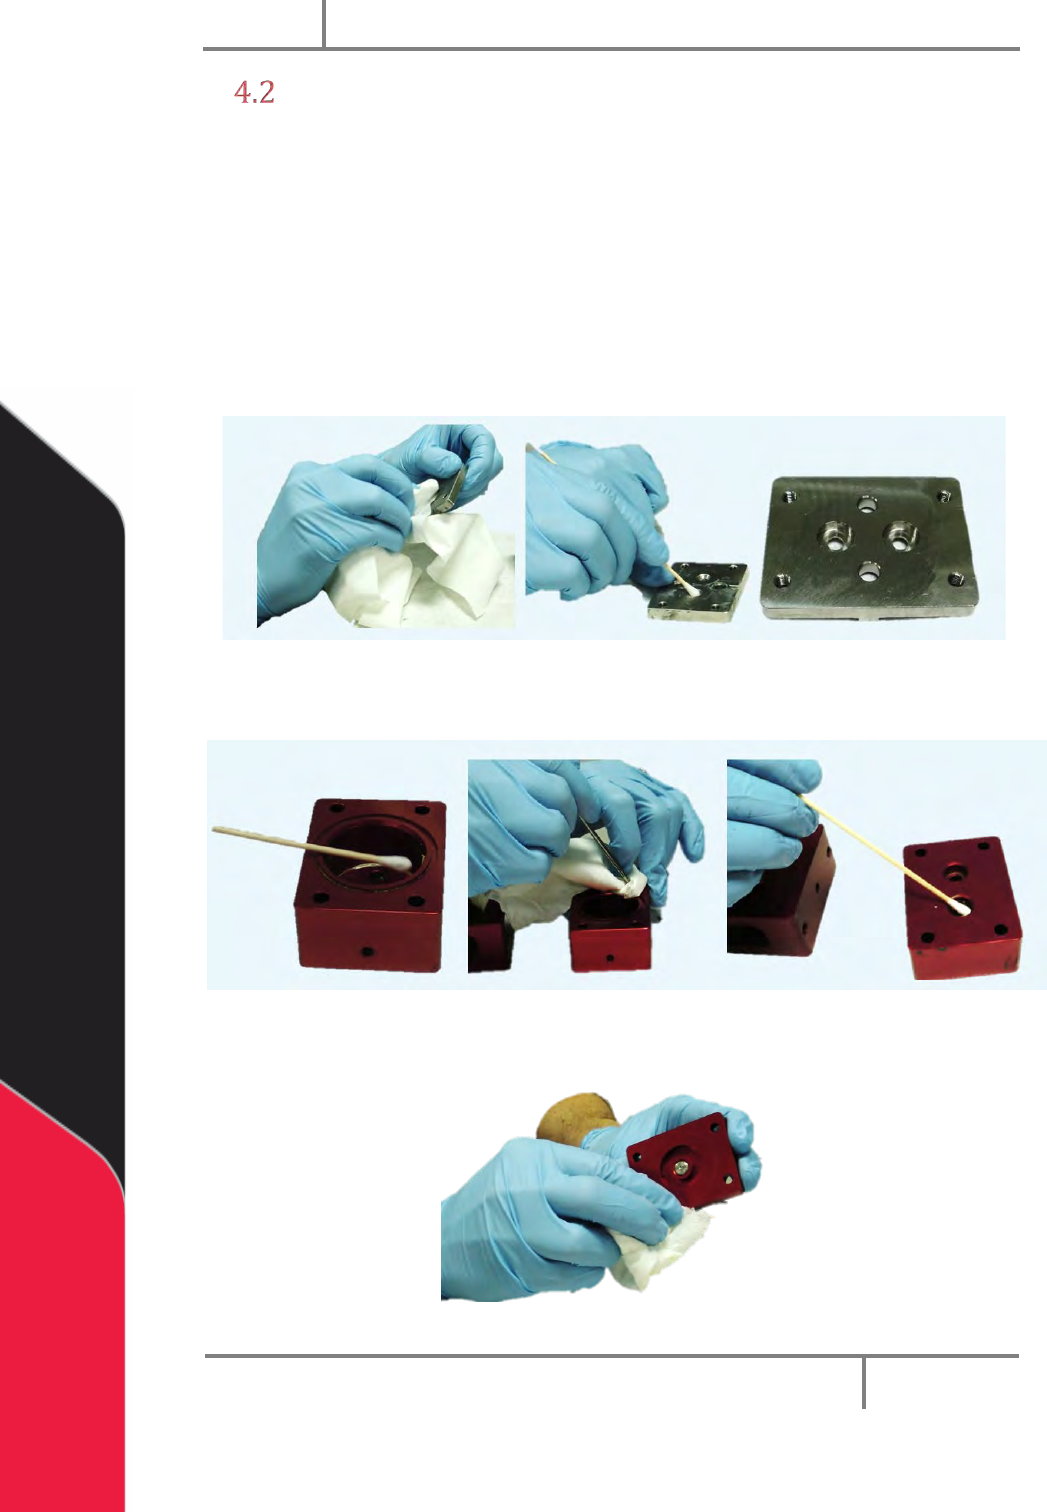
Clean the Disassembled Valve
Use solvent, lint free towels, and cotton tipped applicators to clean the valve. Wear
protective gloves. Do not get material or solvent on your skin.
When you clean the valve, remove all grease and material before the valve is assembled
again. All O-rings, seals, and screws should be cleaned.
1. Clean every part completely with appropriate solvent. Do not mix material A
with material B or they will cure.
2. Clean the seal plate.
Figure 25: Clean the Seal Plate
3. Clean the air cylinder.
Figure 26: Clean the Air Cylinder
4. Clean the cylinder cap.
Figure 27: Clean the Cylinder Cap