PC200_Manual_REV_G-1.pdf - 第21页
PC200 PVA Revis ion G (201 9) 21 of 56 Clean the Disassembled Va lve Use solve nt, lint free t o wels, and cotton tipped applicators to clean t he valve. Wear protective gloves. Do not get material or solve nt on your sk…
PC200
PVA
Revision G (2019)
20 of 56
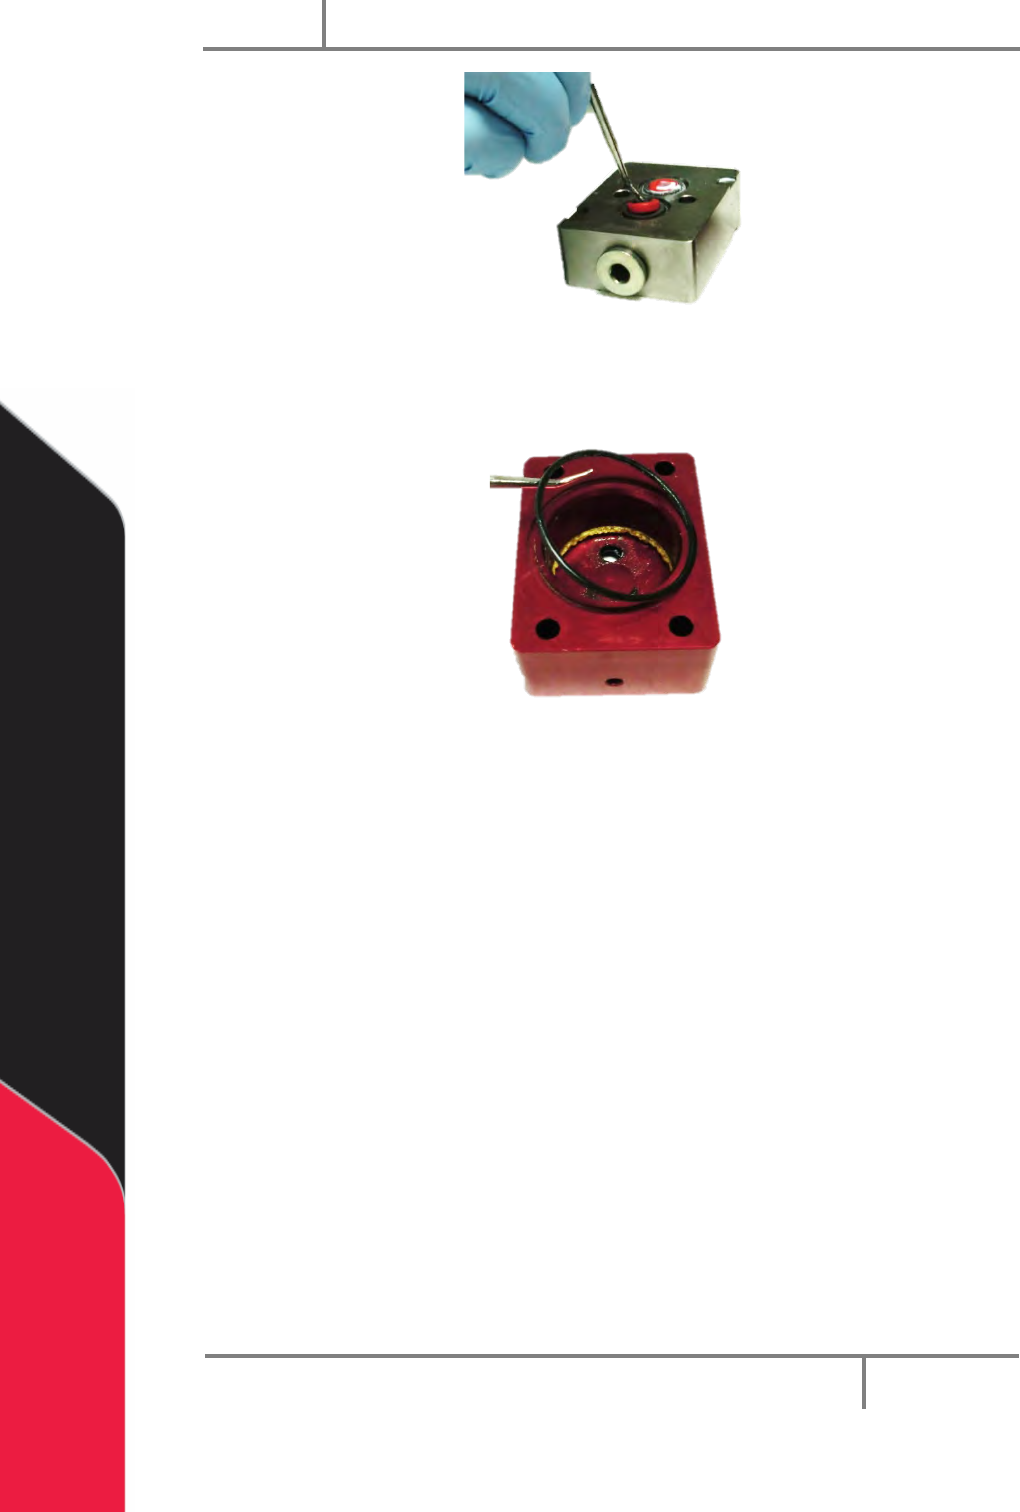
Figure 23: Remove Lip Seals From Fluid Section
27. Clean the lip seals.
28. Use the hook and pick set to remove the O-ring in the air cylinder.
Figure 24: Air Cylinder O-ring
29. Examine and clean the O-ring.
PC200
PVA
Revision G (2019)
21 of 56
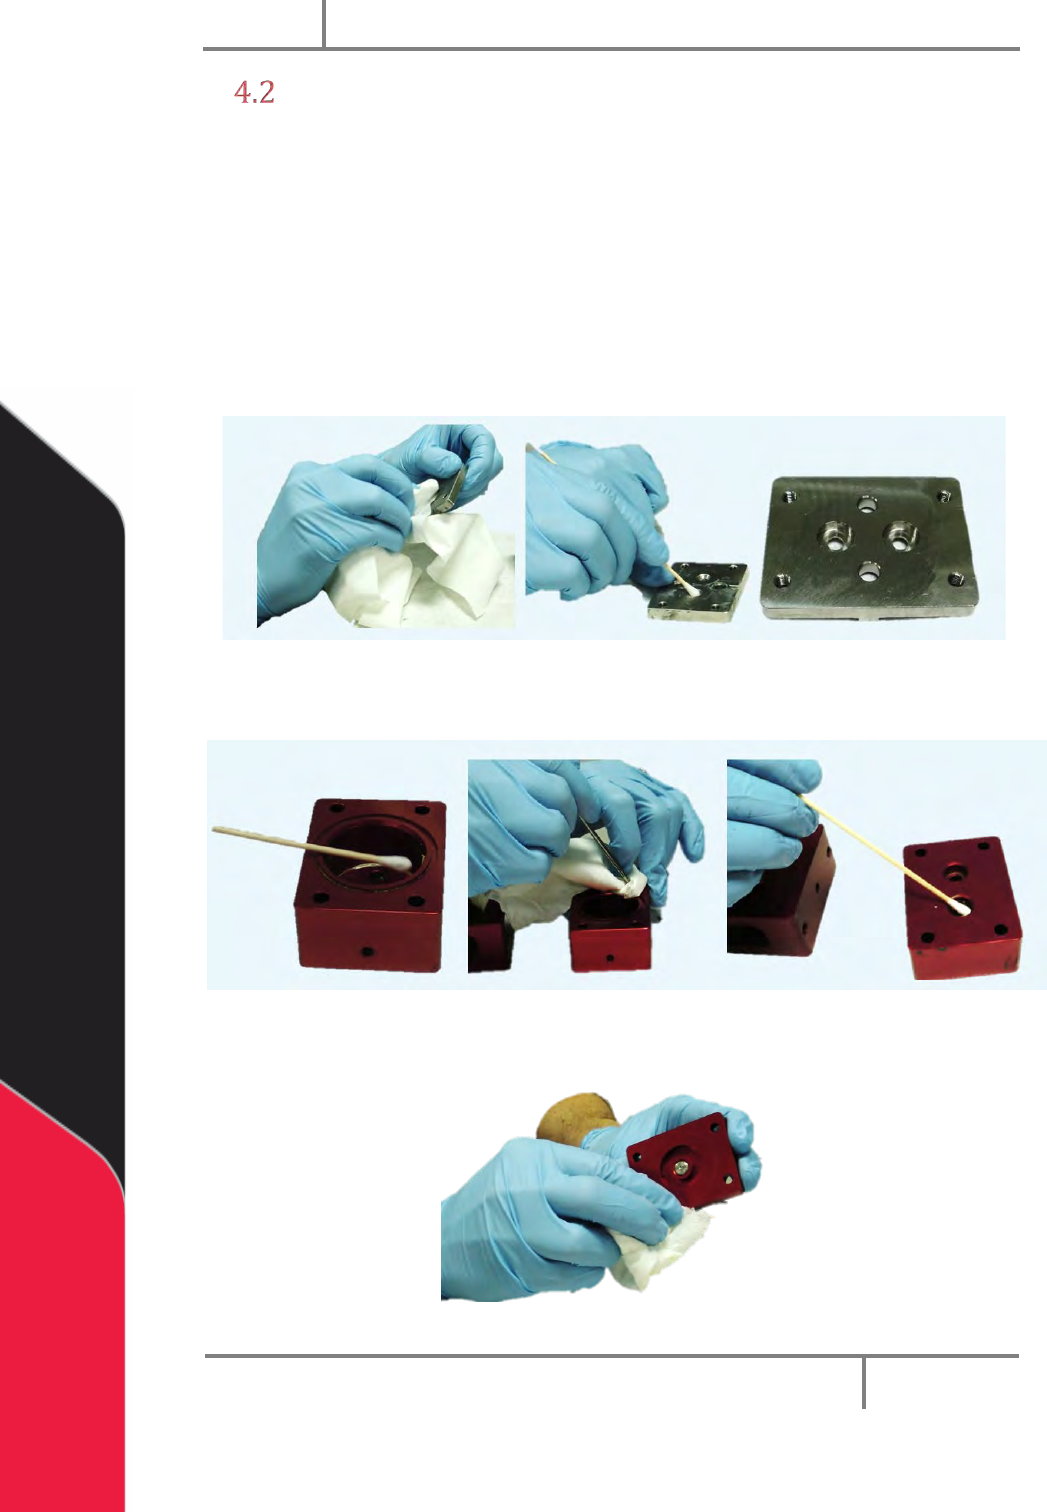
Clean the Disassembled Valve
Use solvent, lint free towels, and cotton tipped applicators to clean the valve. Wear
protective gloves. Do not get material or solvent on your skin.
When you clean the valve, remove all grease and material before the valve is assembled
again. All O-rings, seals, and screws should be cleaned.
1. Clean every part completely with appropriate solvent. Do not mix material A
with material B or they will cure.
2. Clean the seal plate.
Figure 25: Clean the Seal Plate
3. Clean the air cylinder.
Figure 26: Clean the Air Cylinder
4. Clean the cylinder cap.
Figure 27: Clean the Cylinder Cap
PC200
PVA
Revision G (2019)
22 of 56
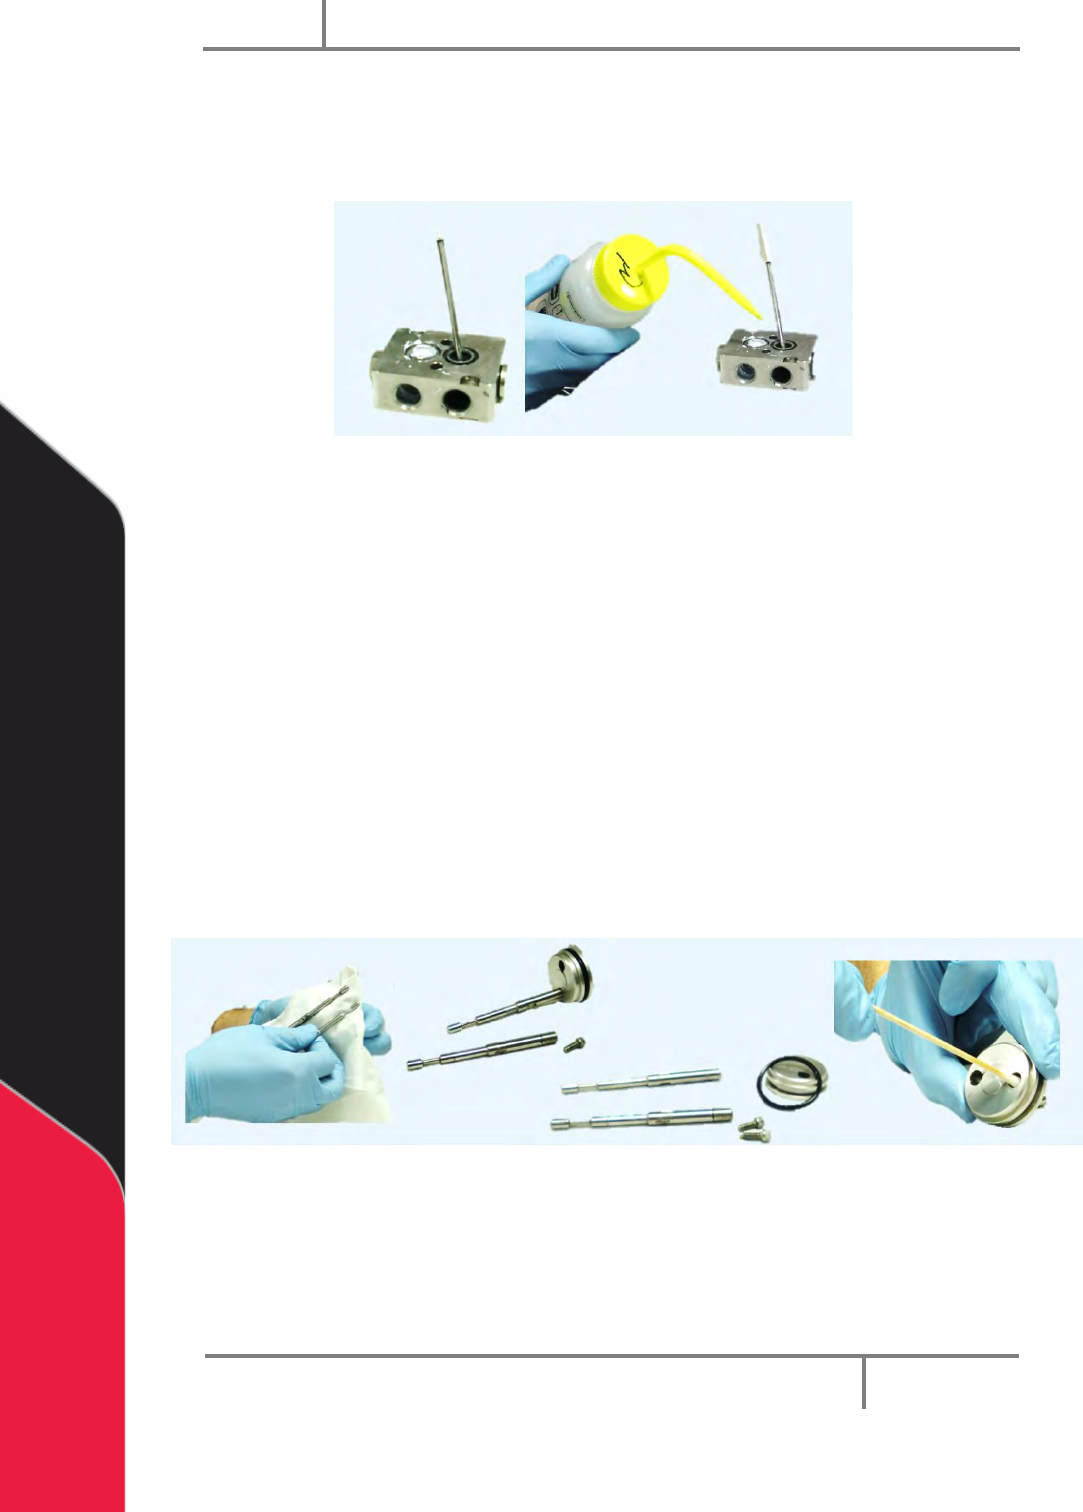
5. Clean the fluid section.
6. Use a pick to remove large amounts of material. Do not mix the materials.
7. Use solvent as necessary to clean hard to get to locations.
Figure 28: Clean the Fluid Section
8. Clean the separation block and manifold. Make sure to clean all grooves and
ports.
9. Clean the piston-rod assembly.
NOTE: RW-series PC200 uses two different size rods.
10. Clean the rods.
11. Use a wrench to hold one rod and a use hex key to loosen the screw that
holds the rod in position in the piston.
12. Remove both rods. Examine the rods and make sure there is no material on
them. Clean the screws if necessary.
13. Use the hook and pick set to remove the O-ring on the piston.
14. Clean the piston and the O-ring.
Figure 29: Clean the Piston-Rod Assembly